Jan 212022
 
sconfig Server Configuration menu

We’re all used to updating our Windows Server operating systems with the Windows Update GUI, but did you know that you can update your server using command prompt and “sconfig”?

The past few years I’ve been managing quite a few Windows Server Core Instances that as we all know, do not have a GUI. In order to update those instances, you need to run Windows Update using the command line, but this method actually also works on normal Windows Server instances with the GUI as well!

Windows Update from CLI (Command Prompt)

Please enjoy this video or read on for why and how!

Why?

Using a GUI is great, however sometimes it’s not needed, and sometimes it even causes problems if it looses the backend connection where it’s pulling the data from. I’ve seen this true on newer Windows operating systems where the Windows Update GUI stops updating and you just sit there thinking the updates are running, when they are actually all complete.

The GUI also creates additional overhead and clutter. If there was an easier alternative to perform this function, wouldn’t it just make sense?

On Windows Server instances that have a GUI, I find it way faster and more responsive to just open an elevated (Administrative) command prompt, and kick off Windows Updates from there.

How

You can use this method on all modern Windows Server versions:

  • Windows Server (with a GUI)
  • Windows Server Core (without a GUI)

This also works with Windows Server Update Services so you can use this method either connecting to Windows Update (Microsoft Update) or Windows Server Update Services (WSUS).

Now lets get started!

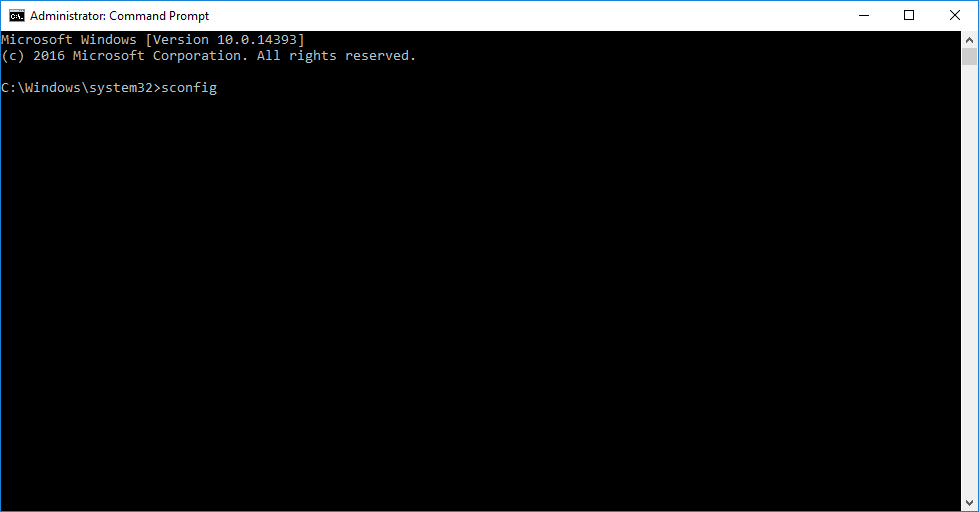
  1. Open an Administrative (elevated) command prompt
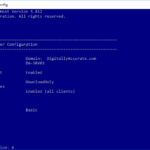
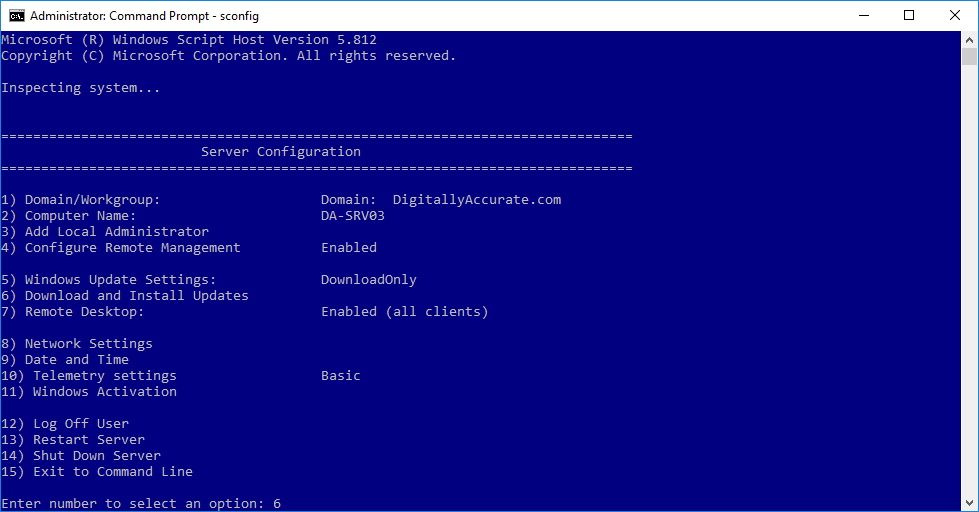
  2. Run “sconfig” to launch the “Server Configuration” application
    command prompt launch sconfig
  3. Select option “6” to “Download and Install Windows Updates”
    sconfig Server Configuration menu
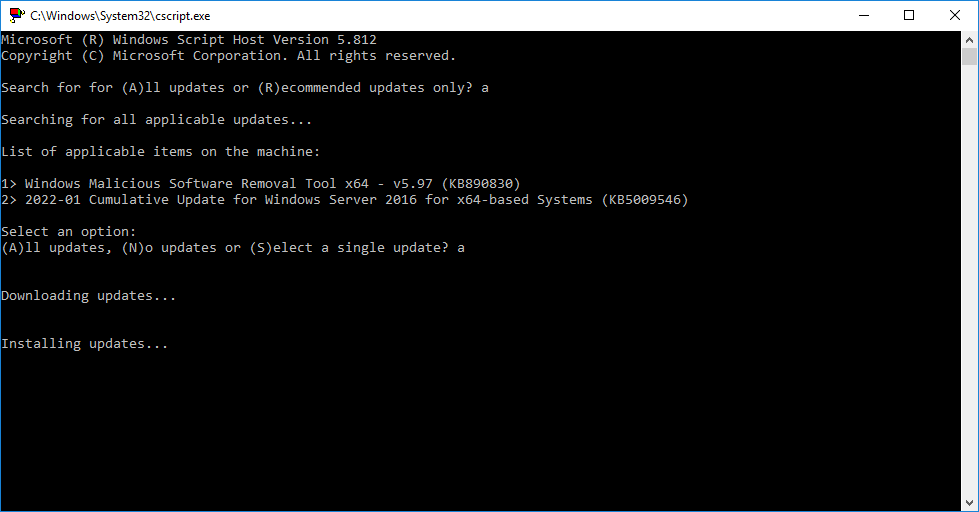
  4. Choose “A” for all updates, or “R” for recommended updates, and a scan will start
  5. After the available updates are shown, choose “A” for all updates, “N” for no updates, or “S” for single update selection

After performing the above, the updates will download and install.

sconfig Windows Update running
“sconfig” Windows Update downloading and installing

I find it so much easier to use this method when updating many/multiple servers instead of the GUI. Once the updates are complete and you’re back at the “Server Configuration” application, you can use option “13” to restart Windows.

Oct 112021
 
Windows Server 2022 Logo

Today we’re going to discuss and deploy Active Directory Certificate Services on a Windows Server 2022 Server. Additionally, we’ll also be generating a domain certificate request inside of IIS and then assign the resultant certificate to a WSUS Server.

This video will demonstrate and explain the process of deploying a Windows Server 2022 Certification Authority with AD CS.

Check it out and feel free to leave a comment! Scroll down below for more information and details on the guide.

Windows Server 2022: Active Directory Certificate Services Discussion and Installation Guide

Who’s this guide for

This guide is perfect for a seasoned IT professional or a beginner who is looking at getting experience with Windows Server 2022.

What’s included in the video

In this guide I will walk you through the following:

  • Discussion
    • SSL Certificates (Host verification)
    • Internal Root Certification Authorities (Root CAs)
    • Internal Root CA vs Public Trusted Root CAs
    • HTTPS Scanning (Web Filtering) and SSL Certificates
    • Intermediate Certificate Authorities
    • Why ADCS?
    • AD CS Certificate Templates
    • Encryption
    • Certificate Issuance
  • Demonstration
    • Server Manager Role Installation
    • MMC Snap-in for Certificates (Local Computer)
      • Root CAs
    • Install Active Directory Certificate Services (AD CS)
      • Add Server Role
      • Root CA Trust Discussion
      • AD CS Installation on Domain Controller Installation
      • AD CS Prerequisites
      • Web Enrollment Discussion
      • AD CS and IIS Discussion
    • Install Internet Information Services (IIS) as pre-requisite
    • Configure Active Directory Certificate Services (AD CS)
      • Credentials
      • Role Configuration
      • Enterprise CA vs Standalone CA
      • Root CA vs Subordinate CA
      • Private Key Creation and Cryptographic options
      • Root CA Naming
      • Validity Period
    • Certification Authority MMC Usage
    • Root CA Replication to Domain (“gpupdate /force” and restart)
    • AD CS Certificate Templates Overview
      • Certificate Templates MMC
      • Duplicate and Customize Web Server Certificate Template
      • Enable Auto-Enrollment for Certificate Template
    • Use IIS to request certificate from Active Directory Certification Authority
      • Create Domain Certificate
    • Enable SSL on WSUS Server using Active Directory Certificate Services Certificate
      • Bind new certificate to IIS Web Server
      • Update GPO to reflect SSL URL and port number
      • Run “iisreset” on elevated command prompt
    • Demonstration Summary

What’s required

To get started you’ll need:

  • 1 x Server (Virtual Machine or Physical Server)
  • Microsoft Windows Server 2022 Licensing
  • A running Windows Server 2022 Instance (OSE)
  • A network router and/or firewall

Hardware/Software used in this demonstration

  • VMware vSphere
  • HPE DL360p Gen8 Server
  • Microsoft Windows Server 2022
  • pfSense Firewall
Sep 192021
 
Windows Server 2022 Logo

Today we’re deploying a Windows Server 2022 member server and joining it to the domain we created in previous videos. I’ll also be explaining the difference between Domain Credentials and Local Credentials on member servers.

This video will demonstrate and explain the process of deploying a Windows Server 2022 member server, network configuration, DHCP vs Static IPs, and domain credentials vs local credentials.

Check it out and feel free to leave a comment! Scroll down below for more information and details on the guide.

Who’s this guide for

This guide is perfect for a seasoned IT professional or a beginner who is looking at getting experience with Windows Server 2022.

What’s included in the video

In this guide I will walk you through the following:

  • Document a new Server deployment
  • Configure Networking
  • Join Windows Server 2022 Server to domain as member server
  • Discussion on time importance with Active Directory and Domains
  • Discussion on Domain Credentials vs Local Credentials

What’s required

To get started you’ll need:

  • 1 x Server (Virtual Machine or Physical Server)
  • Microsoft Windows Server 2022 Licensing
  • A running Windows Server 2022 Instance (OSE)
  • A network router and/or firewall

Hardware/Software used in this demonstration

  • VMware vSphere
  • HPE DL360p Gen8 Server
  • Microsoft Windows Server 2022
  • pfSense Firewall
Sep 192021
 
Windows Server 2022 Logo

Today, I will show you how to create an Active Directory Domain on Windows Server 2022.

This video will demonstrate and explain the process of configuring, and deploying a Windows Server 2022 instance as a Domain Controller, DNS Server, and DHCP Server and then setting up a standard user.

Check it out and feel free to leave a comment! Scroll down below for more information and details on the guide.

Who’s this guide for

This guide is perfect for a seasoned IT professional or a beginner who is looking at getting experience with installing Windows Server 2022.

What’s included in the video

In this guide I will walk you through the following:

  • Document a new Server Installation and domain
  • Promote a Windows Server 2022 Server to a Domain Controller with Active Directory
    • Installation and configuration of Microsoft Active Directory
    • Promote a server as a new domain controller
      • Overview of Forest Functional Level
      • Overview of Domain Functional Level
      • Overview of DSRM (Domain Services Restore Mode) and Password
    • Installation and configuration of DNS Role
    • Installation and configuration of DHCP Role
  • Setup and configuration of a new user account on domain
  • Creation of DHCP Scope for Network

What’s required

To get started you’ll need:

  • 1 x Server (Virtual Machine or Physical Server)
  • Microsoft Windows Server 2022 Licensing
  • A running Windows Server 2022 Instance (OSE)
  • A network router and/or firewall

Hardware/Software used in this demonstration

  • VMware vSphere
  • HPE DL360p Gen8 Server
  • Microsoft Windows Server 2022
  • pfSense Firewall
Sep 182021
 
Windows Server 2022 Logo

With the recent release of Microsoft Windows Server 2022, I felt I needed to give it a shot. Join me as I install Windows Server 2022.

These instructions are also valid for previous versions of Microsoft Windows Server.

This video will demonstrate and explain the process of installing, configuring, and deploying a Windows Server 2022 instance.

Check it out and feel free to leave a comment! Scroll down below for more information and details on the guide.

Who’s this guide for

This guide is perfect for a seasoned IT professional or a beginner who is looking at getting experience with installing Windows Server 2022.

What’s included in the video

In this guide I will walk you through the following:

  • Installing Windows Server 2022 (with Desktop Experience)
  • Document a new Server Installation
  • VMware Tools Installation
  • Configuring Network Settings
  • Computer Name Change
  • Windows Server 2022 Server Manager Overview
  • Windows Updates

What’s required

To get started you’ll need:

  • 1 x Server (Virtual Machine or Physical Server)
  • Microsoft Windows Server 2022 Licensing
  • A network router and/or firewall

Hardware/Software used in this demonstration

  • VMware vSphere
  • HPE DL360p Gen8 Server
  • Microsoft Windows Server 2022
  • pfSense Firewall
May 172020
 
Microsoft Windows Server Logo Image

Today we take it back to basics with a guide on how to create an Active Directory Domain on Windows Server 2019.

These instructions are also valid for previous versions of Microsoft Windows Server.

This video will demonstrate and explain the process of installing, configuring, and deploying a Windows Server 2019 instance as a Domain Controller, DNS Server, and DHCP Server and then setting up a standard user.

I also have a newer guide on How to create an Active Directory Domain on Windows Server 2022!

Check it out and feel free to leave a comment! Scroll down below for more information and details on the guide.

Windows Server 2019: How to Create an Active Directory Domain

Who’s this guide for

No matter if you’re an IT professional who’s just getting started or if you’re a small business owner (on a budget) setting up your first network, this guide is for you!

What’s included in the video

In this guide I will walk you through the following:

  • Installing Windows Server 2019
  • Documenting a new Server installation
  • Configuring Network Settings
  • Installation and configuration of Microsoft Active Directory
  • Promote a server as a new domain controller
  • Installation and configuration of DNS Role
  • Installation and configuration of DHCP Role
  • Setup and configuration of a new user account

What’s required

To get started you’ll need:

Hardware/Software used in this demonstration

  • VMware vSphere
  • HPE DL360p Gen8 Server
  • Microsoft Windows Server 2019
  • pfSense Firewall

Other blog posts referenced in the video

The following blog posts are mentioned in the video:

May 162019
 

There may be a situation where you wish to completely reinstall WSUS from scratch. This can occur for a number of reasons, but most commonly is due to database corruption, or performance issues due to a WSUS database that hasn’t been maintained properly with the normal maintenance.

Commonly, when regular maintenance hasn’t occurred on a WSUS database, when an admin finally performs it, it can take days and weeks to re-index the database, clean up the database, and run the cleanup wizards.

Also, due to timeouts on IIS, the cleanup wizard may fail which could ultimately cause database corruption.

Administrators often want or choose to blast away their WSUS install, and completely start from scratch. I’ve done this numerous times in my own environment as well as numerous customer environments.

In this guide, we are going to assume that you’re running WSUS on a Windows Server that is dedicated to WSUS and is using the WID (Windows Internal Database) which is essentially a built-in version of SQL Express.

PLEASE NOTE: If you are using Microsoft SQL, these instructions will not apply to you and will require modification. Only use these instructions if the above applies to you.

What’s involved

WSUS (Windows Server Update Services) relies on numerous Windows roles and features to function. As part of the instructions we’ll need to completely clear out:

  • WSUS Role, Configuration, and Folders/Files
  • IIS Role, Configuration, and Folders/Files
  • WID Feature, Configuration, and Database Files

Since we are completely removing IIS (Role, Configuration, and Folders/Files), only proceed if the server is dedicated to WSUS. If you are using IIS for anything else, this will completely clear the configuration and files. You also do not want to run this on a domain controller as Active Directory also uses WID.

Let’s get to it!

Instructions

  1. Open “Server Manager” either on the host, or remotely and connect to the host you’d like to reinstall on.
  2. Open “Remove Roles and Features” wizard.
  3. Click “Next”, and select the Server, and click “Next” again.
  4. On the “Remove server roles” screen, under “Roles”, we want to de-select the following: “Web Server (IIS)” and “Windows Server Update Services” as shown below. Selecting WSUS and IIS Roles to be Removed
  5. Click “Next”
  6. On the “Remove features” screen, under “Features”, we want to de-select the following: “Windows Internal Database” and “Windows Process Activation Service” as shown below. Selecting WID and WPAS Features for Removal
  7. Click “Next” and follow the wizard to completion and remove the roles and features.
  8. Restart the Server.
  9. Open an administrative command prompt on the server, and run the command “powershell” or open powershell directly.
  10. Run the following command in powershell to remove any bits and pieces:
    Remove-WindowsFeature -Name UpdateServices,UpdateServices-DB,UpdateServices-RSAT,UpdateServices-API
  11. Restart the Server.
  12. We now must delete the WSUS folders and files. Delete the following folders:
    C:\WSUS
    C:\Program Files\Update Services

    Note: You may have stored the WSUS content directory somewhere else, please delete this as well.
  13. We now must delete the IIS folders and files (and configuration, including the WsusPool application pool, bindings, etc.). Delete the following folders:
    C:\inetpub
    C:\Windows\System32\inetsrv

    Note: You may have issues deleting the “inetsrv” directory. If this occurs, simply rename it to “inetsrv.bad”.
  14. We now must delete the WID (Windows Internal Database) folders and files (including the WSUS SQL Express database). Delete the following folder:
    C:\Windows\WID
  15. While we removed the IIS folders and files, we deleted a needed system file. Run the following command to restore the file:
    sfc /scannow
  16. Restart the Server.

WSUS, IIS, and WID have at this point been completely removed. We will now proceed to install, apply a memory fix, and configure WSUS.

For instructions on installing WSUS on Server Core, please click here: https://www.stephenwagner.com/2019/05/15/guide-using-installing-wsus-windows-server-core-2019/

  1. Open “powershell” (by typing powershell) and Install the WSUS Role with the following command:
    Install-WindowsFeature UpdateServices -Restart
  2. (Optional) If you want to install the WSUS MMC Snap-In/GUI, run the following command in the powershell window:
    Install-WindowsFeature UpdateServices-RSAT, UpdateServices-UI
  3. Run the post installation task command in command prompt to configure WSUS:
    "C:\Program Files\Update Services\Tools\wsusutil.exe" postinstall CONTENT_DIR=C:\WSUS
  4. AT THIS POINT DO NOT CONTINUE CONFIGURING WSUS AS YOU MUST APPLY A MEMORY FIX TO IIS.
  5. Apply the “Private Memory Limit (KB)” fix as provided here: https://www.stephenwagner.com/2019/05/14/wsus-iis-memory-issue-error-connection-error/
  6. Restart the Server.
  7. Open the WSUS MMC on the server or remotely from a workstation on the network and connect it to the WSUS instance on your Server Core install.
  8. Run through the wizard as you would normally and perform an synchronization.
  9. WSUS has been re-installed.

And that’s it. You’ve completely reinstalled WSUS from scratch on your Windows Server.

Oct 082018
 
Microsoft Windows Logo

If you are running Microsoft Windows in a domain environment with WSUS configured, you may notice that you’re not able to install some FODs (Features on Demand), or use the “Turn Windows features on or off”. This will stop you from installing things like the RSAT tools, .NET Framework, Language Speech packs, etc…

You may see “failure to download files”, “cannot download”, or errors like “0x800F0954” when running DISM to install packages.

To resolve this, you need to modify your domain’s group policy settings to allow your workstations to query Windows Update servers for additional content. The workstations will still use your WSUS server for approvals, downloads, and updates, however in the event content is not found, it will query Windows Update.

Enable download of “Optional features” directly from Windows Update

  1. Open the group policy editor on your domain
  2. Create a new GPO, or modify an existing one. Make sure it applies to the computers you’d like
  3. Navigate to “Computer Configuration”, “Policies”, “Administrative Templates”, and then “System”.
  4. Double click or open “Specify settings for optional component installation and component repair”
  5. Make sure “Never attempt to download payload from Windows Update” is NOT checked
  6. Make sure “Download repair content and optional features directly from Windows Update instead of Windows Server Update Services (WSUS)” IS checked.
  7. Wait for your GPO to update, or run “gpupdate /force” on the workstations.

Please see an example of the configuration below:

Download repair content and optional features directly from Windows Update instead of Windows Server Update Services (WSUS)

You should now be able to download/install RSAT, .NET, Speech language packs, and more!

Aug 212018
 
Microsoft .NET Framework

You may notice on Windows Server 2012 R2, when applying Windows Updates that one or more .NET updates may fail with error code 0x80092004. This issue may affect all, or only some of your Windows Server 2012 R2 servers.

When troubleshooting this, you may notice numerous specific errors such as “Couldn’t find the hash of component: NetFx4-PenIMC”, or errors with a CAB file. These errors will probably come from update KB4054566 and KB4340558.

The Fix

To resolve this, we are going to download the updates MSU files from the Microsoft Update Catalog, and fully uninstall, then re-install the problematic updates.

Please Note: Always make sure you have a full backup before making modifications to your servers.

Please follow the instructions below:

  1. Create a folder called “updatefix” on the root of your C drive on the server
  2. Navigate to the Windows Update catalog at: https://www.catalog.update.microsoft.com/
  3. Search for KB4054566 and download the file for “Windows Server 2012 R2”, save it to the folder you created above called “updatefix” on the root of your C Drive. There should be one file in the download.
  4. Search for KB4340558 and download the files for “Windows Server 2012 R2”, save it to the folder you created above called “updatefix” on the root of your C Drive. There should be a total of 3 files in this download.
  5. Create a folder in the “updatefix” folder called “expanded”.
  6. Open an elevated command prompt, and run the following commands to extract the updates CAB files:
    expand -f:* "C:\updatefix\windows8.1-kb4338415-x64_cc34d1c48e0cc2a92f3c340ad9a0c927eb3ec2d1.msu" C:\updatefix\expanded\
    expand -f:* "C:\updatefix\windows8.1-kb4338419-x64_4d257a38e38b6b8e3d9e4763dba2ae7506b2754d.msu" C:\updatefix\expanded\
    expand -f:* "C:\updatefix\windows8.1-kb4338424-x64_e3d28f90c6b9dd7e80217b6fb0869e7b6dfe6738.msu" C:\updatefix\expanded\
    expand -f:* "C:\updatefix\windows8.1-kb4054566-x64_e780e6efac612bd0fcaf9cccfe15d6d05c9cc419.msu" C:\updatefix\expanded\
  7. Now let’s uninstall the problematic updates. Some of these commands may fail depending on which updates you have successfully installed. Run the following commands individually to remove the updates:
    dism /online /remove-package /packagepath:C:\updatefix\expanded\Windows8.1-KB4338424-x64.cab
    dism /online /remove-package /packagepath:C:\updatefix\expanded\Windows8.1-KB4338419-x64.cab
    dism /online /remove-package /packagepath:C:\updatefix\expanded\Windows8.1-KB4338415-x64.cab
    dism /online /remove-package /packagepath:C:\updatefix\expanded\Windows8.1-KB4054566-x64.cab
  8. Reboot your server.
  9. Now let’s cleanly install the updates. All of these commands should be successful when running. Run the following commands individually to install the updates:
    dism /online /add-package /packagepath:C:\updatefix\expanded\Windows8.1-KB4054566-x64.cab
    dism /online /add-package /packagepath:C:\updatefix\expanded\Windows8.1-KB4338415-x64.cab
    dism /online /add-package /packagepath:C:\updatefix\expanded\Windows8.1-KB4338419-x64.cab
    dism /online /add-package /packagepath:C:\updatefix\expanded\Windows8.1-KB4338424-x64.cab
  10. Reboot your server.
  11. You have now fixed the issue and all updates should now be cleanly installing via Windows Updates!

Leave a comment and let me know if this worked for you!

Apr 292018
 
Directory Services Restore Mode

Running Veeam Backup and Replication, a Microsoft Windows Server Domain Controller may boot in to safe mode and directory services restore mode.

About a week ago, I loaded up Veeam Backup and Replication in to my test environment. It’s a fantastic product, and it’s working great, however today I had a little bit of an issue with a DC running Windows Server 2016 Server Core.

I woke up to a notification that the backup failed due to a VSS snapshot issue. Now I know that VSS can be a little picky at times, so I decided to restart the guest VM. Upon restarting, she came back up, was pingable, and appeared to be running fine, however the backup kept failing with new errors, the event log was looking very strange on the server, and numerous services that were set to automatic were not starting up.

This specific server was installed using Server Core mode, so it has no GUI and is administered via command prompt over RDP, or via remote management utilities. Once RDP’ing in to the server, I noticed the “Safe Mode” branding on each corner of the display, this was very odd. I restarted the server again, this time manually trying to start Active Directory Services manually via services.msc.

This presented:

Event ID: 16652
Source: Directory-Services-SAM
General Description: The domain controller is booting to directory services restore mode.

Screenshot:

Directory Services Restore Mode

The domain controller is booting to directory services restore mode.


This surprised me (and scared me for that matter). I immediately started searching the internet to find out what would have caused this…

To my relief, I read numerous sites that advise that when an active backup is running on a guest VM which is a domain controller, Veeam activates directory services restore mode temporarily, so in the event of a restore, it will boot to this mode automatically. In my case, the switch was not changed back during the backup failure.

Running the following command in a command prompt, verifies that the safeboot switch is set to dsrepair enabled:

bcdedit /v

To disable directory services restore mode, type the following in a command prompt:

bcdedit /deletevalue safeboot

Restart the server and the issue should be resolved!