When it comes to troubleshooting login times with non-persistent VDI (VMware Horizon Instant Clones), I often find delays associated with printer drivers not being included in the golden image. In this post, I’m going to show you how to add a printer driver to an Instant Clone golden image!
In most environments, printers will be mapped for users during logon. If a printer is mapped or added and the driver is not added to the golden image, it will usually be retrieved from the print server and installed, adding to the login process and ultimately leading to a delay.
Due of the nature of non-persistent VDI and Instant Clones, every time the user goes to login and get’s a new VM, the driver will then be downloaded and installed each of these times, creating a redundant process wasting time and network bandwidth.
To avoid this, we need to inject the required printer drivers in to the golden image. You can add numerous drivers and should include all the drivers that any and all the users are expecting to use.
An important consideration: Try using Universal Print Drivers as much as possible. Universal Printer Drivers often support numerous different printers, which allows you to install one driver to support many different printers from the same vendor.
Below, I’ll show you how to inject a driver in to the Instant Clone golden image. Note that this doesn’t actually add a printer, but only installs the printer driver in to the Windows operating system so it is available for a printer to be configured and/or mapped.
Let’s get started! In this example we’ll add the HP Universal Driver. These instructions work on both Windows 10 and Windows 11 (as well as Windows Server operating systems):
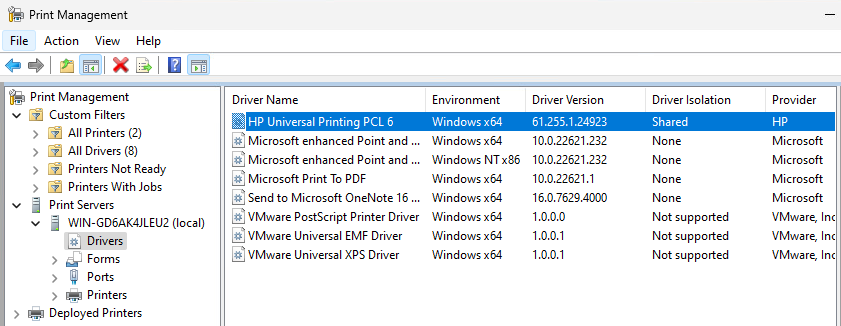
The driver you installed should now appear in the list as it has been installed in to the operating system and is now available should a user add a printer, or have a printer automatically mapped.
Now seal, snap, and deploy your image, and you’re good to go!
While most of us frequently deploy new ESXi hosts, a question and task not oftenly discussed is how to properly decommission a VMware ESXi host. Some might be surprised to… Read More
This guide will outline the instructions to Disable the VMware Horizon Session Bar. These instructions can be used to disable the Horizon Session Bar (also known as the Horizon Client… Read More
Normally, any VMs that are NVIDIA vGPU enabled have to be manually migrated with manual vMotion if a host is placed in to maintenance mode, to evacuate the host. While… Read More
You may experience GPU issues with the VMware Horizon Indirect Display Driver in your environment when using 3rd party applications which incorrectly utilize the incorrect display adapter. This results with… Read More
Today we're going to cover a powerful little NAS being used with VMware; the Synology DS923+ VMware vSphere Use case and Configuration. This little (but powerful) NAS is perfect for… Read More
Today we'll go over how to install the vSphere vCenter Root Certificate on your client system. Certificates are designed to verify the identity of the systems, software, and/or resources we… Read More
View Comments
This printer driver installation instruction page just saved my life. I was considering jumping off my balcony. Thanks!
Thank you very much for that detailed Instruction.
This will help my admins to accurately update the PrinterDrivers at our GoldenImages.
And it saved me time to prepare such a Manual by myself.
Great Site by the way, I will add you to my Bookmarks. Have a great time.
Kind Regards
Andy