Sophos XG and Sophos UTM
Today I’m going to be talking about connecting a Sophos XG firewall to a Sophos UTM firewall for a site-to-site VPN connection specifically using SSL tunneling. Furthermore we are doing this to connect a Microsoft Azure Virtual Network (using a Sophos XG instance) to an On-Premise LAN (running a Sophos UTM).
This type of connection and configuration is standard for corporations, businesses, and organizations who have workloads on Microsoft Azure and need to connect their Azure environment to their corporate LAN. To learn how to deploy Sophos XG in Microsoft Azure, please read this post.
WARNING AND DISCLAIMER: Following the steps in this document if done incorrectly or if your environment is different from the one used in this example, can cause network connectivity issues or a loss of connectivity. An assumption is made that you are skillful enough to know what tasks you are performing and what result they may have on your own environment. You may need to revert these steps if connectivity is lost to restore access to your environment.
The information inside of this post can be used for any of the 4 components above and don’t necessarily have to be used in the same configuration. An example: This guide could be used by someone wanting to connect an on-premise XG and on-premise UTM unit together via SSL VPN (with no need or use for Azure). Another example: The section on routing tables can provide information for someone using a different network security product on Microsoft Azure. However, the ultimate goal of this article is to address all four of the components together for a complete end to end deployment.
Now let’s get to the configuration of each of the four components.
In a previous post, I covered how to deploy a new Sophos XG firewall appliance/instance to Microsoft Azure, specifially allowing deployment to existing resource groups. The full URL (and instructions) can be found at https://www.stephenwagner.com/2018/05/05/deploy-sophos-xg-firewall-microsoft-azure-existing-resource-group/
We will configure the SSL VPN settings on both the Microsoft Azure Sophos XG appliance/instance, and the on-premise Sophos UTM appliance/instance. Afterwards, we will create a tunnel, configure it, enable it, and establish connectivity between the two Sophos firewall instances. During this process, we’ll be configring the SSL VPN settings on both appliance/instances, configuring the tunnel, configuring encryption settings, and establishing VPN communication.
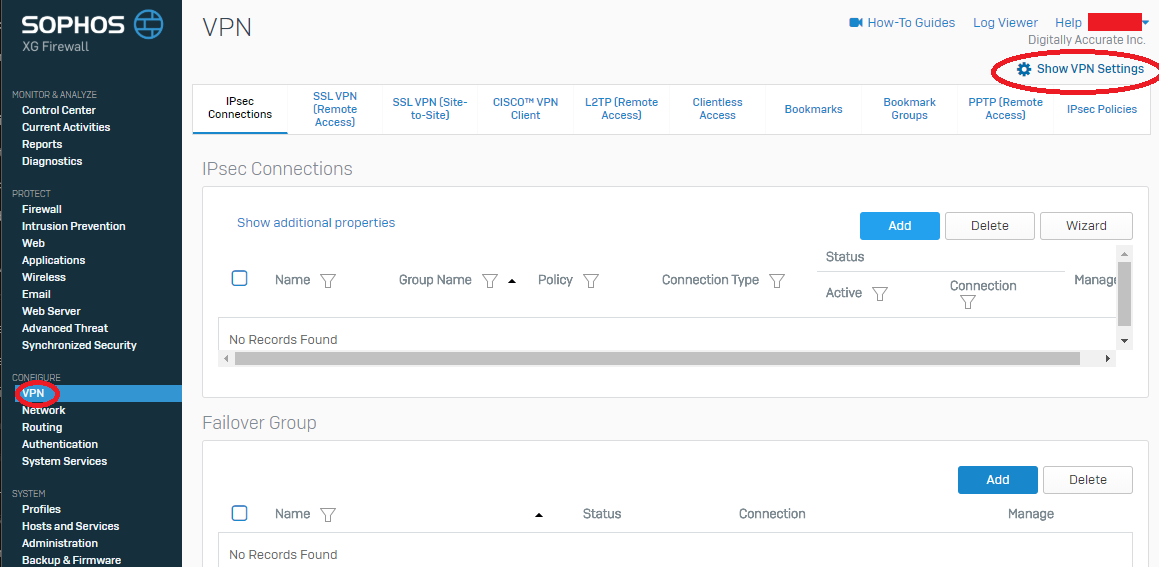
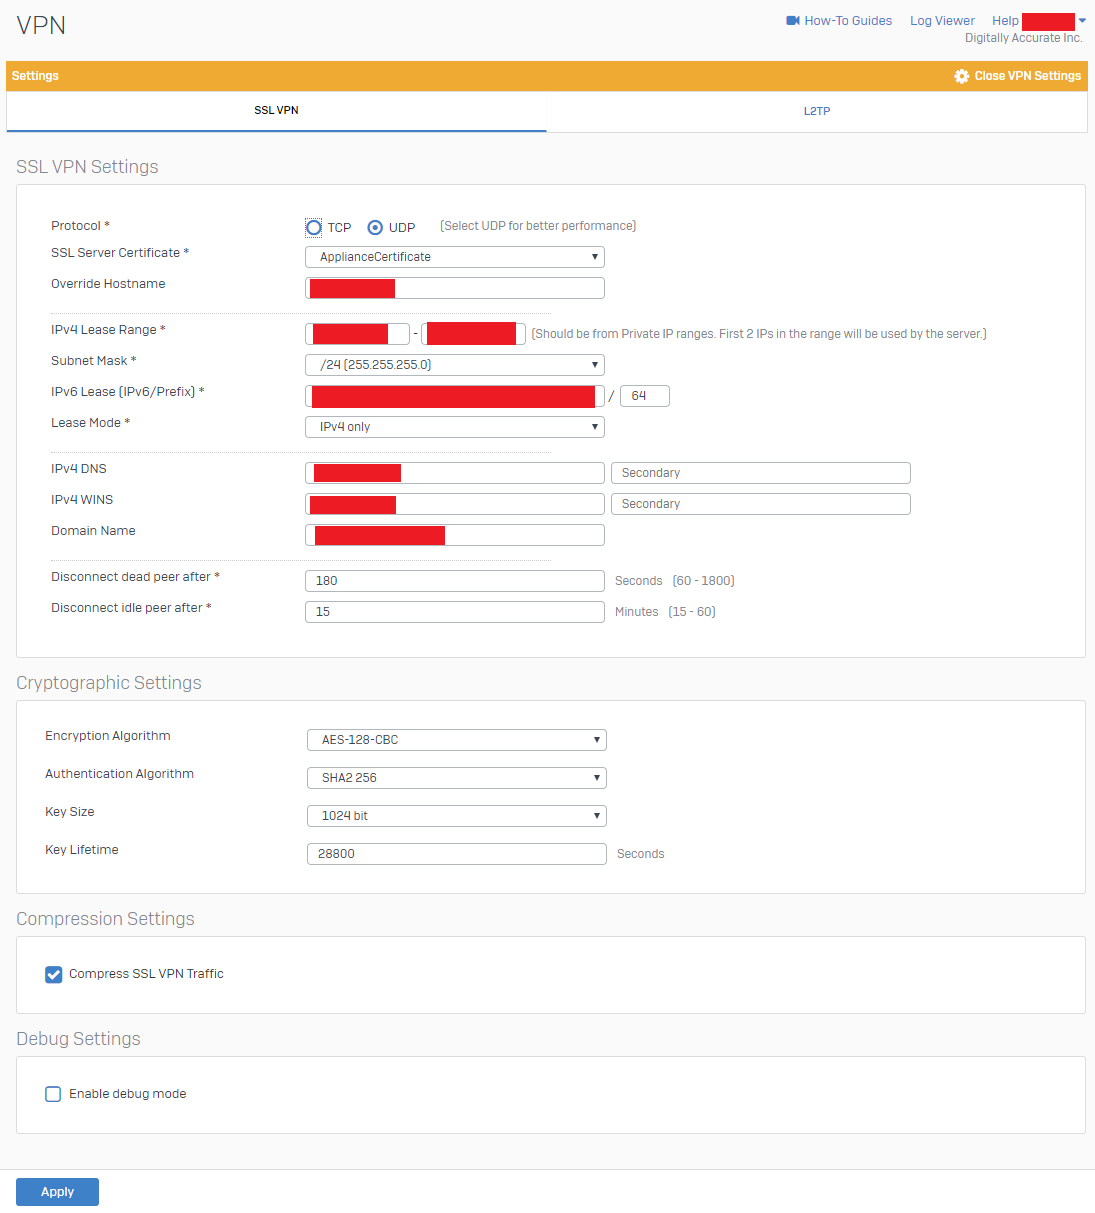
Please note, with this configuration there are essentially 3 networks: the Azure network, the SSL transit network (this is the network in between the networks we are connecting that is part of the SSL VPN), and the on-premise network. When you configure your firewall rules (not in the scope of this document), you must factor this in and allow applicable traffic to/from the SSL network so that the packets can pass. This SSL transit network is specified in the “Show VPN Settings” on the XG unit under “SSL VPN”, and “IPv4 Lease Range”. This network must be different and not overlap any subnets you are using on both your Azure network, and on-premise network. In my case I chose something way off in an entirely different IP space (172.16.0.0), and I suggest you do as well.
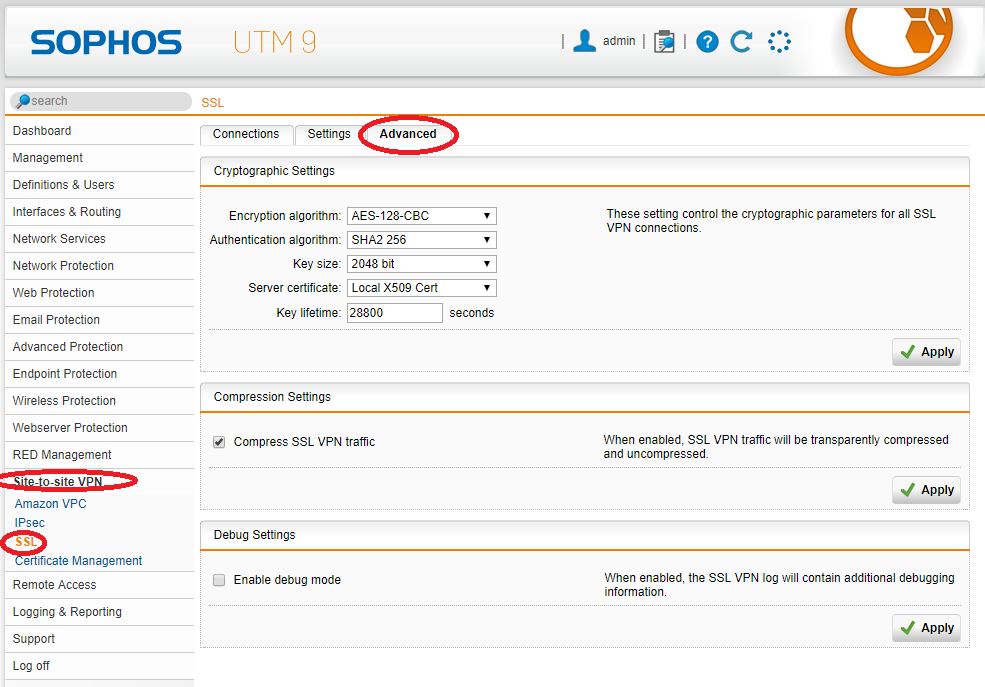
Follow these steps to configure the SSL VPN settings on both Sophos XG and UTM appliances/instances.
You have now configured the general SSL VPN Advanced settings, we can now move on to configuring the tunnel itself.
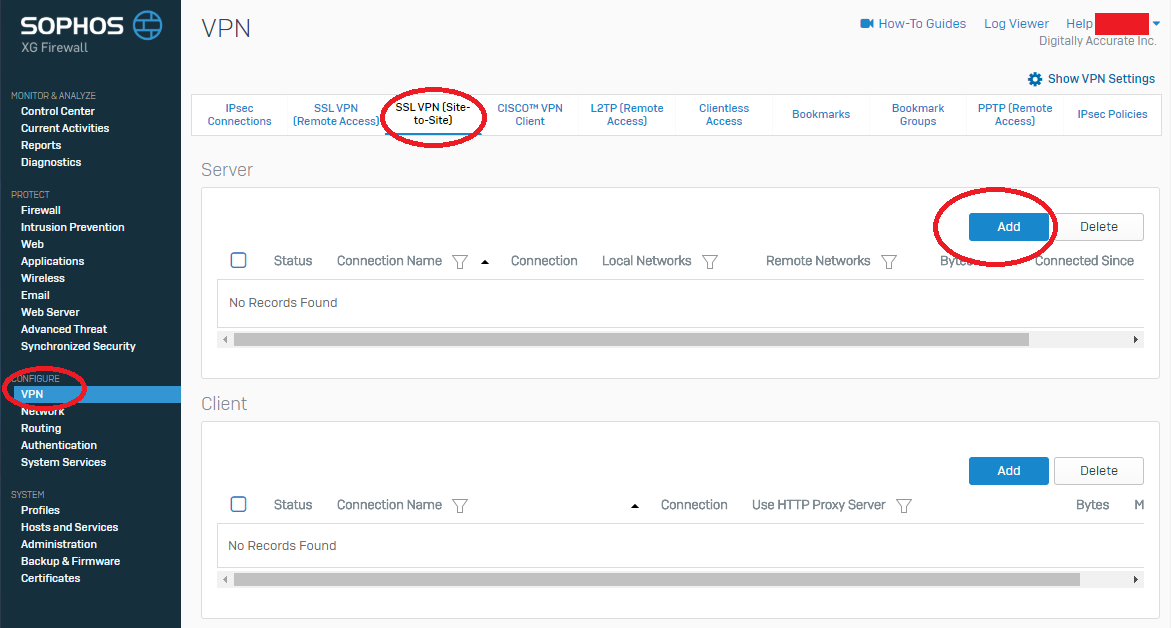
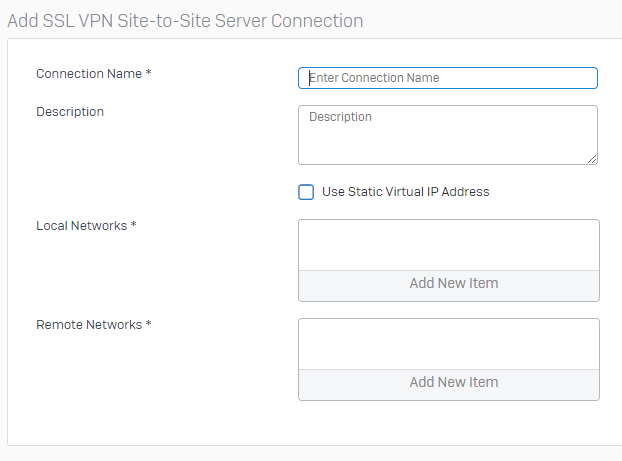
To configure the SSL Site to Site VPN tunnel between the Sophos appliances, we’ll need to configure the Sophos XG (on Azure) to act as a server, and the Sophos UTM (on prem) which will act as the client. Side note: In my own testing, I found that the XG had to be the server in order to get them to connect.
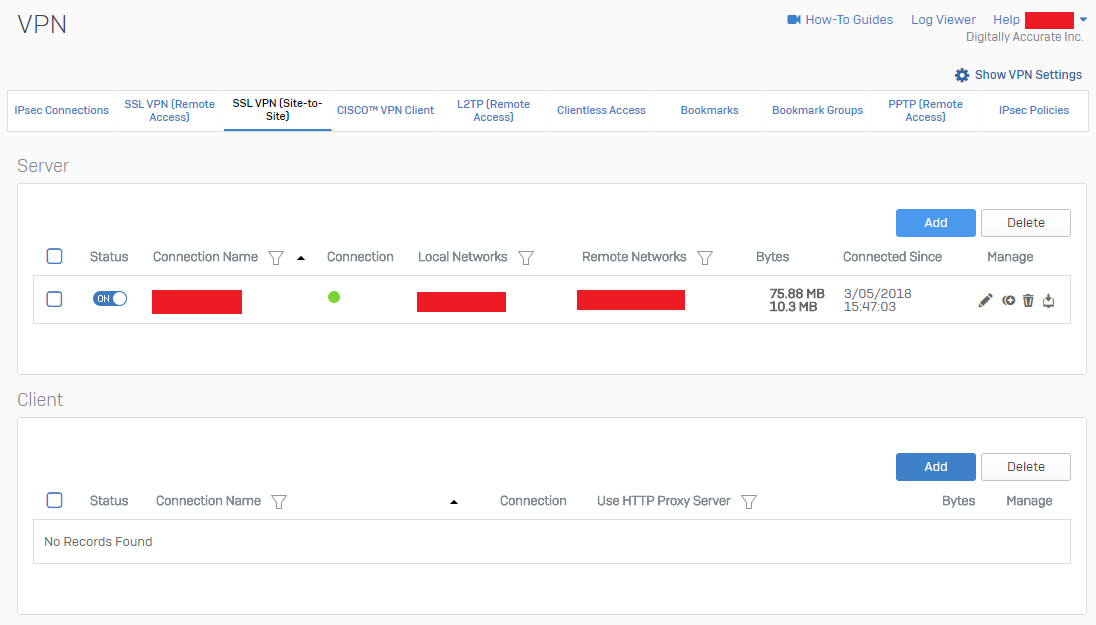
To configure the SSL VPN tunnel Server on the Sophos XG:
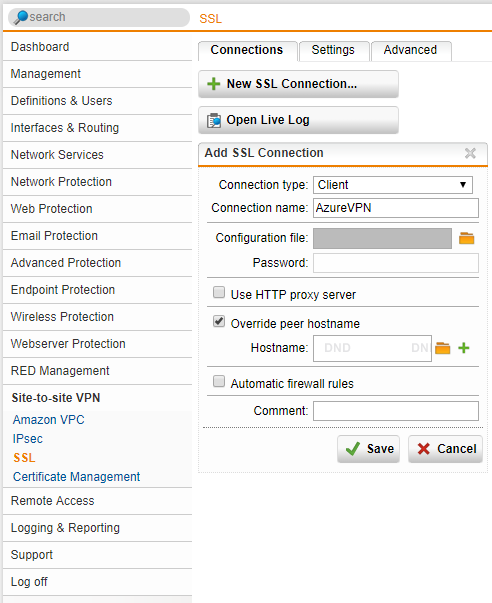
To configure the SSL VPN tunnel Client on the Sophos UTM:
You have now fully configured the SSL Site-to-Site VPN tunnel between your Sophos XG and Sophos UTM instances.
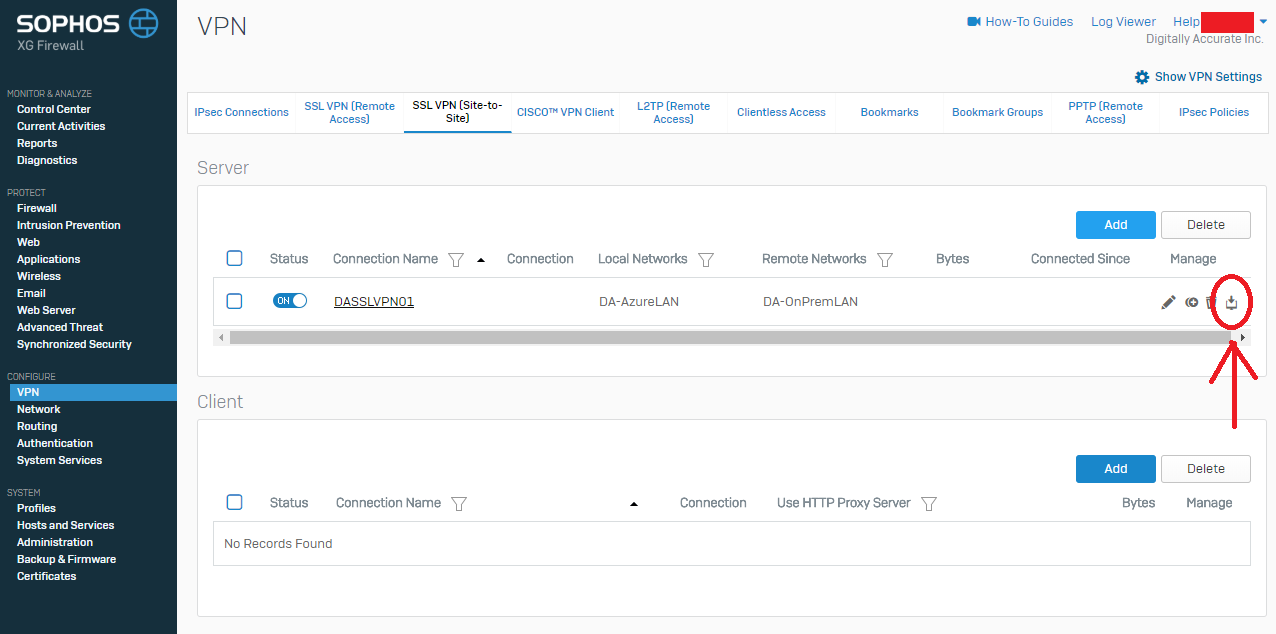
To confirm a functioning VPN tunnel on your Sophos XG unit, you should see something similar to below.
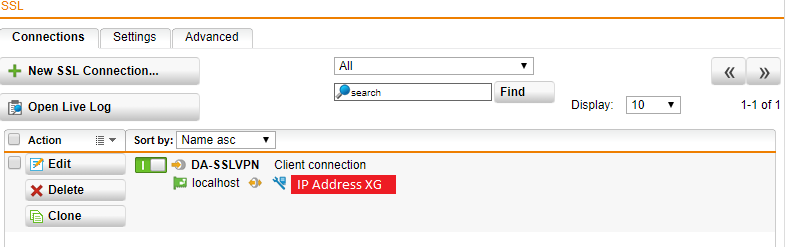
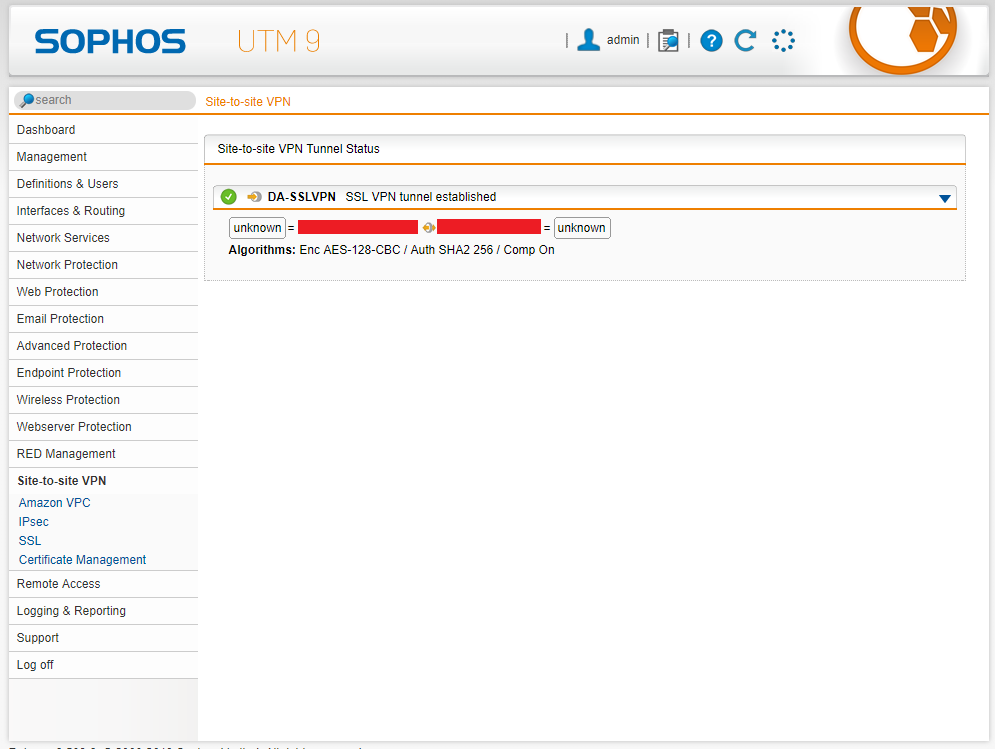
To confirm a functioning VPN tunnel on your Sophos UTM unit, you should see something simialar to below.
Please note that a bug with XG to UTM VPN, is that on the Sophos UTM reports the active subnets as “unknown” as shown above on both sides. This can be safely ignored.
You can start to test some basic communication, however you still need to create firewall rules. Please note that the Azure network will not be routable until you continue the steps below and configure proper routing.
When you create a Virtual Network (VNet) in Microsoft Azure, Azure will handle the routing for you automatically. It will create routers and other “instances” to handle network connectivity as you provision new subnets, gateways, devices, and network paths. Since we are deploying our own router, we want to override these default routing tables that are automatically created.
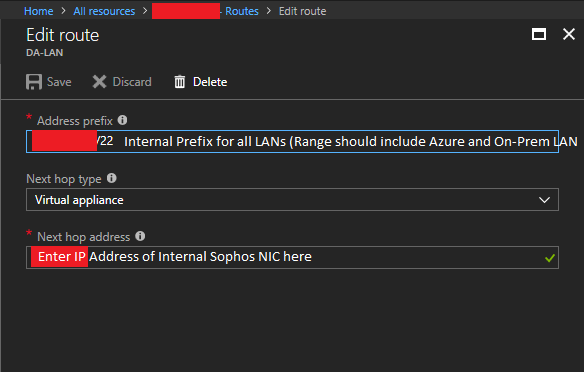
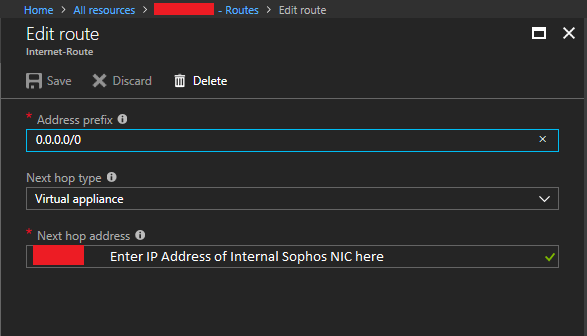
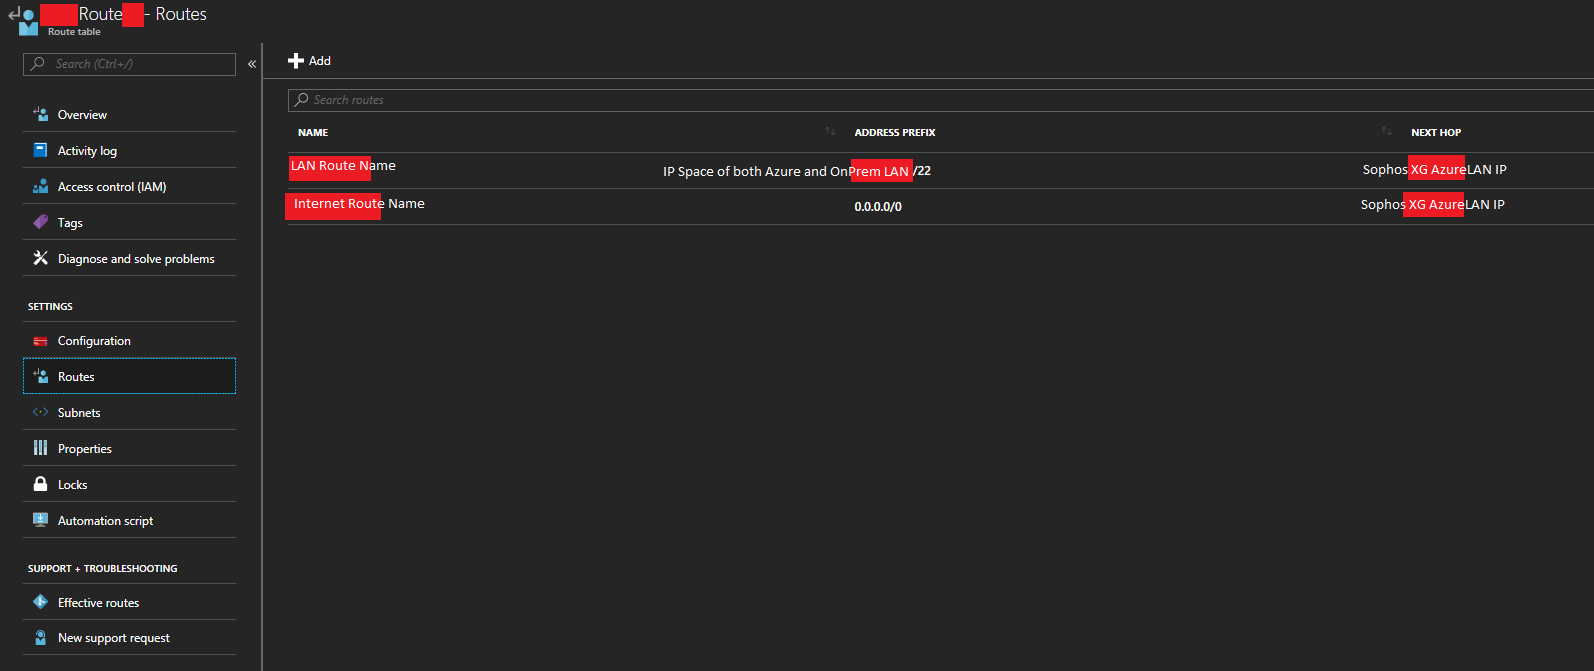
When looking at our target configuration, our Sophos XG unit will have an internet facing static IP, and will be handling communication between our internal network (and hosts), the internet (outside world), and our internal on-premise network (LAN). Because of this, we have to make changes to our Azure enviroinment so that the default subnet network route becomes the Internal IP Address of the Sophos XG firewall. We need to configure routes for both our Azure subnets (if wanted), our corporate on-premise LAN, and our catch-all route for internet access (0.0.0.0/0).
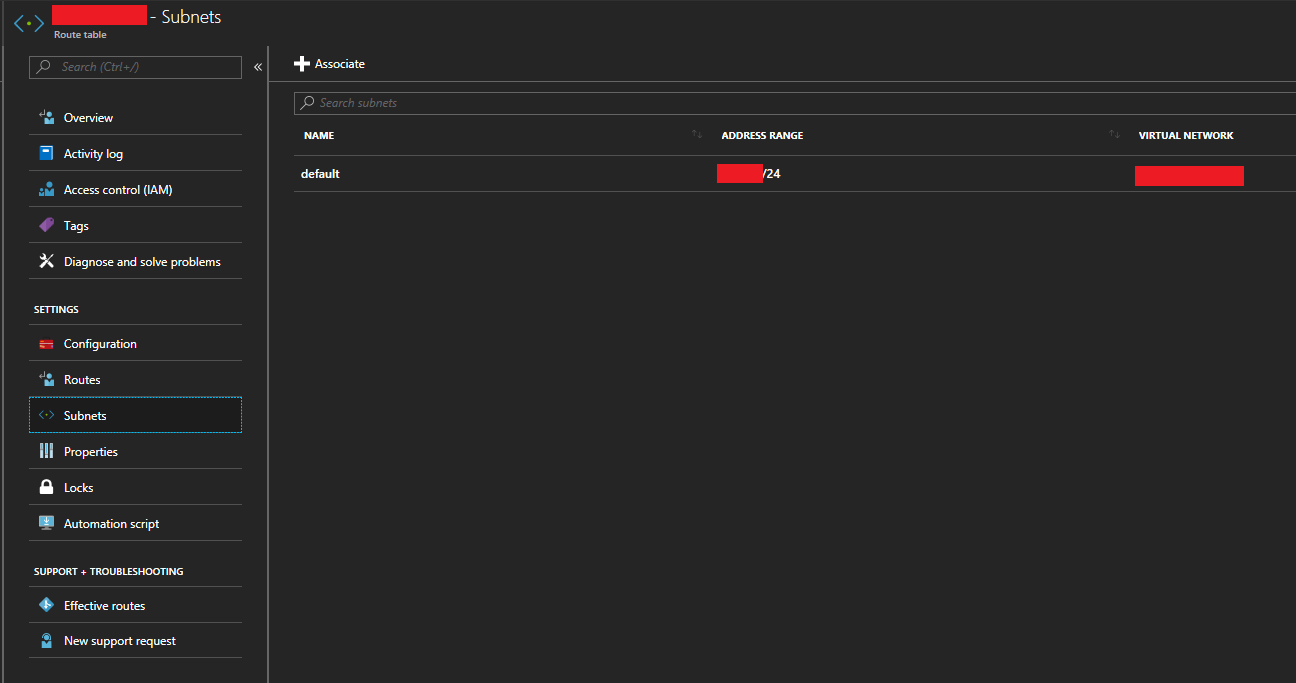
Once we create our own routing table, we’ll need to assign it to specific subnets to make those specific subnets enforce the routes.
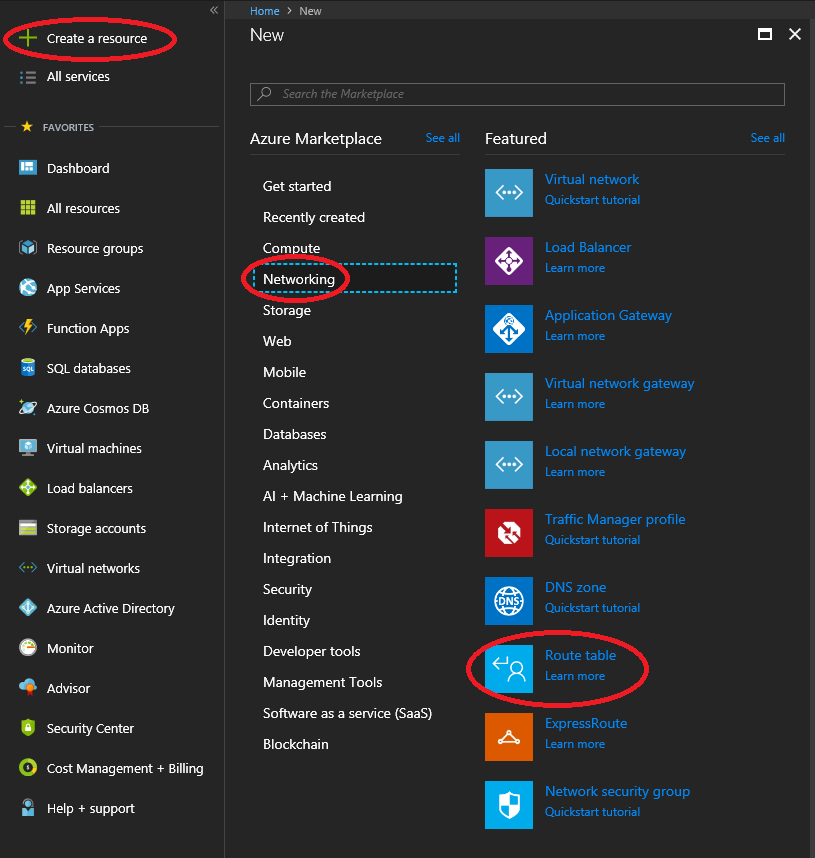
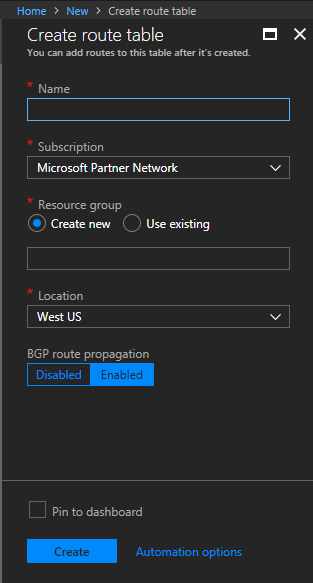
To create a custom Route Table:
You’ve successful configured a custom routing table for your Microsoft Azure subnet which will route packets destined for other subnets (including internet/WAN) to your Sophos XG for further routing.
In order for a VM (Virtual Machine) to have the ability to forward and route packets, we need to enable “IP Forwarding” on both the Internal and External NIC of the Sophos XG appliance running on Azure.
To enable this:
IP Forwarding has now been enabled. The Sophos XG appliance can now successfully route packets in your Microsoft Azure Virtual Network (VNet).
At this point you’ll have everything configured. You’ll have a SSL VPN between your Azure hosted Sophos XG instance and your on-premise Sophos UTM, as well as connectvity between both of the networks. You will now need to configure all your firewall rules to only permit the traffic you want to traverse from internal-azure to internal-onprem as well as external WAN traffic (this is beyond the scope of this document). You need to take care in making sure you only permit traffic that should be going over these network links. Now that both networks are connected, it provides another means to connect and communicate with the other networks which increases your security risks. You’re not only securing against one internet connection on one LAN, but 2 internet connections across 2 networks.
In my scenario by configuring this I was able to decommission the Microsoft Azure VPN Gateway (minimizing costs), and have my own security appliance/instance handle the communication between both networks and also protect both networks with all the fancy features that the Sophos XG and UTM line offer.
Leave a comment with feedback!
While most of us frequently deploy new ESXi hosts, a question and task not oftenly discussed is how to properly decommission a VMware ESXi host. Some might be surprised to… Read More
This guide will outline the instructions to Disable the VMware Horizon Session Bar. These instructions can be used to disable the Horizon Session Bar (also known as the Horizon Client… Read More
Normally, any VMs that are NVIDIA vGPU enabled have to be manually migrated with manual vMotion if a host is placed in to maintenance mode, to evacuate the host. While… Read More
You may experience GPU issues with the VMware Horizon Indirect Display Driver in your environment when using 3rd party applications which incorrectly utilize the incorrect display adapter. This results with… Read More
Today we're going to cover a powerful little NAS being used with VMware; the Synology DS923+ VMware vSphere Use case and Configuration. This little (but powerful) NAS is perfect for… Read More
Today we'll go over how to install the vSphere vCenter Root Certificate on your client system. Certificates are designed to verify the identity of the systems, software, and/or resources we… Read More