Mar 112012
 

For the past 2 weeks I’ve been receiving notifications reporting that one of my clients SBS 2008 environments is about to have some Exchange certificates expire.

Please Note, I provide Small Business Server consulting services, more information is available here!

Below is an example of the event log:

Source: MSExchangeTransport
Category: TransportService
Event ID: 12017
User (If Applicable): N/A
Computer: server.domain.local  Event Description: An internal transport certificate will expire soon. Thumbprint:ZOMGZOMGZOMGZAOMGZOMGZOMGZOM, hours remaining: 46  Event Log Name: Application  Event Log Type: warning  Event Log Date Time: 2012-03-08 13:15:36

Now upon initial research, apparently we were supposed to just be able to run the “Fix My Network” wizard inside of the SBS Console. Running this during the warnings, and after the certificate actually expired did absolutely nothing. The wizard was unable to detect the certificate had expired. It did report something to do with issues with an SMTP connector, however everything was working, and when trying to fix that, the wizard errored out and could not complete. I also read another article that running the “Setup my internet address” my fix the issue, but however it did not.

I decided to take a look at all the certificates currently install and also in use. To view the certificates installed, go to “Start”, then “Run”, type in “mmc.exe” and hit OK. Click on “File”, then “Add/Remove Snap-in”. Inside of this window, highlight “Certificates” and move to the right (hit the button with the arrow). Another window should open, select “Computer Account”, and follow through with the wizard. Once the certificates open, expand “Personal” and “Certificates” underneath it.

In my environment I noticed that there were two certificates that were identical, only difference being expiration. I had a feeling that the proper certificate existed on the server, however for some reason it was using an older one that it should not be. Keep in mind, this specific server was migrated from another (SBS 2008 to SBS 2008 Migration to new hardware).

To confirm they were identical, I opened up a Exchange Shell (find it in the start menu, and right click and “Run As Administrator”). I typed in “Get-ExchangeCertificate | FL”. The output confirmed that the certificates were the same and performed the same function.

ONLY PERFORM THIS if exchange is using the wrong certificate and you have two certificates which are the same, only with different expiration dates. If you do not, you are experiencing another problem and these instruction either won’t help you, or make your problem worse.

I decided to switch Exchange over to the new certificate:

1) Get the thumbprint of the newer certificate, it will be provided when you run “Get-ExchangeCertificate | FL”. Make sure the services and information match the certificate that is about to expire.

2) With the Exchange Shell still open type in “Enable-ExchangeCertificate thumbprint -Services SMTP,POP,IMAP” (sub in the thumbprint where it says thumbprint).

3) It will ask you to confirm, click ok.

4) Delete the old certificate, but make sure you back it up first. Export the old expiring certificate using the Certificate view inside of mmc.exe (what we did above). Export it (with extended data) so it can easily be re-imported if any issues occur. If you do need to restore it, inside of the Certificate view in mmc.exe, simply right click, re-import, and use the “Enable-ExchangeCertificate” (shown above) to re-activate it.

Hope this helps!

Mar 102012
 

Wow, what a horrible weekend it has been dealing with all these certificate expirations (both clients, and my own). Ton’s of articles on the internet, however tons don’t cover what you do if you have your own certificate authority and DON’T want to use a self-signed certificate. Also, all the tutorials on the net use the Shell, I rather use the GUI…

When it comes time to renew your certificate, you’ll be seeing these in your Event Viewer:

Source: MSExchangeTransport
Category: TransportService
Event ID: 12018
User (If Applicable): N/A
Computer: server.domain.com  Event Description: The STARTTLS certificate will expire soon: subject: server.domain.com, thumbprint: ZOMGZOMGZOMGZOMGZOMGZOMGZOMGZOMG, hours remaining: 664. Run the New-ExchangeCertificate cmdlet to create a new certificate.


Source: MSExchangeTransport
Category: TransportService
Event ID: 12017
User (If Applicable): N/A
Computer: server.domain.com  Event Description: An internal transport certificate will expire soon. ZOMGZOMGZOMGZOMGZOMGZOMGZOMGZOMG, hours remaining: 664  Event Log Name: Application  Event Log Type: error

Anyways, first off, DO NOT use this tutorial if your running “Microsoft Small Business Server”, there is a better, easier, and more automated way to perform this on SBS (I won’t be covering that in this blog post, I will however make another one to explain the procedure). Depending on you’re environment, this may or may not be the best way or the right way to do this. In my environment, I have 1 server that acts as a Domain Controller and a Certificate authority, and a second server that is running Microsoft Exchange 2010.

You take your own risk if you perform the instruction in this blog post.


1) Start the renewal process

We need to generate a renewal request. Load up the Exchange Console, and select the “Server Configuration” on the left. It should load up your Exchange Certificates on the lower half of your screen. Look for your certificate that is about to expire. To get the details on the certificates, simply double click and it will load the info, if you’re unsure of which certificate it is, use the thumbprint provided in the Event viewer, and compare it to the Thumbprint on the “Details” tab of the certificate. Once you find it, highlight it and select “Renew Exchange Certificate…” on the action pain to the right.

Renew Exchange Certificate


2) Create renewal request Wizard

This will open the certificate renewal request wizard (as shown below):

Certificate Renewal Request Wizard


Simply choose a file name and location to save the request. It’s easiest just to save it on your desktop. After, hit “Renew”. This will generate the certificate renewal request.


3) Copy certificate request to clipboard

Locate the file you created above inside of Windows Explorer. Right click on this file and select “Open”, or “Open With”. When prompted, uncheck the “Always use the selected program to open this kind of file” option, and select “Notepad” as the program to open the file with. Example below:

Open with Notepad

Open with Notepad


This will open the certificate request. Now highlight all the text and copy it to your clipboard. Example below:

Certificate request in Notepad

Certificate request in Notepad


4) Submit certificate request to certificate authority using web interface

Now we submit the request! Log on to your certificate authority web interface. On the first screen, we will select “Request a certificate”, as shown below:

Request

Request


Then select “advanced certificate request”, as shown below:

Advanced certificate request

Advanced certificate request


And now, choose “Submit a certificate request by using a base-64 encoded CMC or PKCS #10 file, or submit a renewal request by using a base-64-encoded PKCS #7 file.”, again example below:


Finally, we are going to populate the request. Inside of the “Saved Request:” text box, paste your request from your clipboard (which we copied to your clipboard above), then for “Certificate Template:” choose “Web Server”. Example is below:


Now select Submit! On the next page that loads, simply select “Download certificate” and save it to a location you’ll remember.


5) Install certificate on Exchange

We now have a certificate that’s ready to be installed. Go back to the Exchange console where we left off. Inside of the certificate list, you should see an item that has a status that says something about a pending request. Highlight this request, and on the Action Pane, select “Complete request”. I could be wrong on what this says as I can’t remember and did not take screenshots.

A wizard should open up, in this wizard simply point it to the new certificate (the file we just saved at the end of step 4, shown above). Follow the instructions.


6) Assign Services to Certificate

Now that the certificate is installed, we need to assign which services will use it. The new certificate should also now be in the list of certificates inside of Exchange. Highlight the new certificate, right click, and select “Assign Services to Certificate”. Example below:

Assign Services to Certificate

Assign Services to Certificate


Once the wizard opens up, follow through and when actually prompted for the services check everything except for “Unified Messaging”. Finish the wizard.


7) Delete old certificate

Now we are almost done. Go back to the certificate list inside of Exchange and look for the old certificate that is going to expire. Highlight it, right click, and select “Remove”.


You’re Done!


Mar 022012
 

Well, today I was cleaning up and found an old Linksys SPA-3102 device that I purchased 3-4 years ago. I originally purchased this device to connect my Trixbox (Asterisk) PBX to my land line at my house.

The SPA-3102 is a device manufactured by Linksys/Cisco that provides one FXS terminal, and one FXO terminal. This device can connect your PSTN phone line to your VoIP PBX, and it can also allow you to connect a standard phone to your VoIP PBX as an extension, all at the same time.

While I wasn’t to happy with performance of the solution, nonetheless I figured it out and got it running. I decided to write up a little blog post as a How-To get the SPA-3102 working with Trixbox. This solution is mostly just a bunch of config, so excuse the lack of How-To and the bulk of config dumps:

Update (2017): This also works on new versions of FreePBX Asterisk Linux Distro. I can confirm T.38 faxing works on the FXO line, but have not been able to get it working on the FXS PSTN line (fails to re-negotiate).


1) Configure the Asterisk extension (this configures the line you hook up to a phone on the SPA-3102):

Create a extension inside of Trixbox or FreePBX. Leave everything default except:

Display Name: Fax Machine (change this to whatever you want)

Extension: 199

secret: password (choose you password)

canreinvite: yes

host: dynamic

type: friend

nat: yes

qualify: yes

2) Configure the Asterisk Trunk for the SPA-3102

Go to the Trunk Menu inside of Trixbox or FreePBX PBX configuration. Add a new SIP Trunk. Leave settings default except:

Outbound Caller ID: 1234567890 (Change the number to your PSTN line, if the number doesn’t match, it could break things)

Trunk Name: spa3102

PEER Details:

username=spa3102
type=friend
secret=P4SSw0rdz (replace with your password)
qualify=yes
port=5062
nat=no
host=dynamic
dtmfmode=rfc2833
context=from-trunk
canreinvite=yes

3) Configure Outbound and Inbound Routes

The configuration for the Outbound route is normal and doesn’t require any special configuration other than the normal outbound route you’d normally create for a trunk. However, the Inbound route does require special attention. When creating the Inbound route, make sure that the DID Number value exactly matches the 10 digit number you configure for the PSTN. This is how it will recognize this and categorize the incoming call under that specific inbound route.

4) Now for the SPA-3102 Configuration

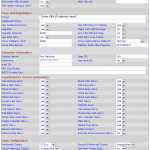
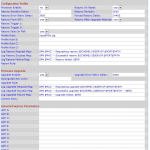
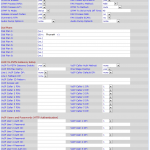
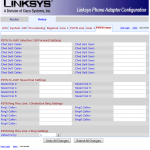
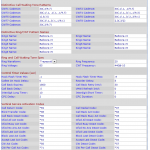
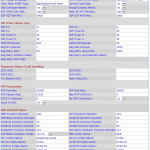
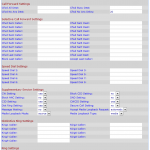
There’s no way I’m writing all the config out for the SPA-3102, so instead I took screenshots for each tab that requires configuration.


And Voila!

You now have your SPA-3102 configured to both act as an extension and a gateway to the PSTN. If anyone has any better configuration please write a comment, I’d love to update this article, and I’d like to get this working better than it currently is of possible. One additional note: When the SPA3102 is factory reset, it’s default settings are optimized for the North America region.