A great and useful purpose for old embedded Linux wireless routers, is to re-purpose them as VLAN breakout boxes!
If you’re like me, you probably have a bunch of old Linksys (or other brand) Linux embedded wireless routers sitting around your home. You probably also have VLANs running on your home network or homelab for various reasons.
Let’s get to it!
Why would we need to do this?
VLANs are great, but typically the money it costs for VLAN supported switches, APs, routers, and other devices is more than your typical home gear.
You may be able to justify these purchases for your core network infrastructure, but when your cabling out to individual rooms in your house or apartment, you may not want to spend a lot of money on switches for that room.
The cost of a gigabit embedded Linux router is usually a lot less than a manageable switch that provides VLANs. At the same time, if you’re a true geek you probably have at least 5 of these embedded Linux routers sitting around in boxes… Why spend money at all?
What does this accomplish?
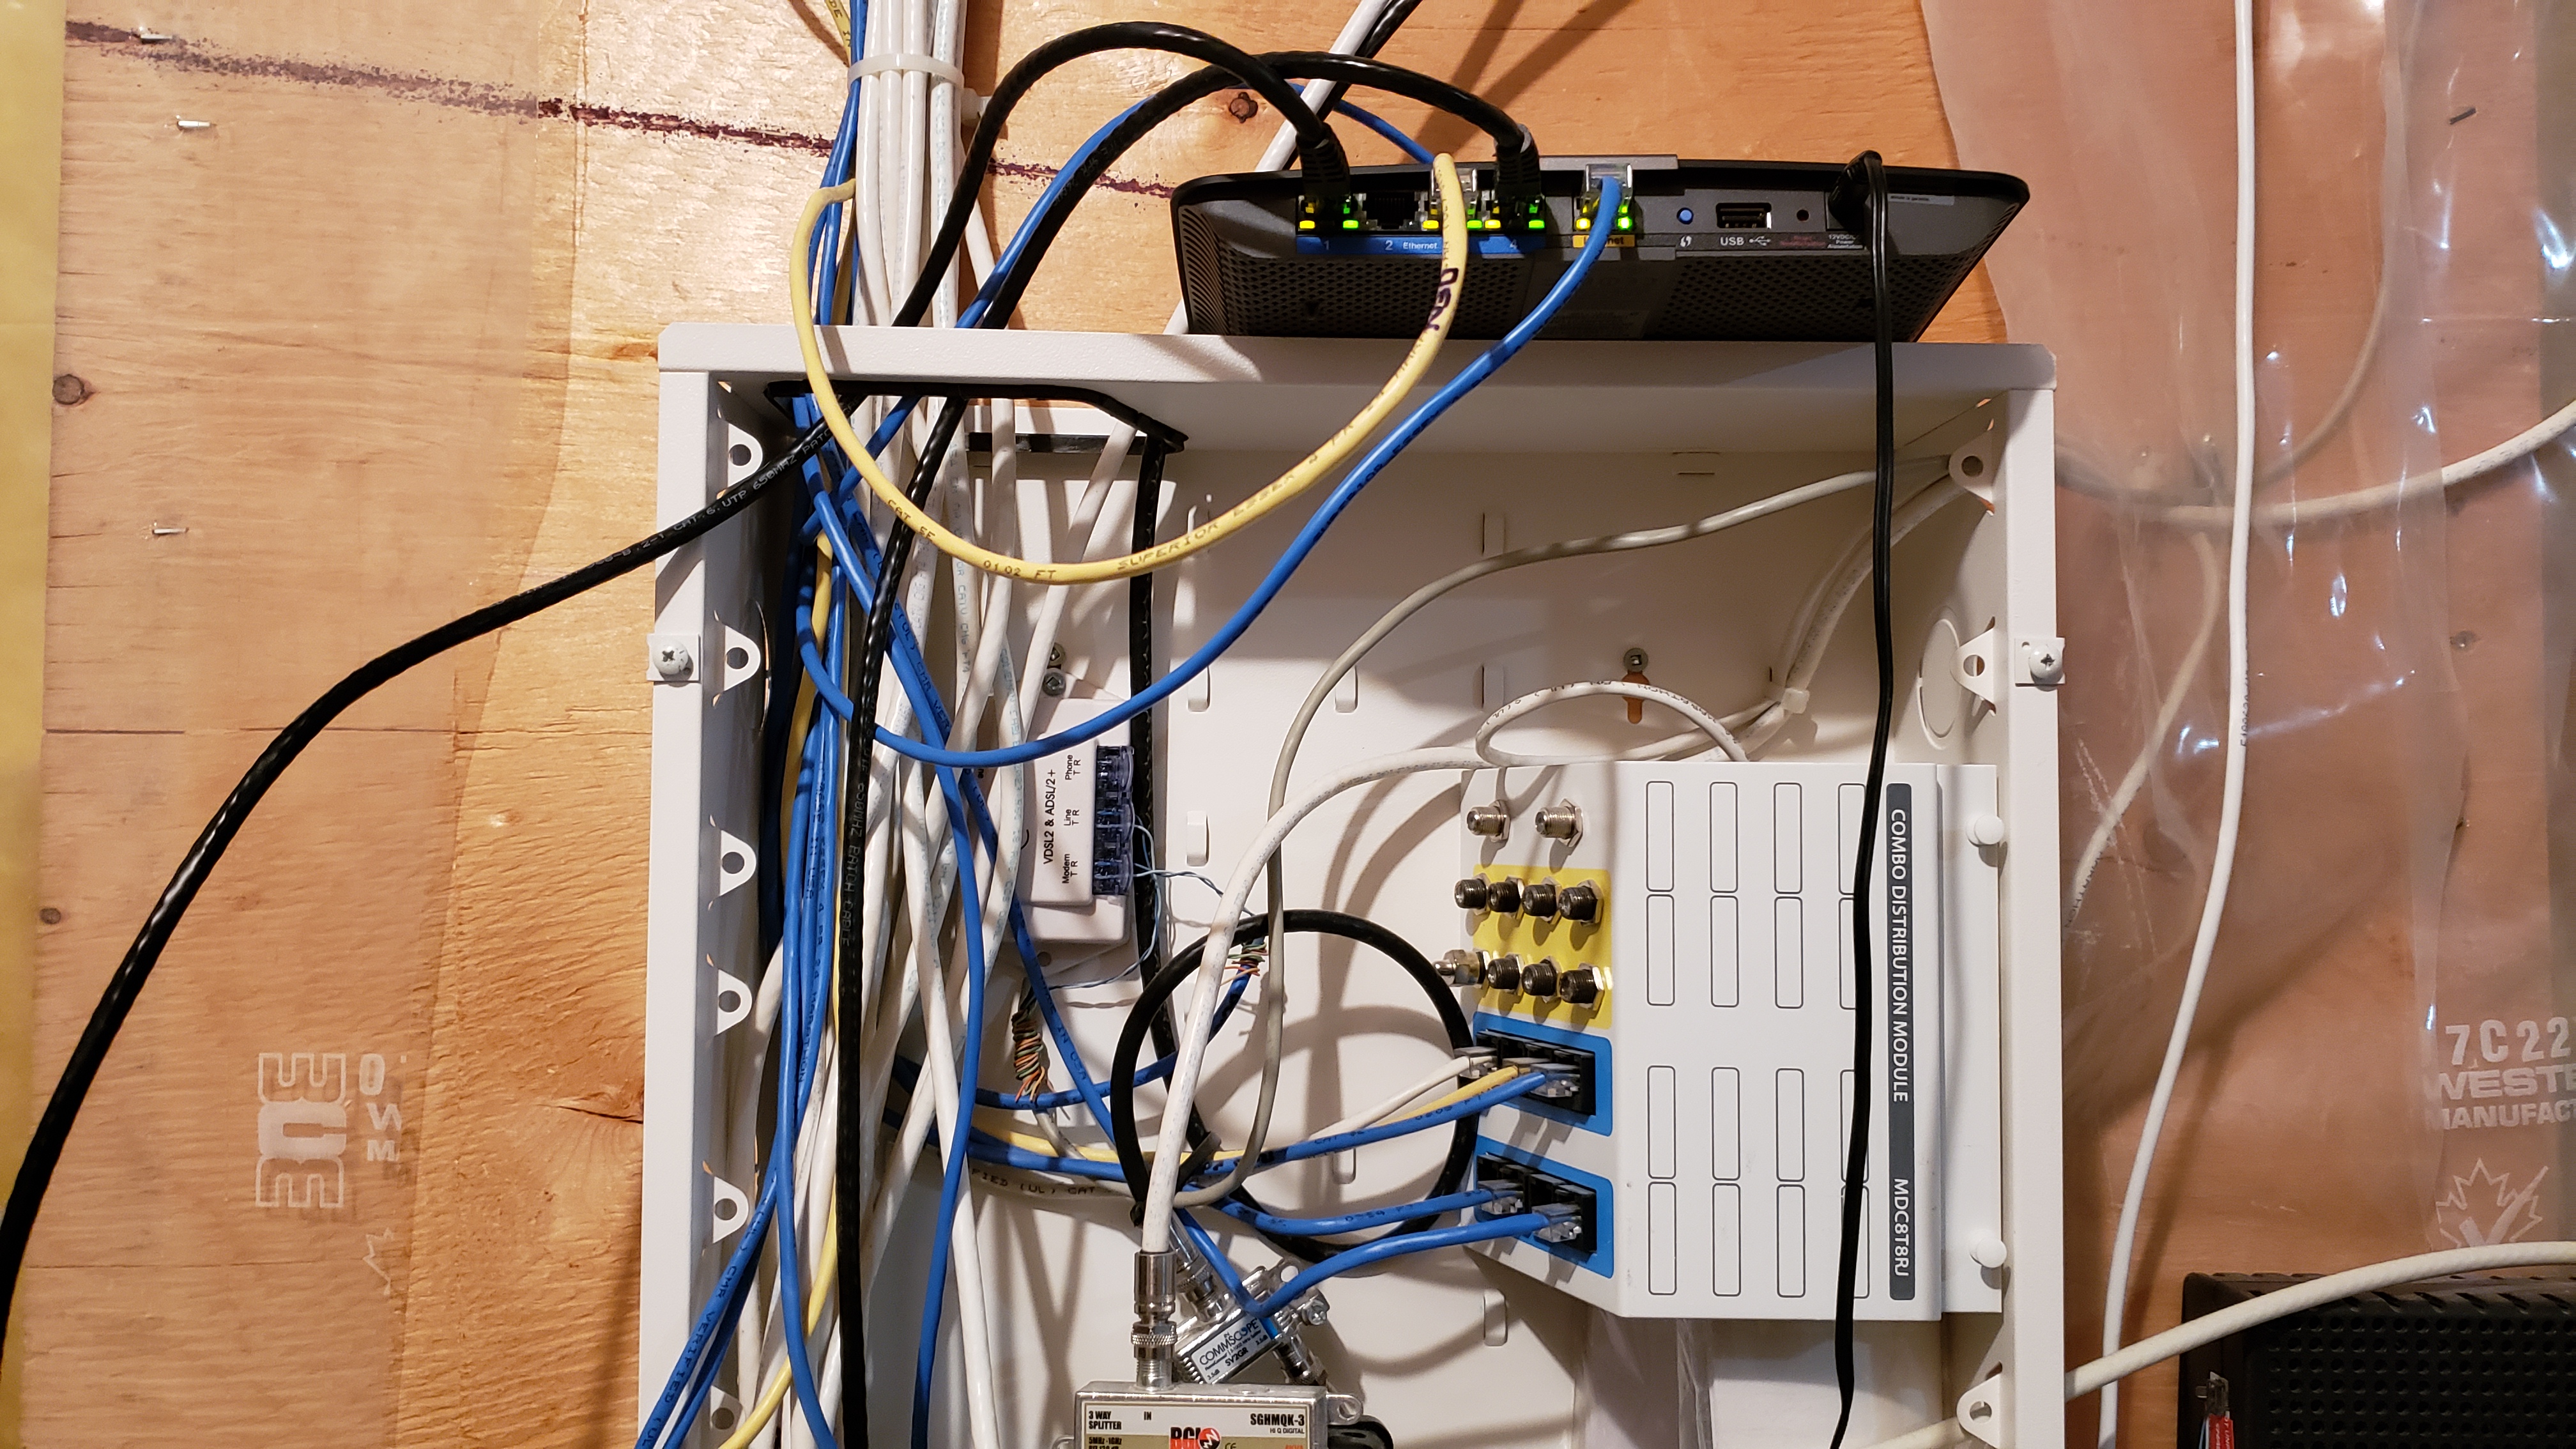
As an example: In my basement I have a single Cat 5e Ethernet cable providing all VLANs in a trunk from my server room. In my basement I have all my multimedia devices, IoT devices, a wireless access point (with 3 SSIDs/VLANs), and more.
Instead of purchasing an expensive manageable switch that supports VLANs, I ended up flashing OpenWRT on a couple Linksys E4200v2 wireless access points. I then connect the OpenWRT device to my Ubiquiti UniFi Network Infrastructure.
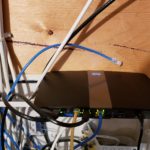
Linksys OpenWRT Switch On Panel
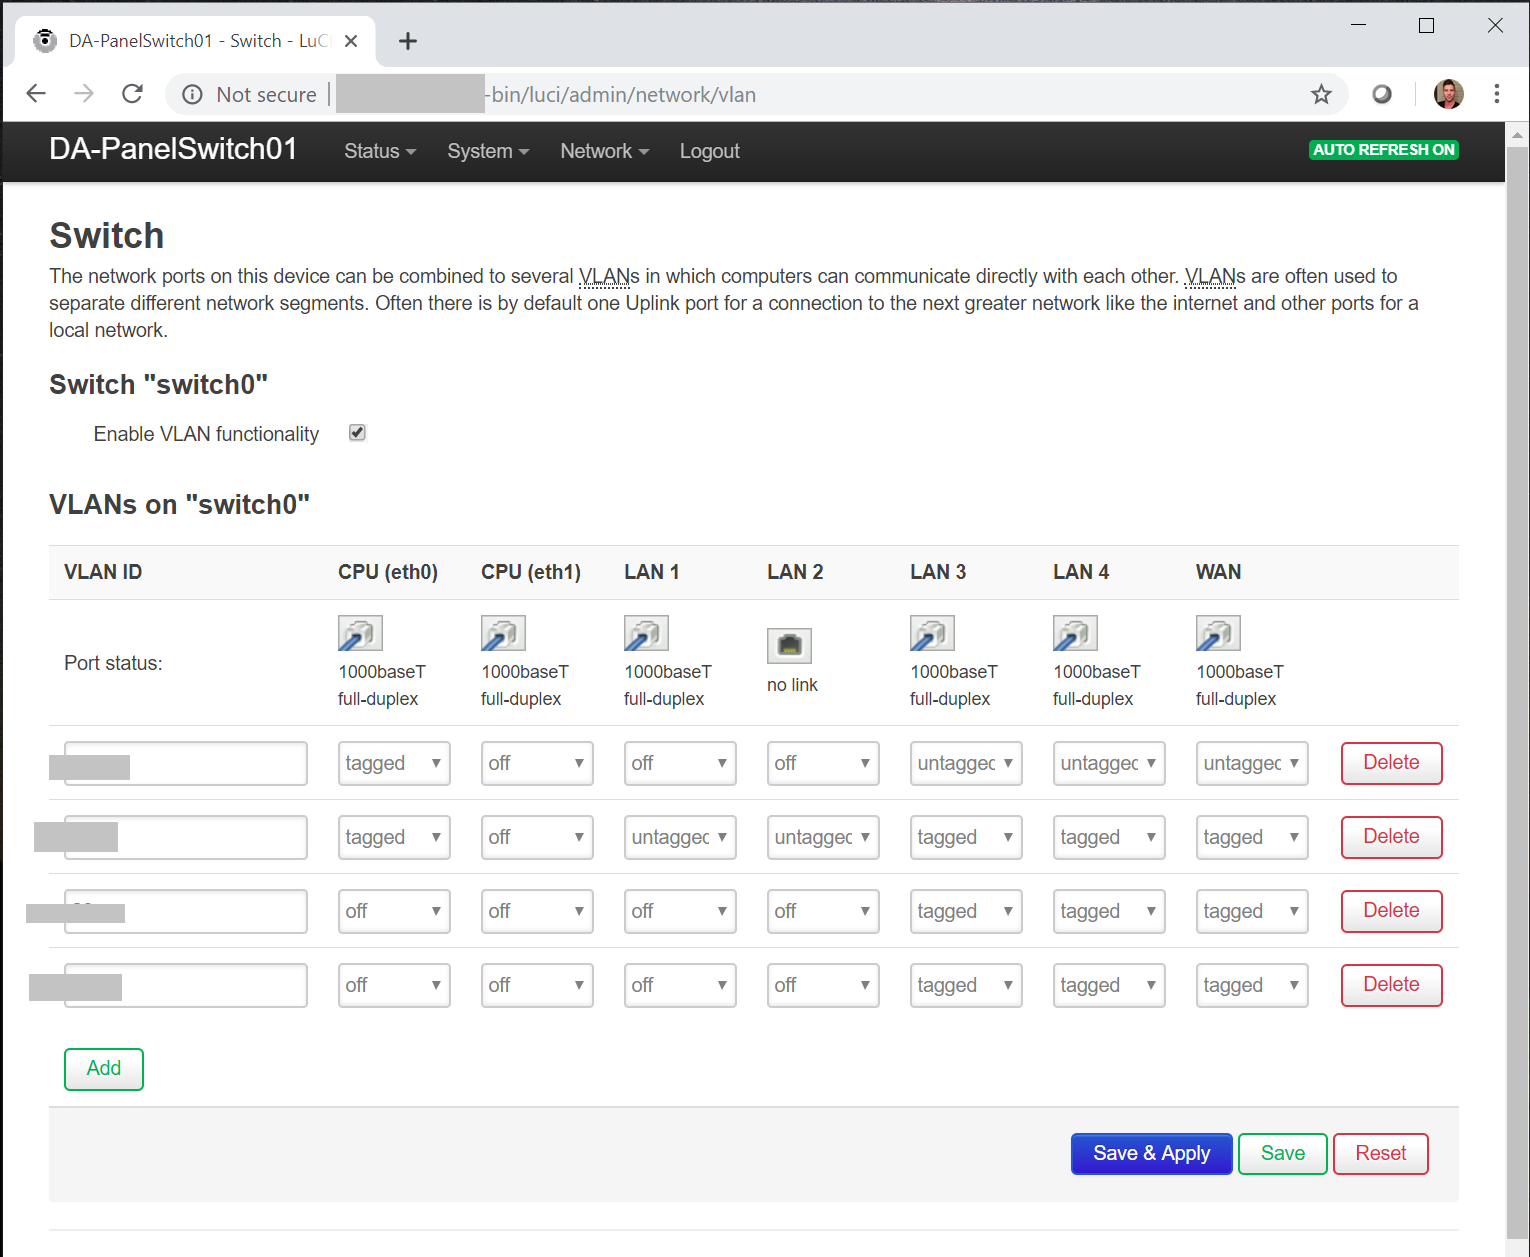
On the E4200 for my basement, I configured the WAN port to accept the incoming VLAN trunk and then configured the other LAN ports depending on their purpose. One of the LAN ports remains as a VLAN trunk for the Ubiquiti UniFi NanoHD wireless access point (as it needs all VLANs), and the other LAN ports untag traffic on various VLANs for specific purposes. One of these ports is the output for my main network LAN (which goes to a normal non-VLAN switch).
OpenWRT VLAN Configuration Basement AP
All you have to do is make sure you label the ports so you know what VLAN or trunk you’re plugging in to.
This is why I call it a “VLAN Breakout Box”! I also make sure to disable all the wireless radios on the router as I don’t need these (it also reduces the load on the CPU, although negligible).
So how do we do this?
We use OpenWRT and flash it to compatible embedded Linux wireless routers, switches, and other devices. It can even be used on x86 hardware.
If we’re picky, we’d prefer embedded SBC (Single Board Computer) devices that have a switch-on-chip setup, so that the packet switching can be handled via hardware and not software. We want this for better performance.
You can download and find more information about OpenWRT here: https://openwrt.org/
Always make sure you know what you’re doing when flashing hardware. You may brick your device if you fail to follow instructions properly.
On a final note, one of the reasons why I prefer OpenWRT over DD-WRT, is that with the GUI, you can configure any acceptable VLAN ID, whereas on DD-WRT you’re restricted to a very limited number of VLANs.
Recently I had the pleasure of ordering, installing, and configuring some new Ubiquiti UniFi network products, including a switch, wireless access points, and more! Today, I will review the Ubiquiti UniFi line of products for you!
My company Digitally Accurate Inc. is an Ubiquiti reseller, and we have Ubiquiti product in inventory and stock in our Vancouver and Toronto warehouses. Contact us if you’re looking at purchasing any Ubiquiti gear in Canada!
There are plenty of pictures below! 🙂
Update – March 20th 2020
It’s been just over 8 months now and I’m still in love with and highly recommend the UniFi hardware! It’s been working great, I’ve had no issues with any firmware updates or UniFi Controller updates, and it’s been rock solid!
The only problem I’ve experienced is an issue auto-negotiating 10Gig links with the SFP+ to 10GBase-T module. Forcing 10G on the server resolved this issue permanently.
I’m excited to add even more UniFi equipment to my network! Please enjoy this Ubiquiti UniFi Review!
The back story
For some time I’ve been wanting to replace a bunch of aging networking equipment at my company. This includes switches and wireless access points, and I wanted to consolidate the number of pieces of networking equipment I used. No more daisy chaining switches!
Wireless
First off, up to date I have been re-purposing consumer grade wireless routers as access points. While this has worked by disabling the router functions, DHCP, and DNS, it’s still not ideal. I wanted a true managed wireless solution. I always wanted proper coverage and no dropped connections.
Switching
Secondly, I’ve also been using a number of cheap daisy chained 8-port network switches. The amount of cables I use is absolutely crazy, the power-bar space for the transformers is crazy, and this is just crazy dumb! I wanted a true business/enterprise class manageable network switch that could handle all the cabling requirements my business has with all it’s servers, SANs, NASs, and other equipment.
Multiple Networks
Third, I’ve been using the multiple switches to maintain 4 different isolated networks across my virtualization stack. It would be ideal to implement VLANs on VLAN capable hardware, to consolidate, and ease management of the environment.
10Gb Requirement
Fourth, I do require some 10Gb capabilities. While my servers are using multiple SFP+ DAC cables to direct-connect to the SAN, I still have numerous unused 10GBASET NICs and ports on my servers that I’d like to use. It would be fantastic if I could use this as a backhaul to a switch.
The Goal
Ultimately I wanted a business/enterprise class networking solution, that could handle all my wireless and networking needs, in an easy to manage way, and in an affordable way that wouldn’t break the bank.
After researching a number of vendors, weighing the pros/cons, I found the answer: Ubiquiti UniFi
Ubiquiti UniFi
Ubiquiti UniFi Hardware
Ubiquiti UniFi is a portfolio of enterprise grade products including wireless technologies, network switching, cloud management capabilities, and other hardware technology.
UniFi offers the latest technologies at affordable prices. They also allow you to integrate with the cloud, or keep everything separate and centrally managed on your own hardware and software.
The UniFi products support a number of enterprise technologies you’d normally find in enterprise gear, such as central management, VLANs, multi-SSID wireless, Guest WiFi access, Captive Portal, and way more!
They also have a beautiful switch line up consisting of numerous different port options, PoE options, and uplink options (SFP, SFP+, etc).
The Solution
So, after making the decision to switch to Ubiquiti UniFi, I spec’ed out the hardware I wanted to purchase. See below for the items I ordered:
I ordered the equipment from my Vancouver warehouse (as mentioned before, my company has stock in Vancouver/Toronto), and waited!
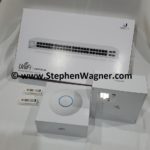
2 days later, the equipment arrived…
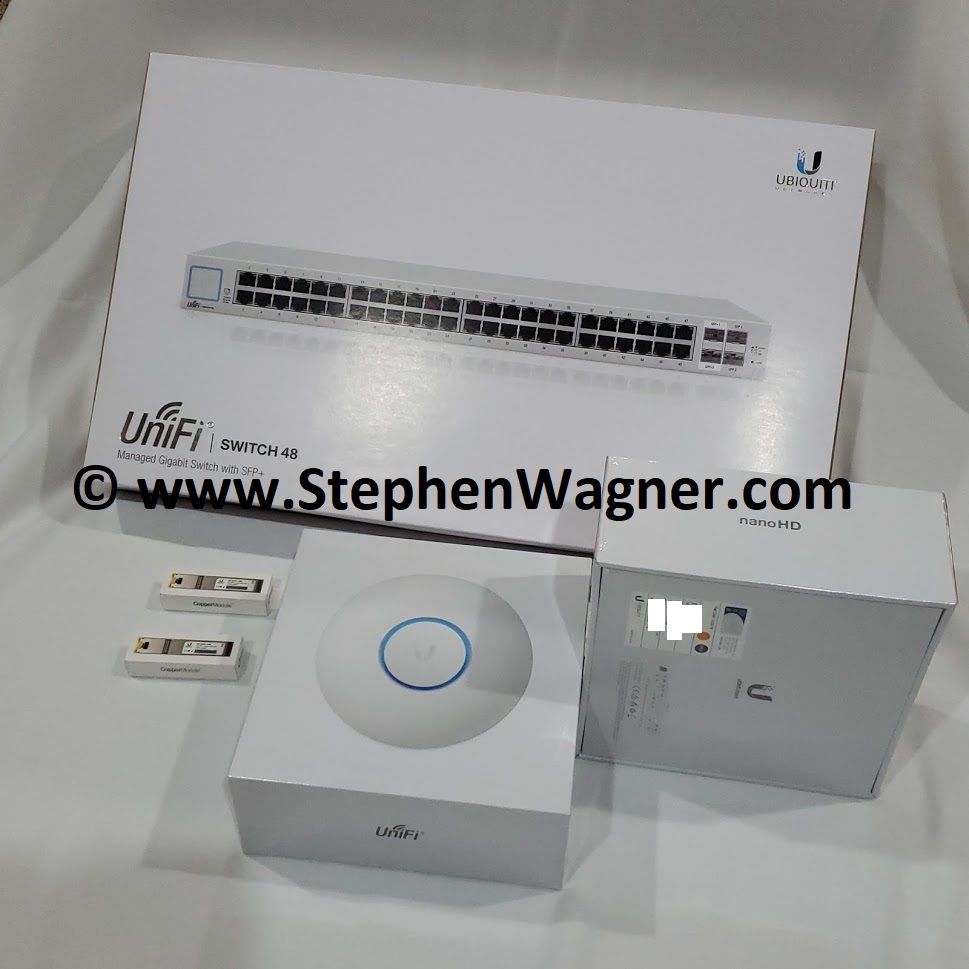
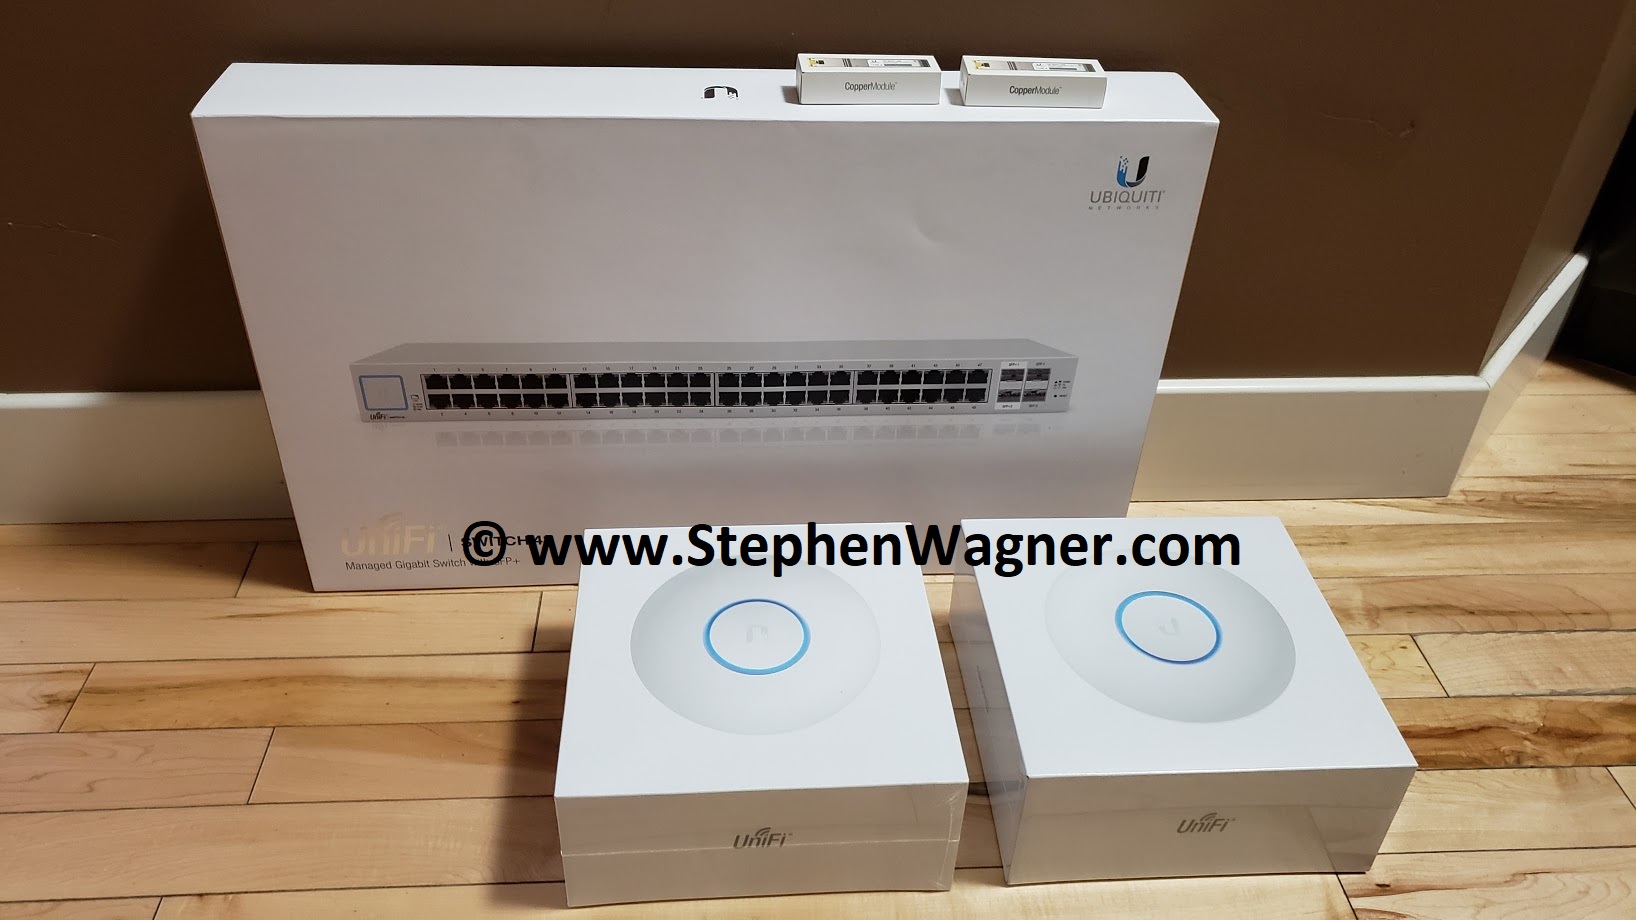
Ubiquiti UniFi Shipment
I was very impressed with the packaging! Even opening the products, you were actually “presented” with the products. Very nicely done Ubiquiti!
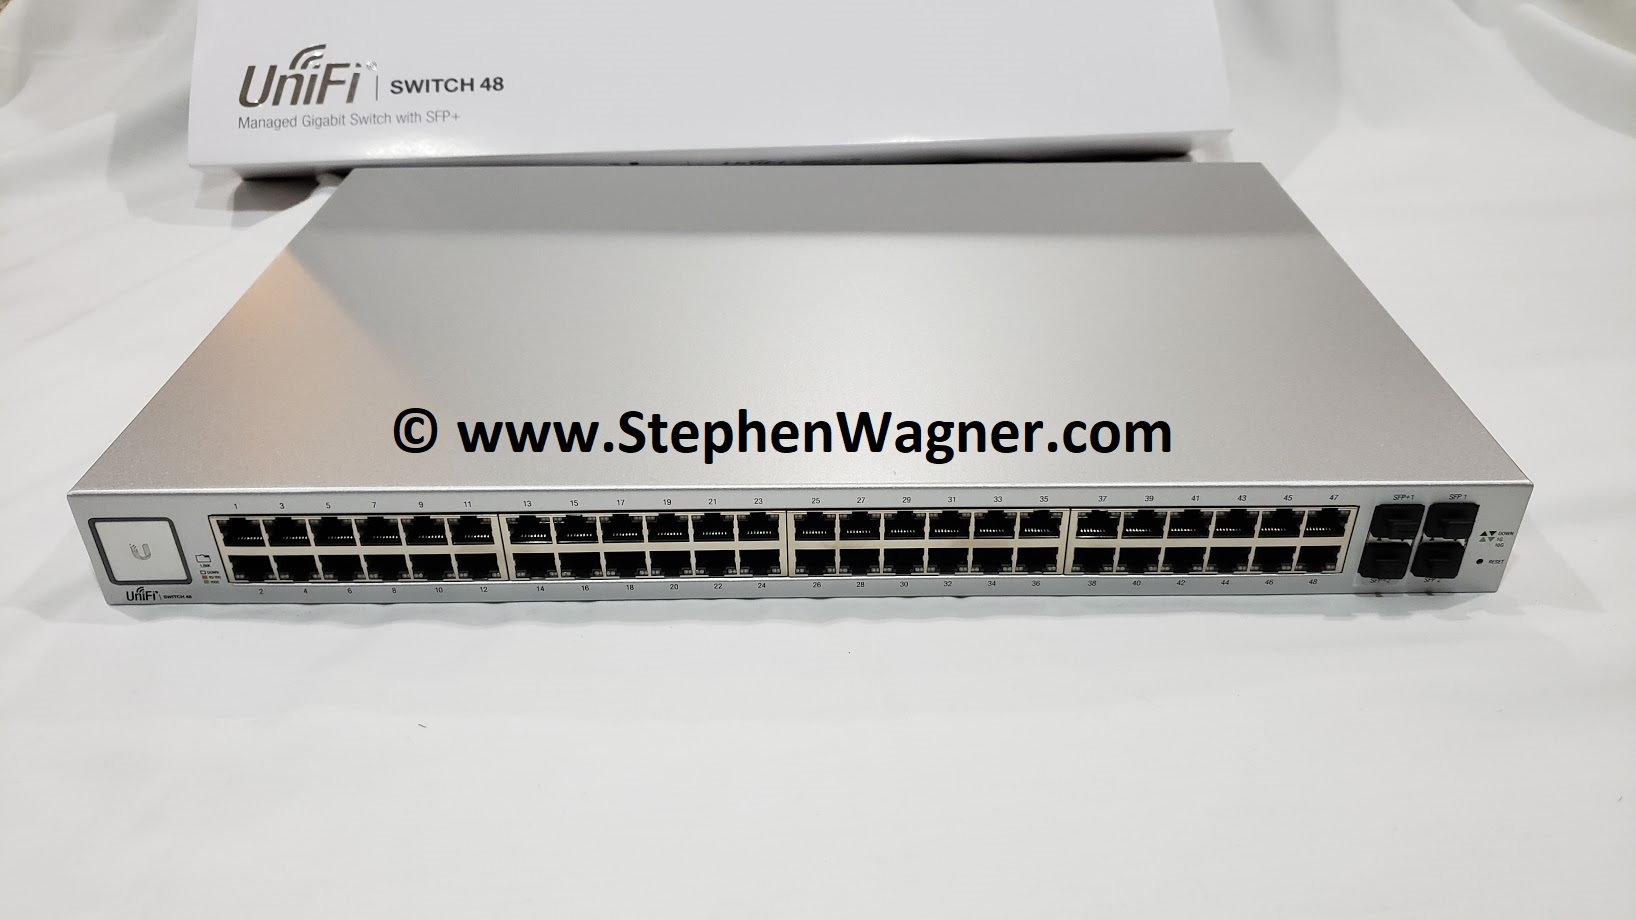
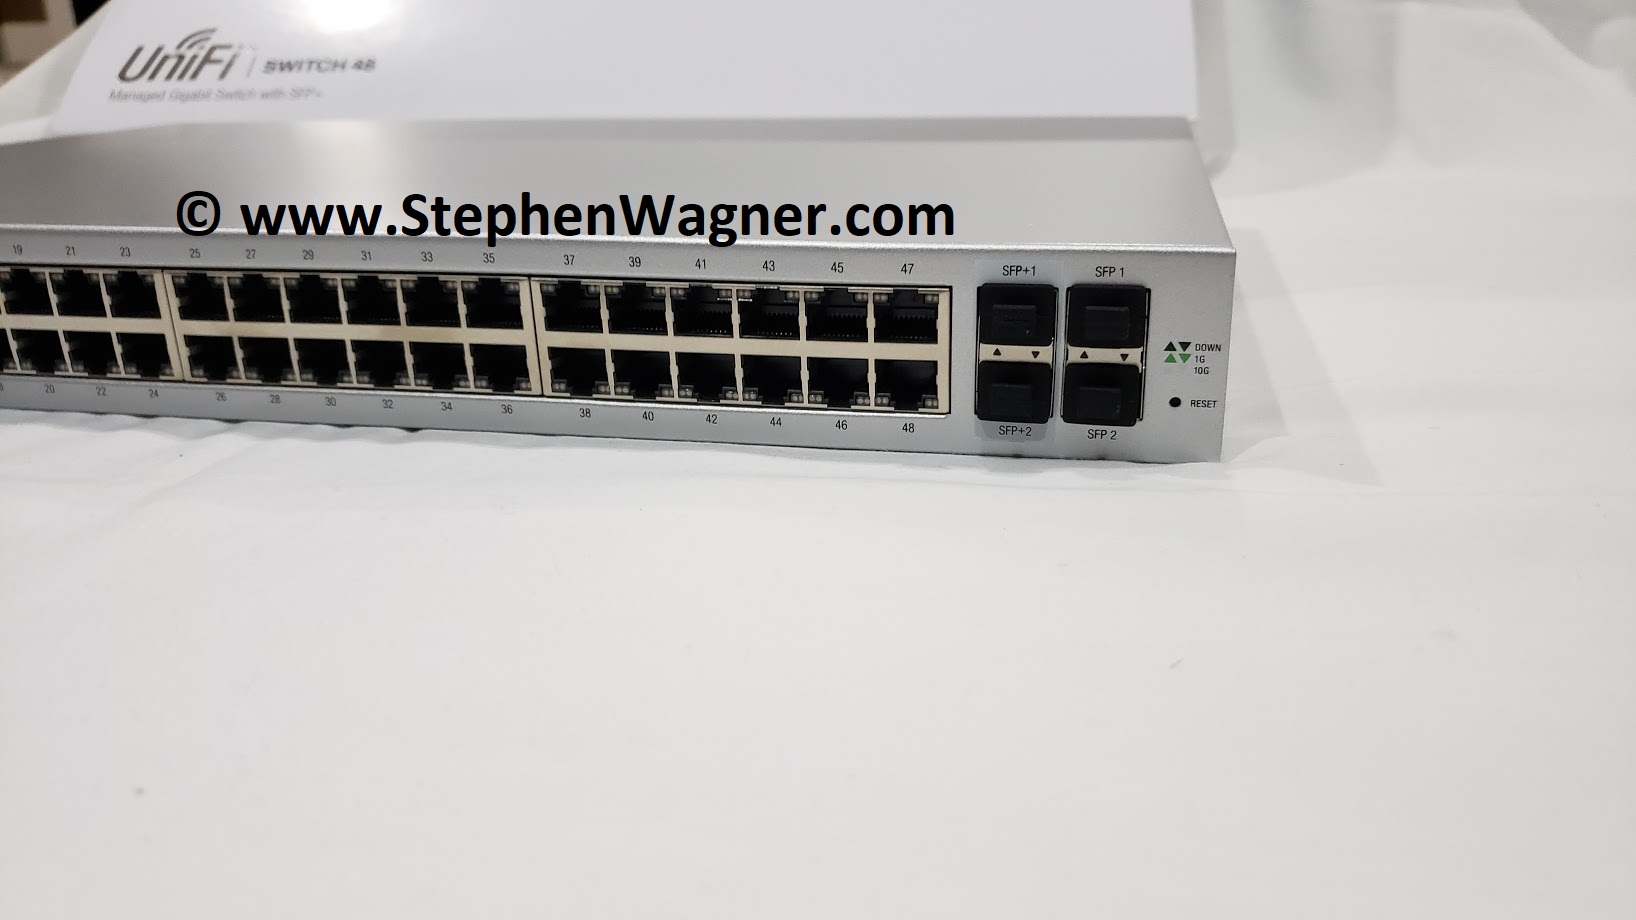
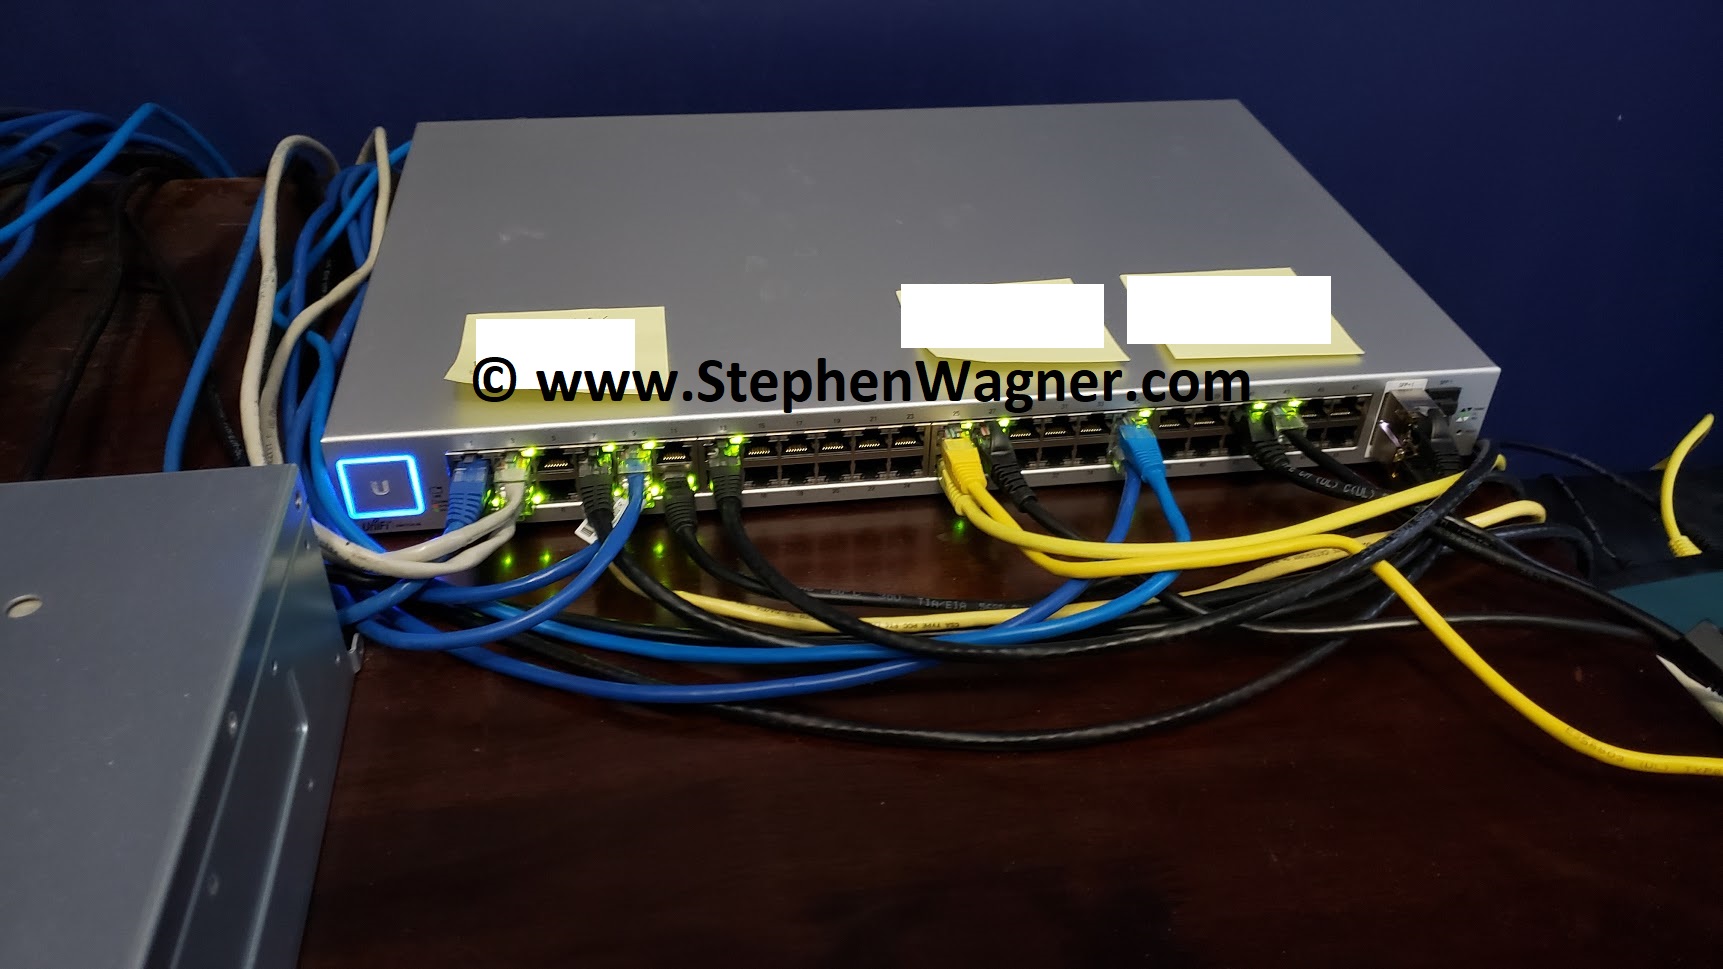
Ubiquiti UniFi Switch 48
Ubiquiti UniFi Switch 48
The UniFi Switch 48, provides 48 x 1Gb standard ports, along with 2 x 10Gb SFP+ ports, and 2 x 1Gb SFP ports.
You can order this switch with multiple PoE options, however I ordered the non-PoE version.
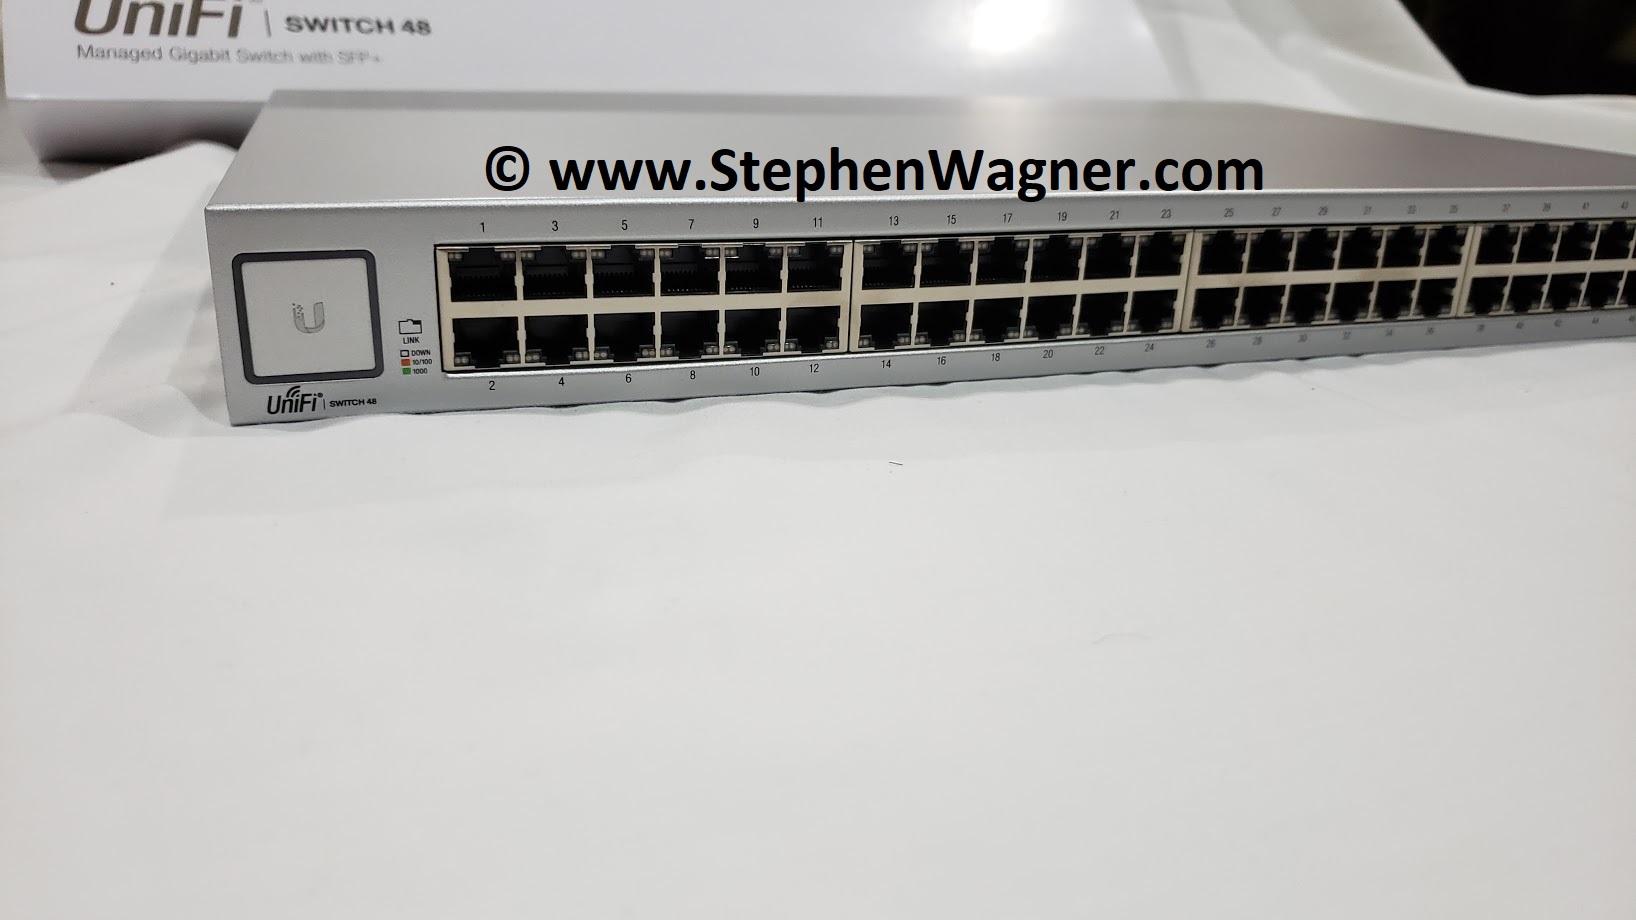
Ubiquiti UniFi Switch 48 Left Side
The switch has 70Gbps of non-blocking throughput, and 140Gbps of switching capacity.
The switch does have fans, however I haven’t heard them come on except for the initial power-up test.
Left view of Ubiquiti UniFi Switch 48
The SFP+ modules do run hot (hot to the touch), however after doing research I found out this is completely normal. There is a number of SFP+ and SFP module options that you can populate the ports with on the switch.
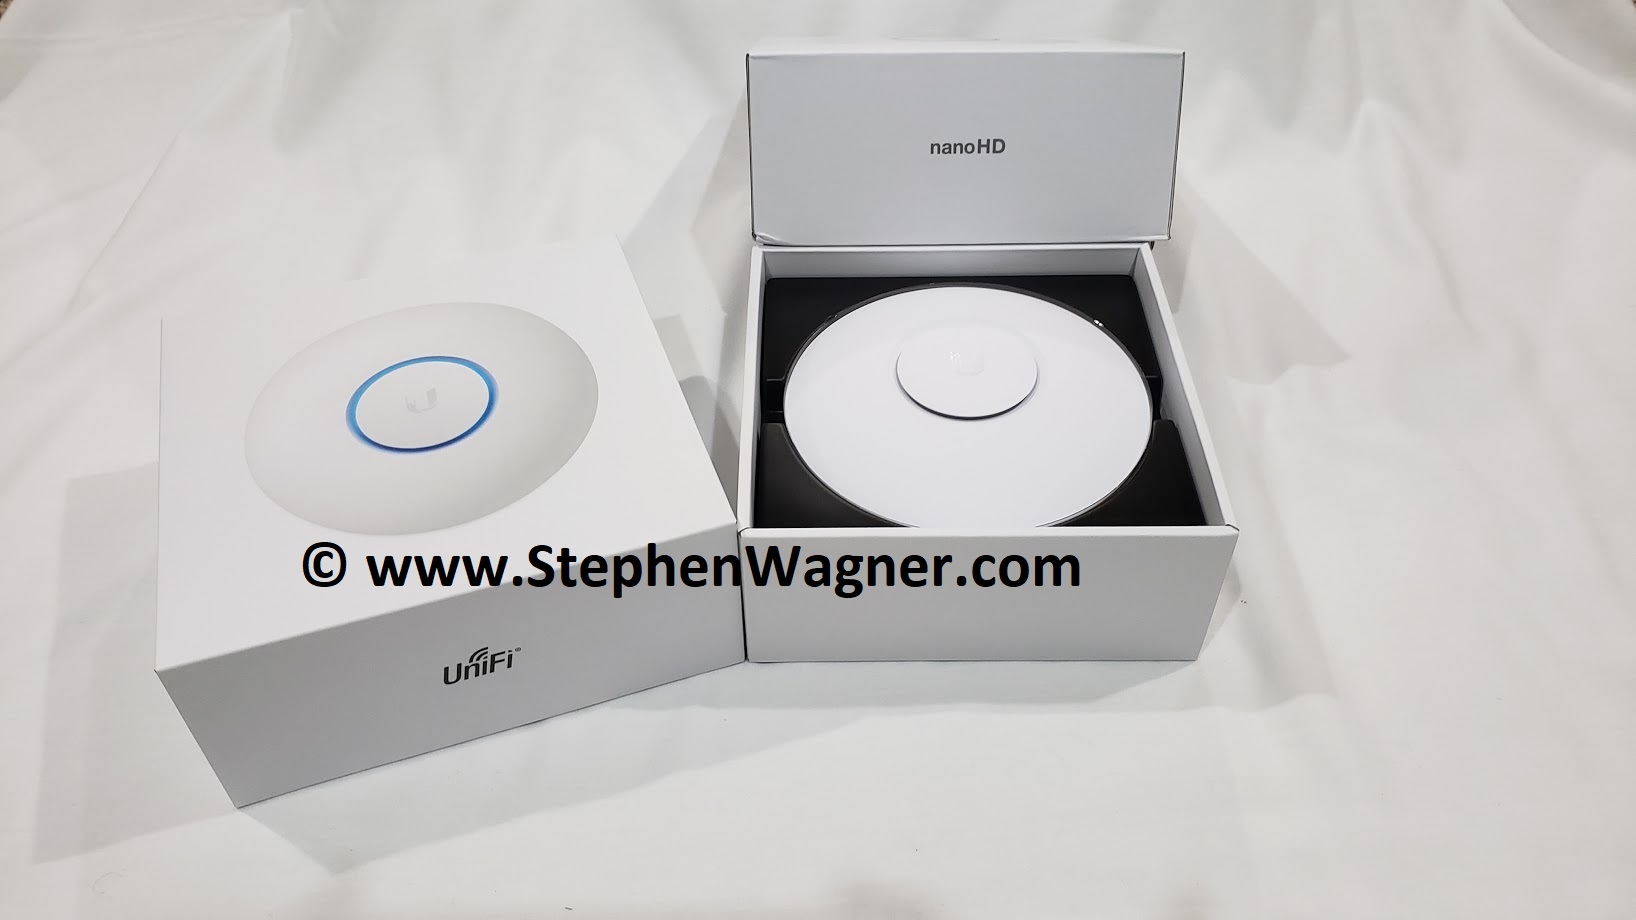
Ubiquiti UniFi nanoHD
Ubiquiti UniFi nanoHD Wireless Access Point
The UniFi nanoHD wireless access point is a compact (smaller than the other UniFi APs) 802.11ac Wave2 device with MU-MIMO technology.
The unit is powered via PoE and is designed for roof mounting, although works great on a wall, or sitting on a desk.
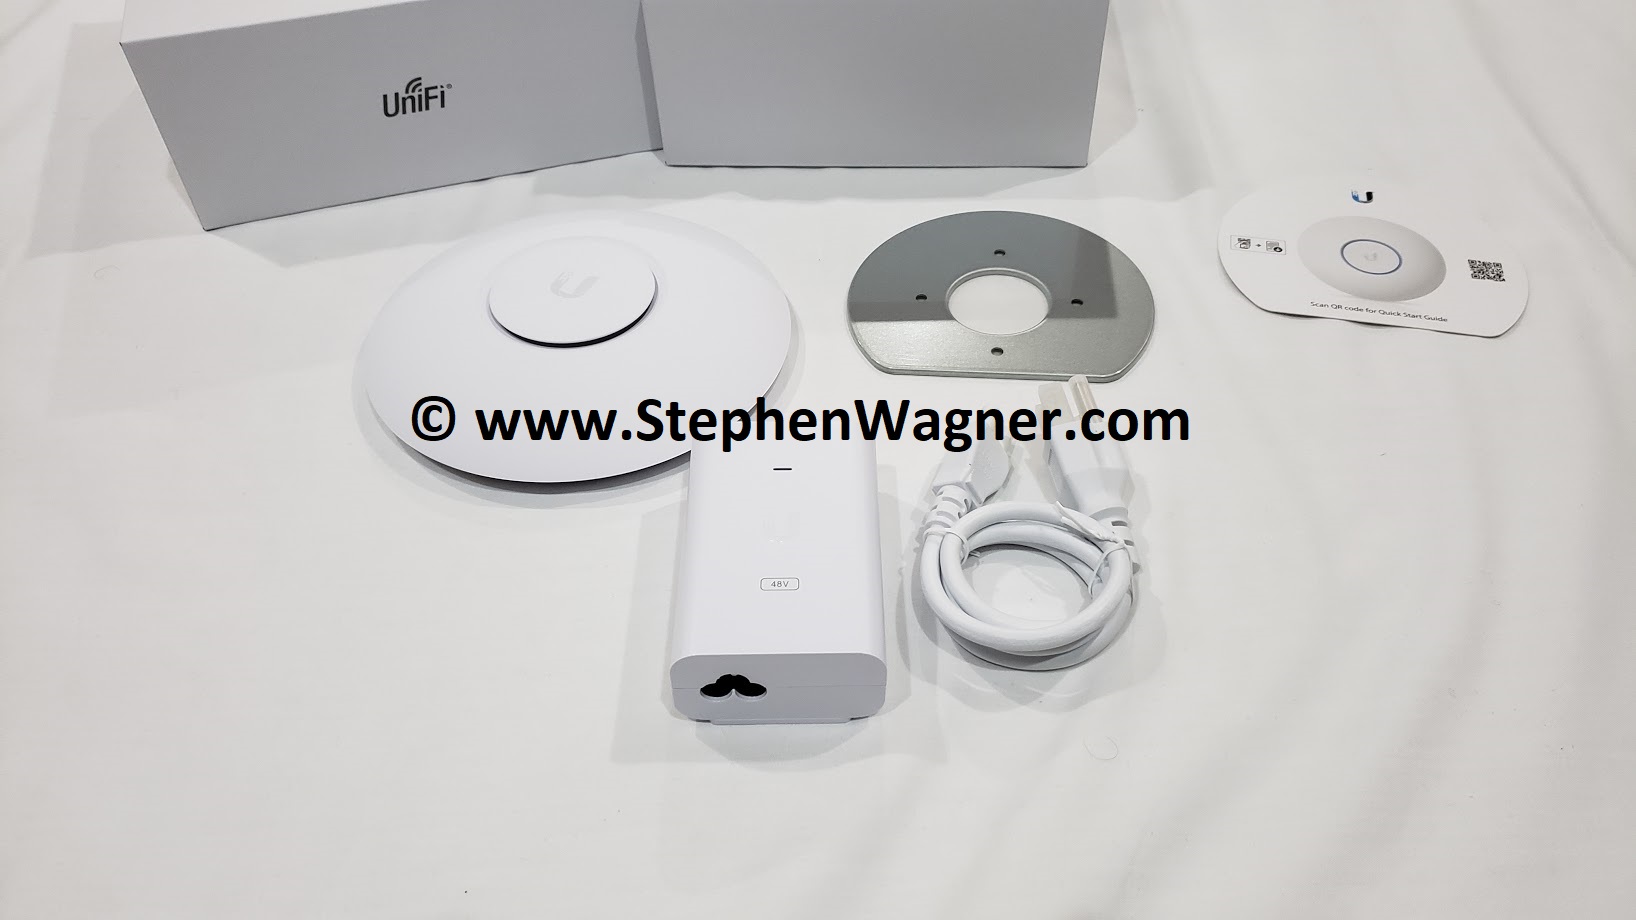
Ubiquiti UniFi nanoHD unboxing
The single quantity SKUs (like the one I ordered) include a PoE injector as seen above, however the multi-quantity SKUs do not. You can either use the PoE injector, or power it via your switch if your switch supports PoE.
The unit also ships with a roof mounting bracket and a getting started flyer.
On the 5Ghz band, the unit has a maximum throughput of 1733Mbps (1.73Gbps), and the 2.4Ghz band has a maximum throughput of 300Mbps.
The nanoHD supports a maximum of 8 seperate SSIDs per radio.
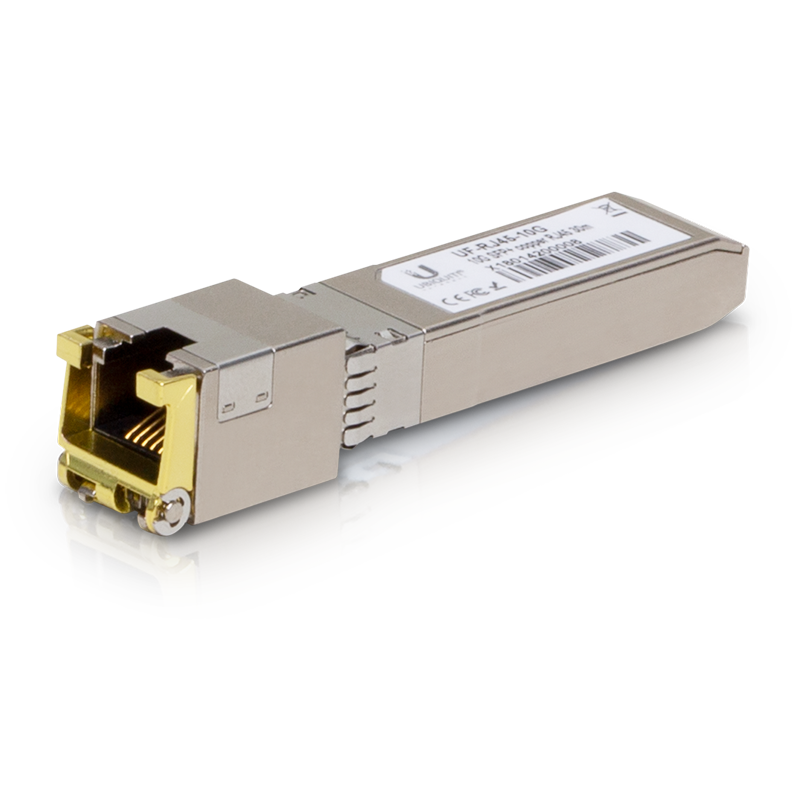
Ubiquiti 10GBASE-T SFP+ CopperModule
10GBASE-T CopperModule UF-RJ45-10G
The 10GBASE-T SFP+ CopperModule allows you to connect RJ45 10Gb copper ethernet to the SFP+ port on a switch. This allows you to connect devices or other switches that support 10Gb links over RJ45 ethernet.
Ubiquiti has a number of other SFP+ and SFP modules that you can use to populate your ports depending on your requirements.
UniFi Controller
The UniFi controller is the software (or hardware) that controls and centrally manages all the UniFi products. In my specific environment, I deployed a virtual machine running Ubuntu Linux, installed the apt repo’s for the UniFi Controller, installed the UniFi controller, and then configured it.
You can also purchase a UniFi Cloud key, which is a hardware device that runs the UniFi controller software. This removes the need to deploy a computer, VM, or additional hardware to install the controller on.
Inside of the UniFi controller, you create your wireless networks, network profiles, network switch port profiles, and other configuration, so that it can be easily provisioned to hardware as you add it and expand your network.
My Configuration, Notes, and Observations
Ubiquiti UniFi Switch 48
For my configuration on the UniFi controller, I configured 9 VLANs, 4 SSID wireless networks, and numerous switch profiles for aggregation (via LACP).
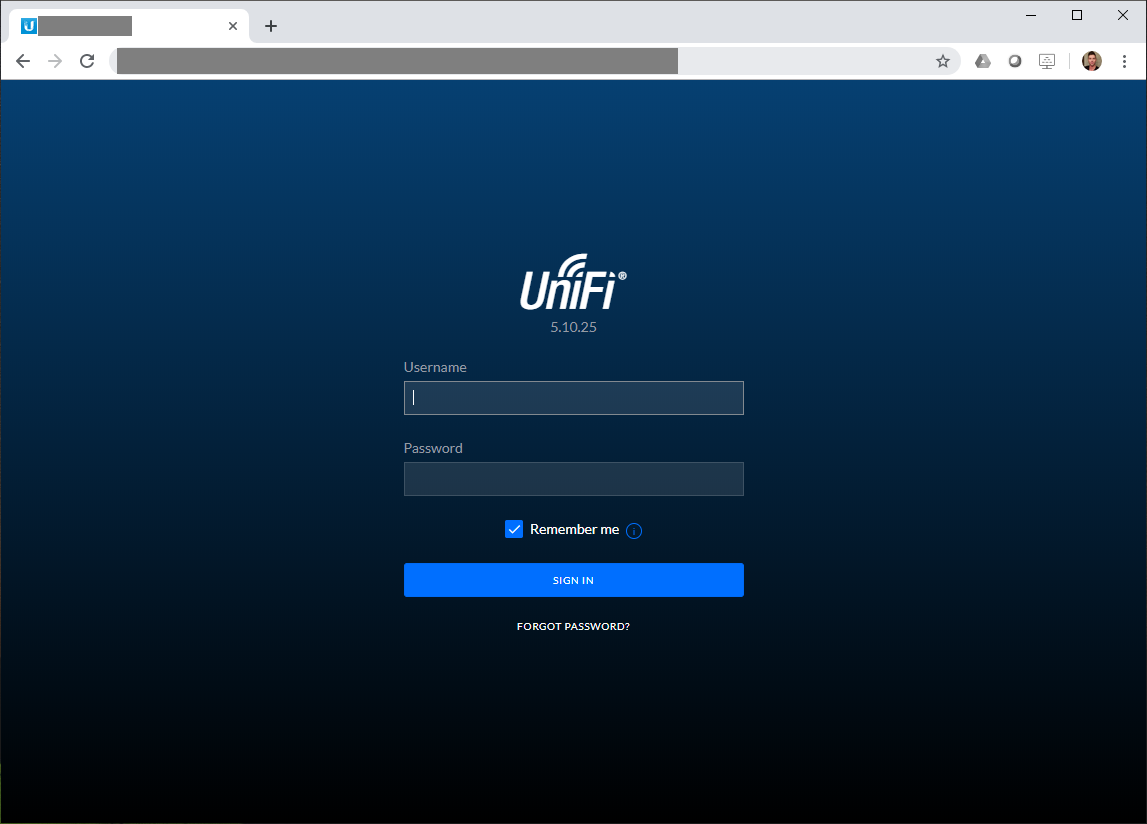
UniFi Controller Login
When bringing the switch online, the profiles were provisioned and I could attach the profiles to individual network ports, or groups of ports. I could also override these profiles and manually set aggregation, VLAN IDs, trunking, etc if need be.
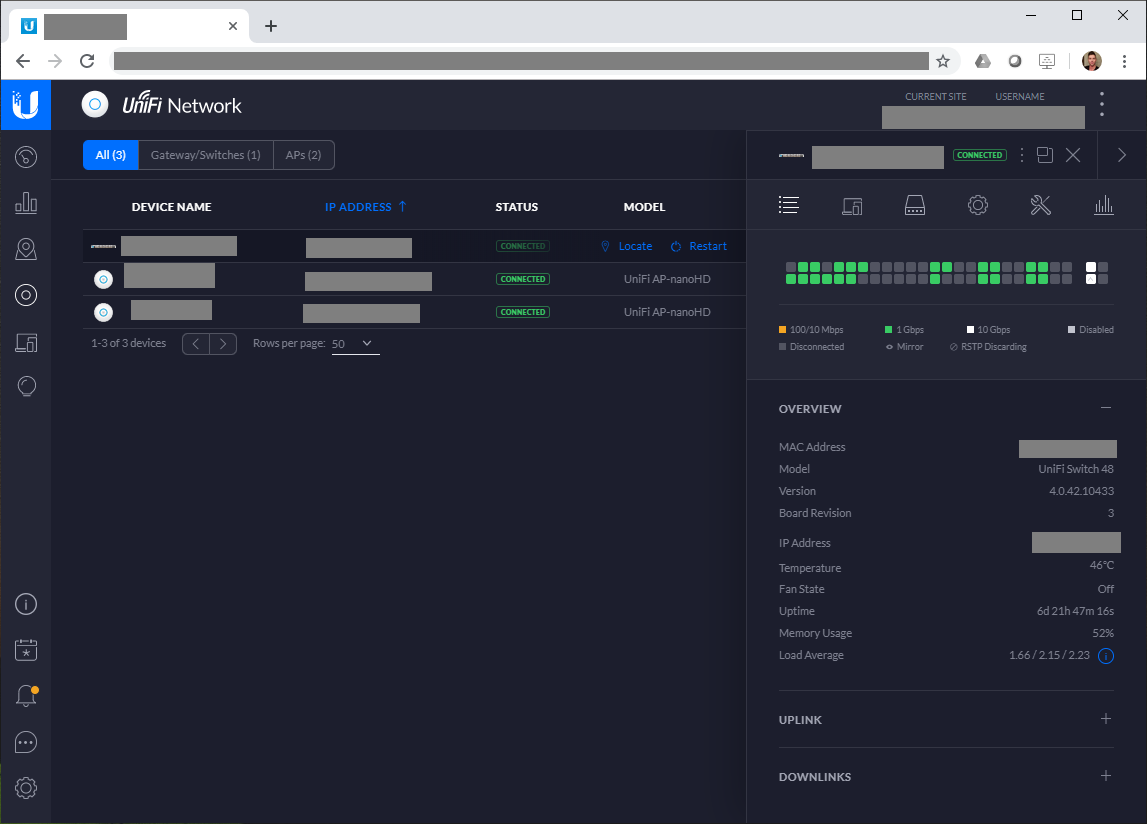
UniFi Controller Switch Information
Since I’m using VLANs and want to configure multiple SSIDs, I need to have the wireless access points connected to a VLAN trunk, so that each network is available to be broadcast by the nanoHD APs. Since I configured the VLAN and network profiles earlier, this was instantly deployed automatically as I powered them on. If you had a simple network and didn’t use VLANs, none of this would be necessary and you’d be up and running in minutes.
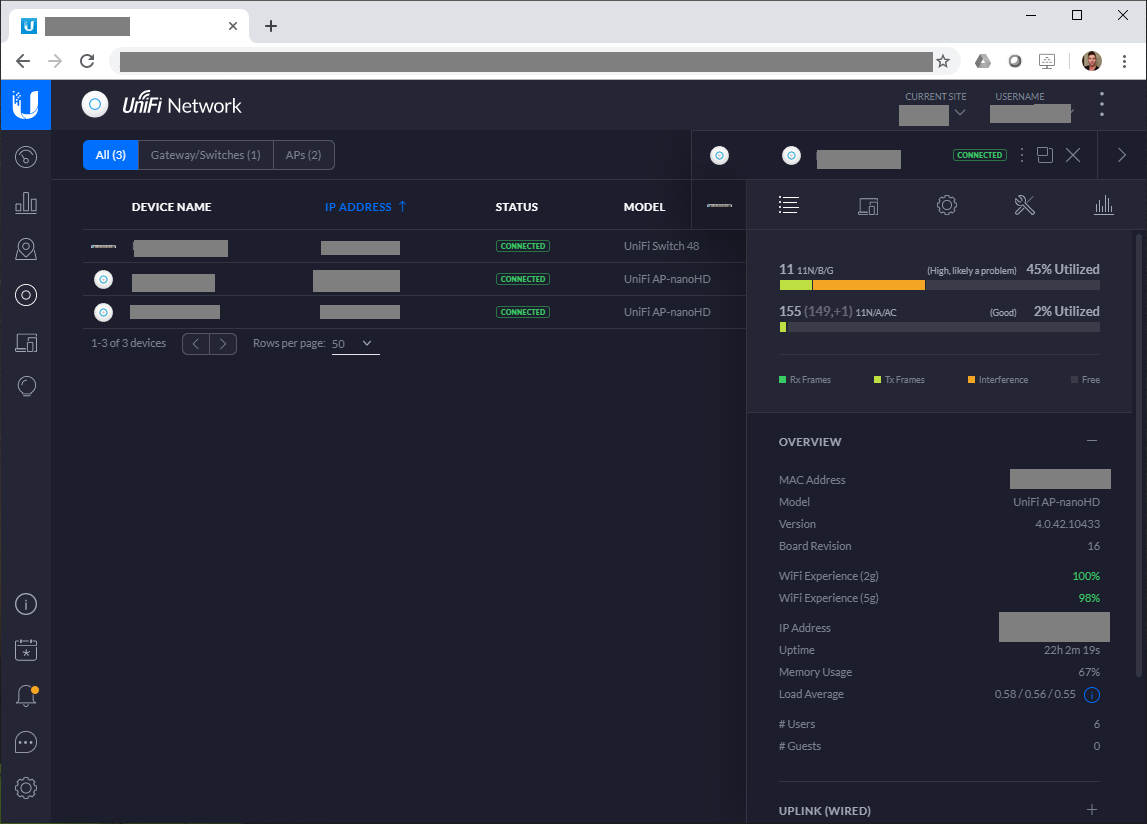
UniFi Controller Wireless Access Point Information
Inserting the 10GBASE-T CopperModule in to the SFP+ ports on the switch, they were instantly detected. Connecting my 2 HPE DL360p Servers using Cat6, I was able to establish a 10Gb link with both servers instantly. The connection has been rock solid since for over 7 days. These connections are used as a VLAN trunks to my VMware vSphere instance. I also have a secondary connection from each server at 1Gb as failover (standby).
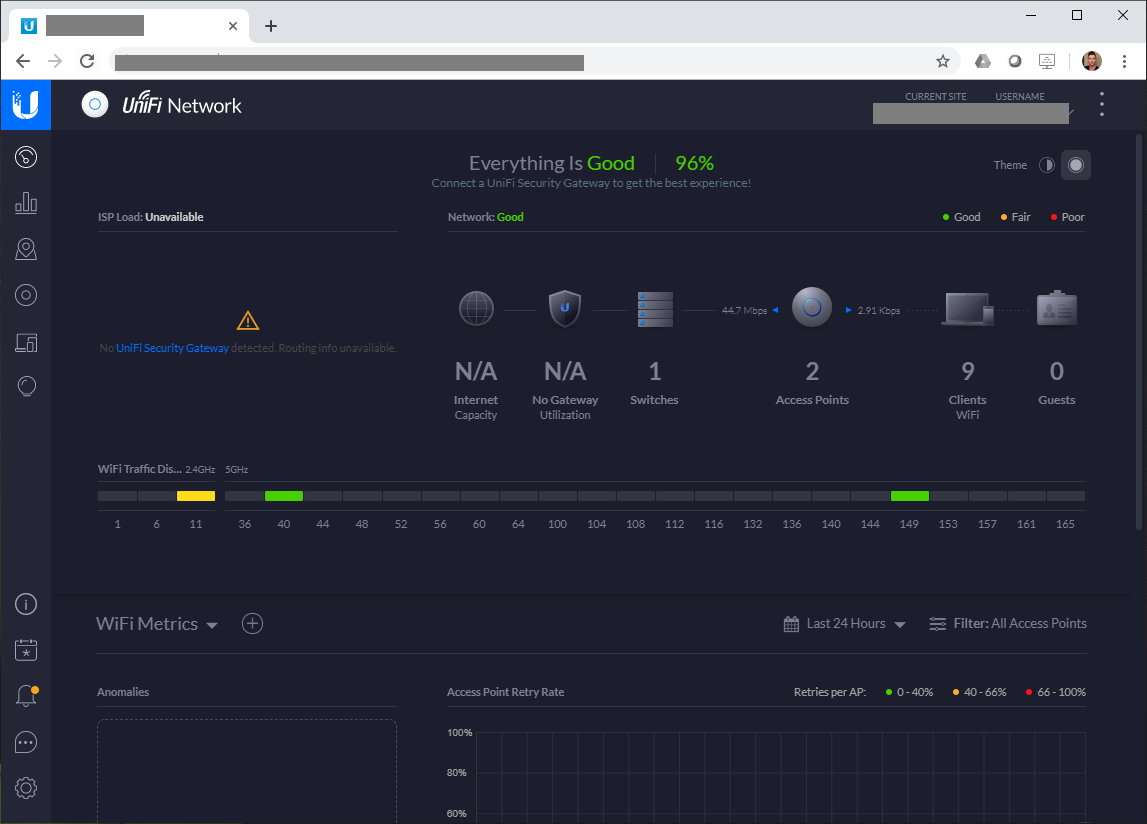
UniFi Controller Dashboard
Enabling Jumbo frames was easy, and Ubiquiti UniFi fully supports it. While I couldn’t find out the exact MTU, I do know it’s around 9000. I’m assuming they allotted slightly more to account for the extra bytes due to VLAN tagging.
Overall Review
Overall, I’m extremely happy and impressed with the product. I’d definitely recommend this to clients, as well as friends and family.
The features and functionality make this product perfect for any business. And with the price point and ease of management, this equipment would be suitable for home and power users as well!
Not only did I get up and running in no time with an extremely complicated configuration, but it’s been rock solid now for over 7 days. If you had a simple configuration, you could have the equipment deployed in minutes.
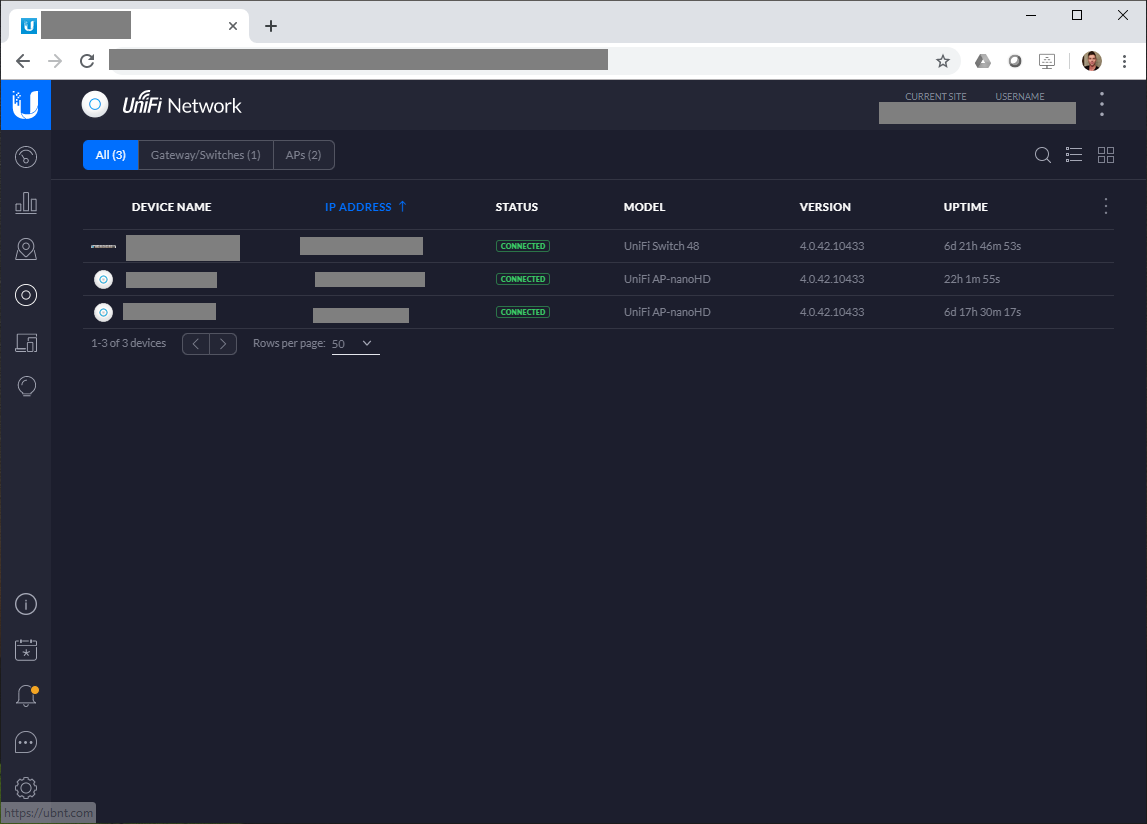
UniFi Controller Device List
What I liked the most:
Wireless Speed
Easy Switch Port Configuration
Easy Wireless/SSID Deployment and Configuration
Ease of Management (really easy yet extremely powerful)
Monitoring and Statistics inside of UniFi Controller
E-Mail notifications of rogue APs and other alerts
Visibly beautiful hardware
PoE injectors are included with single quantity AP SKUs
Product lineup available
Smartphone app for Android/iOS (Configure, Monitor, Deploy)
Reliable 10Gb on the CopperModule SFP+ 10GBASE-T Modules
Getting back to basics, the equipment has filled all the requirements I originally had and than some, I’m extremely happy!
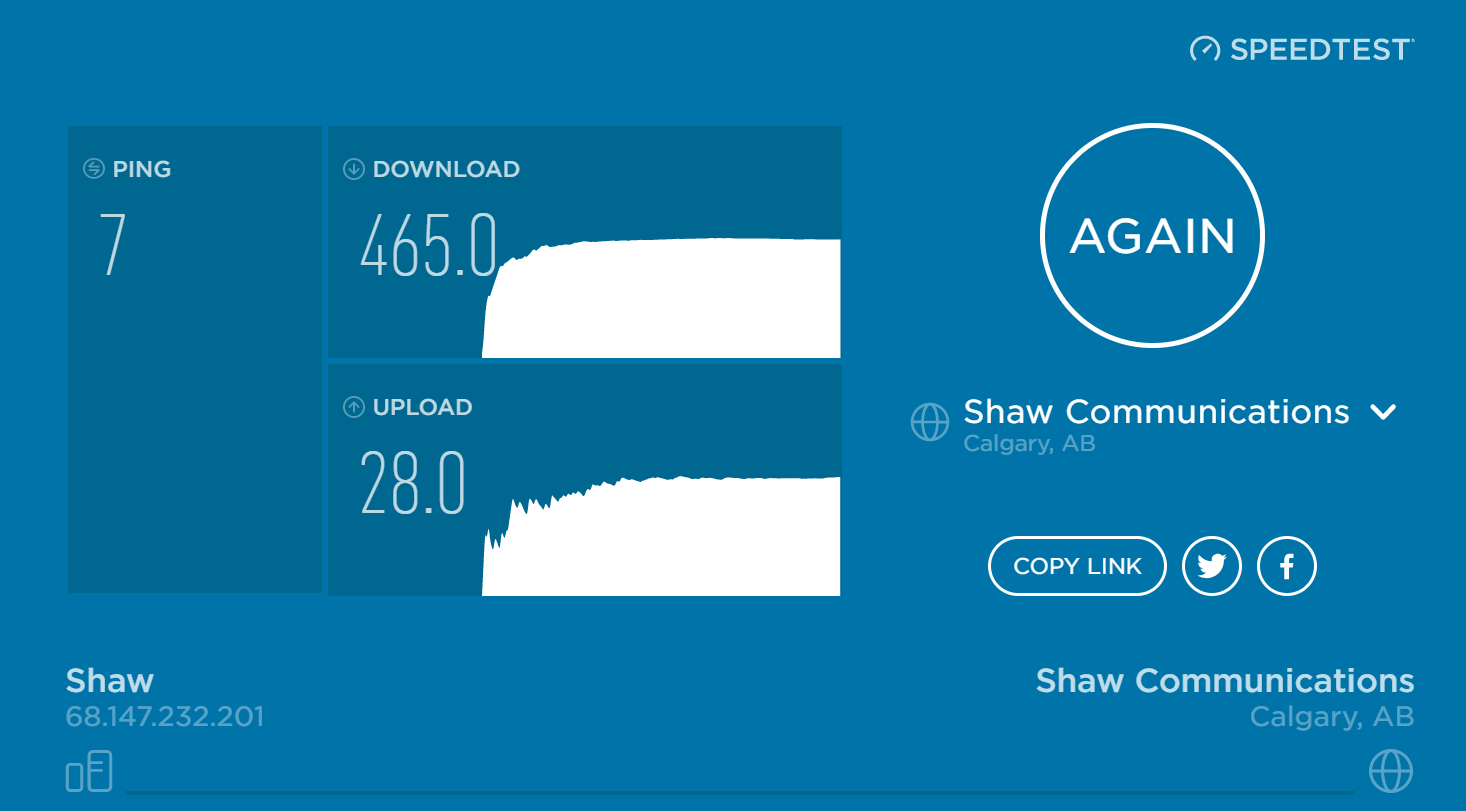
And I almost forgot to mention, the wireless is FAST! Absolutely no complaints. I’ve posted a speed test below, please note I’ve achieved way faster accessing content internally, however this was limited by my internet connection at the time.
SpeedTest
I’m actually looking forward to purchasing some more equipment, my shopping list includes:
More nanoHD APs for coverage
Possibly a couple UniFi HD In-Wall units for testing
2 x UniFi Switch 16 XG for SAN connectivity
4 x UniFi Switch 8 (150W) for remote cable drops and PoE
Hope this review helps if you’re considering Ubiquiti! And remember, I’m a re-seller so I can offer some very attractive pricing on this equipment!
In the many years I’ve been providing IT Services, I’ve noticed that whenever taking over a customer from a competitor, or providing consulting services for a company that has IT staff, that I don’t see DHCP reservations being used all that frequently.
I wanted to write a post and create a video to discuss the comparison, when each should be used and the various case scenarios. I’m hoping my readers may provide their own input in the comments.
See below for the video, or read on for the blog post!
As an example: When a customer was purchasing a VoIP PBX, the PBX vendor get angry when I requested that it be configured for DHCP so that a DHCP reservation could be used, I advised I’d prefer this method so I could change the IP when needed for maintenance or network restructuring. They tried to convince me the IP will change on a DHCP Server and the port forwarding will stop working, because they simply had no idea of what a DHCP reservation was. Ultimately when the day came where I had to change the IP and firewall rules for the PBX, I had to log a support call with the vendor since I couldn’t change the IP myself (which resulted in delays, and costs). If we were using DHCP reservations, I could have simply modified the firewall rules, modified the IP address on the reservation, and restarted the device using the buttons on the front panel (I didn’t have any other access to the device).
Just to state the obvious:
A static IP address is an IP address that’s manually set on a NIC (Network Interface Card).
A DHCP Reservation is a pre-set IP that’s provided by a DHCP Server, and given to a NIC when a NIC calls out to a DHCP server for an IP address.
Static IP Addresses
It’s in my opinion that for server, network, core, and all top level infrastructure, all of these devices and services should be configured with Static IP addresses.
These devices which are almost always running, and have other services that rely on them, require a set static IP that should and will not change. Typically, these IP addresses will never change, even when major changes are being made to the core infrastructure.
These addresses should always be logged, documented, and added to network topology maps.
An example of devices commonly seen with Static IPS:
Computers/Workstations using special services (or requiring firewall exceptions)
DHCP Reservations
DHCP stands for Dynamic Host Configuration Protocol, and was created to dynamically configure hosts networking configuration on the fly for easy deployment.
In it’s most simplest explanation, when a computer (or device) that is configured to use DHCP reaches out to the network, the DHCP server will assign and provide an IP address for the computer to use.
In home networks, pretty much every computer and device will get it’s IP address from the DHCP server running on the router.
In business networks, pretty much every computer and device that isn’t hosting services will get it’s IP address from the DHCP server running on one of their servers or routers.
DHCP Servers support something called a “DHCP Reservation”, which essentially allows you to provide a pre-set IP address to a specific client based on it’s physical MAC address. This means that the device will always get the same IP address and it will never change (whereas they typically do on occasion).
I’m surprised I don’t see these used more often, as they can become quite the powerful tool on the IT tool belt when used properly. I’ve listed some pros and cons below.
The Pros:
Manage IP addresses (IP reservations) from a single console
Ability to change IP addresses on the fly easily from a single console without having to log in to the device.
Manage network topology for ROBO (Remote Office, Branch Office) remotely, easily, and efficiently.
Manage IP addresses for 3rd party devices that you don’t normally have access to modify (tell the vendor to set to DHCP), reducing support calls for external services.
Ability to create different PXE boot environments as each reservation can have it’s own PXE boot options assigned.
The Cons:
Device must support DHCP Configuration.
The device MUST RELY on a DHCP Server once set to use DHCP. If the DHCP Server is down, so is the device.
If rogue DHCP servers appear on your network, it may disrupt communication (this can also happen with static IPs and conflicts).
So with the list above, DHCP reservations look pretty powerful. The next question, is where do we use DHCP reservations. Let’s finish off with the devices we’d use them on, and what use case scenarios apply.
Devices:
Wireless Access Points
Printers
2nd Level (non core) Routers and Gateways
IoT Devices
IP Phones
IP PBX Systems (VoIP, Traditional with IP Management, etc).
Thin Clients and Zero Clients
Use Cases:
Remote Offices (remote sites with limited access)
Remote Support environments
Branch Offices
IP Phone Networks
Wireless LAN Access Point VLANs
DHCP Reservation Use Cases
I use DHCP reservations frequently with customers that have remote or branch offices in remote geographical areas. When supporting these users and troubleshooting issues, it’s awesome to be able to just log in to the DHCP server to change IP addresses of printers, phones, and wireless access points.
Also, when configuring, shipping, and deploying new devices to these offices, I can simply log and write down the MAC address, configure the DHCP reservation, and the device will get the IP address I’ve chosen once it’s connected to the network and powered on.
Using DHCP reservations, you can easily make big changes to these remote networks without having to be present. If you were to use Static IPs and something was misconfigured, this might cause a physical visit to the site to resolve.
If by change a vendor directly dropships equipment to the remote site, I can simply call someone at that office to get the MAC address. Most devices with a NIC (printers, MFPs, wireless access points), all usually have their MAC addresses printed on the outside of the box. With this information provided, I can login to the remote server, create a DHCP reservation, configure drivers, and push the device config out to the network.
DHCP reservations add to the whole concept of a centrally managed environment, which further helps ease of maintaining, and supporting it.
Let’s say that you’re hosting someone’s equipment and they start to abuse their connection speed. Let’s say that you’re limited in your bandwidth, and you want to control your own bandwidth to make sure you don’t max out your own internet connection. You can take care of both of these problems by building your own traffic shaping network control device using CentOS and using the “tc” linux command.
In this post I’m going to explain what traffic shaping is, why you’d want to use traffic shaping, and how to build a very basic traffic shaping device to control bandwidth on your network.
What is traffic shaping
Traffic shaping is when one attempts to control a connection in their network to prioritize, control, or shape traffic. This can be used to control either bandwidth or packets. In this example we are using it to control bandwidth such as upload and download speeds.
Why traffic shaping
For service providers, when hosting customer’s equipment, the customer may abuse their connection or even max it out legitimately. This can put a halt on the internet connection if you share it with them, or cause bigger issues if it’s shared with other customers. In this example, you would want to implement traffic shaping to allot only a certain amount of bandwidth so they wouldn’t bring the internet connection or network to a halt.
For normal people (or a single business), as fast as the internet is today, it’s still very easy to max your connection out. When this happens you can experience packet loss, slow speeds, and interruption of services. If you host your own servers this can cause even a bigger issue with interruption of those services as well. You may want to limit your own bandwidth to make sure that you don’t bring your internet to a halt, and save some for other devices and/or users.
Another reason is just to implement basic QoS (Quality of Service) across your network, to keep usage and services in harmony and eliminate any from hogging the network connections up.
How to build your own basic traffic shaping device with CentOS and tc
In this post we will build a very simple traffic shaping device that limits and throttles an internet connection to a defined upload and download speed that we set.
You can do this with a computer with multiple NICs (preferably one NIC for management, one NIC for internet, and one NIC for network and/or the hosts to be throttled). If you want to get creative, there are also a number of physical network/firewall appliances that are x86 based, that you can install Linux on. These are very handy as they come with many NICs.
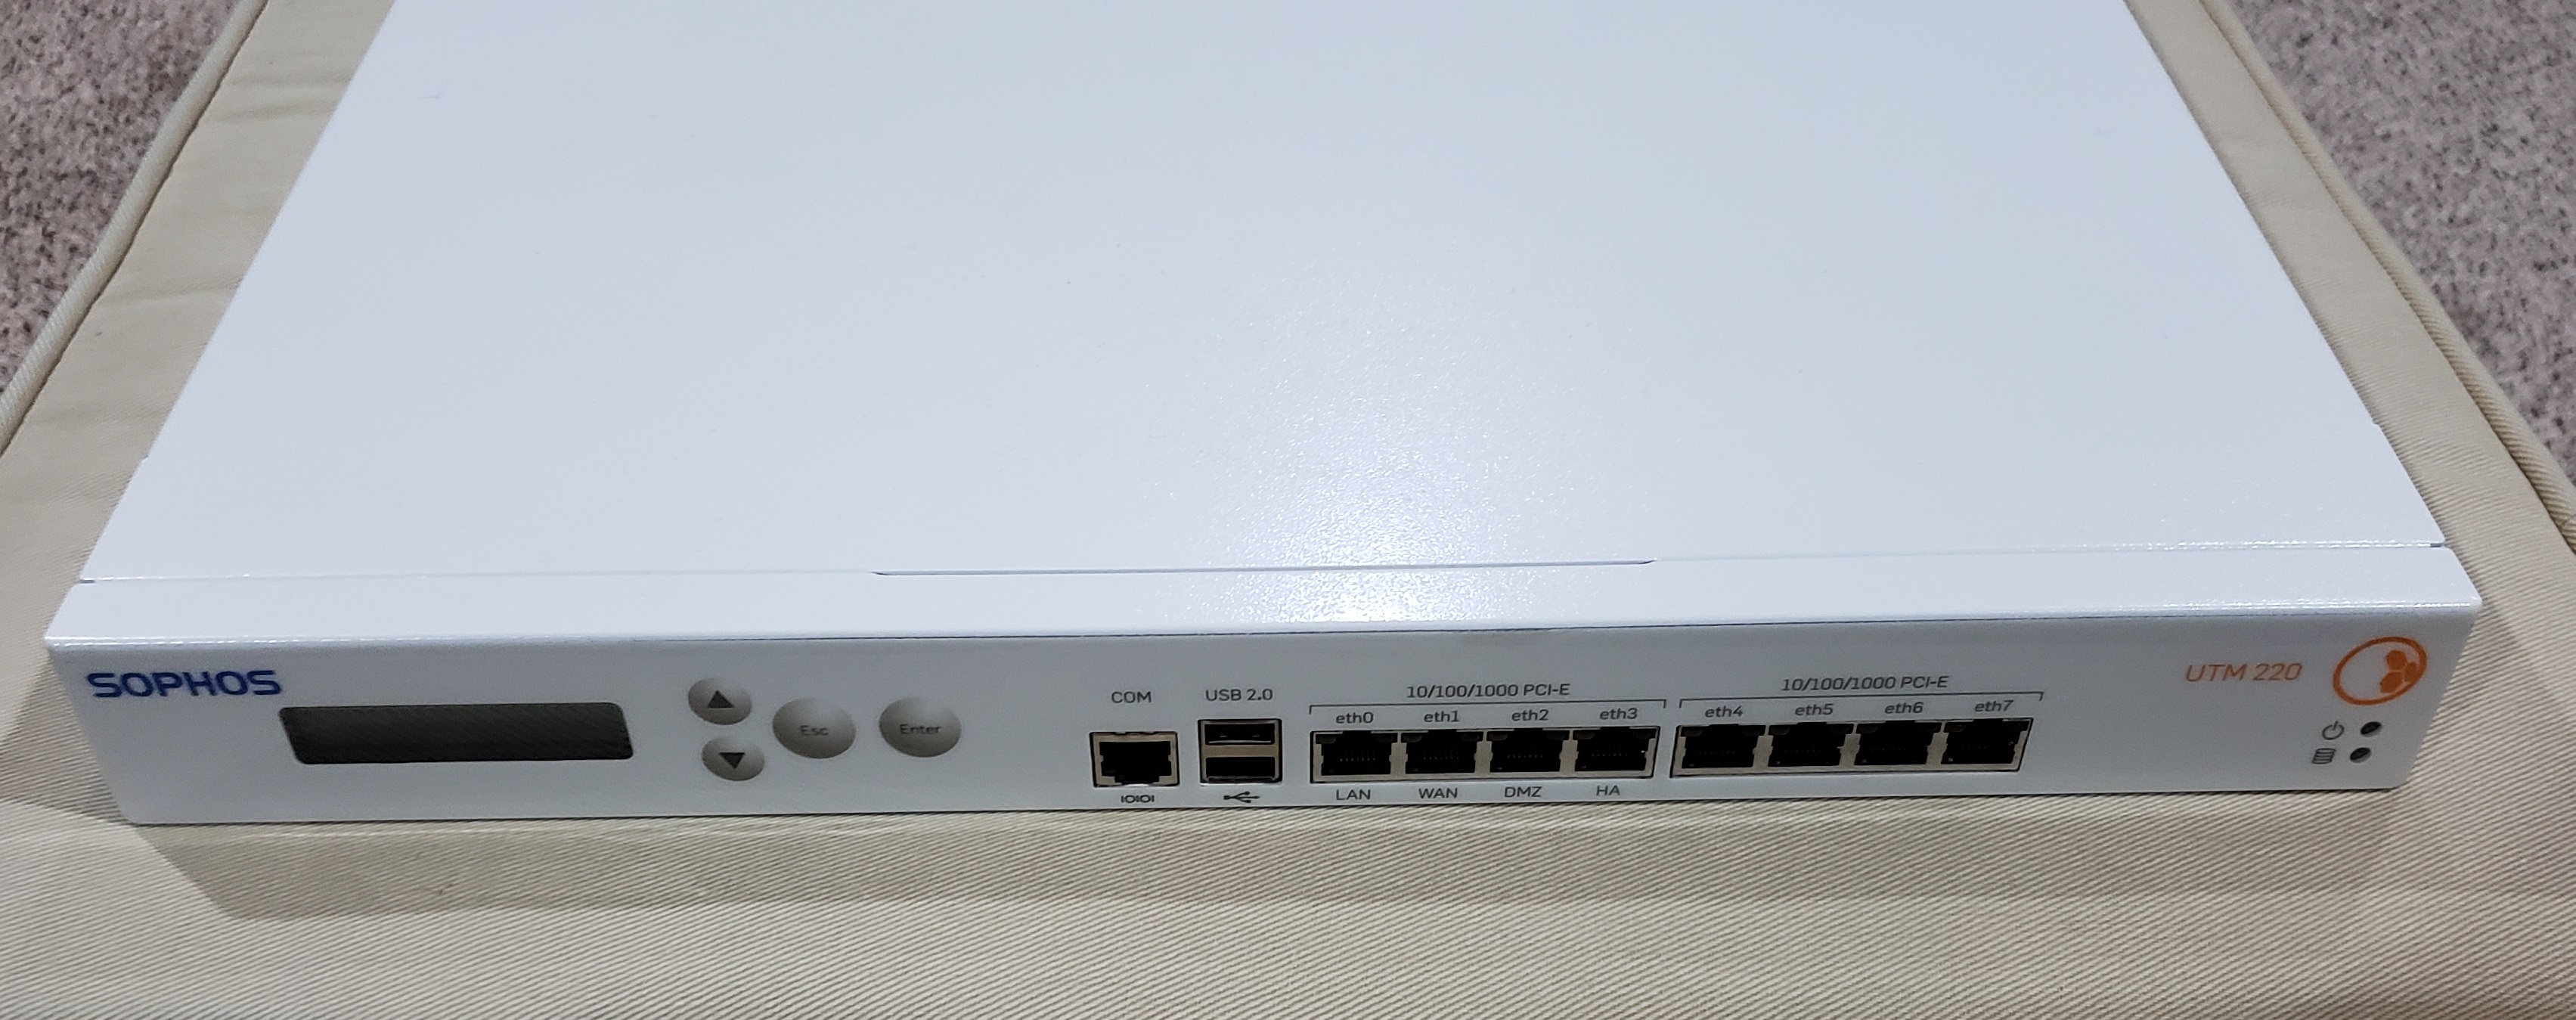
When I set this up, I used an old decommissioned Sophos UTM 220 that I’ve had sitting around doing nothing for a couple years (pic below). The UTM 220 provides 8 NICs, and is very easy to install Linux on to.
Sophos UTM 220 Running CentOS Linux
Please Note: The Sophos UTM 220 is just a fancy computer in a 1U rack mounted case with 8 NICs. All I did was install CentOS on it like a normal computer.
Essentially, all we’ll be doing is installing CentOS Linux, installing “tc”, configuring the network adapters, and then configuring a startup script. In my example my ISP provides me 174Mbps download, and 15Mbps upload. My target is to throttle the connection to 70Mbps download, and 8Mbps upload. I will allow the connection to burst to 80Mbps down, and 10Mbps up.
To get started:
Install CentOS on the computer or device. The specifics of this are beyond the scope of this document, however you’ll want to perform a minimal install. This device is strictly acting as a network device, so no packages are required other than the minimal install option.
During the CentOS install, only configure your main management NIC. This is the NIC you will use to SSH to, control the device, and update the device. No other traffic will pass through this NIC.
After the install is complete, run the following command to enable ssh on boot:
chkconfig sshd on
Install “tc” by running the command:
yum install tc
Next, we’ll need to locate the NIC startup scripts for the 2 adapters that will perform the traffic shaping. These adapters are the internet NIC, and the NIC for the throttled network/hosts. Below is an example of one of the network startup scripts. You’re NIC device names will probably be different.
/etc/sysconfig/network-scripts/ifcfg-enp2s0
Now you’ll need to open the file using your favorite text editor and locate and set ONBOOT to no as shown below. You can ignore all the other variables. You’ll need to repeat this for the 2nd NIC as well.
Now we can configure the linux startup script to configure a network bridge between the two NICs above, and then configure the traffic shaping rules with tc. Locate and open the following file for editing:
/etc/rc.d/rc.local
Append the following text to the rc.local file:
# Lets make that bridge
brctl addbr bridge0

# Lets add those NICs to the bridge
brctl addif bridge0 enp5s0
brctl addif bridge0 enp2s0

# Confirm no IP set to NICs that are shaping
ifconfig enp5s0 0.0.0.0
ifconfig enp2s0 0.0.0.0

# Bring the bridge online
ifconfig bridge0 up

# Clear out any existing tc policies
tc qdisc del dev enp2s0 root
tc qdisc del dev enp5s0 root

# Configure new traffic shaping policies on the NICs
# Set the upload to 8Mbps and burstable to 10mbps
tc qdisc add dev enp2s0 root tbf rate 8mbit burst 10mbit latency 50ms
# Set the download to 70Mbps and burstable to 80Mbps
tc qdisc add dev enp5s0 root tbf rate 70mbit burst 80mbit latency 50ms
Restart the linux box:
shutdown -r now
You now have a traffic shaping network device!
Final Thoughts
Please note that normally you would not place the script in the rc.local file, however we wanted something quick and simple. The script may not survive in the rc.local file when updates/upgrades are applied against on the Linux install, so keep this in mind. You’ll also need to test to make sure that you are throttling in the correct direction with the 2 NICs. Make sure you test this setup and allow time to confirm it’s working before putting it in a production network.
This website uses cookies to improve your experience. We'll assume you're ok with this, but you can opt-out if you wish.
Do you accept the use of cookies and accept our privacy policy? AcceptRejectCookie and Privacy Policy
Privacy & Cookies Policy
Privacy Overview
This website uses cookies to improve your experience while you navigate through the website. Out of these cookies, the cookies that are categorized as necessary are stored on your browser as they are essential for the working of basic functionalities of the website. We also use third-party cookies that help us analyze and understand how you use this website. These cookies will be stored in your browser only with your consent. You also have the option to opt-out of these cookies. But opting out of some of these cookies may have an effect on your browsing experience.