Jan 112024
 
ESXi-Host-Decommission

While most of us frequently deploy new ESXi hosts, a question and task not oftenly discussed is how to properly decommission a VMware ESXi host.

Some might be surprised to learn that you cannot simply just power down and remove the host from the vCenter server, as there are a number of steps that must be taken beforehand to ensure a proper successful decommission. Properly decommissioning the ESXi host avoids orphaned objects in the vCenter database, which can sometimes cause problems in the future.

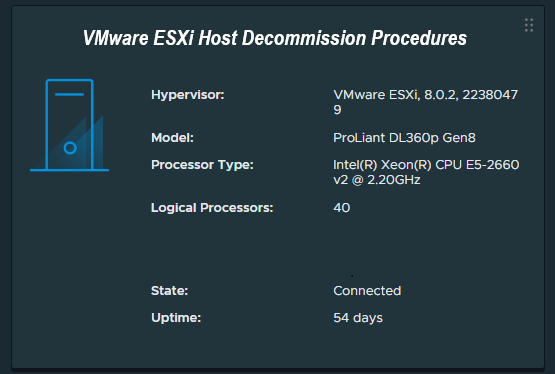
Today we’ll go over how to properly decommission a VMware ESXi host in an environment with VMware vCenter Server.

The Process – How to decommission ESXi

We will detail the process and considerations to decommission an ESXi host. We will assume that you have since migrated all your VMs, templates, and files from the host, and it contains no data that requires backup or migration.

VMware ESXi Host Decommission Procedures

Process in Short:

  1. Enter Maintenance Mode
  2. Remove Host from vDS Switches
  3. Unmount and Detach iSCSI LUNs
  4. Move host from cluster to datacenter as standalone host
  5. Remove Host from Inventory

Please read further for extended procedures and more information.

Enter Maintenance Mode

We enter maintenance mode to confirm that no VMs are running on the host. You can simply right click the host, and enter maintenance mode.

Remove Host from vDS Switches

You must gracefully remove the host from any vDS switches (VMware Distributed Switches) before removing the host from vCenter Server.

You can create a standard vSwitch and migrate vmk (VMware Kernel) adapters from the vDS switch to standard vSwitch, to maintain communication with the vCenter server and other networks.

Please Note: If you are using vDS switches for iSCSI connectivity, you must gracefully develop a plan to deal with this beforehand, either by unmounting/detaching the iSCSI LUNs on the vDS before removing the switch, or gracefully migrating the vmk adapters to a standard vSwitch, using MPIO to avoid losing connectivity during the process.

Unmount and Detach iSCSI LUNs

You can now proceed to unmount and detach iSCSI LUNs from the selected system:

  1. Unmount the iSCSI LUN(s) from the host
  2. Detach the iSCSI LUN(s) from the host

You will unmount only on the selected host to be decommissioned, and then detach the LUNs (again only on the host you are decommissioning).

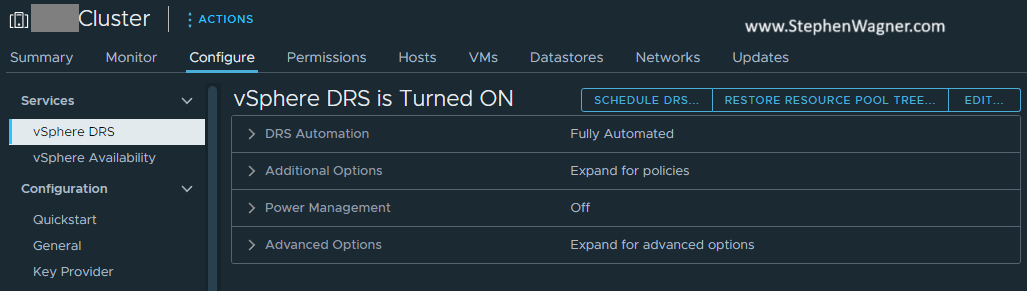
Move Host from Cluster to Datacenter as standalone host

While this may not be required, I usually do this to let vSphere Cluster Services (HA/DRS) adjust for the host removal, and also deal with reconfiguration of the HA agent on the ESXi Host. You can simply move the host from the cluster to the parent datacenter level.

Remove Host from Inventory

Once the host has been moved and a moment or two have elapsed, you can now proceed to remove the host from inventory.

While the host is powered on and still connected to vCenter, right click on the host and choose “Remove from Inventory”. This will gracefully remove objects from vCenter, and also uninstall the HA agent from the ESXi host.

Host Repurposing

At this point, you can now log directly on to the ESXi host using the local root password, and shutdown the host.

Jan 072024
 
VMware Horizon View Logo

This guide will outline the instructions to Disable the VMware Horizon Session Bar. These instructions can be used to disable the Horizon Session Bar (also known as the Horizon Client Menu Bar or Shade Bar) for full screen Horizon VDI sessions.

Horizon Client Menu Bar (Shade)

The Horizon Client Menu Bar, or “Shade”, is the Session bar at the top of full screen VMware Horizon VDI Sessions.

This Menu Bar provides information on the connection, ability to send key sequences, connect USB devices, restart a VDI guest VM and more.

In same cases, users or administrators may want to disable the Shade.

Disable the Horizon Client Menu Bar (Shade)

There are multiple ways that you can disable the shade including using GPOs as well as the registry on client systems. Please note that if you are setting up clients in Kiosk mode, the shade will be automatically disabled and these instructions aren’t required.

Disable Horizon Shade using GPO

To disable the Shade with GPOs, create a Group Policy Object (or edit the local group policy on the client system), and navigate to the following location:

User Configuration -> Policies -> Administrative Templates -> VMware Horizon Client Configuration

Here, we will set Enable the shade to “Disabled”, as show below:

Disable VMware Horizon Shade using GPO to set “Enable the Shade” to Disabled

Disable Horizon Shade using Registry

To disable the Shade using registry on the client system, navigate to the following registry key:

HKEY_LOCAL_MACHINE\Software\VMware, Inc.\VMware VDM\Client\

Here, we can create a String (REG_SZ) value called EnableShade and set it to False which will disable the Shade.

Additional Information

Jan 062024
 
vMotion with vGPU

Normally, any VMs that are NVIDIA vGPU enabled have to be manually migrated with manual vMotion if a host is placed in to maintenance mode, to evacuate the host. While we may have grown accustomed to this, there is a better way, with vGPU Enabled VM DRS Evacuation during Maintenance mode!

A new feature that was introduced with vSphere 7.0 U3f, was the ability to configure and allow automatic vMotion of VMs with vGPUs, meaning that DRS can now migrate your VDI and AI/ML vGPU enabled workloads when hosts are placed in to maintenance mode. This also allows you to streamline remediation with vLCM when updating vGPU enabled hosts running vGPU enabled VMs.

Additionally, as of vSphere 8.0 U2, DRS can now estimate the STUN times required for vMotion of vGPU enabled VMs, and control whether automatic DRS vMotion’s are allowed. This STUN time limit can be set buy an administrator.

Enable automatic vMotion evacuation of vGPU enabled VMs

To enable the automatic vMotion of vGPU enabled VMs on your vSphere Cluster:

  1. Navigate to your vSphere Cluster.vSphere Cluster Selected
  2. Click on the “Configure” Tab, and then select “vSphere DRS”, and click “Edit”.vSphere DRS Cluster - DRS Advanced Settings
  3. Navigate to the “Advanced Options” tab.
  4. Add “VgpuMMAutomationTimeoutSecs” and set to “-1”.vSphere DRS set VgpuMMAutomationTimeoutSecs

After performing the above, when you place a host with vGPU enabled Virtual Machines in to Maintenance Mode, vSphere DRS will evacuate and migrate the VMs to other hosts in the cluster that have the required hardware.

If you attempt to place a host in to Maintenance Mode without enabling automatic vMotion of vGPU enabled VMs, it will fail with the error: “DRS failed to generate a vMotion recommendation for a virtual machine on a host entering Maintenance Mode“.

Enable and Configure vGPU STUN Time Estimate and Limits

If you are running vSphere 8U2 or higher, you can enable vGPU STUN time estimation and limits for DRS on the vGPU enabled cluster. Similar to the instructions above, we can add and configure two variables to the vSphere DRS cluster “Advanced Options”.

To enable STUN time estimation, add PassthroughDrsAutomation and set to “1”.

To override the default vMotion STUN time limit of 100 seconds, add VmDevicesStunTimeTolerated and set it to your preferred maximum number of seconds. Alternatively, you can set this limit Per VM by navigating to the VM in vSphere and adding this variable under the “VM Options” “Advanced Settings” section.

Additional Documentation

Jan 052024
 
NVIDIA vGPU Installed in VMware ESXi Host

You may experience GPU issues with the VMware Horizon Indirect Display Driver in your environment when using 3rd party applications which incorrectly utilize the incorrect display adapter. This results with the inability to use and/or run GPU accelerated workloads including VDI, AI, and ML.

This issue effects NVIDIA vGPU (both vGPU and vDGA passthrough), AMD MxGPU, and Intel Data Center GPU Flex GPUs using SR-IOV, in any deployment where the VMware Indirect Display Driver is installed.

When this issue occurs, the application will incorrectly query the capabilities of the VMware Indirect Display Adapter instead of the GPU that is presented to the VM, resulting in a scenario where the application isn’t aware of the capabilities of the GPU you are utilizing, failing to utilize the GPU, and hardware acceleration, such as hardware encoding (NVENC) and hardware decoding.

What is the VMware Horizon Indirect Display Driver

The VMware Horizon Indirect Display Driver, also known as the VMware Indirect Display Driver, is a “virtual” display driver that isn’t bound to a specific hypervisor, and works with many deployments because of the lack of that limitation.

GPU Issues with the VMware Horizon Indirect Display Driver Enabled

This driver is installed with the VMware Horizon agent, and can work in conjunction with hardware acceleration, including GPUs (such as NVIDIA vGPU, AMD MxGPU, and Intel Data Center GPUs using SR-IOV).

Under normal circumstances, the VMware Horizon Indirect Display Driver is prioritized as a fallback driver for remoting protocols, except in environments where no hypervisor or GPU display drivers are available (like Horizon Cloud on Azure) in which case it would become the priority.

The Problem

Applications designed to use a GPU, may not be able to correctly identify which display adapter to use on the VM. While you may have a GPU, vGPU, or 3D acceleration in your environment, the application may be unaware of the device and/or its capabilities.

This is caused by the application either not correctly using the preferred primary display adapter (GPU and/or vGPU), or not being designed to handle multiple display adapters (and drivers).

Example Scenario:

When using CyberLink PowerDirector 360 in a VMware Horizon environment with an NVIDIA vGPU, the application will query the VM’s Windows instance for hardware acceleration capabilities, specifically hardware encoding, hardware decoding, and use of APIs like NVIDIA’s NVENC encoder. In this scenario, while the VM does have an NVIDIA vGPU workstation profile attached with a valid NVIDIA RTX Virtual Workstation (vWS) license, the application is only aware of the VMware Indirect Display Driver and it’s capabilities. This results in all hardware accelerated encoding and decoding capabilities to be disabled.

Example Symptoms

  • 3D Acceleration not detected by application
  • CUDA Cores not available for application
  • OpenCL not available
  • DirectX and Direct3D usage unavailable

In all scenarios, the VM will appear to have 3D acceleration, however one or multiple applications won’t have access.

The Solution

Thanks to the design of the VMware Indirect Display Driver, it should be prioritized in a fashion that it’s used only when other display drivers aren’t available (including NVIDIA vGPU), or system resources aren’t available; however, some 3rd party application may not be able to reference the prioritization, or support multi-GPU (multi display driver), resulting in the incorrect display adapter being used.

As a workaround, you can remove the VMware Indirect Display Driver from the Windows instance running in the VM.

NVIDIA vGPU with VMware Horizon Indirect Display Driver Removed

Please note that simply disabling the “VMware Horizon Indirect Display Driver” will not suffice. A full removal (Right Click, “Uninstall Device”) is required to workaround this issue. Additionally, upgrading or re-installing the VMware Horizon Agent will re-install the VMware Indirect Display Driver.