I’m writing today to share about an experience I had hours ago, where the Microsoft Azure AD Connect software (specifically the Azure AD Connect Agent Updater) actually updated itself, and restarted the server it’s installed on, all during production hours.
Pretty serious stuff hey?
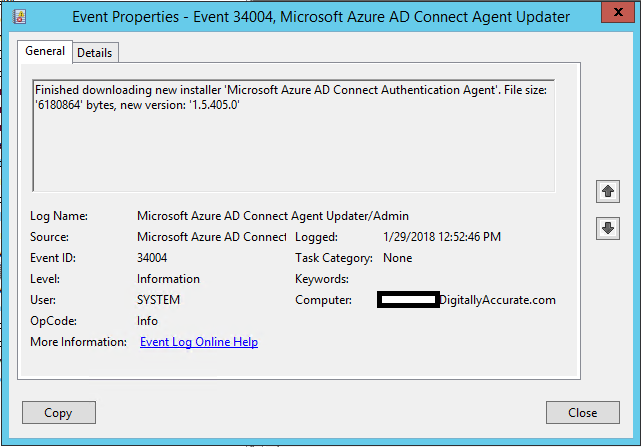
It all happened around 12:50PM (Mountain Time)… I received a notification that a service had been marked as failed on the particular server (notification from my monitoring/management system), and I went to investigate. I noticed that the server was actually gracefully restarted. After logging in, I came across these event logs.
Both Event ID 34004 and Event ID 1074 were logged, reporting both that it had downloaded an update, installed, and the installer initiated a restart.
I thought: no way should auto-updating be enabled, and I still can’t actually confirm it either. I found this article which explains of an automatic update feature:
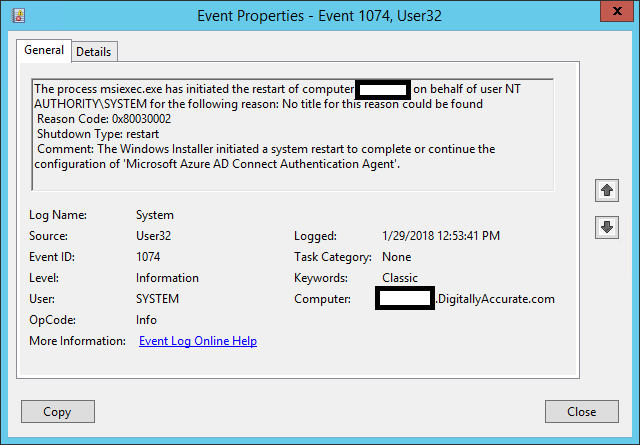
However, not only did I not meet the criteria of auto-update being enabled, but upon further investigation it was actually disabled by running the powershell command:
Get-ADSyncAutoUpgrade
As you can see below the command returned as “suspended”.
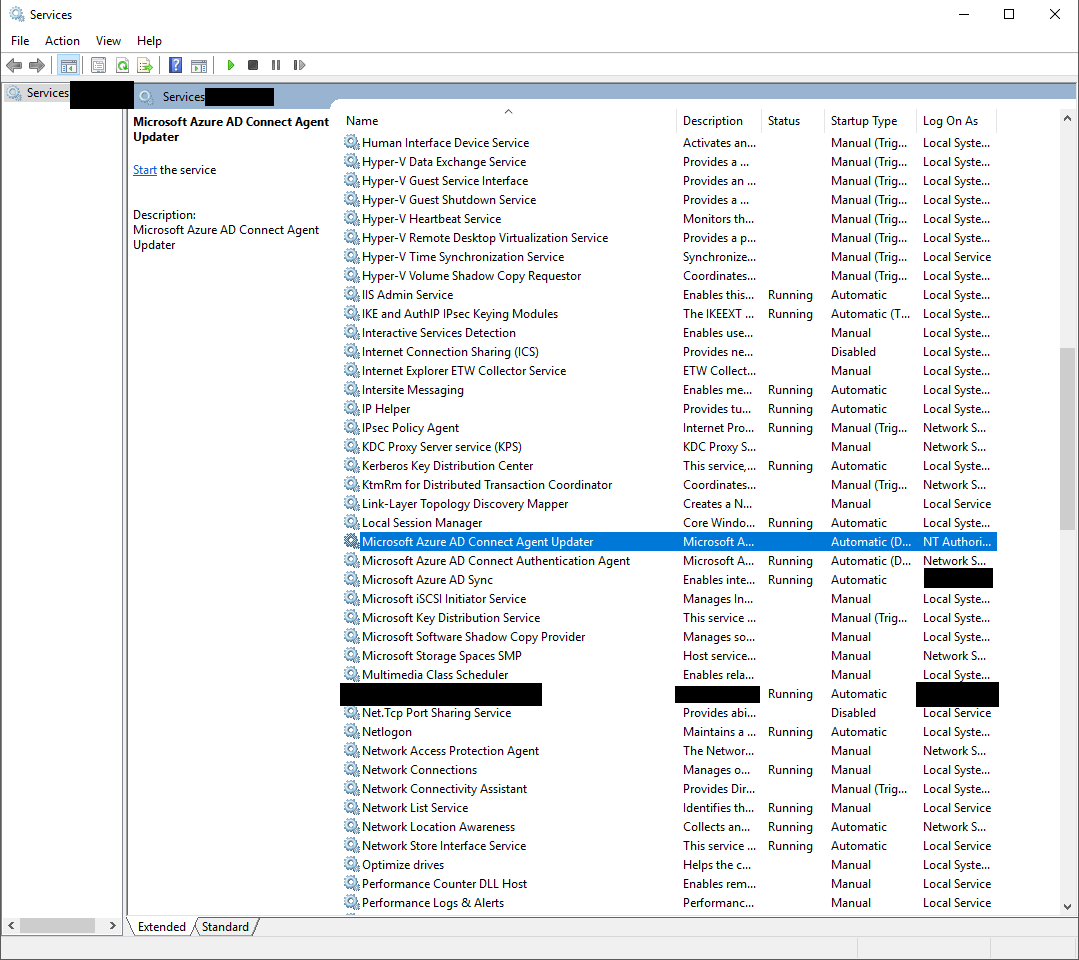
After spending tons more time searching and not finding anything, I decided I’d just disable the service called “Microsoft Azure AD Connect Agent Updater”. In my environment it was running and set to “Automatic (Delayed)”, but I stopped the service and changed it to “Disabled”.
It’s not reflected in the picture below, but this is the service that was responsable for updating and restarting the server. Since I’ve stopped it, it appears everything is functioning correctly, except auto-updating.
In an effort to truly showcase the capabilities of VMware Horizon View and the 10ZiG 5948q Zero Client, I wanted to put together a demo showing the ability to run Red Hat Enterprise Linux (RHEL 7.4) in a VDI environment.
First and foremost, this was super easy to setup. It was almost too easy…
Sidenote: Remember, my company Digitally Accurate Inc. is a 10ZiG partner. We can configure and sell 10ZiG Zero Clients (and thin clients), help with solution design and deployment, and provide consulting services! Contact us today for information or a quote! We sell and ship to Canada and the USA!
Please see below for video:
You’ll notice during login that after the credential prompt multiple desktops were available (we chose to log on to the RHEL instance) to choose from. You’ll see further on in the video versioning and specifications as well as video playback. Again, please note that my environment does not have any GPU or 3D rendering.
Please Note: The momentary black border on the bottom right side during login, was due to a resolution change on the VDI session. This was the first time logging in with this client, and the border doesn’t normally occur unless changing resolutions.
Please note, my company Digitally Accurate Inc, is a VMware Solution Provider Partner, 10ZiG Partner, and Red Hat Ready Business partner. Please don’t hesitate in reaching out for anything VDI! We design, sell, implement, and support VMware and VDI environments!
This weekend I configured Azure AD Connect for pass through authentication for my on-premise Active Directory domain. This was a first for me and extremely easy to do, however there was a few issues with my firewall and SSL content filtering and scanning rules which was blocking the connection. I figured I’d create a post providing some information you’ll need to get this setup and running quickly.
In my environment, I have a Sophos UTM firewall which provides firewall services (port blocking), as well as HTTP and HTTPs scanning and filtering (web filtering).
The Problem
After running the Azure AD Connect wizard, all went good however there was an error at the end of the wizard notifying that synchronization was configured but is not occurring due to firewall. It provided a link for more information (that actually didn’t really contain the information needed).
While this issue is occurring, you’ll notice:
-Azure AD Connect in the Azure portal is reporting that pass-through authentication is Enabled, however after expanding the item, the Authentication Agent reports a status of Inactive on your internal domain controllers.
-In the Event log, under “Applications and Services Logs”, then “Microsoft”, then “AzureADConnect”, then “AuthenticationAgent”, and finally “Admin”, you’ll see the following error event:
Event ID: 12019

Source: Microsoft Azure AD Connect Authentication Agent (Microsoft-AzureADConnect-AuthenticationAgent)

Event:
The Connector stopped working because the client certificate is not valid. Uninstall the Connector and install it again. Request ID: '{WAJAJAJA-OHYA-YAAA-YAAAA-WAKAKAKAKAKAKAK}'
This event log above is due to the SSL and HTTPs content filtering.
-Azure Pass-Through authentication won’t work
The Fix
After doing some research, I came up with the following list of ports and hosts you’ll need to allow unfiltered to a specific list of hosts.
Ports
The following ports are used by Azure AD Connect:
Port 443 – SSL
Port 5671 – TCP (From the host running the Azure AD Connect to Internet)
If you’re running a Sophos UTM like I am, you’ll need to create an HTTP(s) scanning exception and then import this list in to a rule “Matching these URLs”:
After creating the exceptions, I restarted the “Microsoft Azure AD Connect Authentication Agent”. The errors stopped and Azure AD Pass-through started to function correctly! Also the status of the Authentication Agent now reports a status of active.
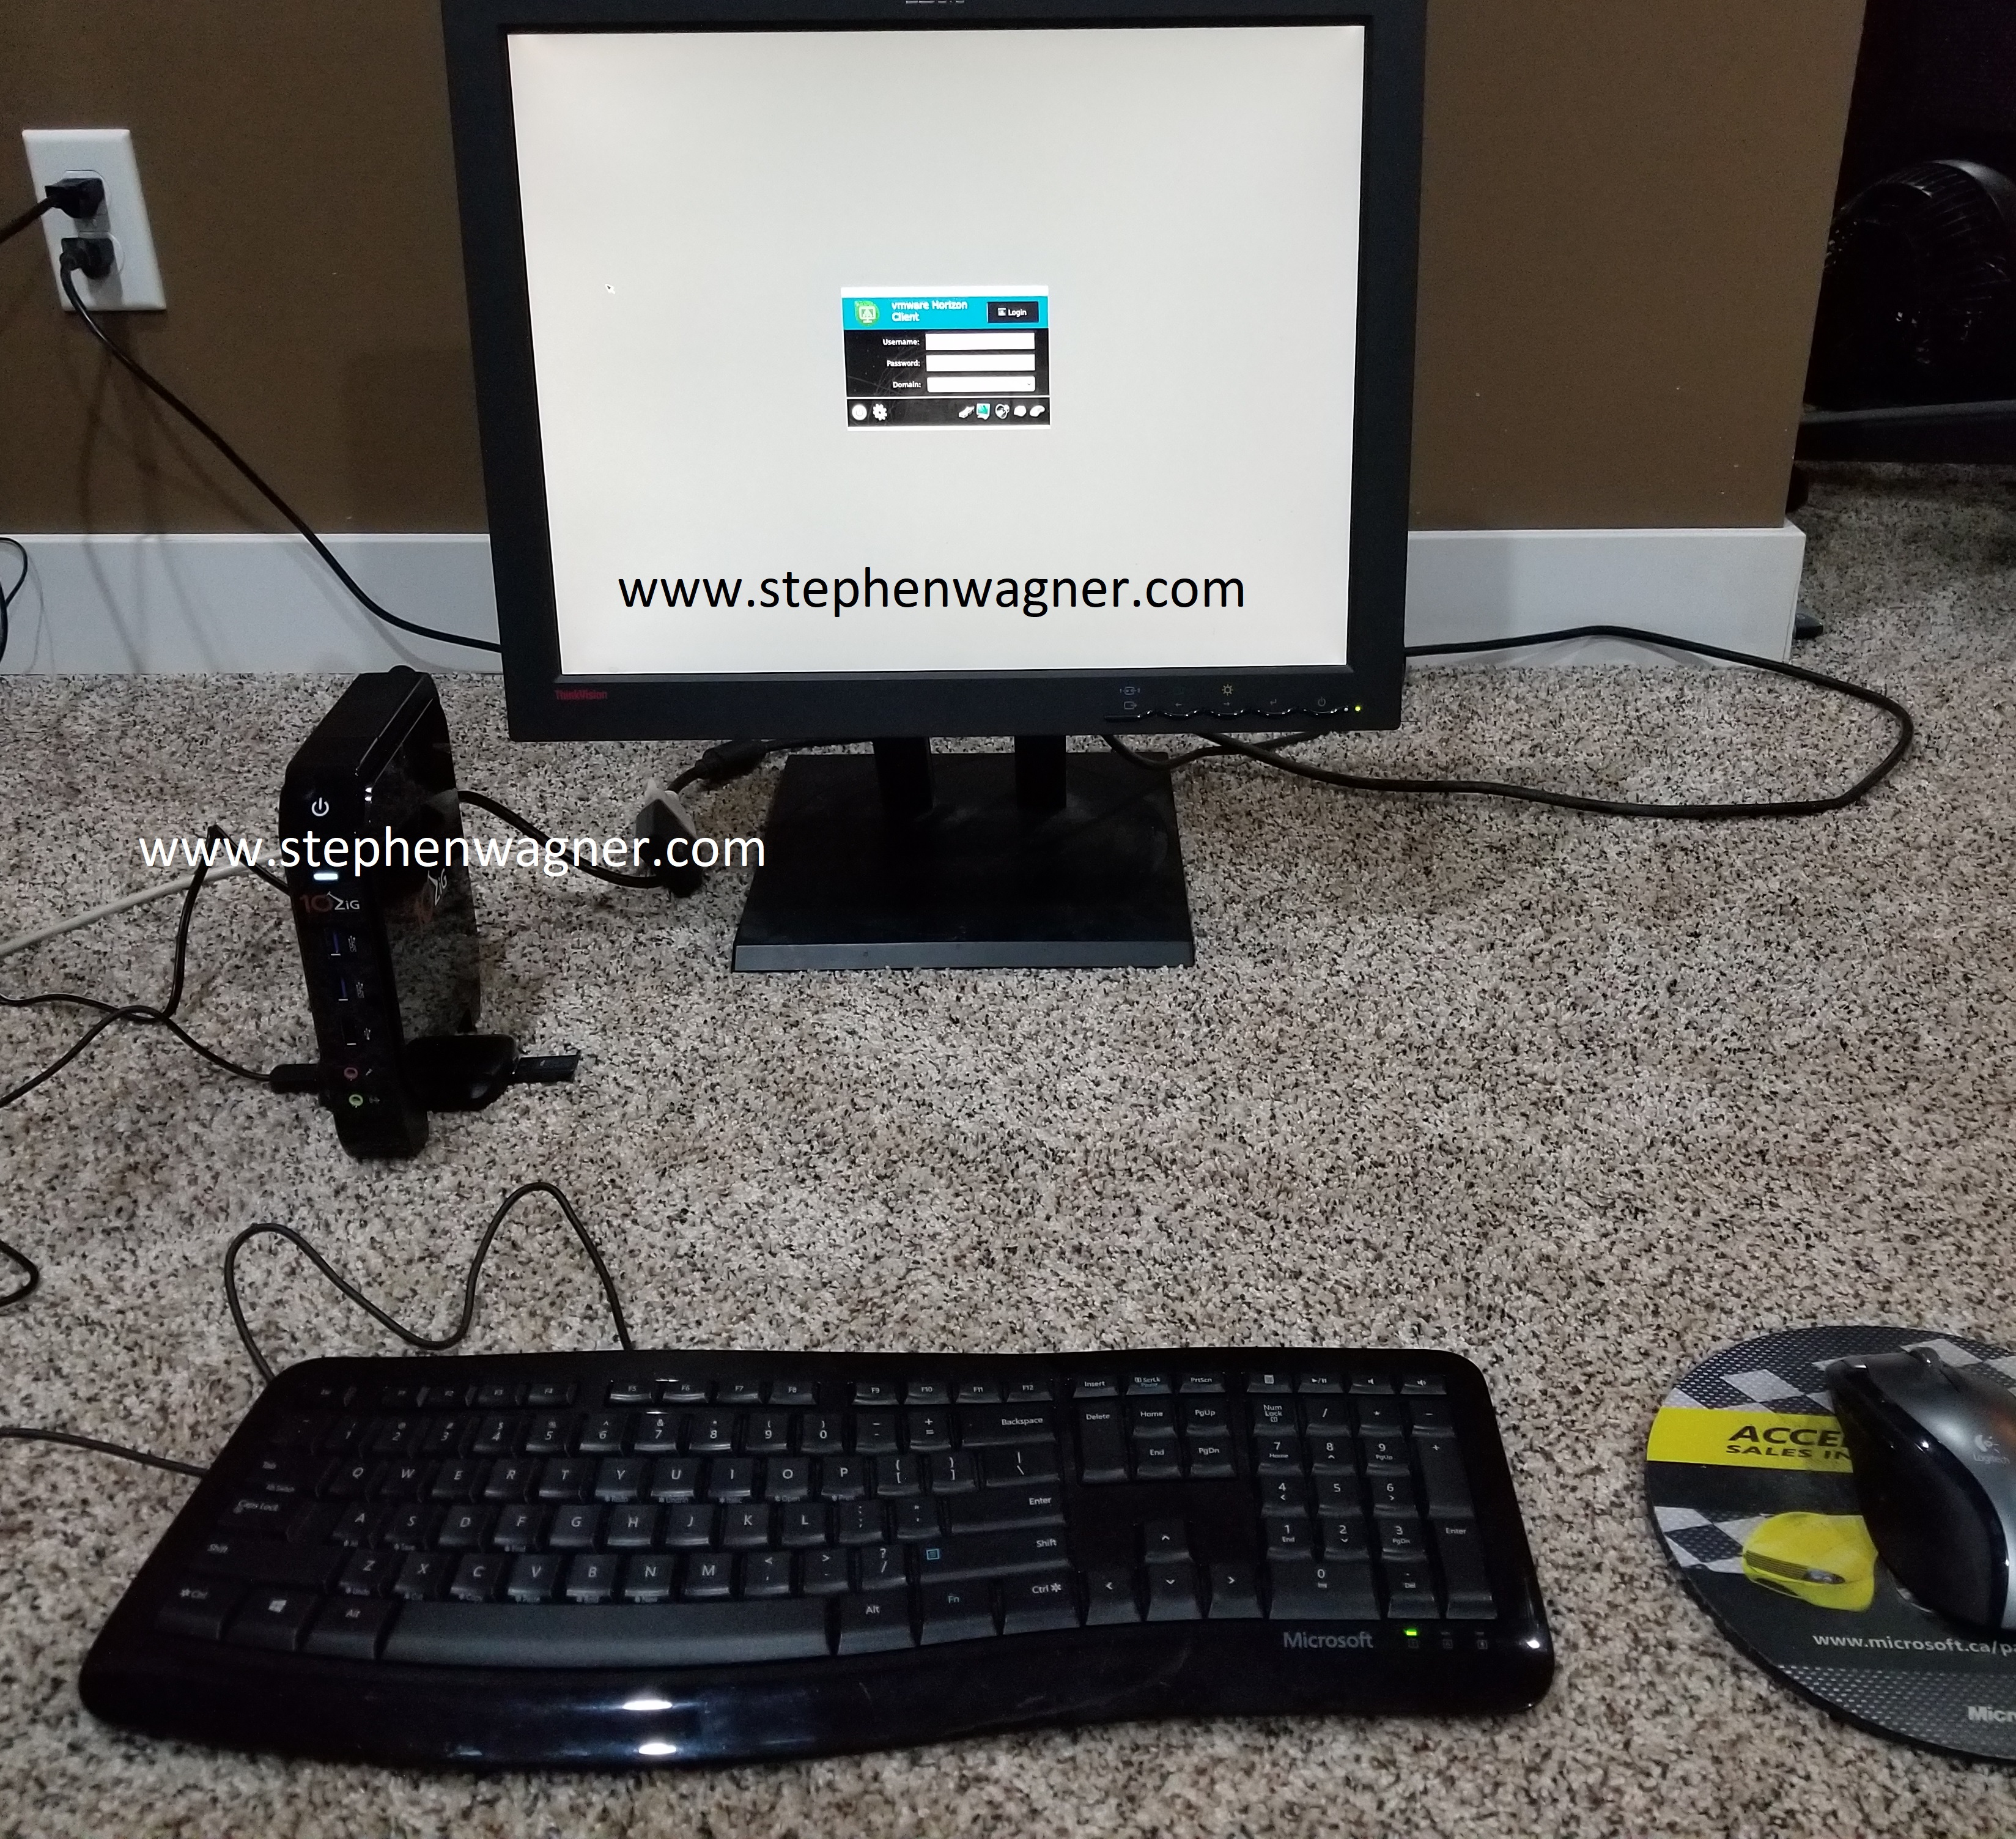
As promised in my previous post which covered my first impressions, here are some pictures and video of the 10ZiG 5948q zero client in action! In the videos I demonstrate video playback as well as the USB redirection capabilities of the 10ZiG Zero Client and VMware Horizon View. Scroll down to the bottom for videos!
If you’re interesting in 10ZiG products and looking to buy, don’t hesitate to reach out to me for information and/or a quote! We can configure and sell 10ZiG Zero Clients (and thin clients), help with solution design and deployment, and provide consulting services! We sell and ship to Canada and the USA!
Pictures
10ZiG 5948q Zero Client
10ZiG 5948qv Zero Client VMware Horizon View
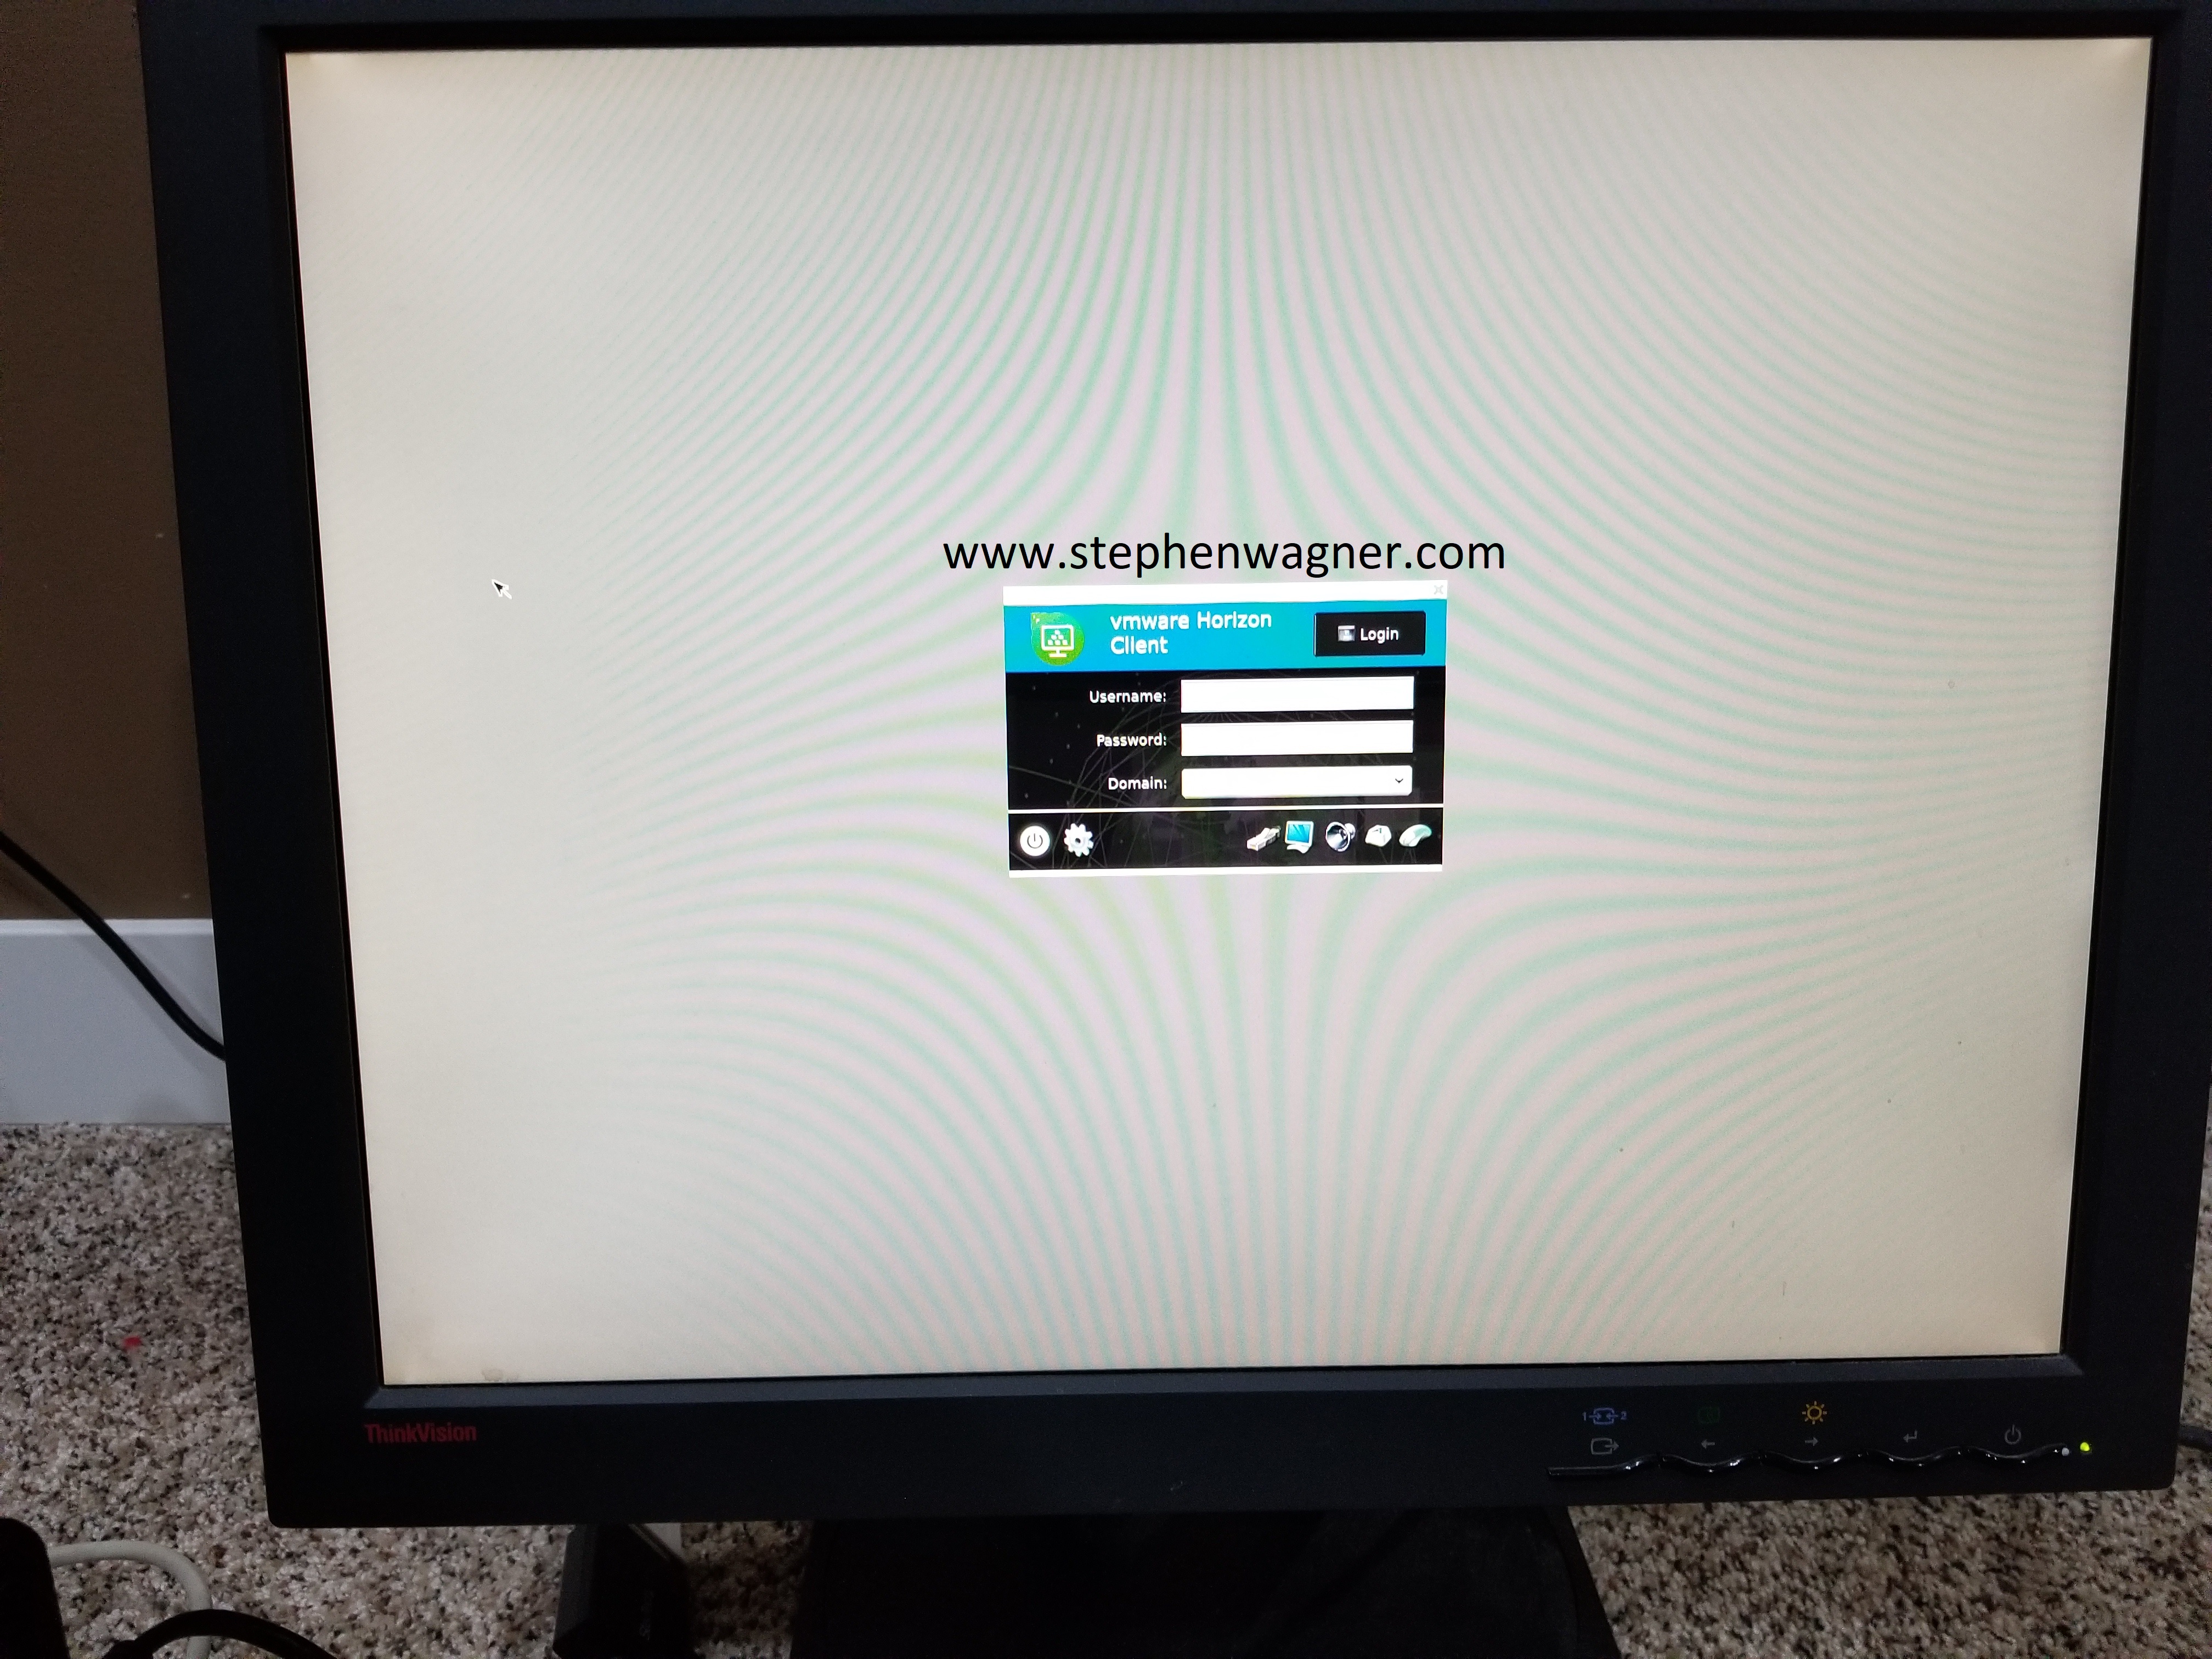
10ZiG 5900 Series Zero Client VMware Horizon View Login
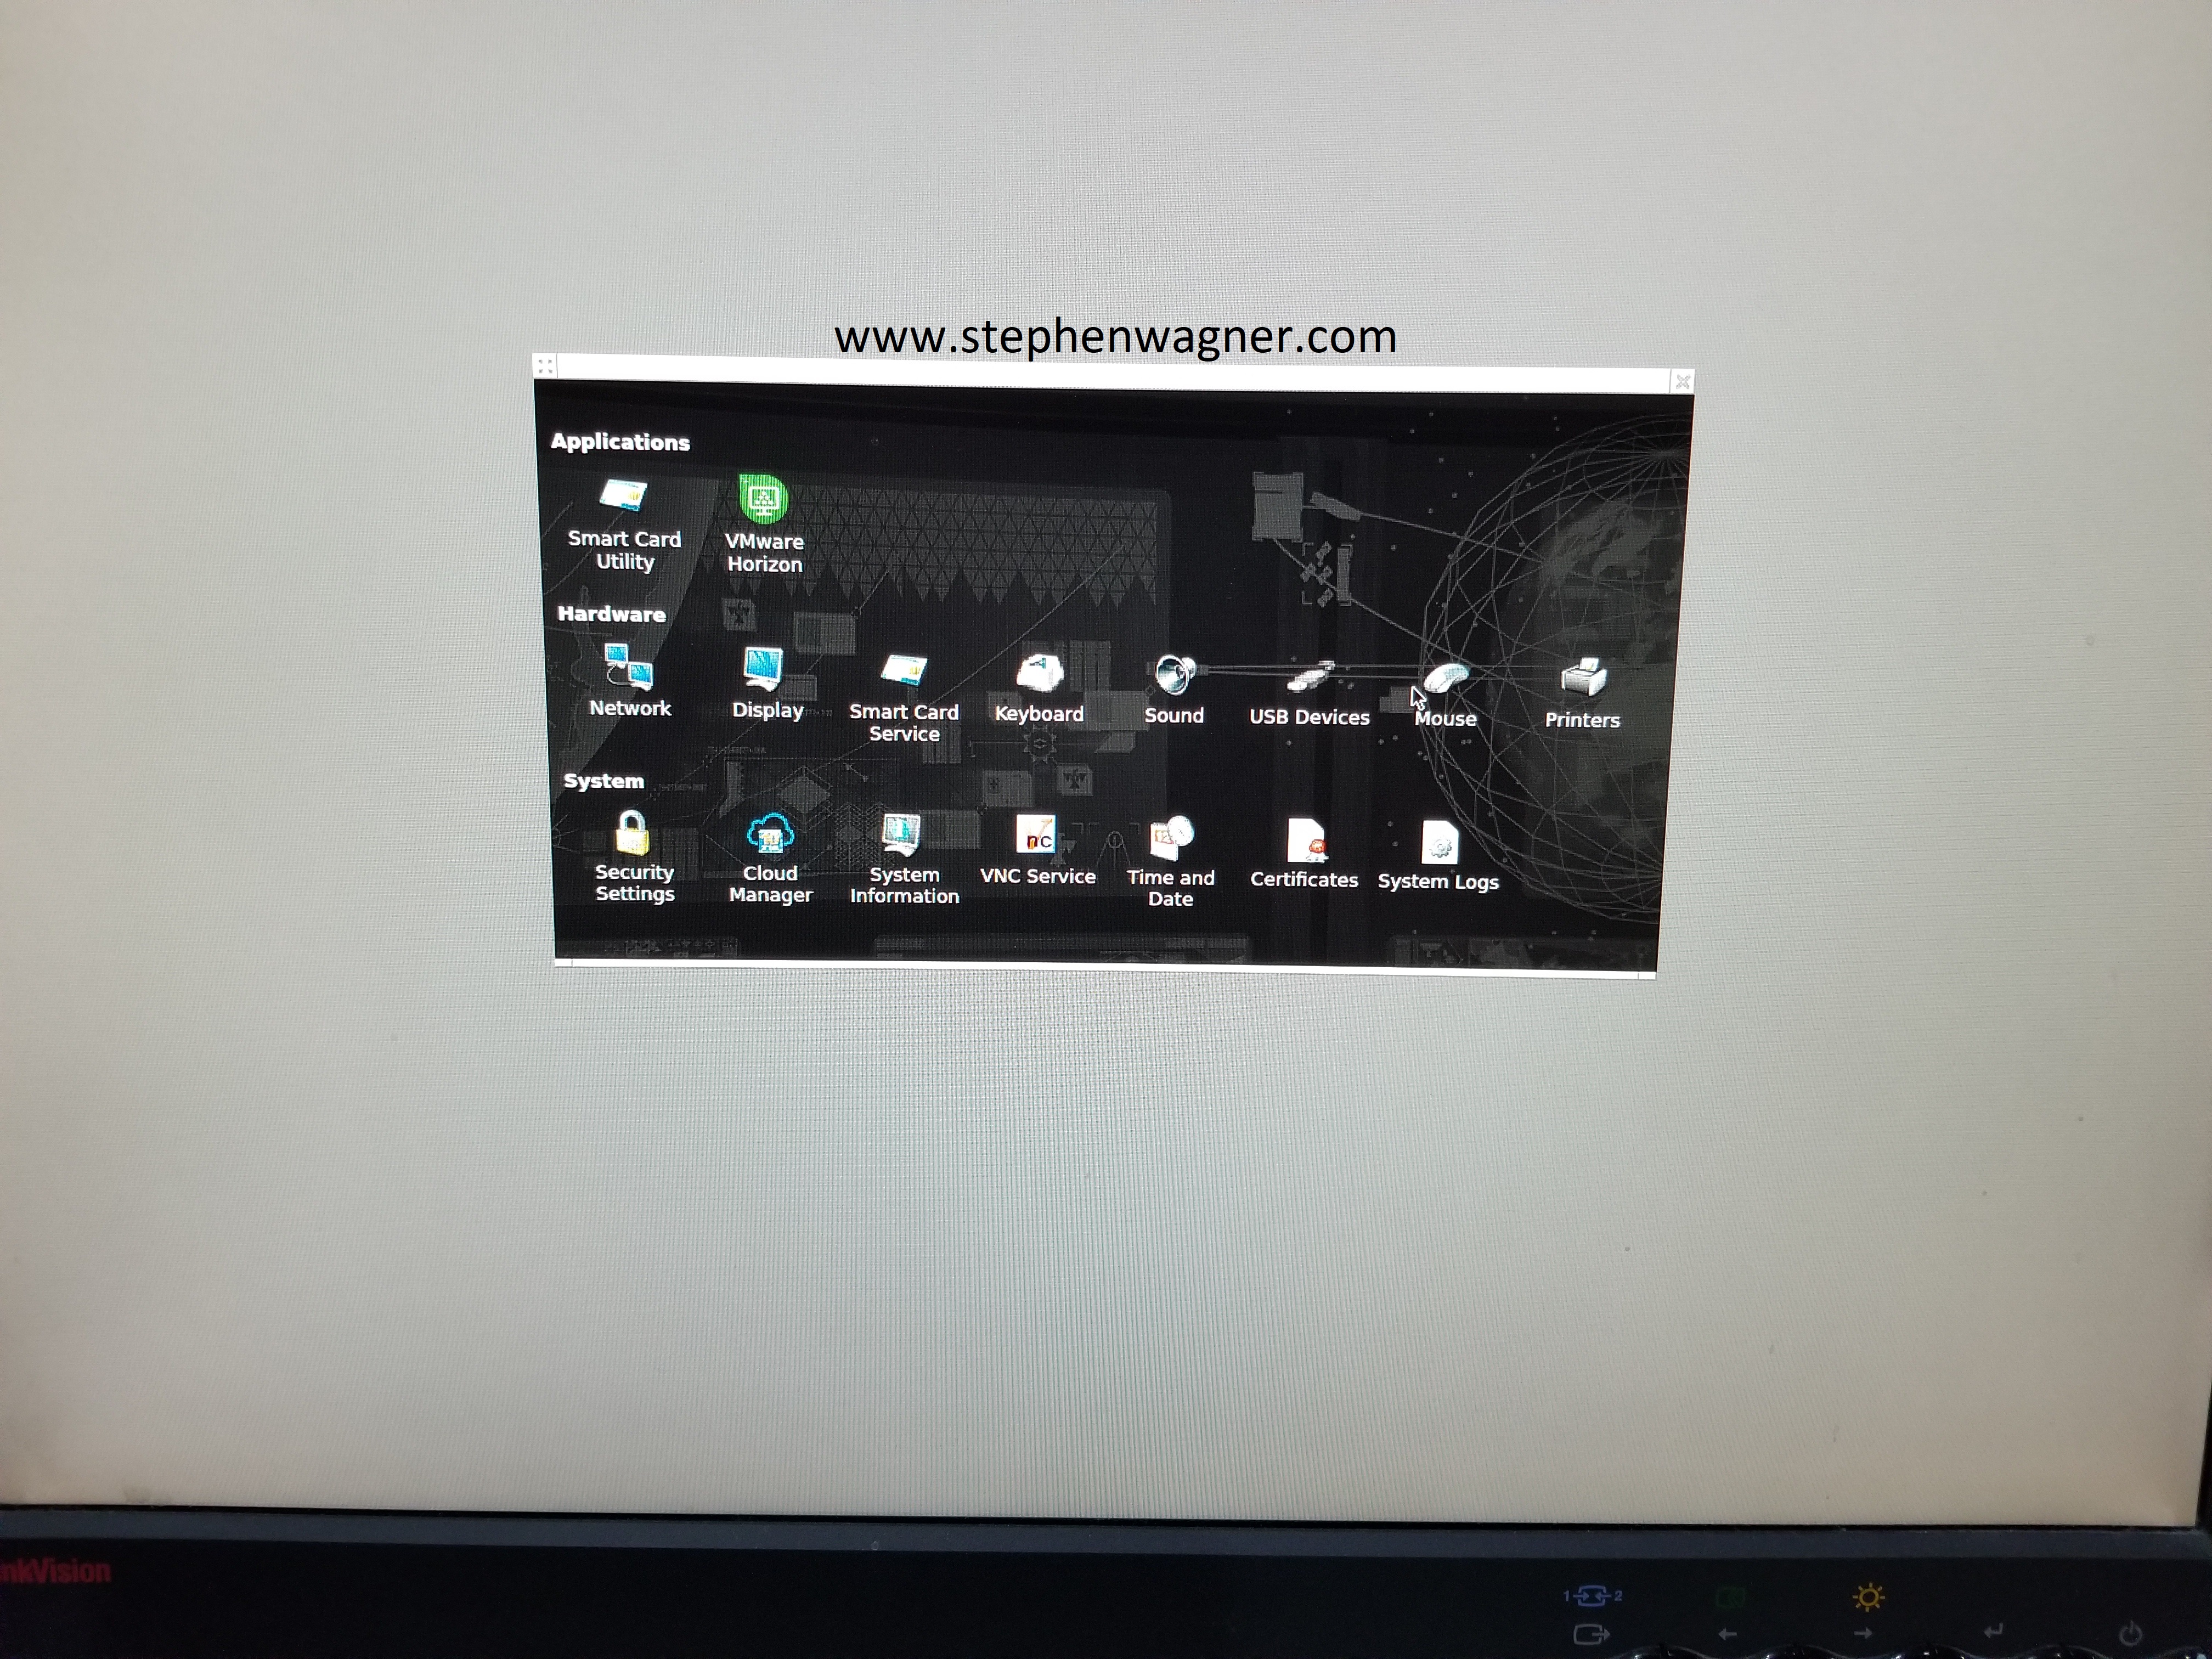
10ZiG 5948q Series Zero Client Configuration Menu
Videos
In this video, I demonstrate the capability of the 10ZiG 5948q zero client connected to a VMware Horizon View server (via a Unified Access Gateway) playing a video from YouTube. Please note that the ESXi server does not have a GPU and 3D rendering is disabled for the test (this is as low performance as it gets).
In this video, I demonstrate the capability of the 10ZiG 5948q zero client using USB redirection on a live VDI session.
And finally, here’s a video of a 10ZiG zero client cold boot for those that are interested.
And remember, my company Digitally Accurate Inc. is a VMware Solutions Provider and 10ZiG Partner. I’m also regularly posting content on these on the corporate blog as well!
It’s an exciting weekend as I got my hands on 2 new 10ZiG5900 Series Zero Clients (5948qv). My company purchased these for internal testing and demo purposes since we sell VMware VDI solutions and 10ZiG Thin and Zero Clients. I figured I’d do a brief post to offer my first impressions, offer a few pictures, as well as a brief write up.
If you’re interesting in 10ZiG products and looking to buy, don’t hesitate to reach out to me for information and/or a quote! We can configure and sell 10ZiG Zero Clients (and thin clients), help with solution design and deployment, and provide consulting services! We sell and ship to Canada and the USA!
Why a Zero Client
For a brief backstory, zero clients are used for environments and businesses that use desktop virtualization (VDI) instead of traditional computers. This means that an employee won’t actually have a computer, instead they will be using a zero client which relays video/keyboard/mouse (it’s actually more complicated than that, lol) to a desktop computer that’s virtualized on a server (either in the cloud, data center, or on-premise). This allows the company to save on hardware, provide better performance to end users, and really simplify a big portion of the IT landscape.
I’m a big fan of VDI, particularly the VMware Horizon View product. My company has a full demo/test VDI environment we have available to showcase this technology.
What’s really awesome is that you don’t necesarily even need to use a zero client. You could instead use an old netbook, laptop, computer, or even a cellphone to connect to these virtualized desktops using the VMware Horizon View client.
The next question you may be asking, is what about graphics quality? Well, you can implement special graphics cards to virtualize GPUs (such as the AMD FirePro MxGPU class of cards) and provide high end graphical capabilities to your users.
In my deployment we’ve been using software based VDI clients, but it was time to get our hands dirty with some zero clients. We decided to partner up with 10ZiG, and order a couple of these units for internal and demo purposes.
Now let’s get started!
10ZiG 5948qv Zero Client (5900q Series Zero Client)
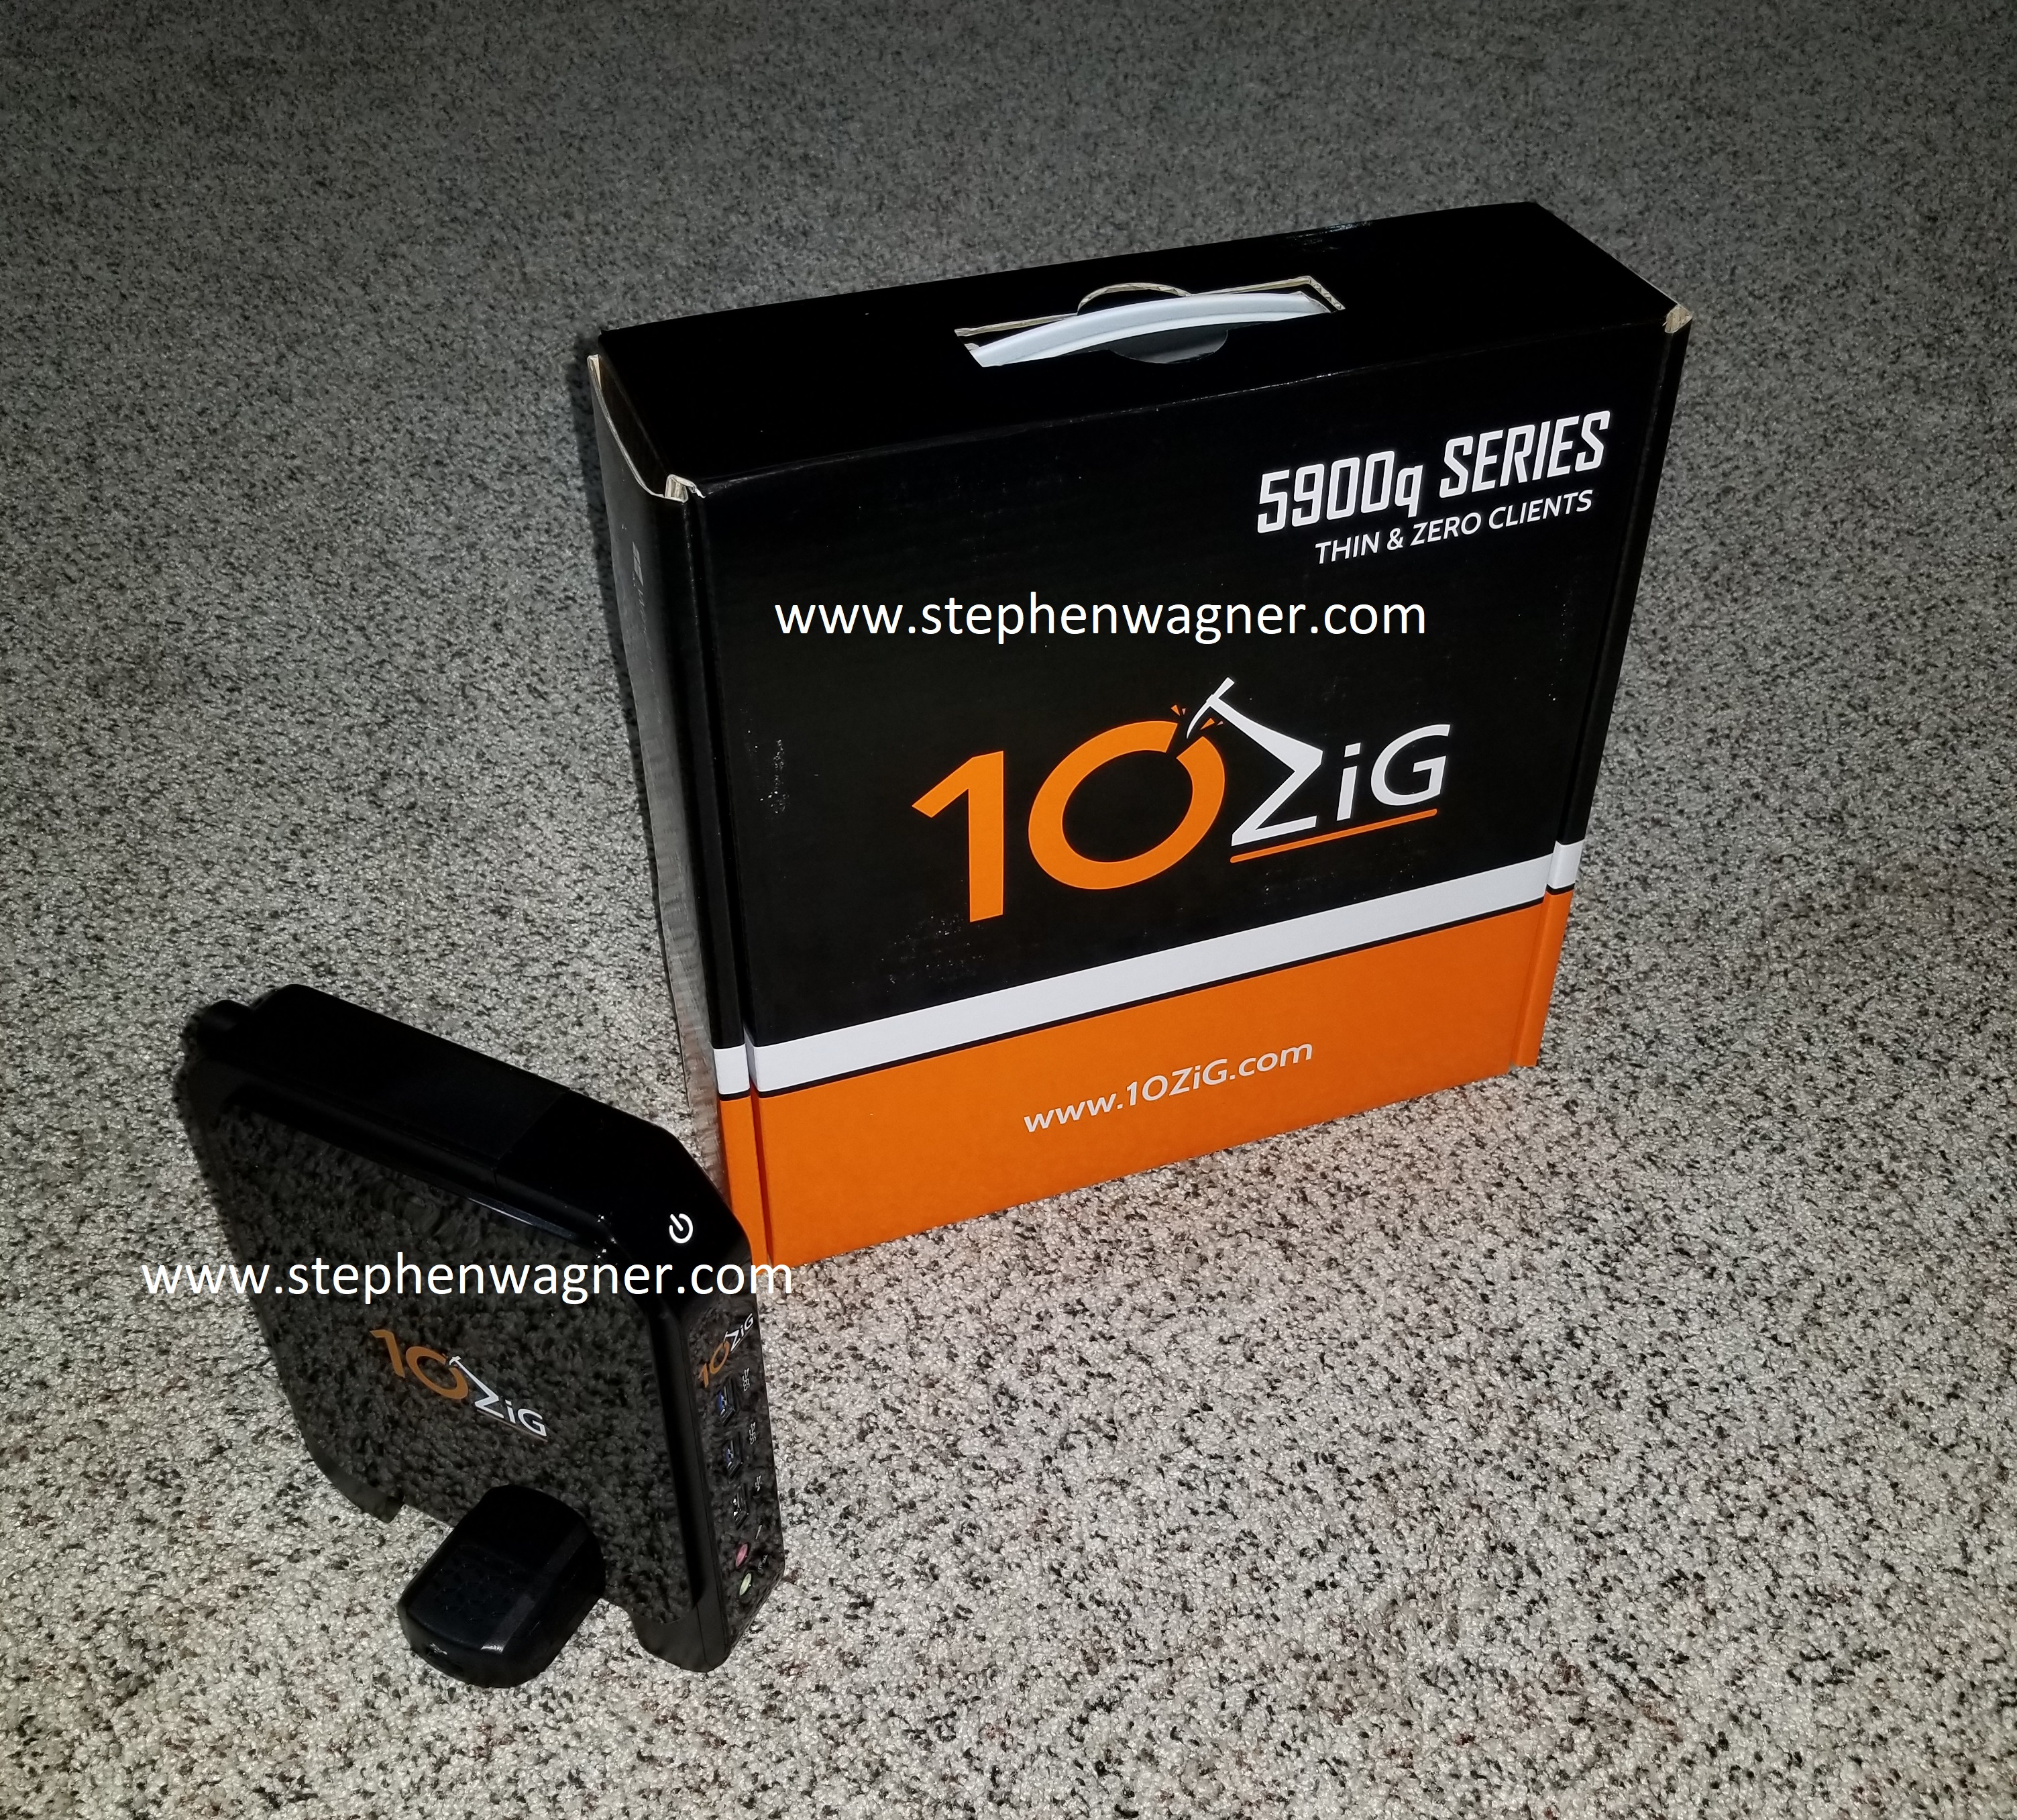
Unboxing
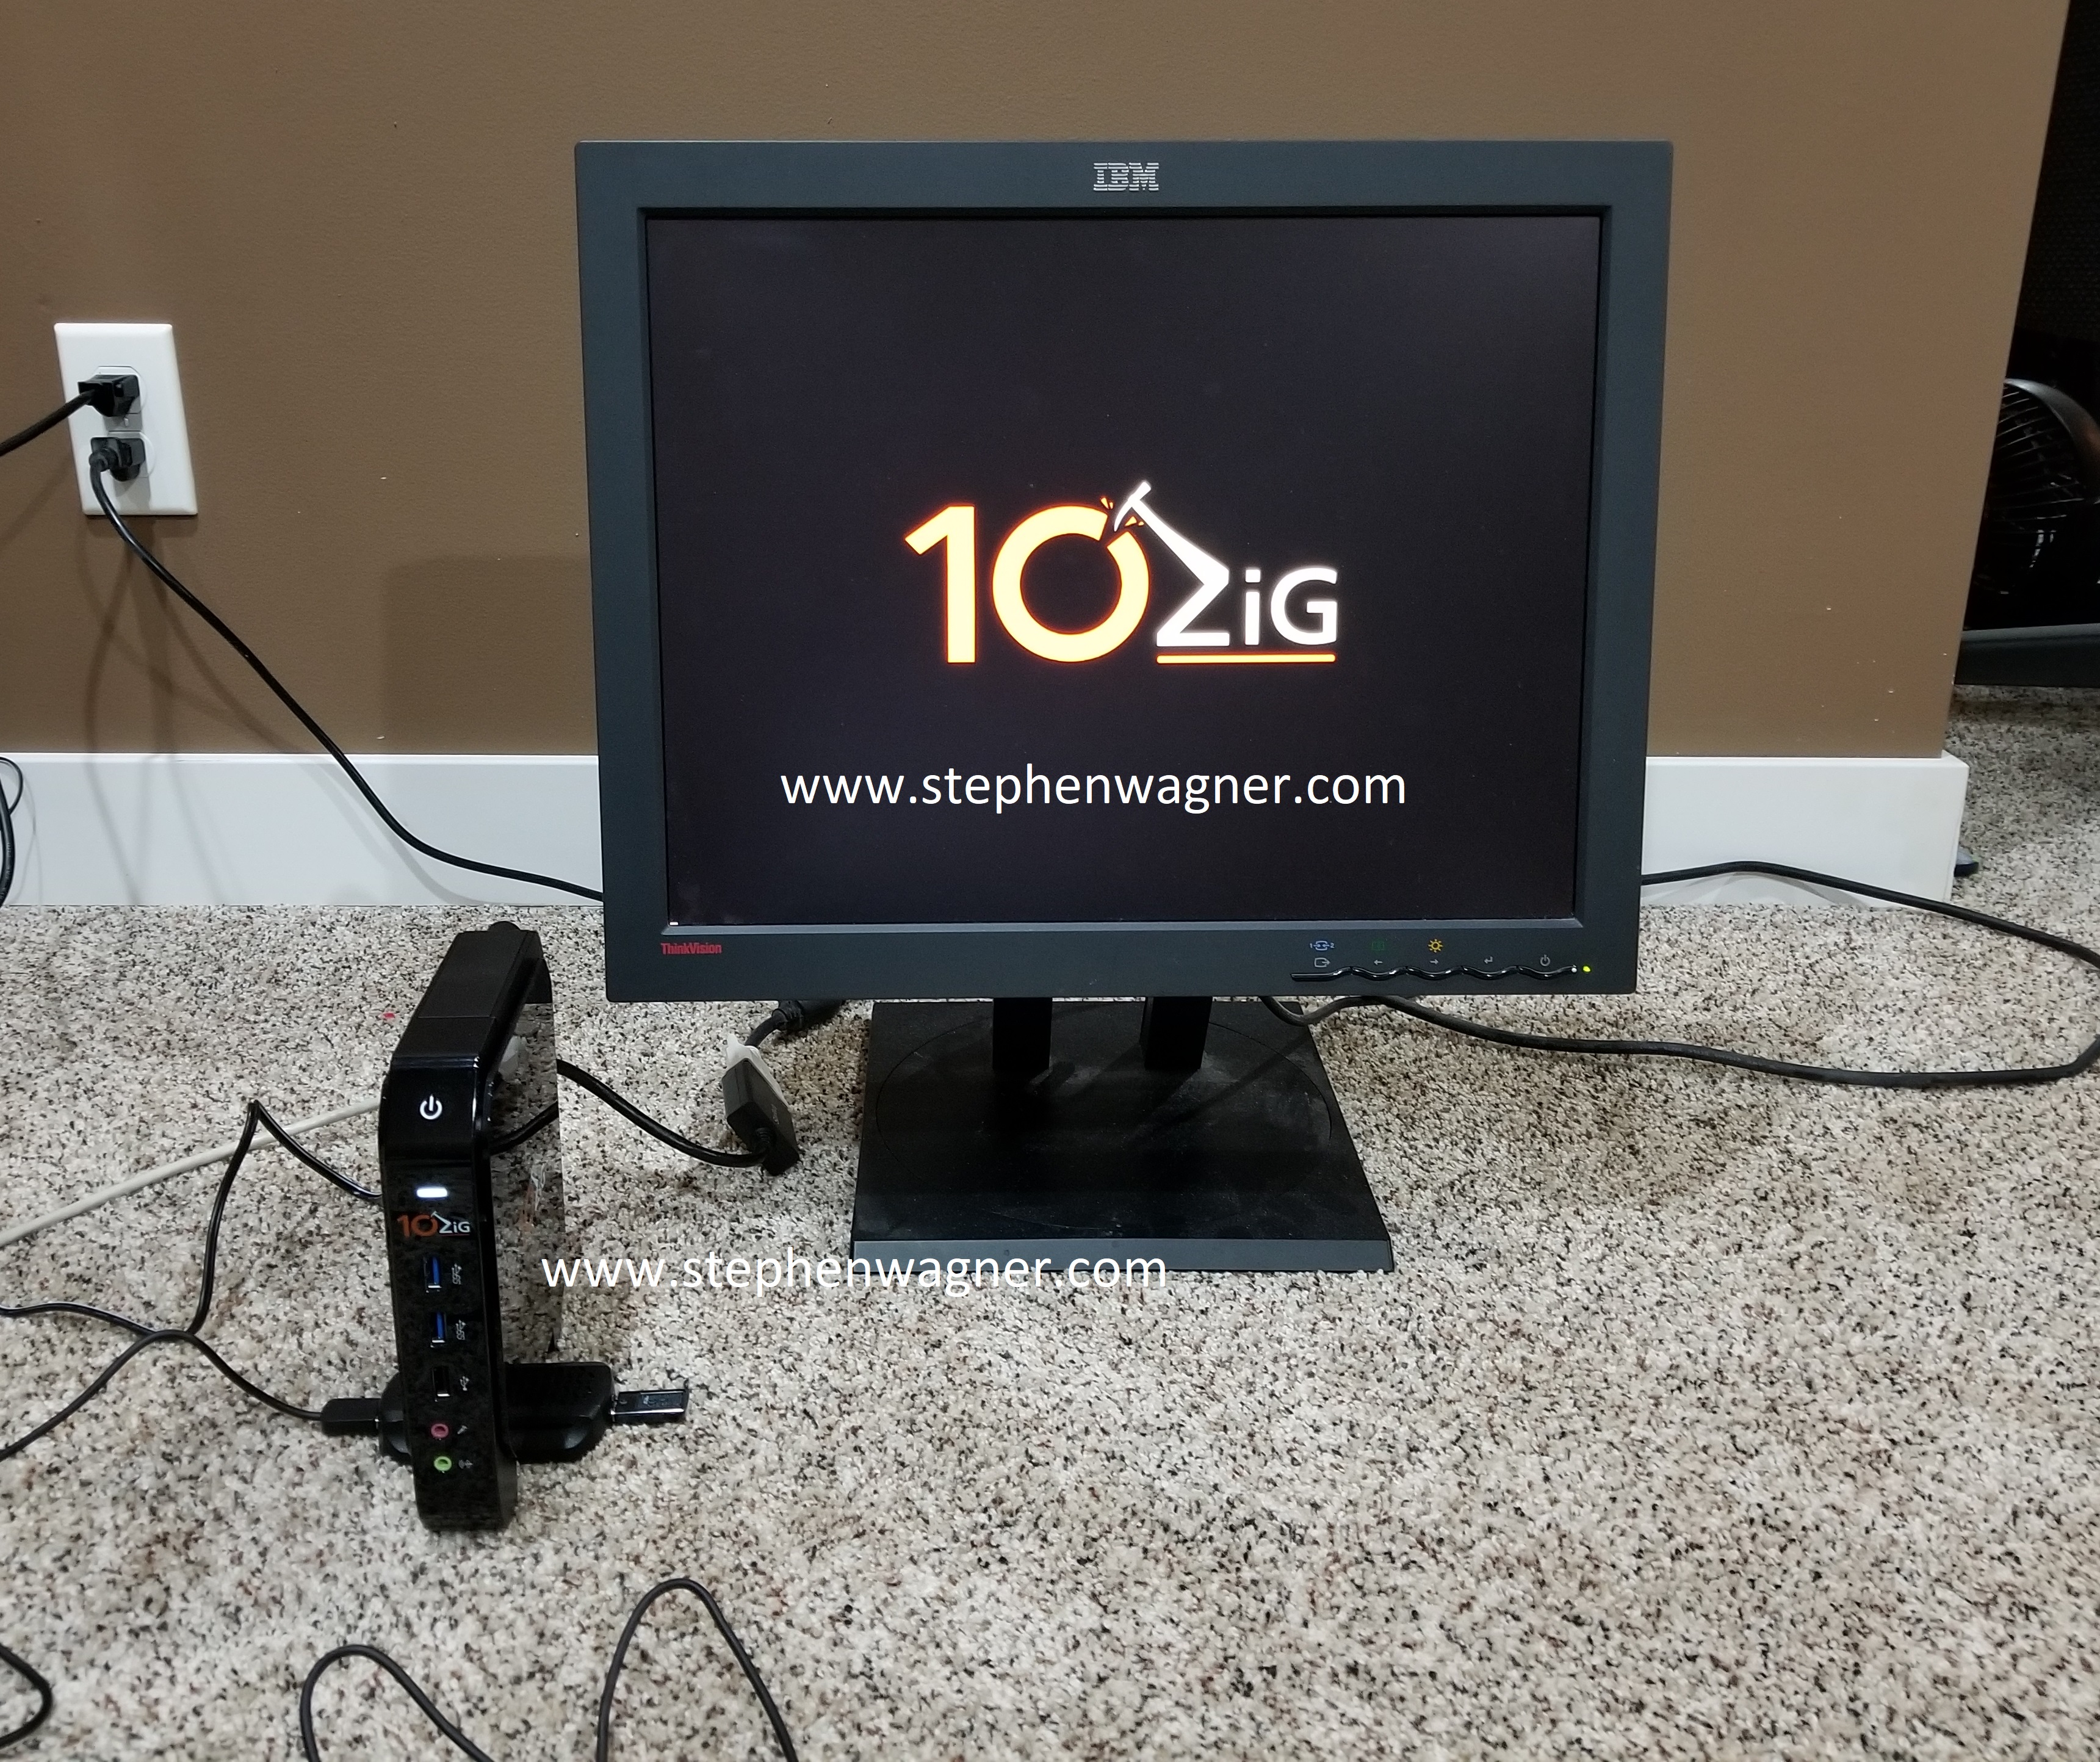
10ZiG 5948q Zero Client
The 5948qv is part of 10ZiG’s power class of zero clients. This bad boy is the latest and greatest model and supports 3 displays (yup, that’s right) and 4K UHD resolutions. The hardware itself is based off an Intel Braswell (refreshed version) CPU. The device has 1 HDMI port, as well as 2 DisplayPort connections. It also has a microphone, audio line out, and a ton of USB ports (including both USB2 and USB3) for USB redirection. You can choose from 4GB or 8GB RAM configurations.
The 5948qv runs off 10ZiG’s NOS operation system. This is a compact and lightweight operating system that includes the VMware Horizon View client, as well as all the configuration utilities you’ll need to get up and running (as well as troubleshoot the device if needed).
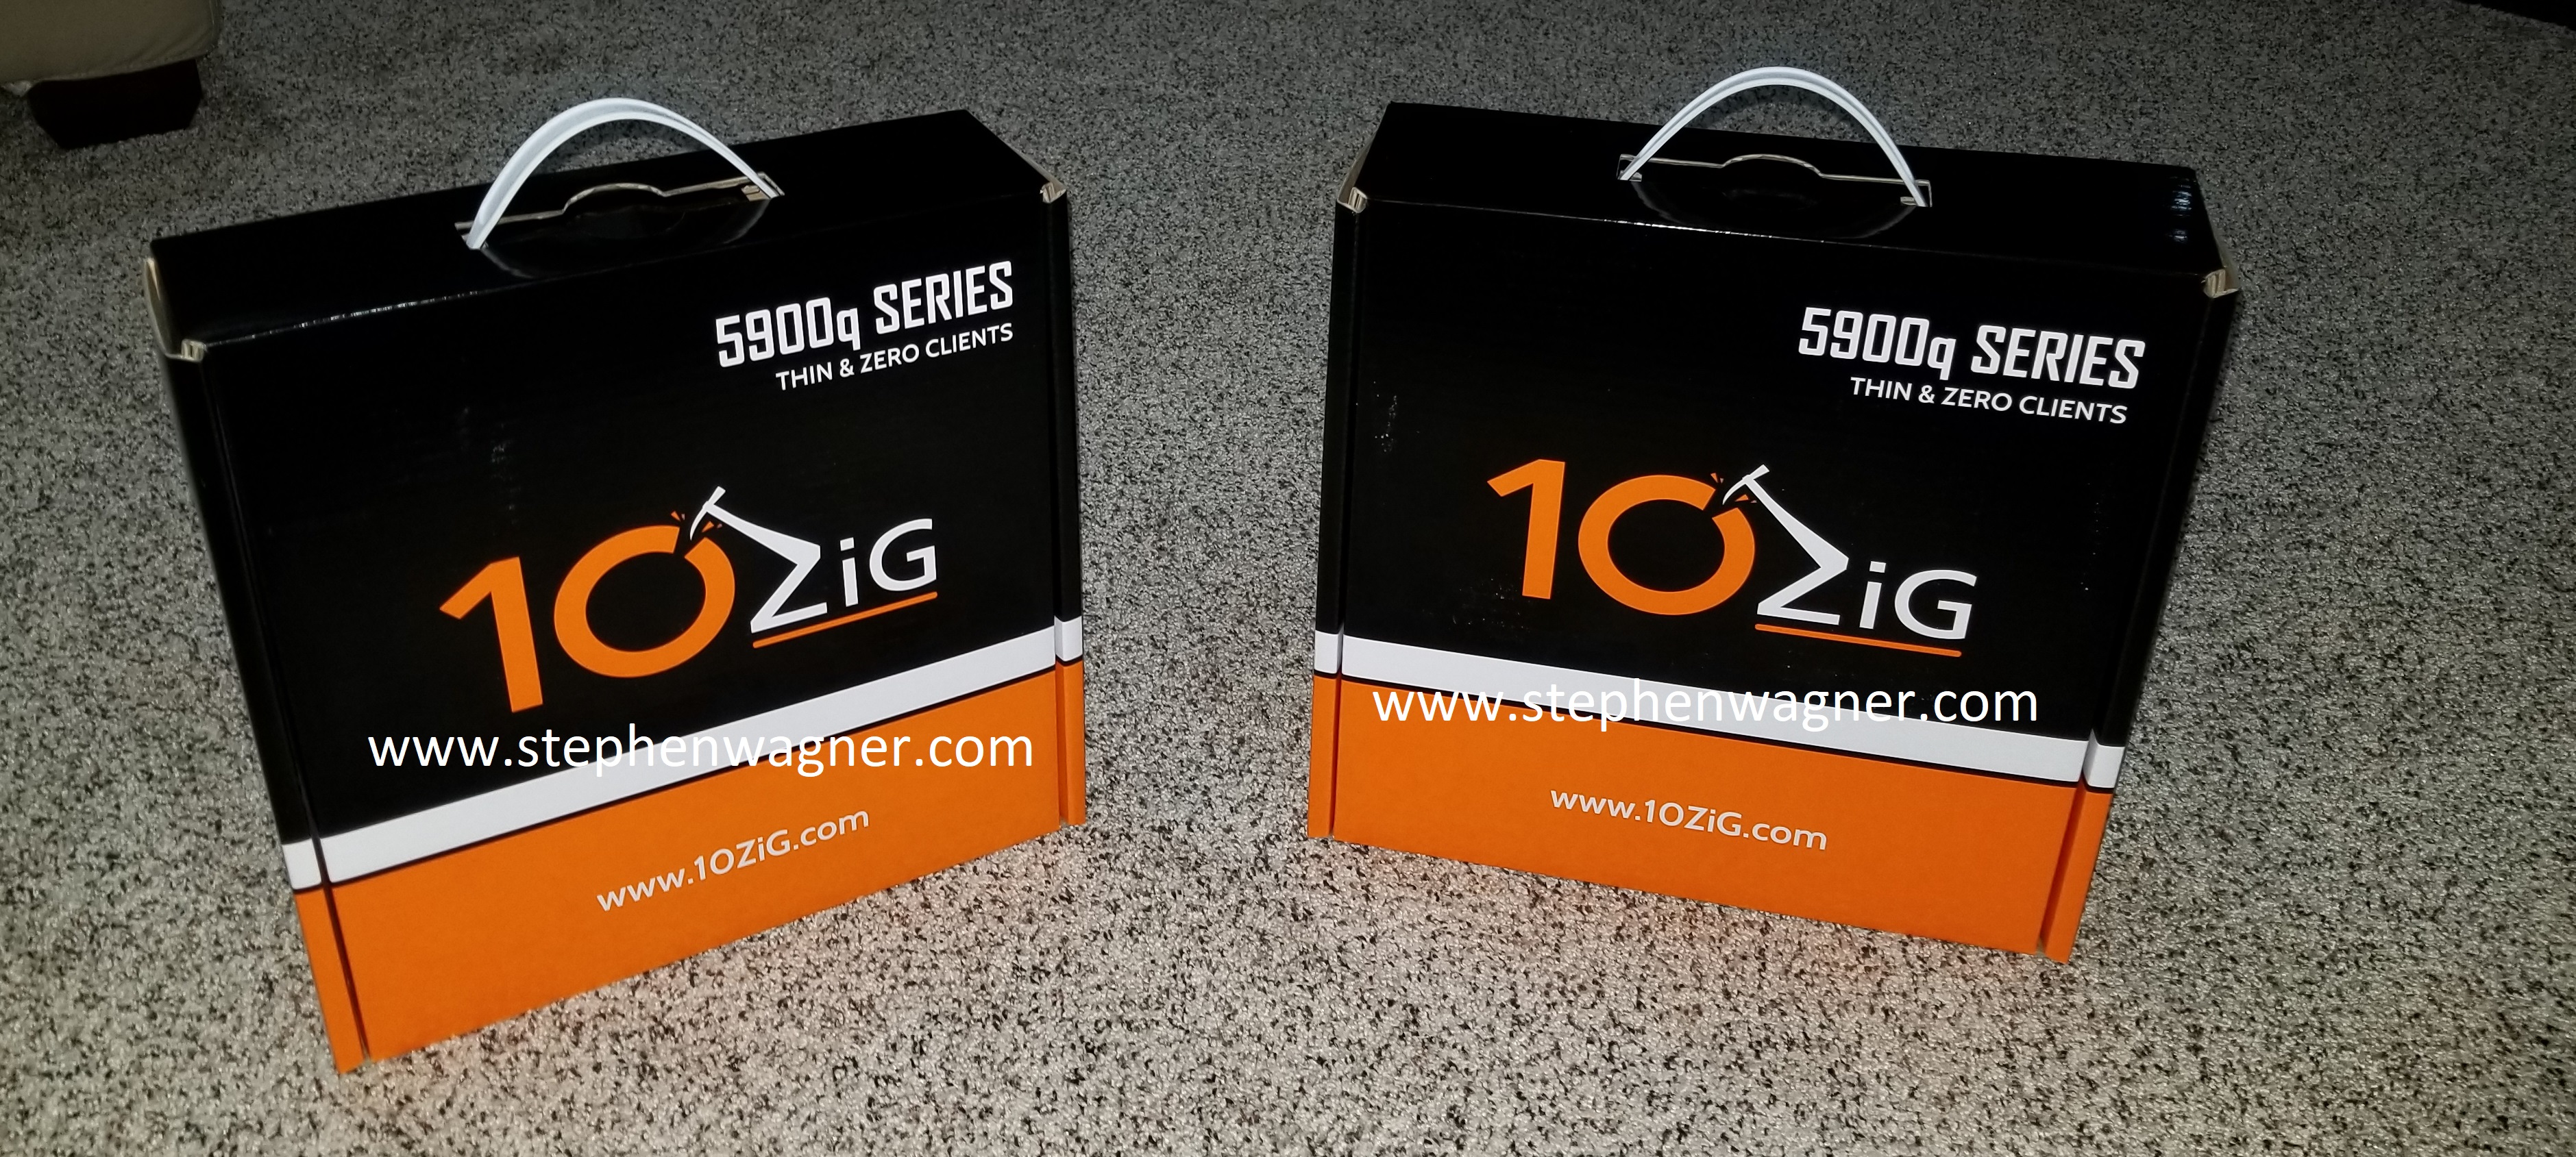
When I received the first two units, I noticed that the boxes were very heavy (I was actually really surprised).
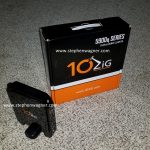
10ZiG 5900q Series Zero Client Box Shot
10ZiG 5948q Series Zero Client Box Shot
The packaging was very nice, and the contents were safely secured with proper cardboard spacers to avoid items shifting during transport.
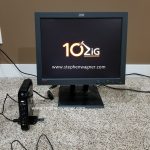
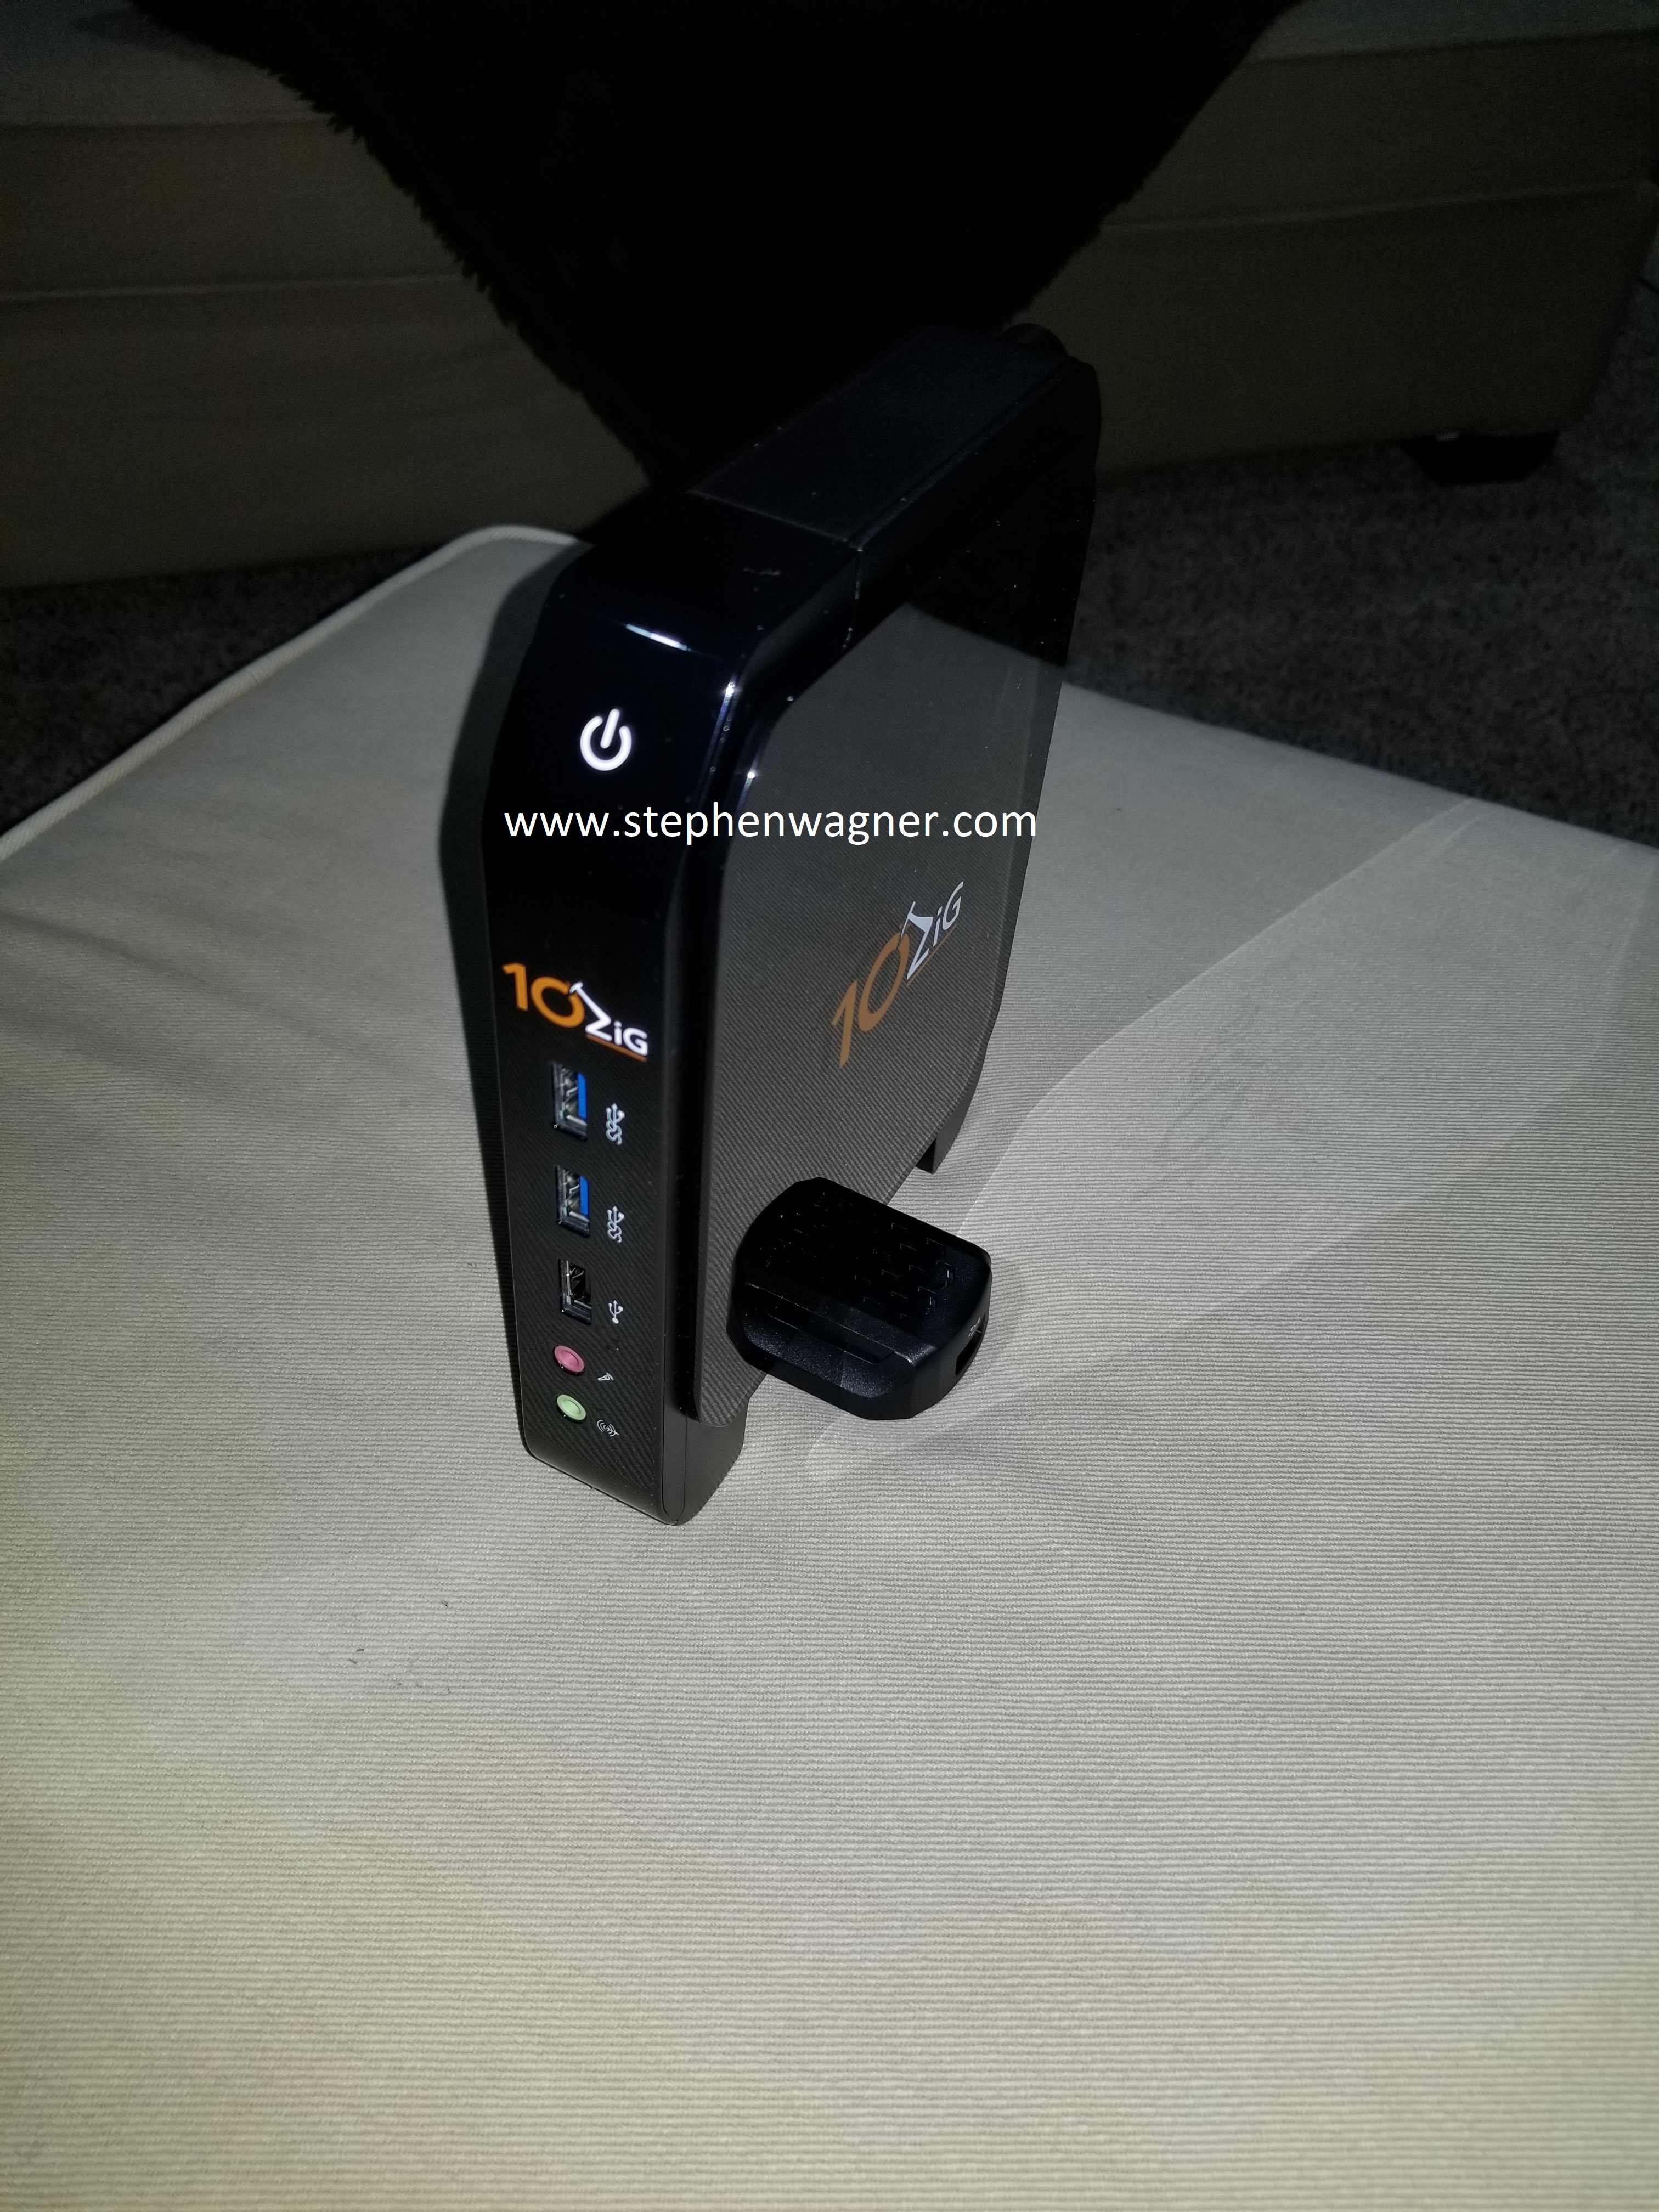
The Zero Client
Finally it was time to take the zero client out! It is a very sleek, and very well put together device (I was actually surprised). As mentioned, it has some weight to it. It just looks great…
10ZiG 5948qv Zero Client
The bottom of the device swivels and turns to expose 2 hidden USB ports which can be used for any type of USB device. The device also has 2 x USB3.0 ports on the front, an additional 1 x USB2.0 on the front, and 2 x USB2.0 ports on the back.
10ZiG NOS – Linux Based OS
Plugging in the device and turning it on, it brings you to a big 10ZiG splash image and then on to first time configuration. In the first time configuration with the 10ZiG NOS Operating System you specify your locale and region settings, date and time, and others. One problem I came across, is that when choosing Canada, it defaulted the keyboard to French for some reason. I actually didn’t even realize this until later when trying to log in to my VDI session (it was registering the wrong characters when pressing keys) and rejecting my password. It actually took me over an hour to realize this when I finally started poking around in the console and noticed that the “/” key was triggering an entirely different character. Changing the keyboard to US English fixed this (although in my opinion it should have been the default).
Usage
After the first time setup is complete, the interface is very simple yet powerful. You can configure your VMware View Connection Server address (and properties for the connection), as well as all the hardware components of the zero client, this includes: Network, Display, Mouse, Keyboard, USB devices, printers, etc…
After specifying my View connection server and then leaving the control panel, I logged in to my VDI session and it worked great!
Initially I tested some videos on YouTube, which looked great, and then moved on to trying some other things that involved audio and all was perfect. This product was production ready! I also tested the USB redirection by connecting a USB thumb flash drive to a USB port. The Windows 10 VM detected the USB drive, and I was able to partition, format, and use the stick without any problems. Initial testing resulted in 4MB/sec USB redirection speeds.
I’m really hoping that when my budget permits, I can purchase an AMD MxGPU S7150 card so I can test the 10ZiG with some high performance graphic applications. In the meantime though, this works great!
Now before I leave you, there are two important things I want to mention:
The 10ZiG zero clients can be completely centrally managed and provisioned by the 10ZiG Manager, which is completely free if you own the products. You’d use this to deploy many zero clients (hundreds, thousands, etc…) in large scale deployments.
All in all, I’m very impressed with the device and have absolutely no complaints. I’ll be doing some more write ups and videos on the device soon! Stay posted!
This website uses cookies to improve your experience. We'll assume you're ok with this, but you can opt-out if you wish.
Do you accept the use of cookies and accept our privacy policy? AcceptRejectCookie and Privacy Policy
Privacy & Cookies Policy
Privacy Overview
This website uses cookies to improve your experience while you navigate through the website. Out of these cookies, the cookies that are categorized as necessary are stored on your browser as they are essential for the working of basic functionalities of the website. We also use third-party cookies that help us analyze and understand how you use this website. These cookies will be stored in your browser only with your consent. You also have the option to opt-out of these cookies. But opting out of some of these cookies may have an effect on your browsing experience.