Well, it’s official, according to the release notes for VMware Horizon 2106, VMware now supports Media Optimization for Microsoft Teams on the VMware Horizon Linux Client.
This is great news for zero clients, as most VDI Zero Clients are based of embedded Linux. As soon as major vendors update their firmware to the latest VMware Horizon Client, we should start seeing Microsoft Teams Optimization on VDI Zero Clients.
This guide will show you to install Microsoft (Classic) Teams and deploy Microsoft Teams VDI Optimization on VMWare Horizon for Manual Pools, Automated Pools, and Instant Clone Pools, for use with both persistent and non-persistent VDI. This guide works for Microsoft Teams on Windows 10 and Windows 11, including the new Windows 11 22H2.
Please see my post Deploy and install the New Teams for VDI to learn how to deploy the new Teams client for VDI. The Classic client will go end of support on June 30, 2024.
Before Microsoft Teams VDI Optimization, VMware’s RTAV (Real-Time Audio-Video) was generally used. This offloaded audio and video to the VMware Horizon Client utilizing a dedicated channel over the connection to optimize the data exchange. With minor tweaks (check out my post on enhancing RTAV webcam with VMware Horizon), this actually worked quite well with the exception of microphone quality on the end-users side, and high bandwidth requirements.
Starting with Horizon View 7.13 and Horizon View 8 (2006), VMware Horizon now supports Microsoft Teams Optimization. This technology offloads the Teams call directly to the endpoint (or client device), essentially drawing over the VDI VM’s Teams visual interface and not involving the VDI Virtual Machine at all. The client application (or thin client) handles this and connects directly to the internet for the Teams Call. One less hop for data, one less processing point, and one less load off your server infrastructure.
Microsoft Teams Optimization uses WebRTC to function.
Deploying Microsoft Teams Optimization on VMware Horizon VDI
There are two components required to deploy Microsoft Teams Optimization for VDI.
Microsoft Specific Setup and Configuration of Microsoft Teams
VMware Specific Setup and Configuration for Microsoft Teams
We’ll cover both in this blog post.
Microsoft Specific Setup and Configuration of Microsoft Teams Optimization
First and foremost, do NOT bundle the Microsoft Teams install with your Microsoft 365 (Office 365) deployment, they should be installed separately.
We’re going to be installing Microsoft Teams using the “per-machine” method, where it’s installed in the Program Files of the OS, instead of the usual “per-user” install where it’s installed in the user “AppData” folder.
Non-persistent (Instant Clones) VDI requires Microsoft Teams to be installed “Per-Machine”, whereas persistent VDI can use both “Per-Machine” and “Per-User” for Teams. I use the “Per-Machine” for almost all VDI deployments. This allows you to manage versions utilizing MSIs and GPOs.
Please Note that when using “Per-Machine”, automatic updates are disabled. In order to upgrade Teams, you’ll need to re-install the newer version. Take this in to account when planning your deployment. If you use the per-user, it will auto-update.
For Teams Optimization to work, your endpoints and/or clients MUST have internet access.
Let’s Install Microsoft Teams (VDI Optimized)
For Per-Machine (Non-Persistent Desktops) Install, use the following command:
And that’s it for the Microsoft Specific side of things!
VMware Specific Setup and Configuration for Microsoft Teams Optimization
When it comes to the VMware Specific Setup and Configuration for Microsoft Teams Optimization, it’s a little bit more complex.
VMware Horizon Client Installation
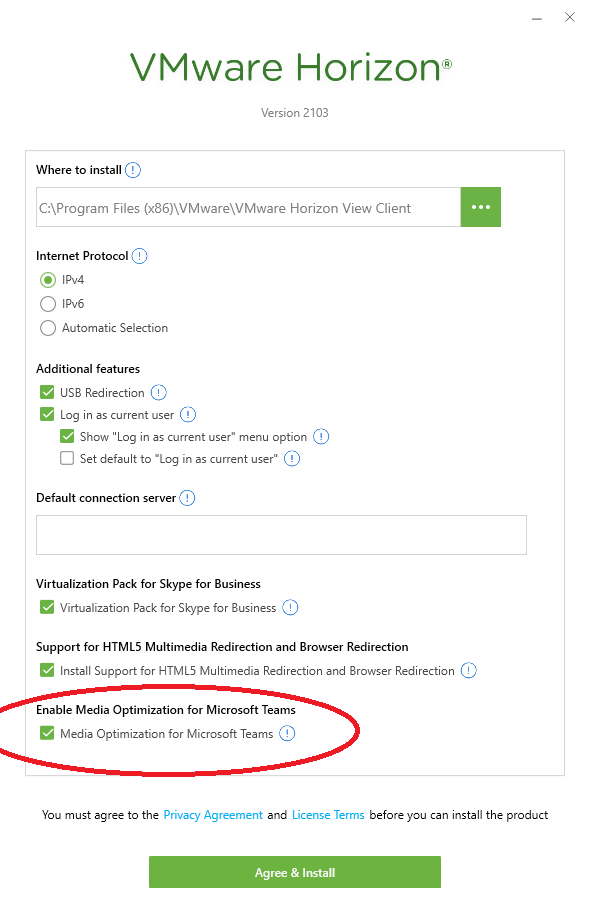
When installing the VMware Horizon Client, the Microsoft Teams optimization feature should be installed by default. However, doing a custom install, make sure that “Media Optimization for Microsoft Teams” is enabled (as per the screenshot below):
VMware View Client Install with Microsoft Teams Optimization
Group Policy Object to enable WebRTC and Microsoft Teams Optimization
You’ll only want to configure GPOs for those users and sessions where you plan on actually utilizing Microsoft Teams Optimization. Do not apply these GPOs to endpoints where you wish to use RTAV and don’t want to use Teams optimization, as it will enforce some limitations that come with the technology (explained in Microsoft’s documentation).
We’ll need to enable VMware HTML5 Features and Microsoft Teams Optimization (WebRTC) inside of Group Policy. Head over and open your existing VDI GPO or create a new GPO. You’ll need to make sure you’ve installed the latest VMware Horizon GPO Bundle. There are two switches we need to set to “Enabled”.
Expand the following, and set “Enable HTML5 Features” to “Enabled”:
Next, we’ll set “Enable Media Optimization for Microsoft Teams” to “Enabled”. You’ll find it in the following:
Computer Configuration -> Policies -> Administrative Templates -> VMware View Agent Configuration -> VMware HTML5 Features -> VMware WebRTC Redirection Features -> Enable Media Optimization for Microsoft Teams
And that’s it, you’re GPOs are now configured.
If you’re running a persistent desktop, run “gpupdate /force” in an elevated command prompt to grab the updated GPOs. If you’re running a non-persistent desktop pool, you’ll need to push the base image snapshot again so your instant clones will have the latest GPOs.
Confirming Microsoft Teams Optimization for VDI
There’s a simple and easy way to test if you’re currently running Microsoft Teams Optimized for VDI.
Open Microsoft Teams
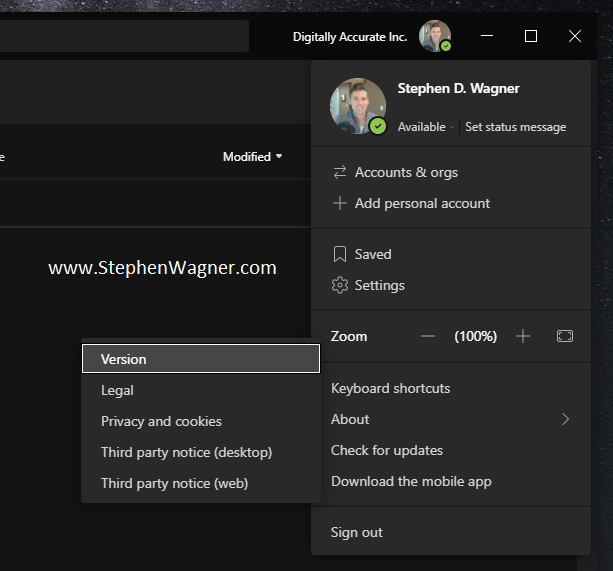
Click on your Profile Picture to the right of your Company Name
Expand “About”, and select “Version”
Microsoft Teams – About and Version to check Teams Optimization for VDI
After selecting this, you’ll see a toolbar appear horizontally underneath the search, company name, and your profile picture with some information. Please see the below examples to determine if you’re running in 1 of 3 modes.
The following indicates that Microsoft Teams is running in normal mode (VDI Teams Optimization is Disabled). If you have configured VMware RTAV, then it will be using RTAV.
Microsoft Teams VDI Optimization disabled
The following indicates that Microsoft Teams is running in VDI Optimized mode (VDI Teams Optimization is Enabled showing “VMware Media Optimized”).
Microsoft Teams VDI Optimization enabled
The following indicates that Microsoft Teams is configured for VDI Optimization, however is not functioning and running in fallback mode. If you have VMware RTAV configured, it will be falling back to using RTAV. (VDI Teams Optimization is Enabled but not working showing “VMware Media Not Connected”, and is using RTAV if configured).
Microsoft Teams VDI Optimization Fallback
If you’re having issues or experiencing unexpected results, please go back and check your work. You may also want to review Microsoft’s and VMware’s documentation.
Conclusion
This guide should get you up and running quickly with Microsoft Teams Optimization for VDI. I’d recommend taking the time to read both VMware’s and Microsoft’s documentation to fully understand the technology, limitations, and other configurables that you can use and fine-tune your VDI deployment.
Looking to repurpose old PCs or laptops in to VDI Thin Clients (or Zero Clients)? Looking at implementing VDI but don’t have the budget for fancy Thin Clients or Zero Clients? Look no further! 10ZiG RepurpOS (also known as RPOS) allows you to repurpose PCs and laptops as VDI client endpoints.
You get all the power of a thin client, but built in to a piece of software that you can install on traditional x86 PC hardware. This means you don’t have to throw away semi-new hardware when rolling out your VDI deployment, it also means you can repurpose old hardware that was destined for recycling.
Read the post, or scroll down to watch the video!Please note that the screenshots may be a bit blurry since they were captured from the video recording.
The Software
10ZiG RepurpOS (RPOS) is built on Linux, similar to their NOS OS for Zero Clients. It install’s like an operating system on traditional x86 computer systems, and turns them in to a fully functioning Thin Client which can be used for VDI.
Pros of the Software
Easy installation
Installs on x86 hardware (PCs, Laptops)
Supports most VDI Technologies (VMware, Citrix, RDP/VDA)
You can also contact me (or 10ZiG) for a free 10ZiG Repurposing Trial.
Demonstration
Below you’ll see a demonstration video of the 10ZiG RepurpOS (RPOS) in action, followed further below by a text review of the software.
10ZiG RepurpOS (RPOS) Software Video Demonstration
The continuation of this blog post features the different segments of the video.
Setup and Configuration
Getting started is easy… You’ll be provided with a compressed archive that contains an ISO file (which you can burn to CD), or you can use an executable provided that will write the ISO to a USB stick, so you can boot the computer from that.
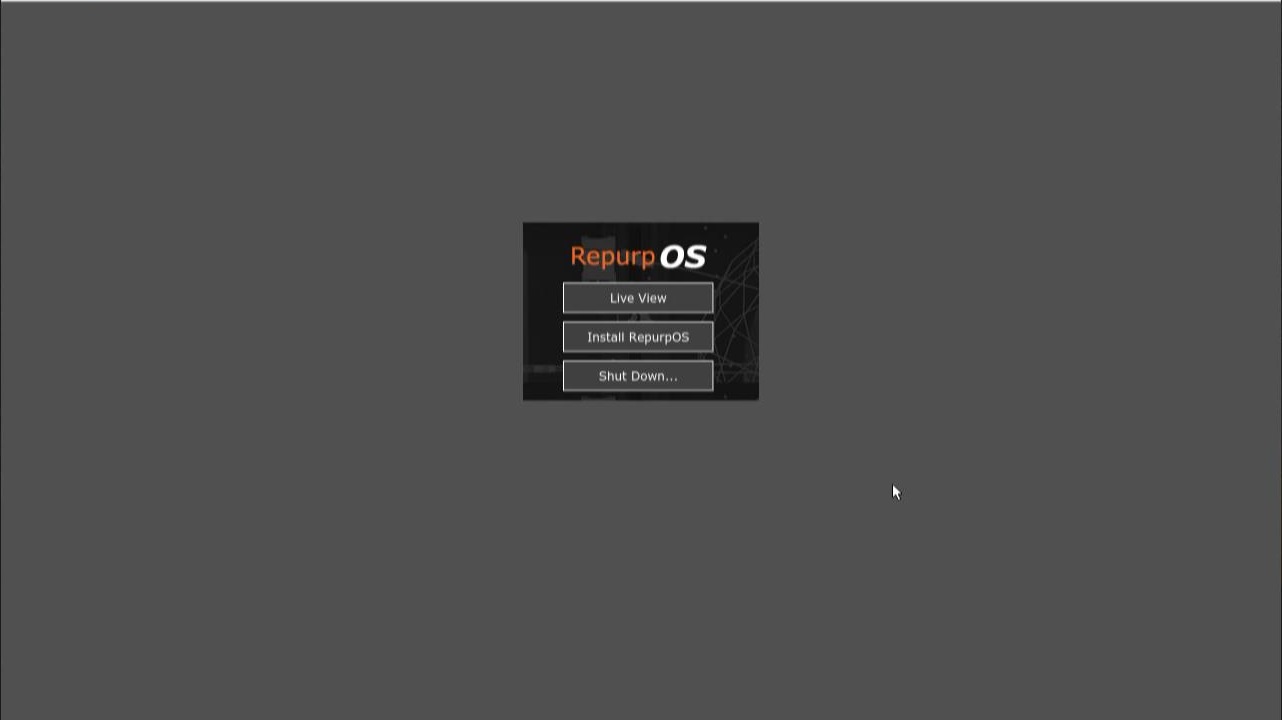
After booting the installer, you’ll see a very simple interface to get started.
10ZiG RepurpOS (RPOS) Installer
You’ll note that you have the capability of both running a Live Instance as a Live CD, or you can choose to install the 10ZiG repurposing software to the hard drive disk.
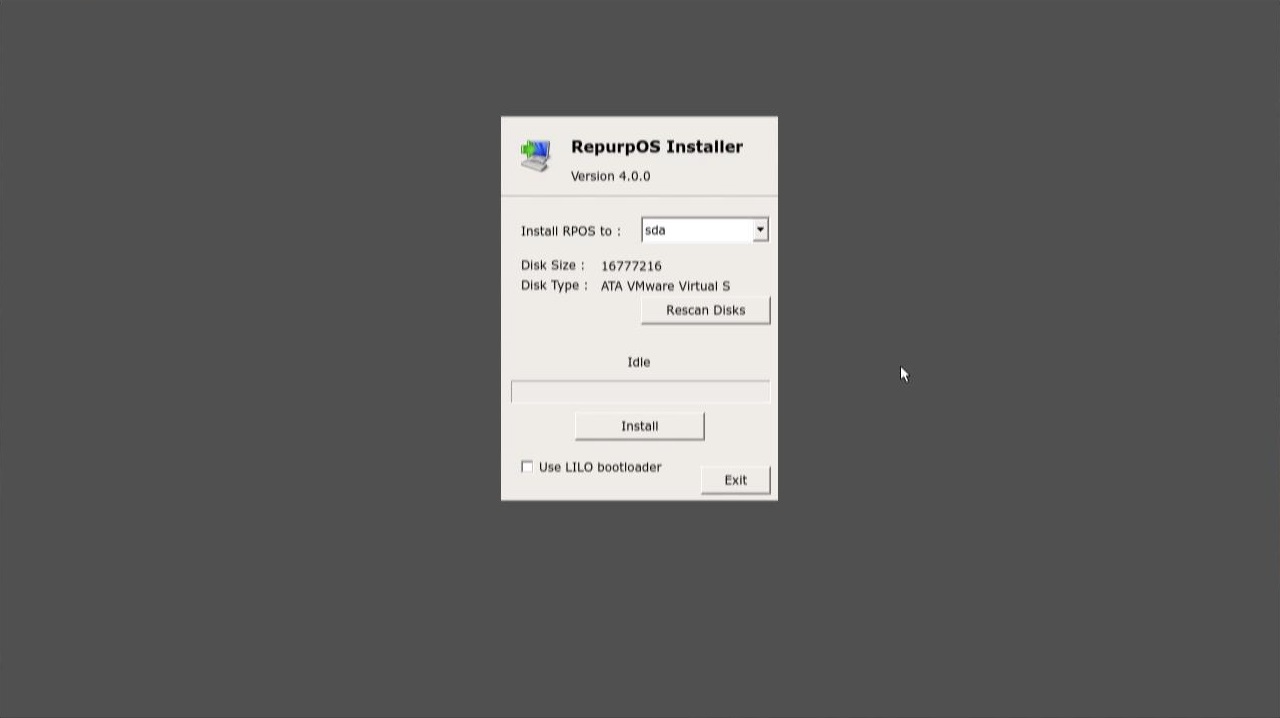
After choosing to “Install RepurpOS”, you select the disk and hit “Install”.
Install the 10ZiG RepurpOS (RPOS) to disk
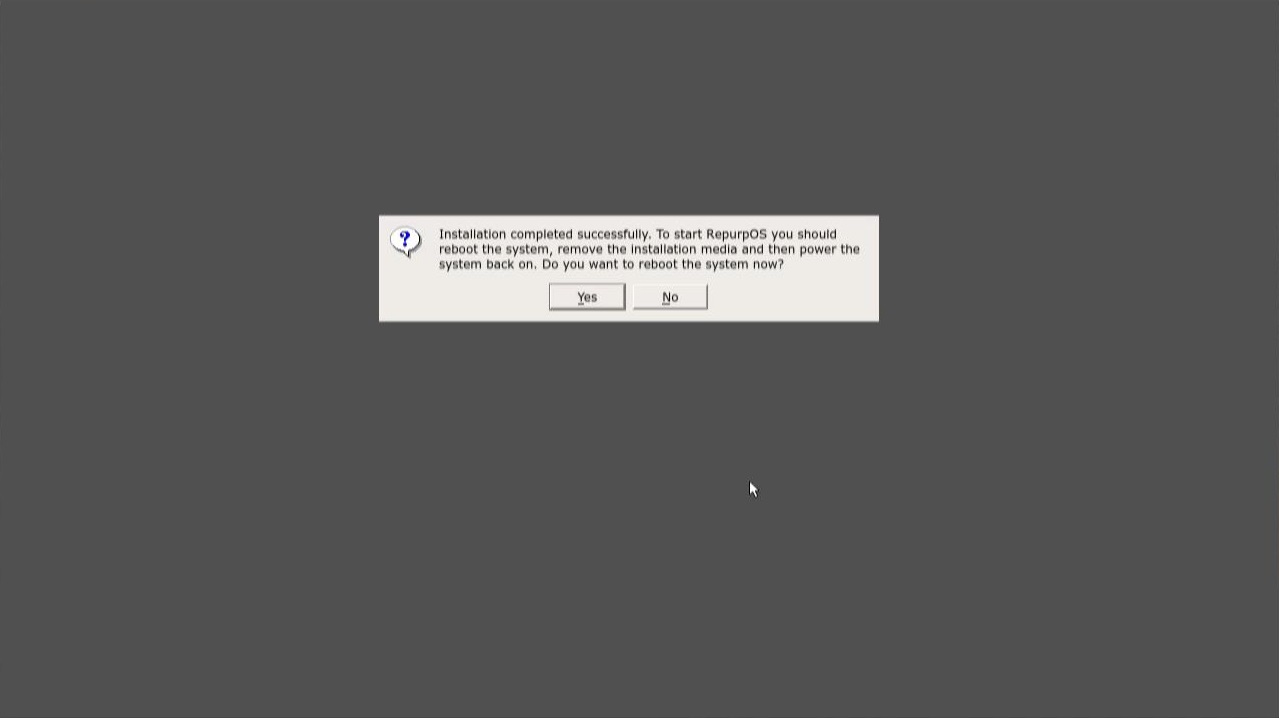
After a few moments, the install will complete. You’ll hit “Exit” and then restart the PC.
10ZiG RepurpOS Installed
10ZiG RepurpOS Reboot after Installation
Interface and Usage
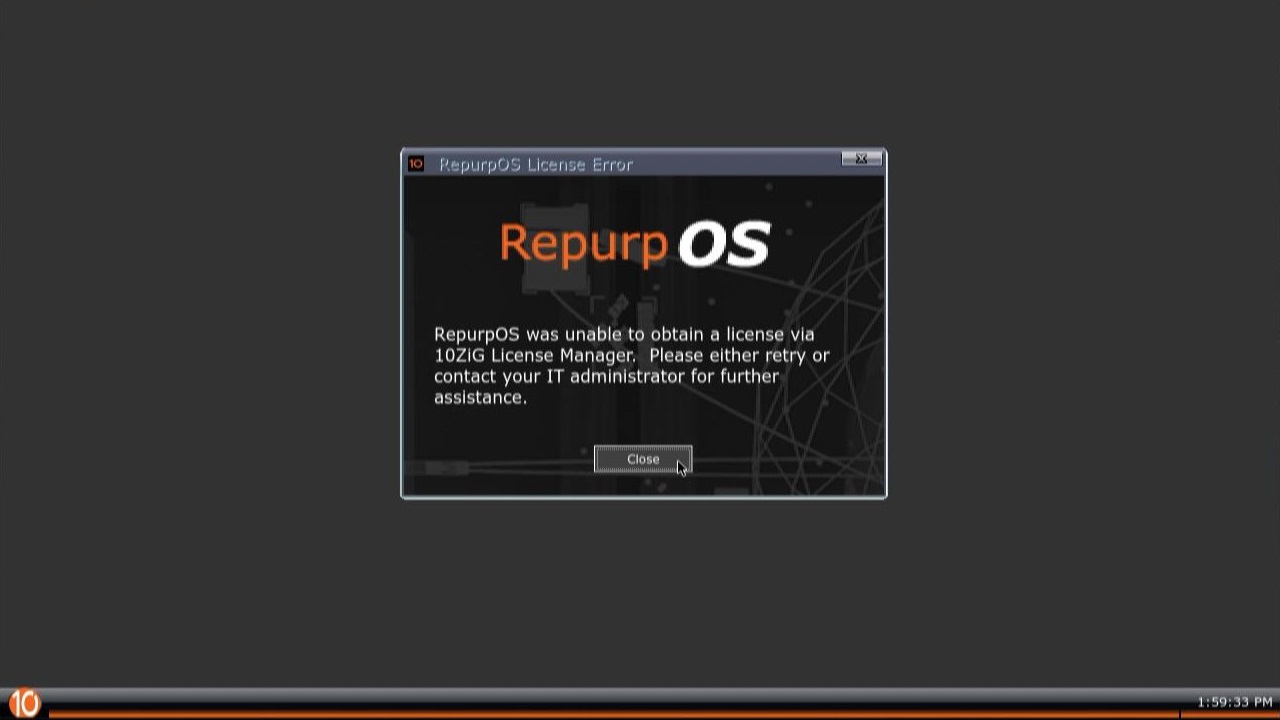
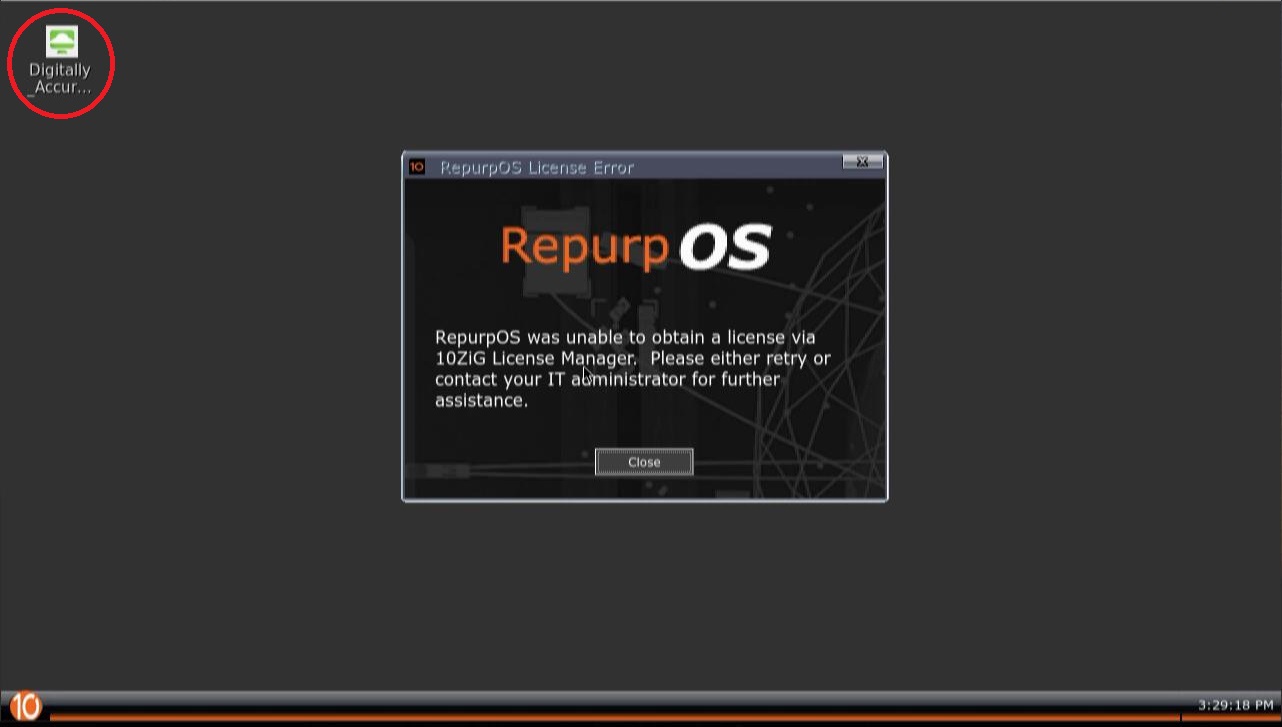
On first boot, you’ll notice the PC repurposing software has a very simple look and interface. We started off with a licensing message since we are using a demo.
10ZiG RepurpOS (RPOS) unable to obtain a license
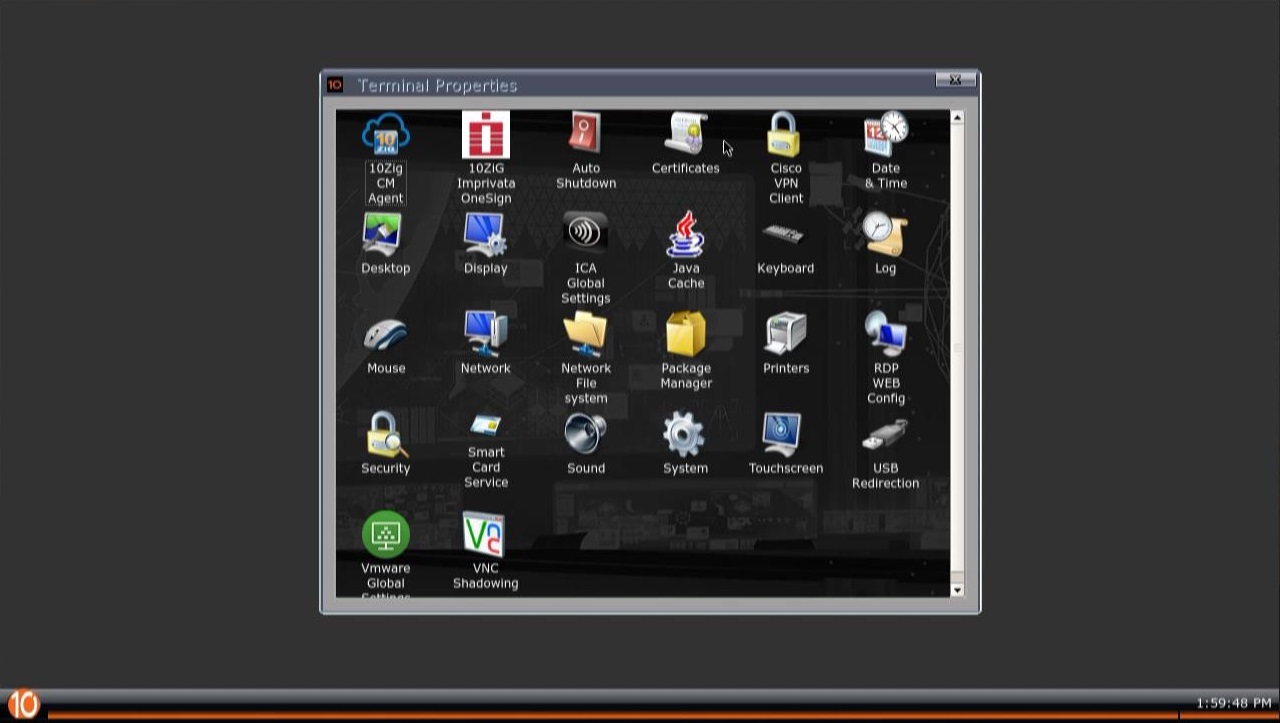
To get started, theres a simple “Start menu”-like interface that allows you to configure and use the client. You can configure the thin client settings, or configure and add connections.
10ZiG RepurpOS (RPOS) Programs
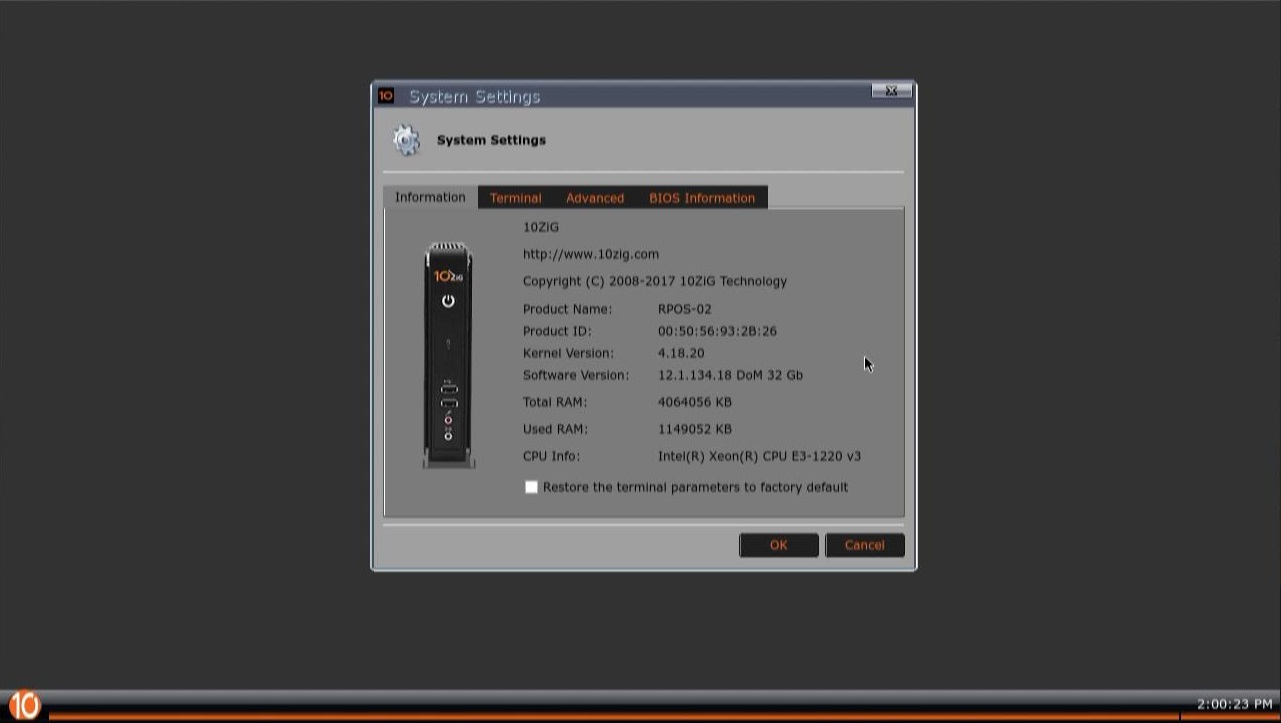
And we have the settings menu.
10ZiG RepurpOS (RPOS) Settings Menu
I want you to keep in mind that while you can configure and use the 10ZiG RPOS software from this interface, in a large corporate environment you’d probably want to use the 10ZiG Manager software, and lock out the interface.
10ZiG RepurpOS Configuration and 10ZiG Manager Compatibility
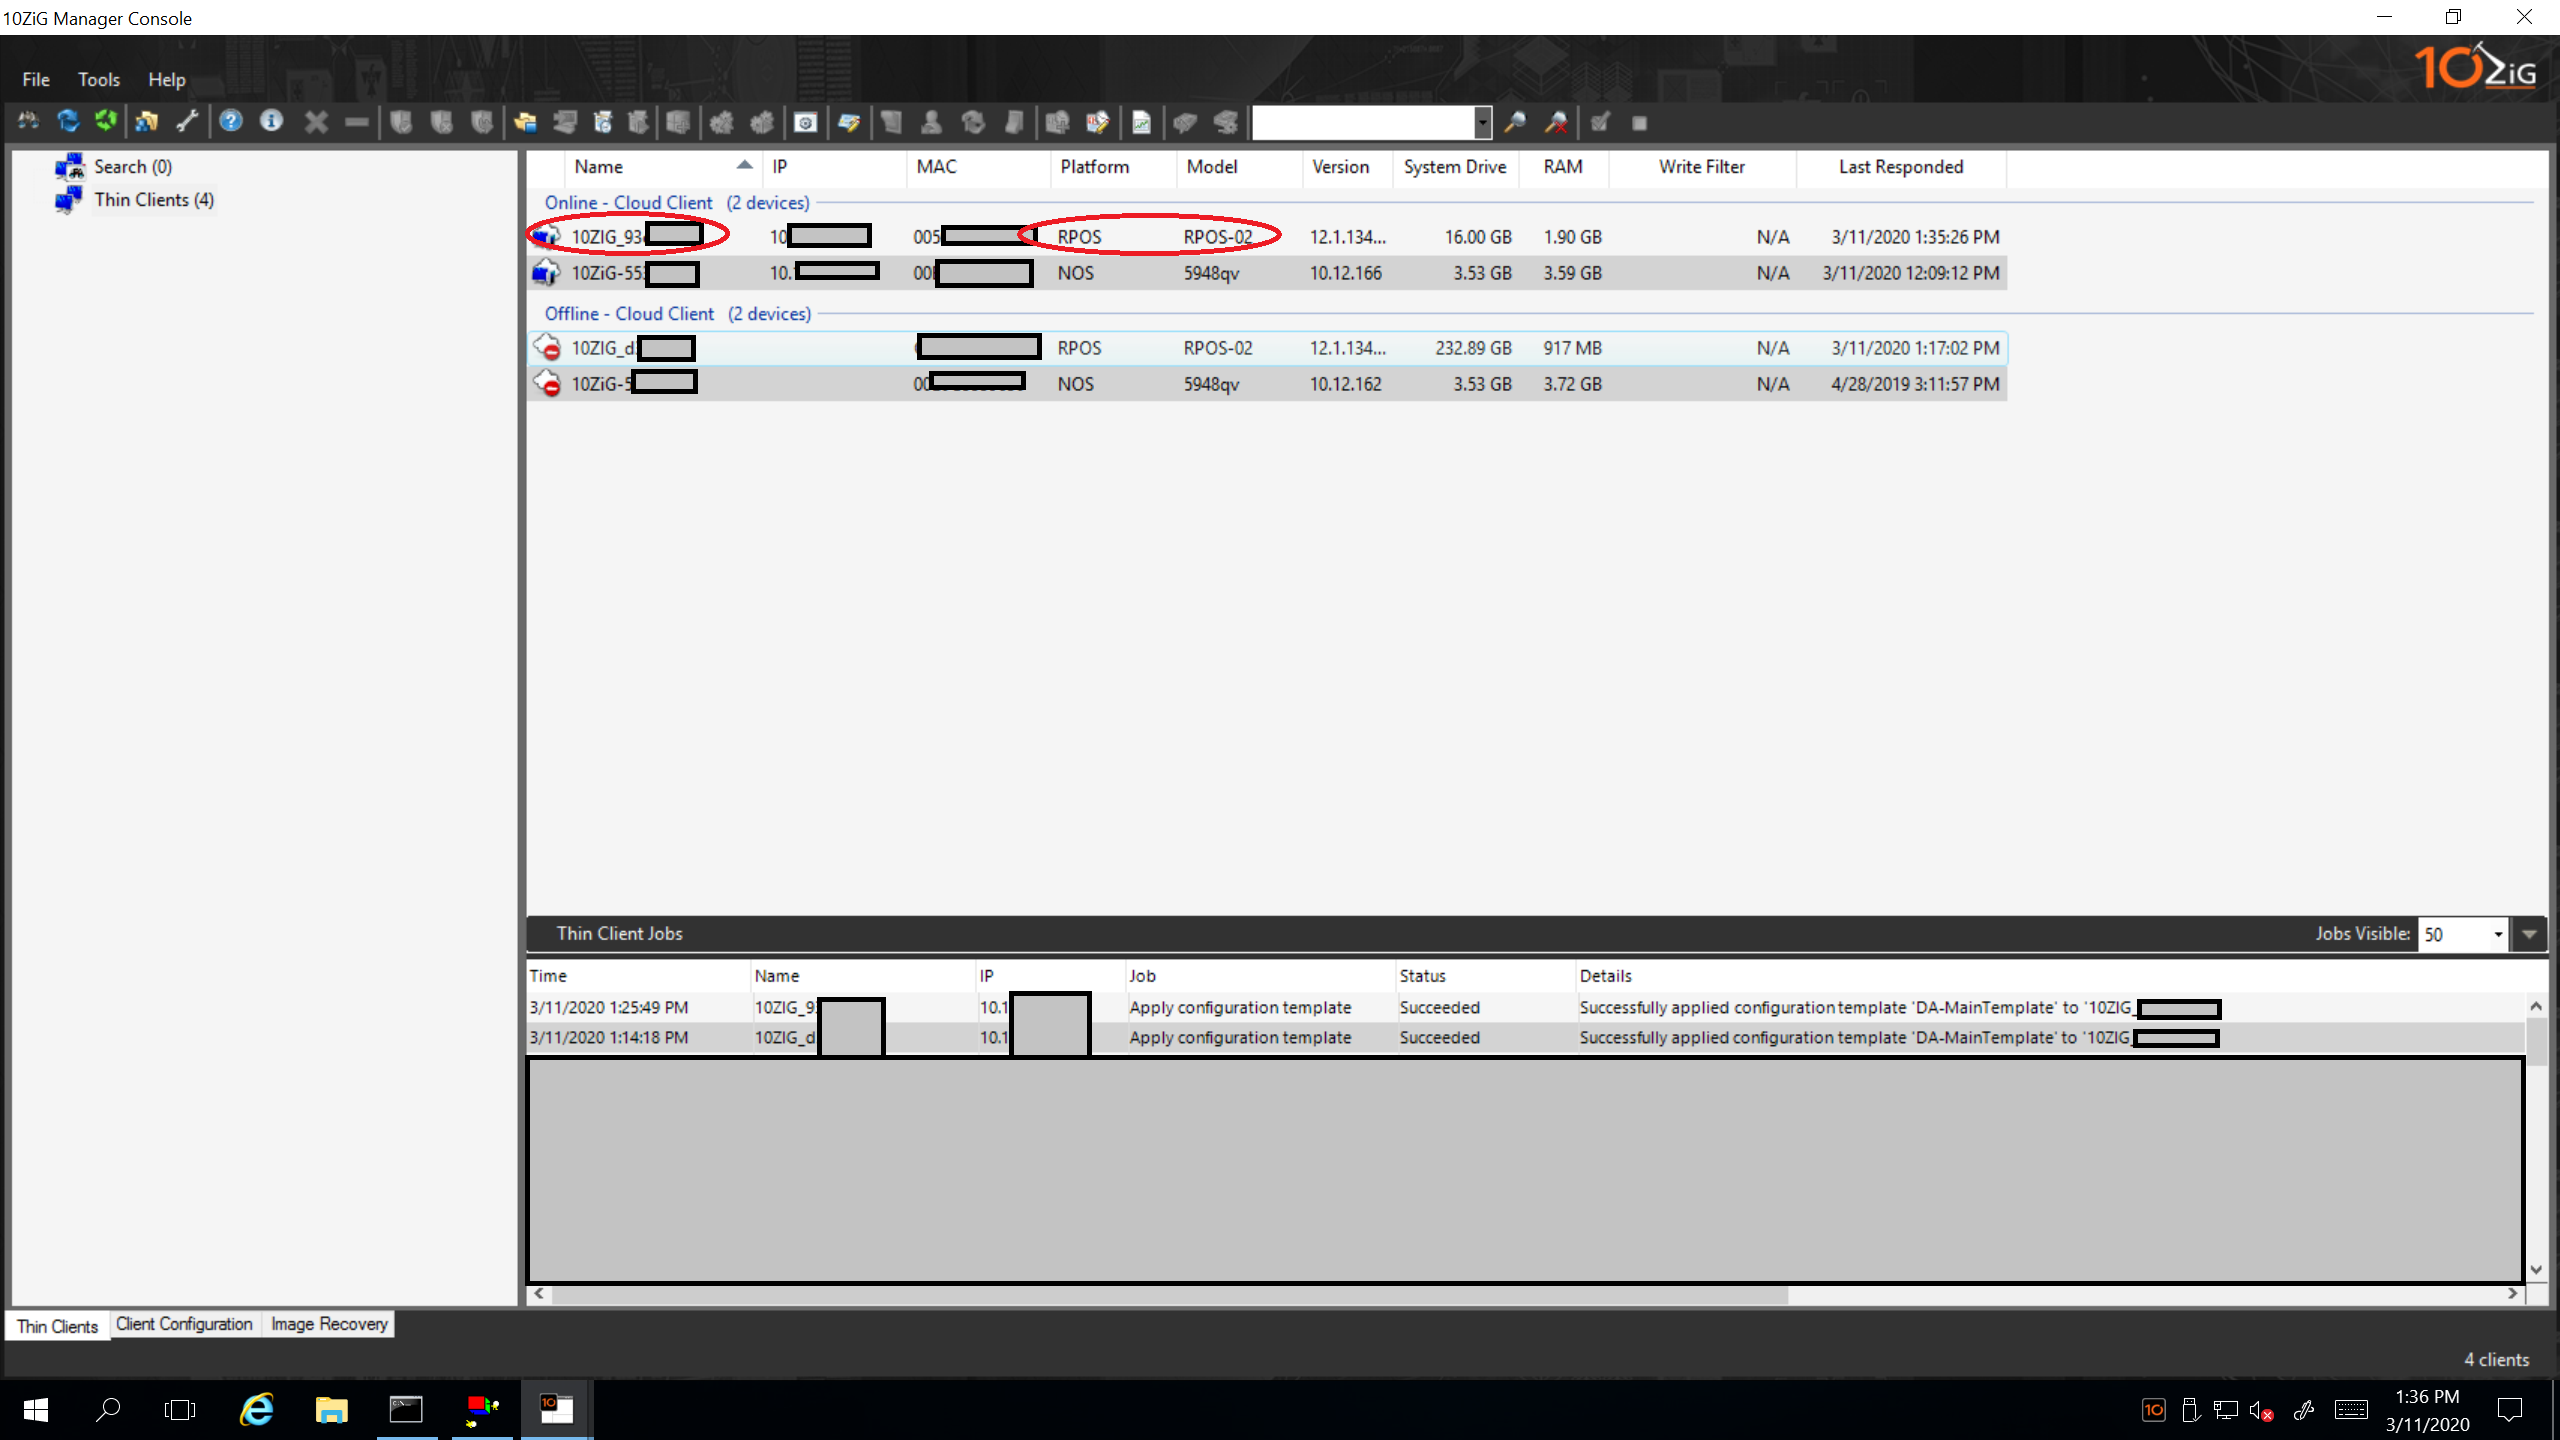
All components of this software can be managed and configured via the 10ZiG Manager, just like the 10ZiG 5948qv and other 10ZiG Zero Clients. This makes the software extremely powerful since you can easily manage and maintain it, even if you have thousands of repurposed PCs running RPOS.
Inside of the 10ZiG Manager, the RPOS devices show up similar to how the other 10ZiG Thin clients and Zero clients would appear.
10ZiG RepurpOS (RPOS) with RPOS and NOS Clients
You can see above that I pushed my main configuration template to the RPOS demo devices. For more posts on 10ZiG Manager, please see the following posts:
As part of my main template, I have included SSL certificates for my VMware Horizon View connection server, so we’ll be able to test a VDI connection using BLAST.
Using the guides for the 10ZiG Manager above, you could fully configure the RPOS the way you want (for mass deployment), and then create a template and deploy it to a large batch of RPOS PCs. Or you could do all the initial configuration directly from the 10ZiG Manager.
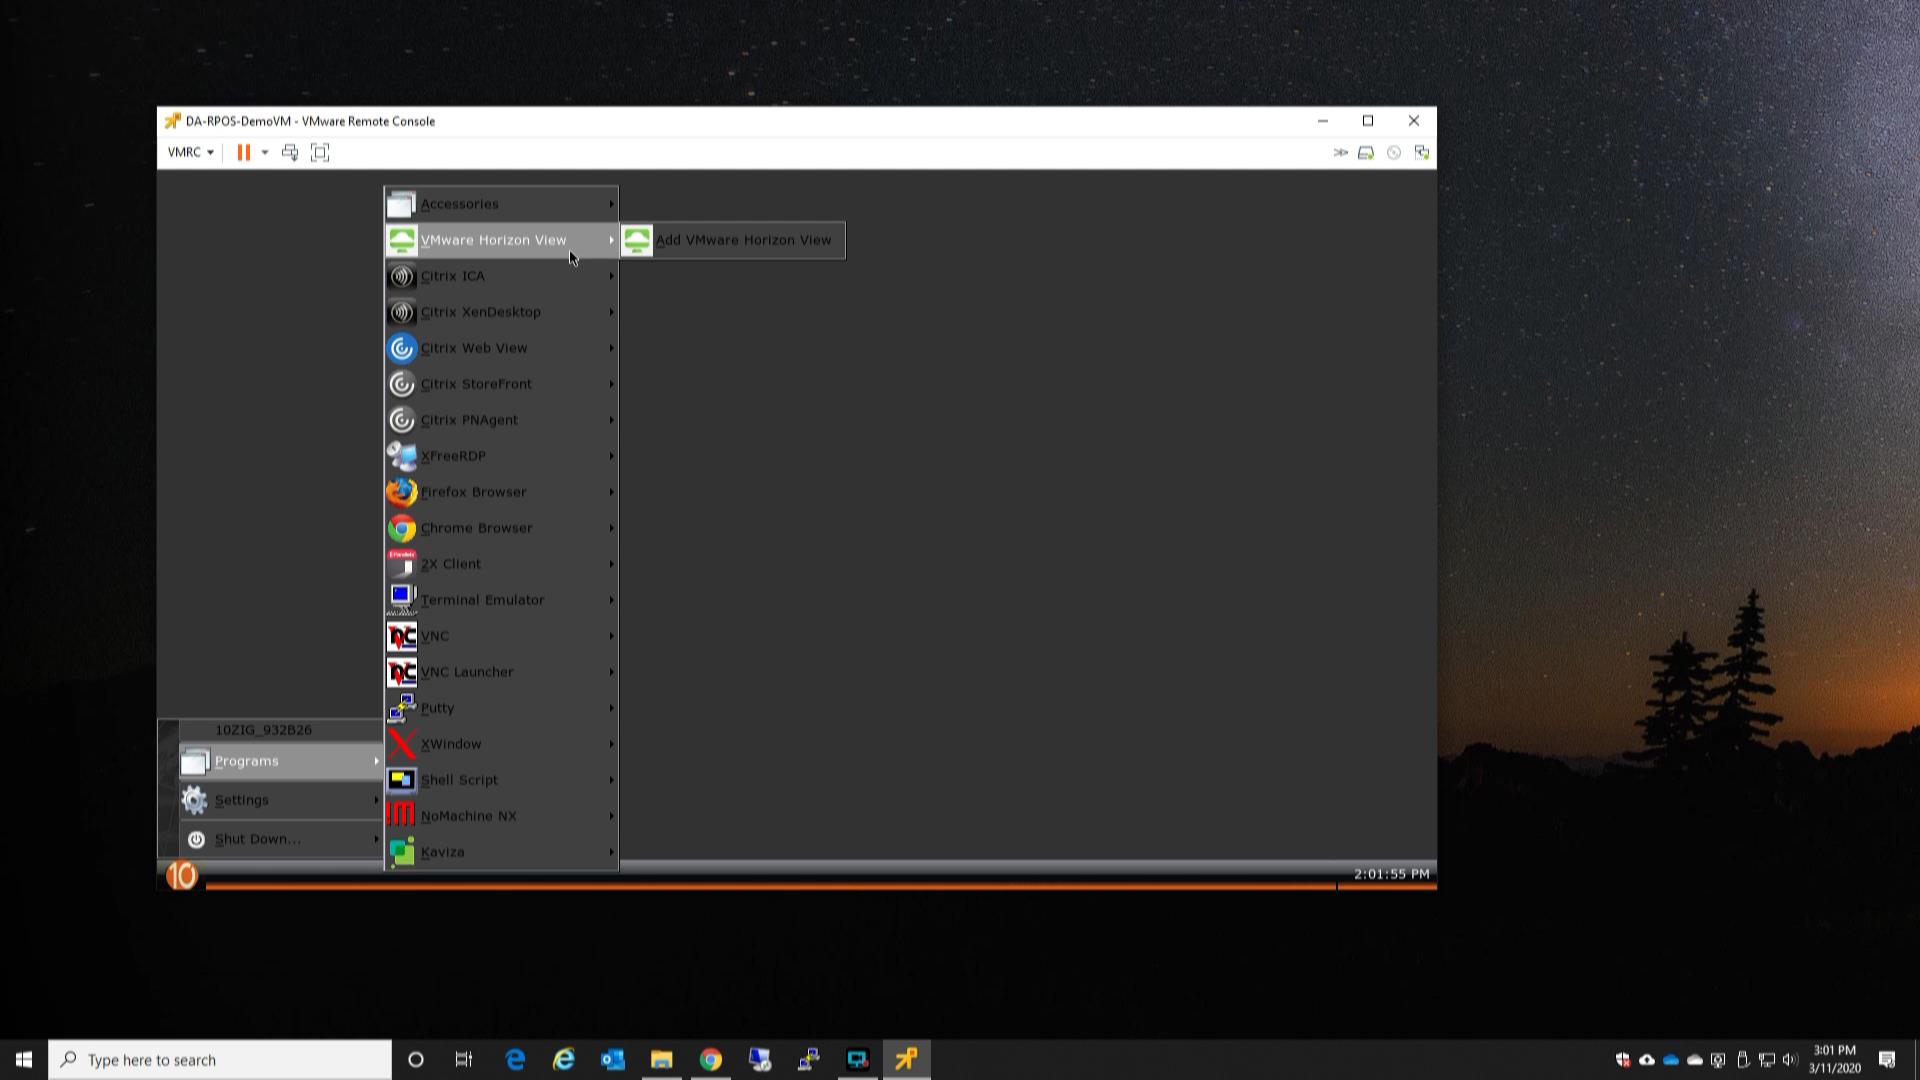
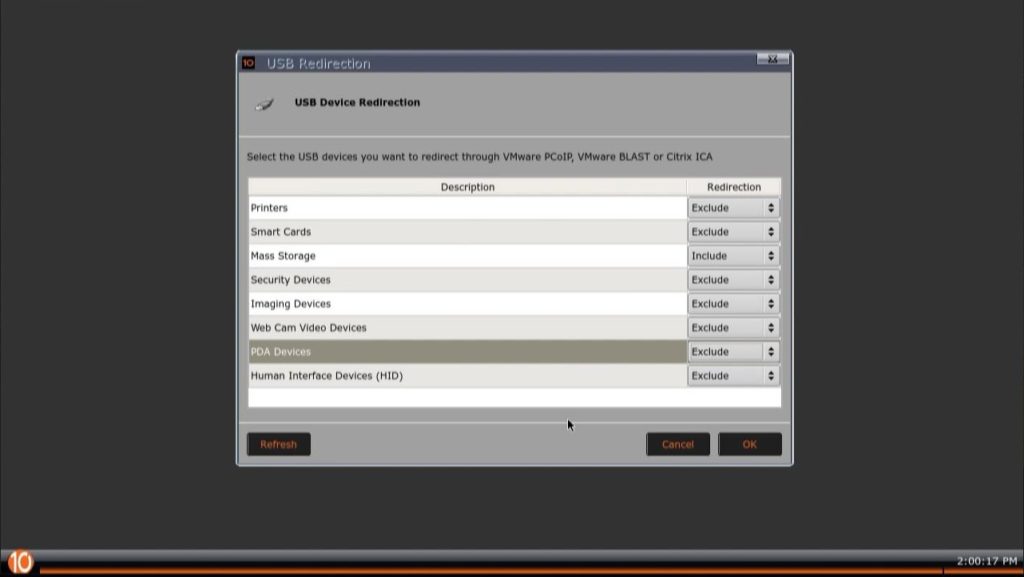
The software supports a number of different protocols and technologies.
10ZiG RepurpOS (RPOS) Programs List
The list of applications and programs on 10ZiG RepurpOS (RPOS)
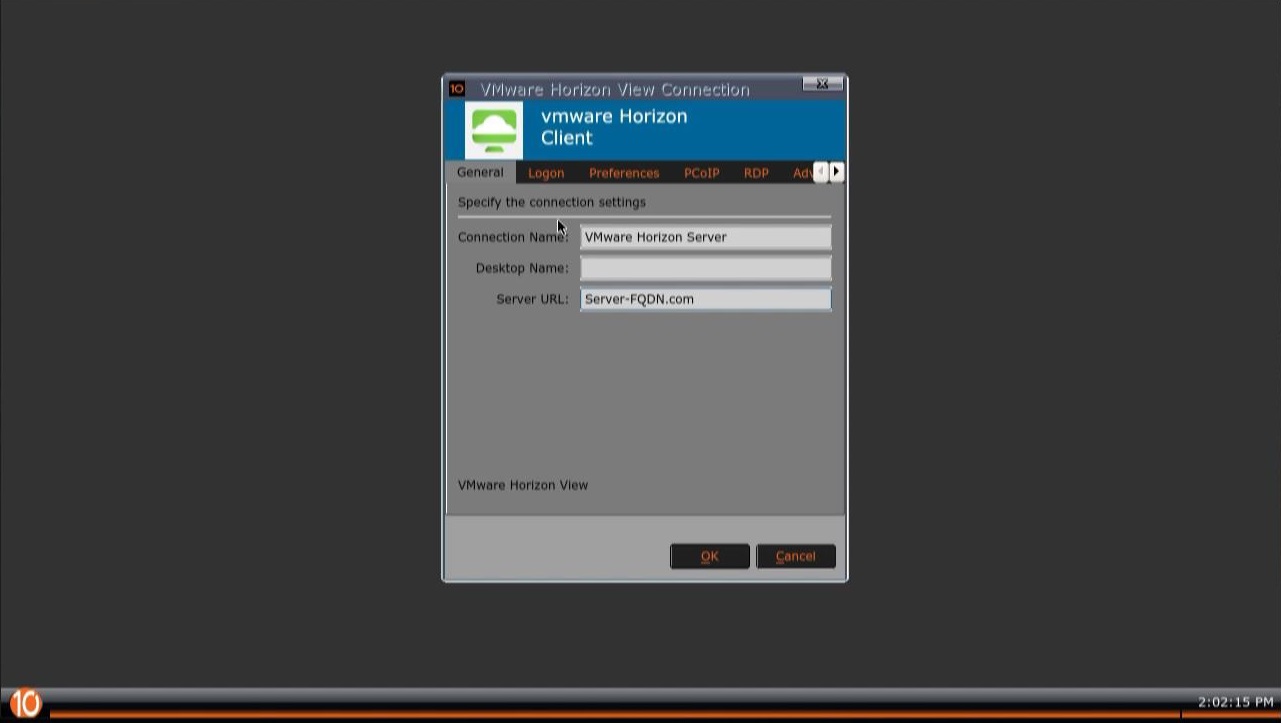
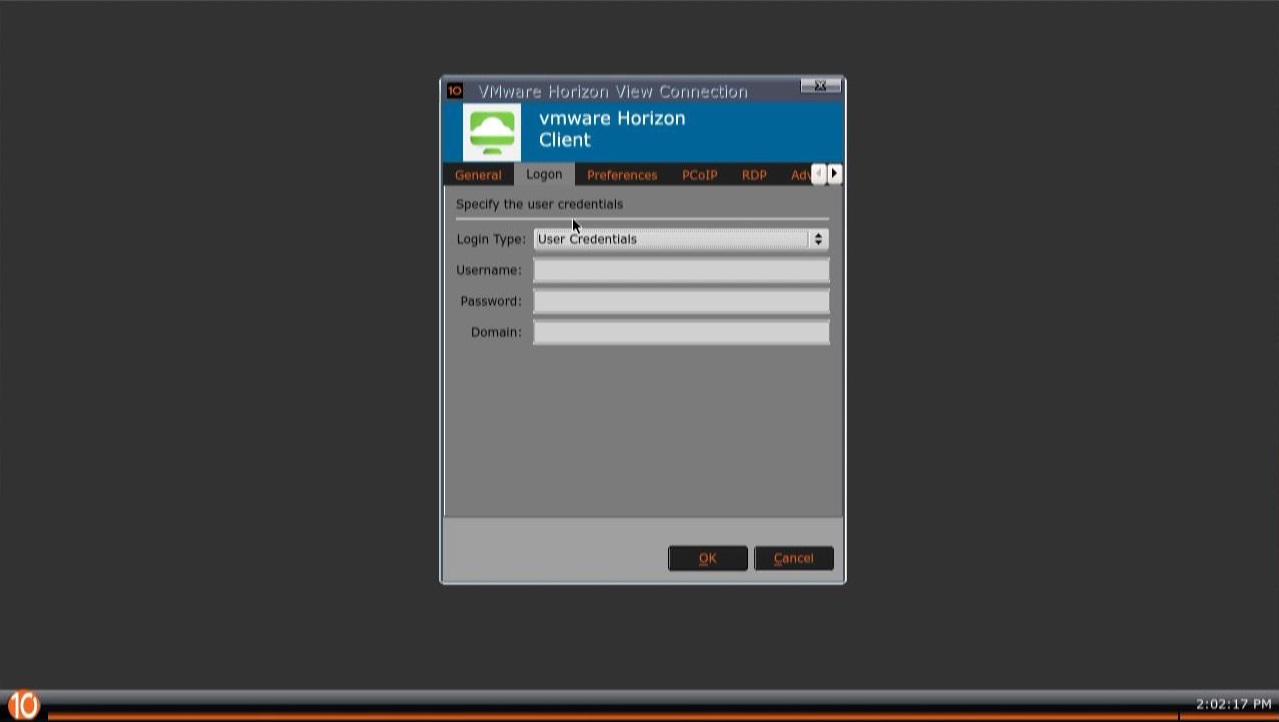
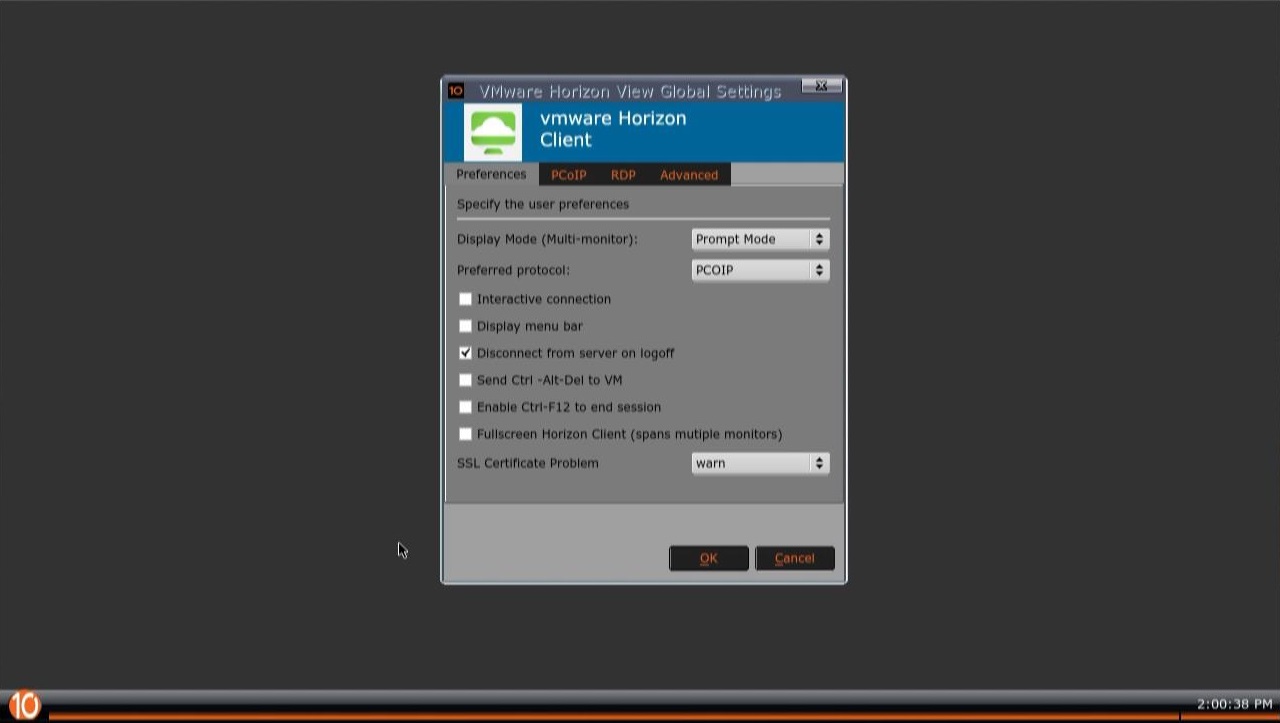
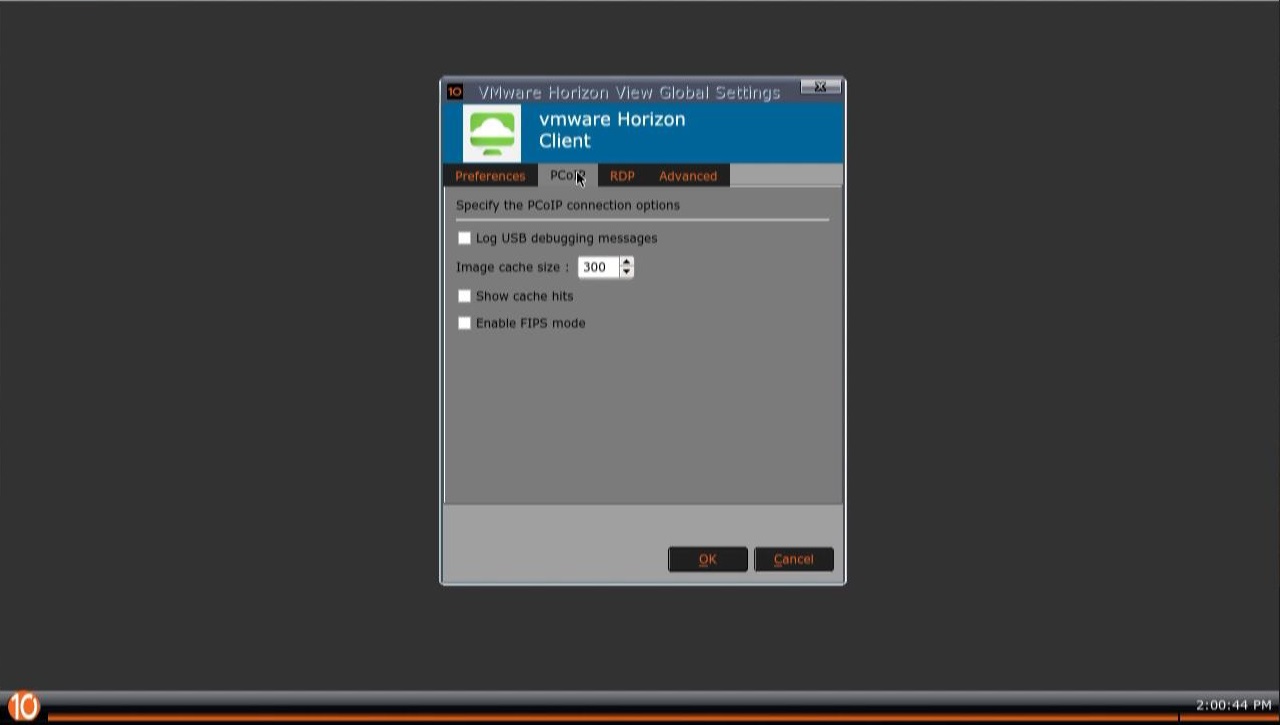
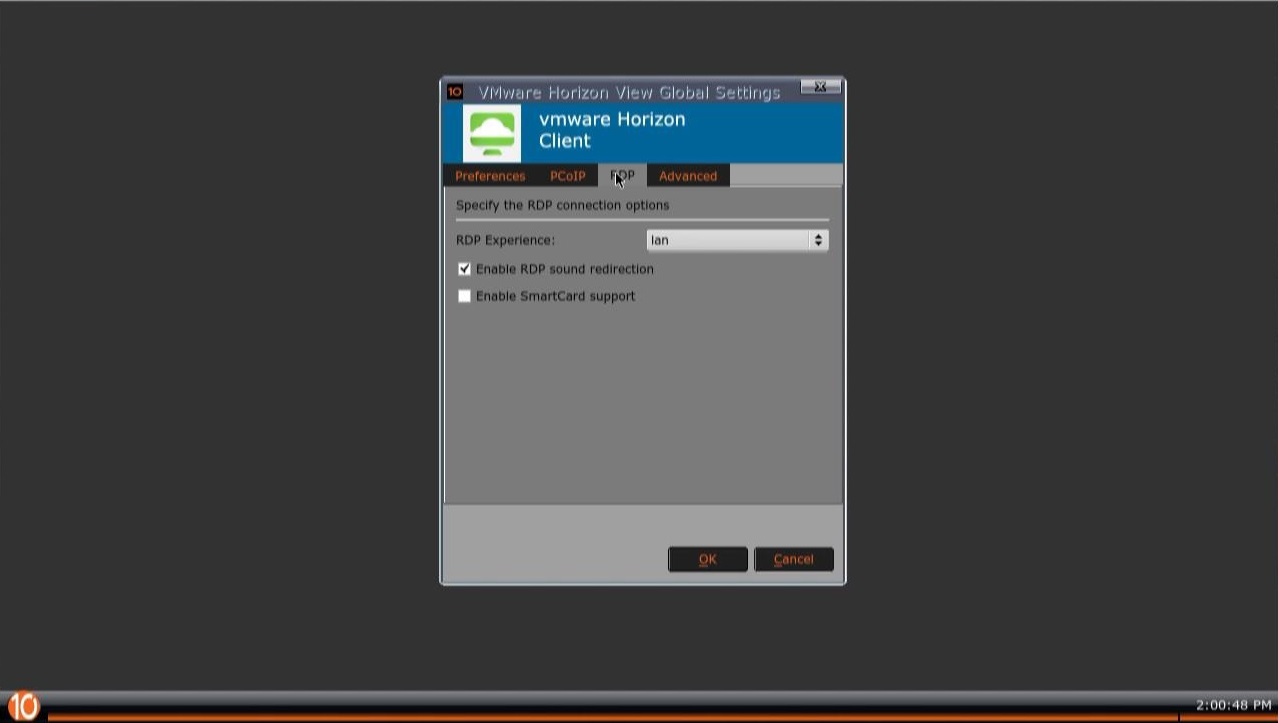
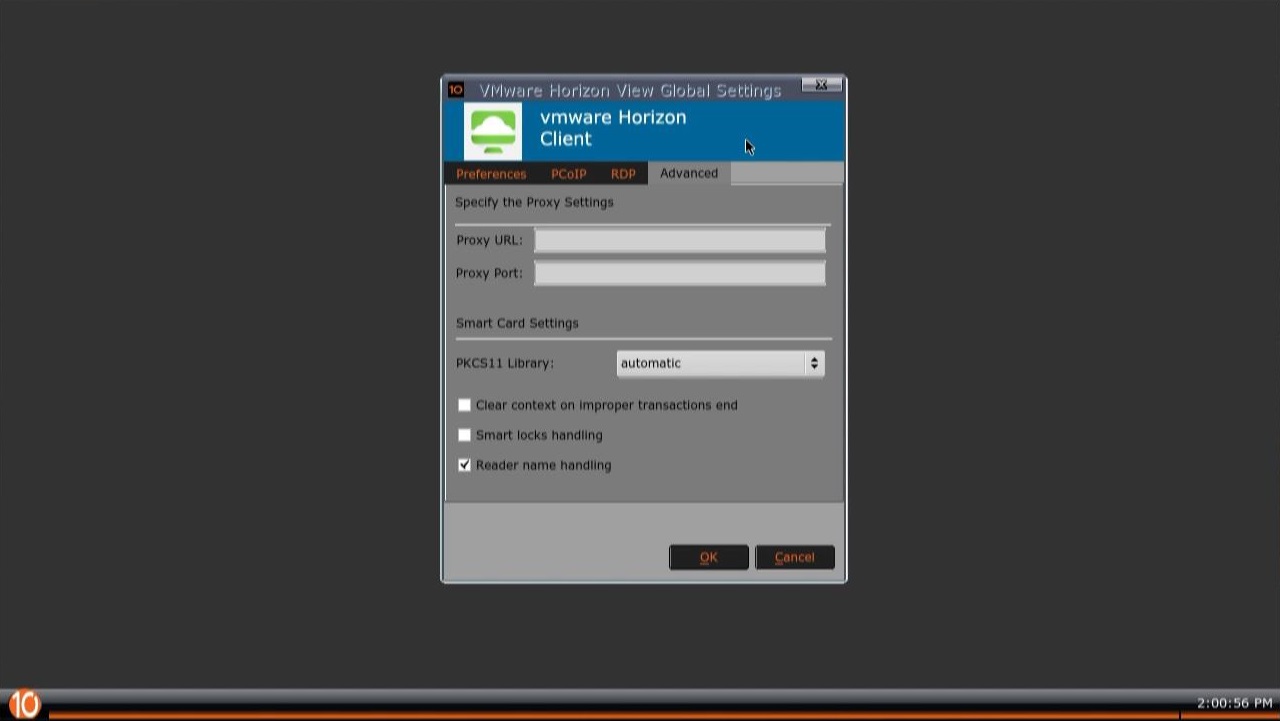
And below we have the VMware Global Settings window.
10ZiG RepurpOS (RPOS) VMware Global Preferences10ZiG RepurpOS (RPOS) VMware Global PCoIP Settings10ZiG RepurpOS (RPOS) VMware Global RDP Settings10ZiG RepurpOS (RPOS) VMware Global Advanced Settings10ZiG RepurpOS (RPOS) VMware Global Settings
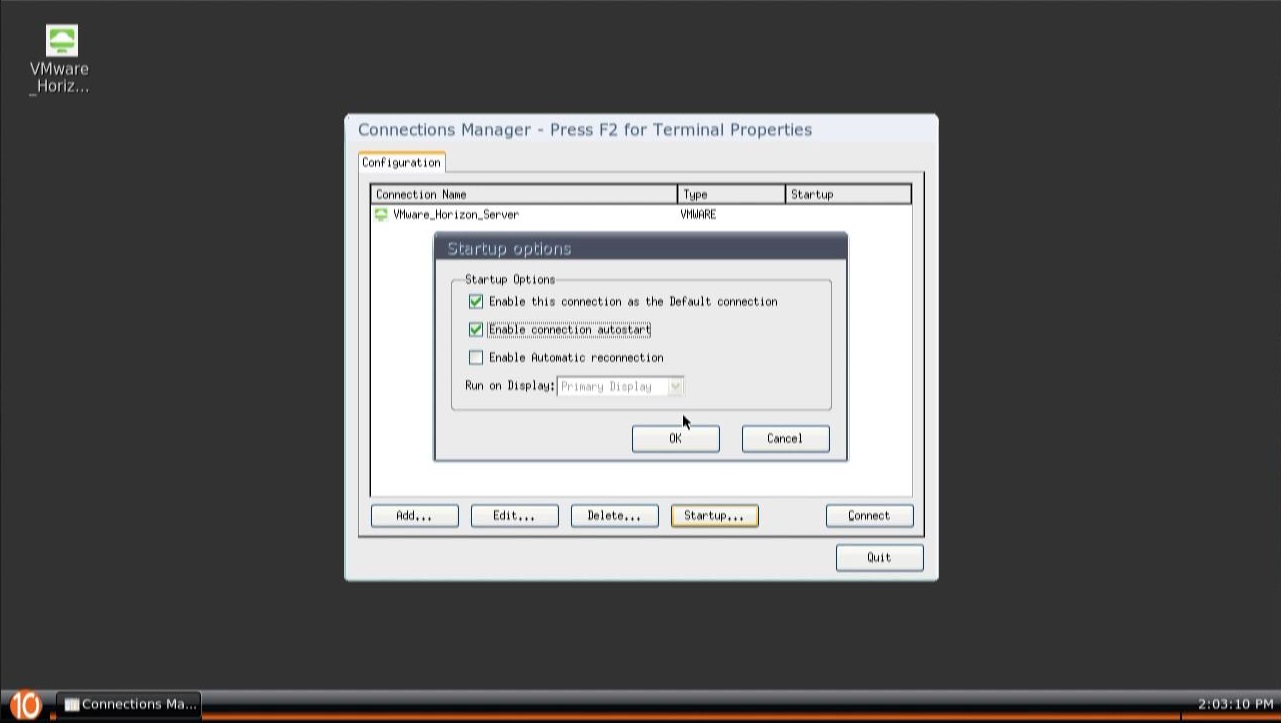
We also have the ability to configure the default connection from the Connection Manager. We can also configure whether we want auto-start a connection and enable automatic reconnection.
10ZiG RepurpOS (RPOS) Connections Manager and Startup options
On a final note, you can see there is multi-display support built in. This is more apparent when browsing through other sections of the UI on the 10ZiG RPOS.
VDI Connection Testing
It’s time to test out the main functionality of the 10ZiG RepurpOS (RPOS) software!
I’ve gone ahead and created a connection profile for my company “Digitally Accurate Inc.” to access our VDI environment.
10ZiG RepurpOS (RPOS) with Connection Profile to Digitally Accurate Inc.
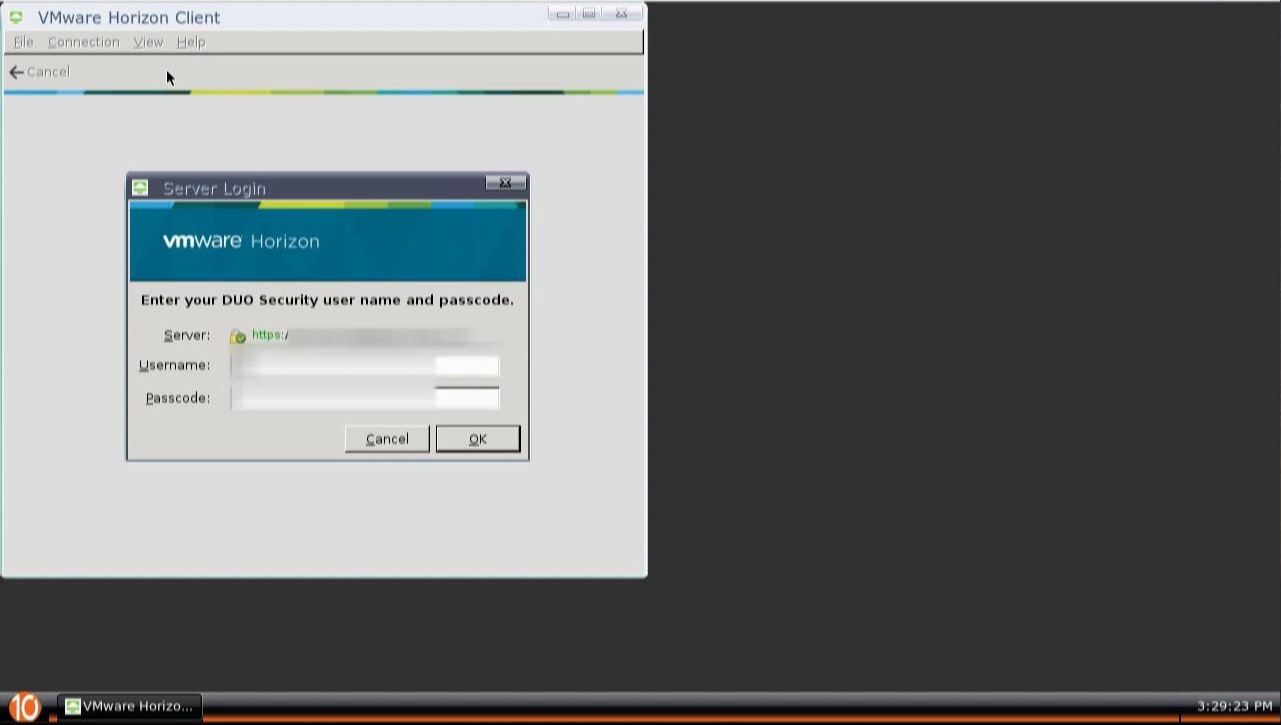
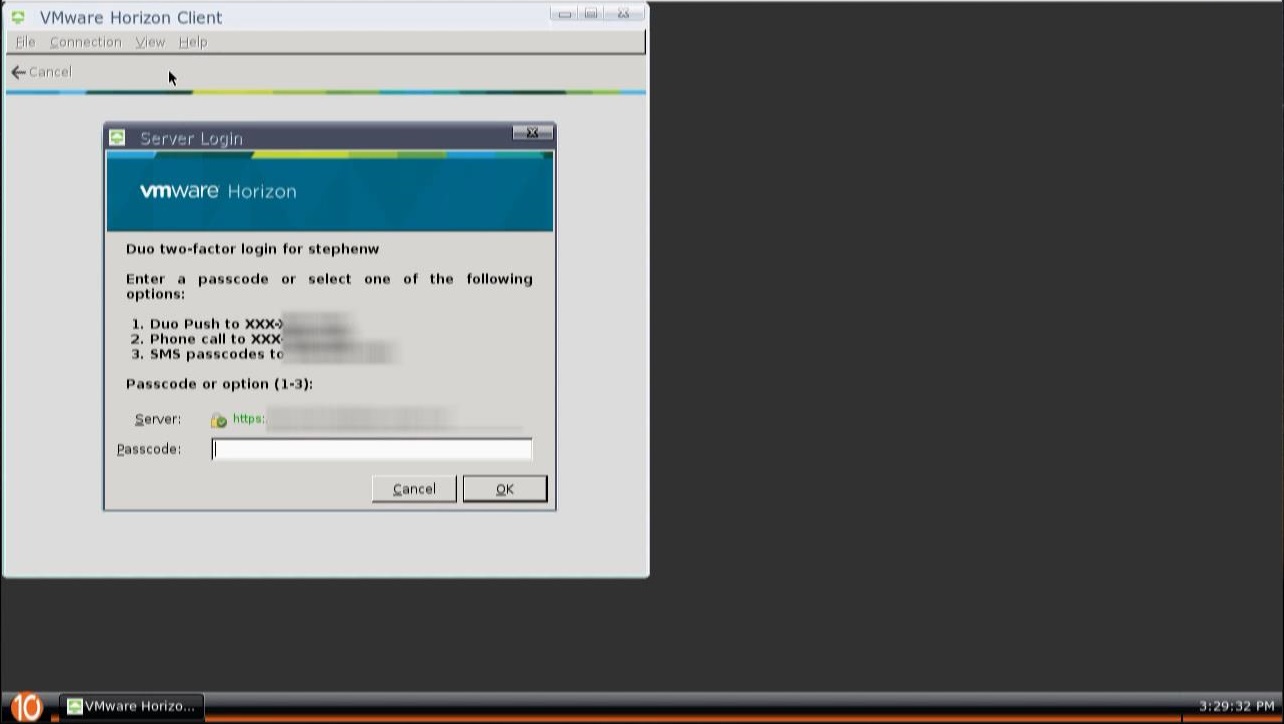
Double clicking that icon, initiates the session. We login with my credentials.
10ZiG Horizon DUO Login10ZiG Horizon DUO Challenge10ZiG RepurpOS (RPOS) Horizon View with DUO MFA Login
And here we are presented with the available desktop pools. Please note, that you can configure it to automatically connect to a chosen desktop pool, or if only one is available it will automatically connect.
And finally, we have a fully functional connection to our VDI environment on our VMware Horizon View environment using the 10ZiG repurposing software.
10ZiG RepurpOS (RPOS) with active VDI session on VMware Horizon View
Again, please note that the screenshots may be a little fuzzy due to the capture from video, the interface in reality is sharp and clear.
Conclusion
In conclusion, the 10ZiG RepurpOS (RPOS) software is a great way to bring life to old or existing hardware, reduce spending during a VDI rollout, and bring value to your investment.
Further backing up that investment, is the ability to use the 10ZiG Manager which is free, and can be used to manage a large number of devices.
I’d highly recommend this software and I look forward to using it more!
Lately, I’ve been playing with video editing and encoding as a new hobby. It requires a powerful system for the production process for both editing, and encoding. While CPU power isn’t necessarily important, the CPU instruction sets and your GPU play a key part with editing and encoding.
For the last few weeks, I’ve been attempting to use my desktop rig with a couple of Nvidia GeForce cards and I’ve been struggling to be able to edit in real time, as well as encode completed video productions in a reasonable amount of time.
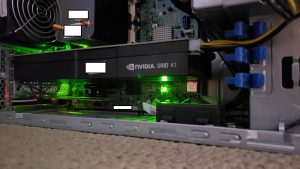
As part of my demo and homelab, I have an HPE ML310e Gen8 v2, with an Nvidia Grid K1 card. This setup is backed with an HPE MSA 2040 SAN for main storage and a Synology DS1813+ for backup and video storage.
It’s a beautiful desktop replacement as it’s silent, provides a desktop backed with a Intel Xeon Processor, and a high performance GPU.
VDI Video Editing and Encoding
For software, I’ve been using Cyberlink’s PowerDirector software. I’ve used this in the past for screen recording, as well as editing videos I use for demos.
On my physical desktop rig, even with two GPUs it struggles to allow me to preview in realtime the edits I’ve done on a project. The preview window is jolty with loss frames, and it’s hard to know what you’re doing. Also, when producing and encoding a finalized video project, it would take forever to complete even a small 5 minute video at 1080p.
When I first loaded this up on my VDI environment, the software instantly detected the Nvidia GRID card, and asked me if it could use it. From that point on the preview window was fluid, transitions and add-ins were rendered on the fly during previewing, and the final production encoding was literally over 20 times faster using 1080p. Keep in mind this VM only has one Nvidia K180q profile attached to it, so I’m only using less than 25% of the cards full capability.
Other benefits to video editing and encoding on VDI
There’s some other benefits that can be realized when doing video editing and encoding inside of a VDI environment:
Ability to connect remotely and work anywhere
Ability to work anywhere with a high performance system
High speed video storage on demand (since it’s all remote)
It can become part of your normal backup solution
This is just another great use case scenario for VDI. Whether it’s for the video professional, or a large organization.
You have VMware Horizon View deployed along with Duo Multi-Factor Authentication (2FA, MFA), and you’re you having user experience issues with 10ZiG Zero Clients and multiple login dialog boxes and planning on how to deal with the MFA logins.
I spent some time experimenting with numerous different settings trying to find the cleanest workaround that wouldn’t bother the user or mess up the user experience. I’m going to share with you what I came up with below.
If you’re interesting in 10ZiG products and looking to buy, don’t hesitate to reach out to me for information and/or a quote! We can configure and sell 10ZiG Zero Clients (and thin clients), help with solution design and deployment, and provide consulting services! We sell and ship to Canada and the USA!
The Issue
When you have DUO MFA deployed on VMware Horizon, you may experience login issues when using a 10ZiG Zero Client to access the View Connection Server. This is because the authentication string (username, password, and domain) aren’t passed along correctly from the 10ZiG Login Dialog Box to the VMware Horizon View Client application.
Additionally, when DUO is enabled on VMware View (as a RADIUS authentication), there is no domain passed along inside of the DUO login prompt on the view client.
This issue is due to limitations in the VMware Horizon View Linux Client. This issue will and can occur on any system, thin-client, or Zero Client that uses a command string to initialize a VMware View session where DUO is configured on the View Connection Server.
Kevin Greenway, the CTO at 10ZiG, reached out to say that they have previously brought this up with VMware as a feature request (to support the required functionality), and are hopeful it gets committed.
At this point in time, we’d like to recommend everyone to reach out to VMware and ask for this functionality as a feature request. Numerous simultaneous requests will help gain attention and hopefully escalate it on VMware’s priority list.
The Workaround
After troubleshooting this, and realizing that the 10ZiG VMware login details are completely ignored and not passed along to the VMware View client, I started playing with different settings to test the best way to provide the best user experience for logging in.
At first I attempted to use the Kiosk mode, but had issues with some settings not being passed from the 10ZiG Client to the View Client.
Ultimately I found the perfect tweaking of settings that created a seamless login experience for users.
The Settings
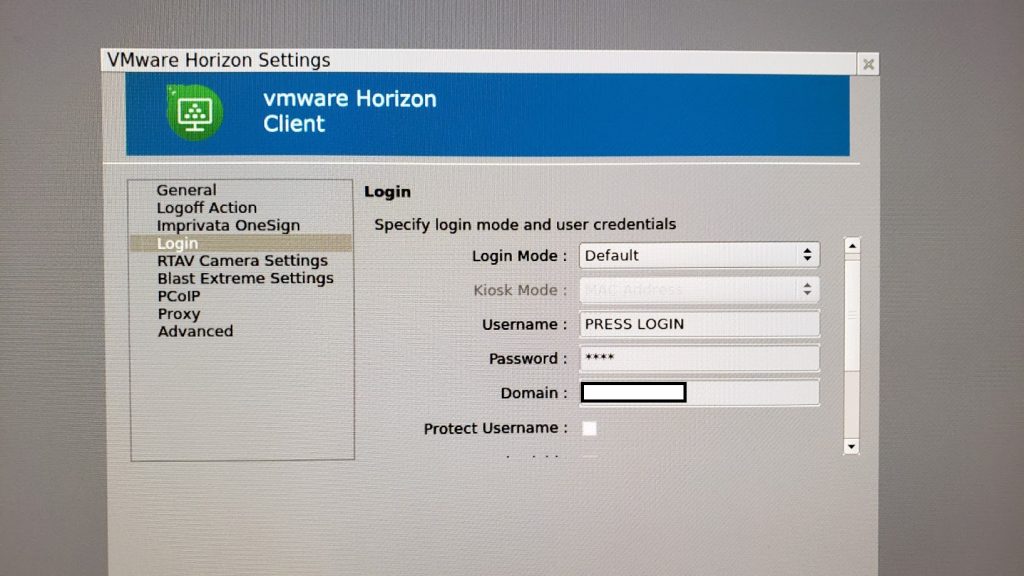
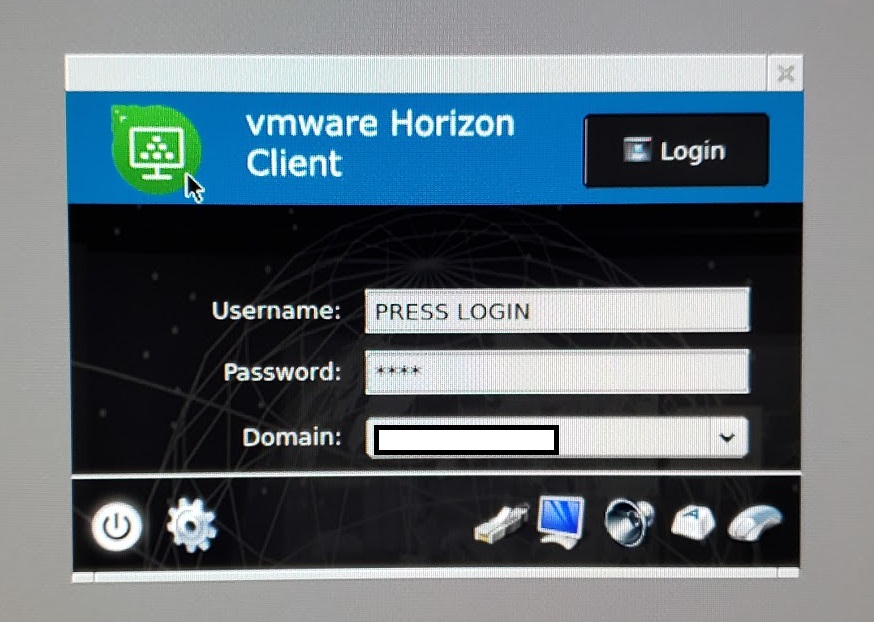
On the 10ZiG Zero Client, we view the “Login” details of the “VMware Horizon Settings” dialog box.
10ZiG Zero Client VMware Horizon Settings Login Settings
Login Mode: Default
Username: PRESS LOGIN
Password: 1234
Domain: YourDomain
Please Note: In the above, because DUO MFA is enabled, the “Username”, “Password” and “Domain” values aren’t actually passed along to the VMware View application on the Zero Client.
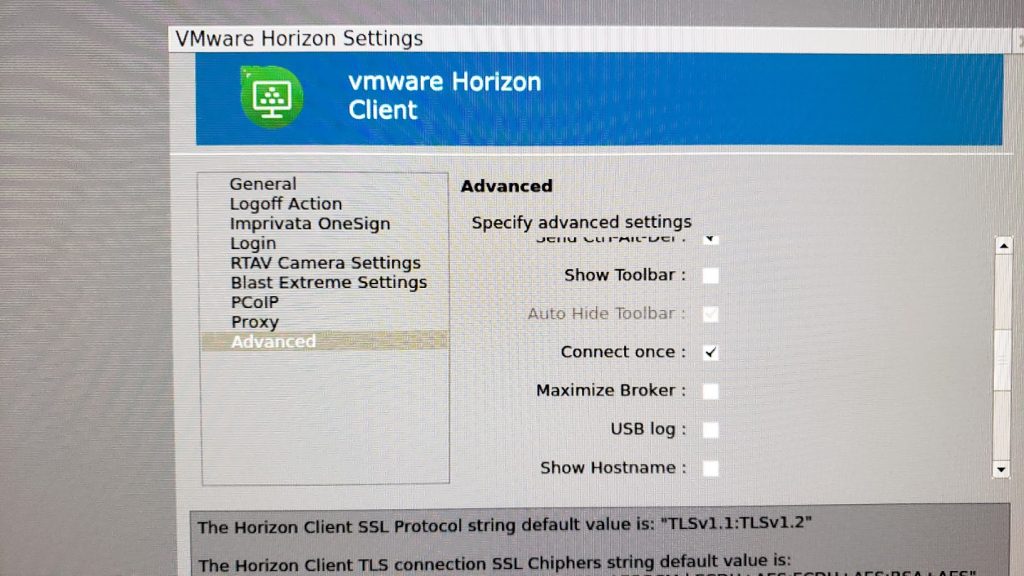
We then navigate to the “Advanced” tab, and enable the “Connect once” option. This will force a server disconnection (and require re-authentication) on a desktop pool logoff or disconnection.
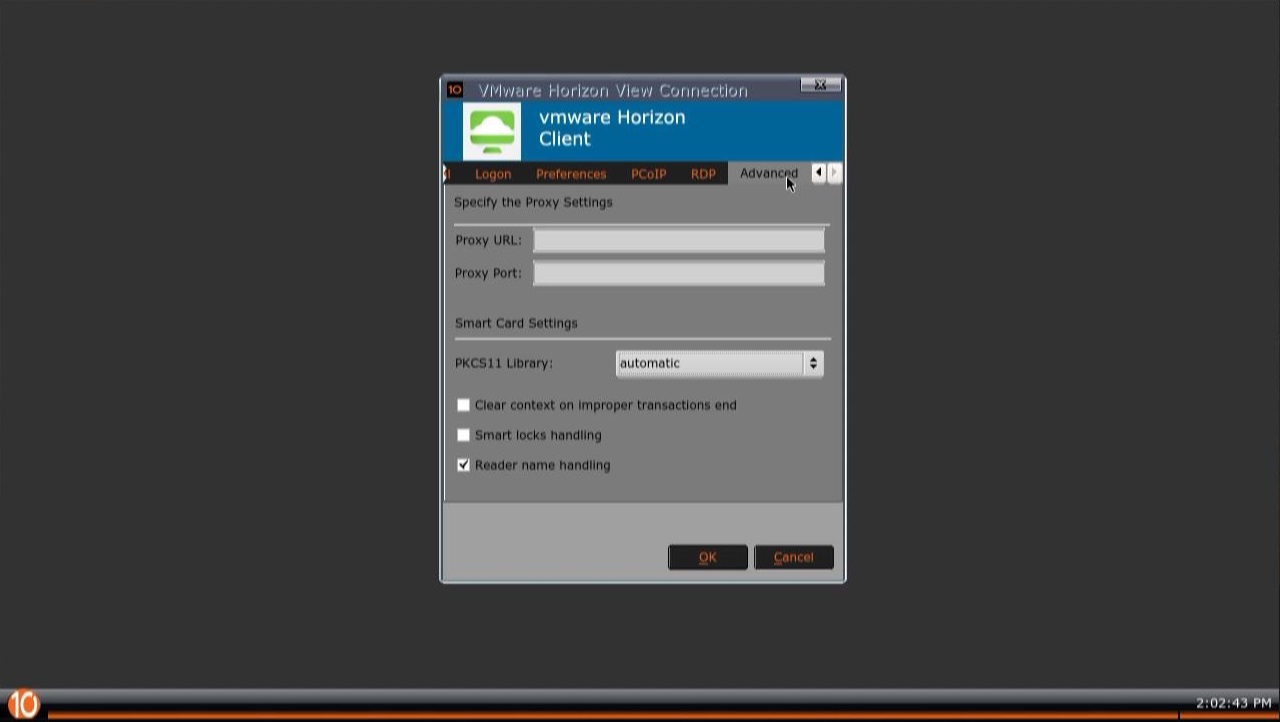
10ZiG Zero Client VMware Horizon Settings Advanced Settings
Please Note: This option is required so that when a user logs off, disconnects, or get’s cut off by the server, the Zero Client fully disconnects from the View Connection Server which causes re-authentication (a new password prompt) to occur.
The Login User Experience
So now that we’ve made the modifications to the Zero Client, I want to outline what the user experience will look like from Boot, to connection, to disconnection, to re-authentication.
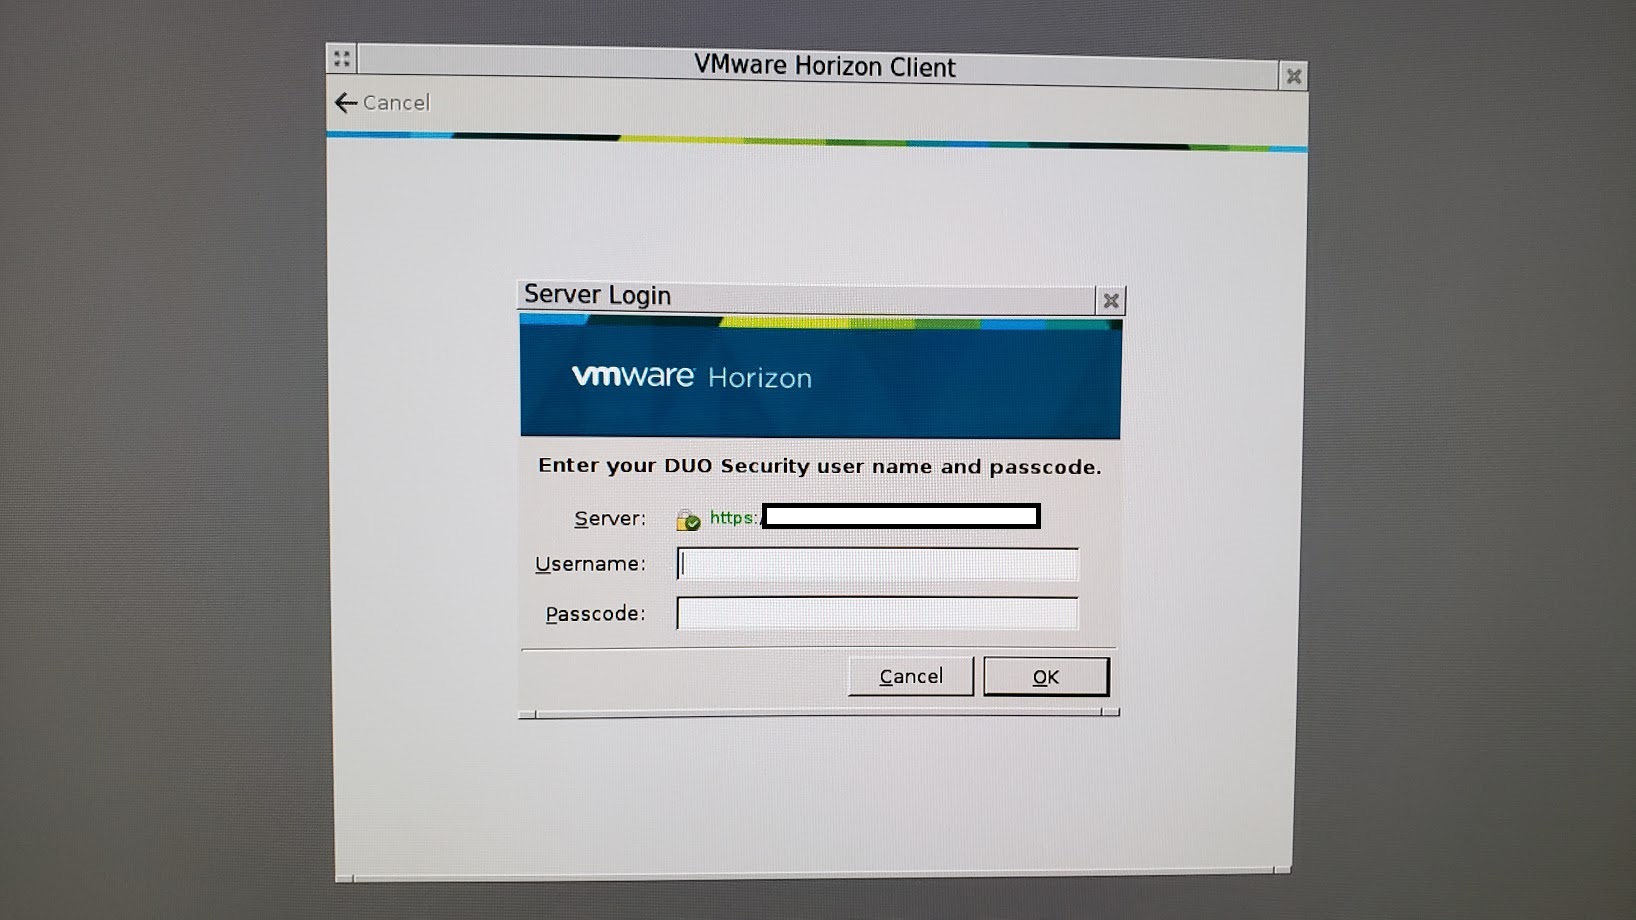
Turning on the 10ZiG Zero Client, you are presented with the DUO Login Prompt on the View Connection Server.
You then must pass 2FA/MFA authentication.
You are then presented with the desktop pools available to the user.
Upon logging off, disconnecting, or getting kicked off the server, the session is closed and you are presented to the 10ZiG VDI Login Window.
To re-establish a connection, click “Login” as instruction by the “Username” field.
You are presented with the DUO Login Window.
And the process repeats.
As you can see it’s a simple loop that requires almost no training on the end user side. You must only inform the users to click “Login” where the prompt advises to do so.
Once you configure this, you can add it to a configuration template (or generate a configuration template), and then deploy it to a large number of 10ZiG Zero Clients using 10ZiG Manager.
Let me know if this helps, and/or if you find a better way to handle the DUO integration!
This website uses cookies to improve your experience. We'll assume you're ok with this, but you can opt-out if you wish.
Do you accept the use of cookies and accept our privacy policy? AcceptRejectCookie and Privacy Policy
Privacy & Cookies Policy
Privacy Overview
This website uses cookies to improve your experience while you navigate through the website. Out of these cookies, the cookies that are categorized as necessary are stored on your browser as they are essential for the working of basic functionalities of the website. We also use third-party cookies that help us analyze and understand how you use this website. These cookies will be stored in your browser only with your consent. You also have the option to opt-out of these cookies. But opting out of some of these cookies may have an effect on your browsing experience.