Aug 272018
 
Right side of MSA 2040

So, what happens in a worst-case scenario where your backup system fails, you don’t have any VM snapshots, and the last thing standing in the way of complete data loss is your SAN storage systems LUN snapshots?

Well, first you fire whoever purchased and implemented the backup system, then secondly you need to start restoring the VM (or VMs) from your SAN LUN snapshots.

While I’ve never had to do this in the past (all the disaster recovery solutions I’ve designed and sold have been tested and function), I’ve always been curious what the process is and would be like. Today I decided to try it out and develop a procedure for restoring a VM from SAN Storage LUN snapshot.

For this test I pretended a VM was corrupt on my VMware vSphere cluster and then restored it to a previous state from a LUN snapshot on my HPE MSA 2040 (identical for the HPE MSA 2050, and MSA 2052) Dual Controller SAN.

To accomplish the restore, we’ll need to create a host mapping on the SAN for the LUN snapshot to a new LUN number available to the hosts. We then need to add and mount the VMFS volume (residing on the snapshot) to the host(s) while assigning it a new signature and then vMotion the VM from the snapshot’s VMFS to original datastore.

Important Notes (Read first):

  • When mounting a VMFS volume from a SAN snapshot, you MUST RE-SIGNATURE THE SNAPSHOT VMFS volume. Not doing so can cause problems.
  • The snapshot cannot be mapped as read only, VMFS volumes must be marked as writable in order to be mounted on ESXi hosts.
  • You must follow the proper procedure to gracefully dismount and detach the VMFS volume and storage device before removing the snapshot’s host mapping on the SAN.
  • We use Storage vMotion to perform a high-speed move and recovery of the VM. If you’re not licensed for Storage vMotion, you can use the datastore file browser and copy/move from the snapshot VMFS volume to live production VMFS volume, however this may be slower.
  • During this entire process you do not touch, modify, or change any settings on your existing active production LUNs (or LUN numbers).
  • Restoring a VM from a SAN LUN snapshot will restore a crash consistent copy of the VM. The VM when recovered will believe a system crash occurred and power was lost. This is NOT a graceful application consistent backup and restore.
  • Please read your SAN documentation for the procedure to access SAN snapshots, and create host mappings. With the MSA 2040 I can do this live during production, however your SAN may be different and your hosts may need to be powered off and disconnected while SAN configuration changes are made.
  • Pro tip: You can also power on and initialize the VM from the snapshot before initiating the storage vMotion. This will allow you to get production services back online while you’re moving the VM from the snapshot to production VMFS volumes.
  • I’m not responsible if you damage, corrupt, or cause any damage or issues to your environment if you follow these procedures.

We are assuming that you have already either deleted the damaged VM, or removed it from your inventory and renamed the VMs folder on the live VMFS datastore to change the name (example, renaming the folder from “SRV01” to “SRV01.bad”. If you renamed the damaged VM, make sure you have enough space for the new restored VM as well.

Procedure:

Mount the VMFS volume on the LUN snapshot to the ESXi host(s)
  1. Identify the VM you want to recover, write it down.
  2. Identify the datastore that the VM resides on, write it down.
  3. Identify the SAN and identify the LUN number that the VMFS datastore resides on, write it down.
  4. Identify the LUN Snapshot unique name/id/number and write it down, confirm the timestamp to make sure it will contain a valid recovery point.
  5. Log on to the SAN and create a host mapping to present the snapshot (you recorded above) to the hosts using a new and unused LUN number.
  6. Log on to your ESXi host and navigate to configuration, then storage adapters.
  7. Select the iSCSI initator and click the “Rescan Storage Adapters” button to rescan all iSCSI LUNs.

    VMware ESXi Host Rescan Storage Adapter

    VMware ESXi Host Rescan Storage Adapter

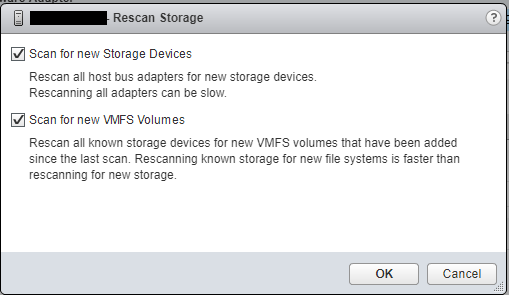
  8. Ensure both check boxes are checked and hit “Ok”, wait for the scan to complete (as shown in the “Recent Tasks” window.

    VMware ESXi Host Rescan Storage Adapter Window for VMFS Volume and Devices

    VMware ESXi Host Rescan Storage Adapter Window for VMFS Volume and Devices

  9. Now navigate to the “Datastores” tab under configuration, and click on the “Create a new Datastore” button as shown below.

    VMware ESXi Host Add Datastore Window

    VMware ESXi Host Add Datastore Window

  10. Continue with “VMFS” selected and select continue.
  11. In the next window, you’ll see your existing datastores, as well as your new datastore (from the snapshot). You can leave the “Datastore name” as is since this value will be ignored. In this window you’re going to select the new VMFS datastore from the snapshot. Make sure you confirm this by looking at the LUN number, as well as the value under “SnapshotVolume”. It is critical that you select the snapshot in this window (it should be the new LUN number you added above).
  12. Select next and continue.
  13. On the next window “Mount Option”, you need to change the radio button to and select “Assign a new signature”. This is critical! This will assign a new signature to differentiate it from your existing real production datastore so that the ESXi hosts don’t confuse it.
  14. Continue with the wizard and complete the mount process. At this point ESXi will resignture the VMFS volume and rename it to “snap-OriginalVolumeNameHere”.
  15. You can now browse the VMFS datastore residing on the LUN snapshot and do anything you’d normally be able to do with a normal datastore.
Copy/Move/vMotion the VM from the snapshot VMFS volume to your production VMFS volume

Note: The next steps are only if you are licensed for storage vMotion. If you aren’t you’ll need to use the copy or move function in the file browsing area to copy or move the VMs to your live production VMFS datastores:

  1. Now we’ll go to the vCenter/ESXi host storage area in the web client, and using the “Files” tab, we’ll browse the snapshots VMFS datastore that we just mounted.
  2. Locate the folder for the VM(s) you want to recover, open the folder, right click on the vmx file for the VM and select “Register VM”. Repeat this for any of the VMs you want to recover from the snapshot. Complete the wizard for each VM you register and add it to a host.
  3. Go back to you “Hosts and VMs” view, you’ll now see the VMs are added.
  4. Select and right click on the VM you want to move from the snapshot datastore to your production live datastore, and select “Migrate”.
  5. In the vMotion migrate wizard, select “Change Storage only”.
  6. Continue to the wizard, and storage vMotion the VM from the snapshot VMFS to your production VMFS volume. Wait for the vMotion to complete.
  7. After the storage vMotion is complete, boot the VM and confirm everything is functioning.
Gracefully unmount, detach, and remove the snapshot VMFS from the ESXi host, and then remove the host mapping from the SAN
  1. On each of your ESXi hosts that have access to the SAN, go to the “Datastores” section under the ESXi hosts configuration, right click on the snapshot VMFS datastore, and select “Unmount”. You’ll need to repeat this on each ESXi host that may have automounted the snapshot’s VMFS volume.
  2. On each of your ESXi hosts that have access to the SAN, go to the “Storage Devices” section under the ESXi hosts configuration and identify (by LUN number) the “disk” that is the snapshot LUN. Select and highlight the snapshot LUN disk, select “All Actions” and select “Detach”. Repeat this on each host.
  3. Double check and confirm that the snapshot VMFS datastore (and disk object) have been unmounted and detached from each ESXi host.
  4. You can now log in to your SAN and remove the host mapping for the snapshot-to-LUN. We will not longer present the snapshot LUN to any of the hosts.
  5. Back to the ESXi hosts, navigate to “Storage Adapters”, select the “iSCSI Initiator Adapter”, and click the “Rescan Storage Adapters”. Repeat this for each ESXi host.

    VMware ESXi Host Rescan Storage Adapter

    VMware ESXi Host Rescan Storage Adapter

  6. You’re done!
Aug 262018
 
Fedora Logo

One of the coolest things I love about running VMware Horizon View and VDI is that you can repurpose old computers, laptops, or even netbooks in to perfect VDI clients running Linux! This is extremely easy to do and gives life to old hardware you may have lying around (and we all know there’s nothing wrong with that).

I generally use Fedora and the VMware Horizon View Linux client to accomplish this. See below to see how I do it!


Quick Guide

  1. Download the Fedora Workstation install or netboot ISO from here.
  2. Burn it to a DVD/CD if you have DVD/CD drive, or you can write it to a USB stick using this method here.
  3. Install Fedora on to your laptop/notebook/netbook using the workstation install.
  4. Update your Fedora Linux install using the following command
    dnf -y upgrade
  5. Install the prerequisites for the VMware Horizon View Linux client using these commands
    dnf -y install https://download1.rpmfusion.org/free/fedora/rpmfusion-free-release-$(rpm -E %fedora).noarch.rpm https://download1.rpmfusion.org/nonfree/fedora/rpmfusion-nonfree-release-$(rpm -E %fedora).noarch.rpm
    dnf -y install gstreamer-plugins-ugly gstreamer-plugins-bad gstreamer-ffmpeg xine-lib-extras-freeworld xine-lib-extras-freeworld libssl* libcrypto* openssl-devel libpng12 systemd-devel libffi-devel
    
  6. To fix an issue with package versions and dependancies, run the following commands
    ln -s /usr/lib64/libudev.so.1 /usr/lib64/libudev.so.0
    ln -s /usr/lib64/libffi.so.6 /usr/lib64/libffi.so.5
  7. Download the VMware Horizon View Linux client from here
  8. Make the VMware bundle executable and then run the installer using these commands (your file name may be different depending on build version number)
    chmod 777 VMware-Horizon-Client-4.8.0-8518891.x64.bundle
    sudo ./VMware-Horizon-Client-4.8.0-8518891.x64.bundle
  9. Complete the installation wizard
  10. You’re done!

To run the client, you can find it in the GUI applications list as “VMware Horizon Client”, or you can launch it by running “vmware-view”.

VMware Horizon View on Linux in action

Here is a VMware Horizon View Linux client running on HP Mini 220 Netbook

Additional Notes:

-If you’re comfortable, instead of the workstation install, you can install the Fedora LXQt Desktop spin, which is a lightweight desktop environment perfect for low performance hardware or netbooks. More information and the download link for Fedora LXQt Desktop Spin can be found here: https://spins.fedoraproject.org/en/lxqt/

-If you installed Fedora Workstation and would like to install the LXQt window manager afterwards, you can do so by running the following command (after installing, at login prompt, click on the gear to change window managers):

dnf install @lxqt-desktop-environment

-Some of the prerequisites above in the guide may not be required, however I have installed them anyways for compatibility.

Aug 252018
 
Fedora Logo

After doing a fresh install or upgrade of Fedora Core Linux (FC28 in my case, but this applies to any version), you may notice that when the system boots it gets stuck on a black screen with a white cursor. The cursor will not move and there will be no drive activity.

This issue occurs with GNOME on my old HP Mini 210 Netbook every time I do a fresh install of Fedora on it (or upgrade it).

Follow the process below to temporarily boot and then permanently fix it.

Temporary fix

To get the system to boot:

  1. Power on the computer, and carefully wait for the GRUB bootloader to appear (the boot selection screen).
  2. When the GRUB bootloader appears, press the “e” key to edit the highlighted (default) boot entry.
  3. Scroll down until you get to the line starting with “linux16”, then use your right arrow key and scroll right until you get to the end of the kernel options (while scrolling right, you may scroll multiple lines down which is fine and expected). The line should finally end with “rhgb” and “quiet”.
  4. Remove “rhgb” and “quiet”, and then add “nomodeset=0”
  5. Press “CTRL+x” to boot the system.
  6. The system should now boot.

FYI: “rhgb” is the kernel switch/option for redhat graphical boot, and “quiet” makes the system messages more quiet (who would have guessed).

Permanent Fix

To permanently resolve the issue:

  1. Once the system has booted, log in.
  2. Open a terminal window (Applications -> Terminal, or press the “Start” button and type terminal).
  3. Use your favorite text editor and edit the file “/etc/default/grub” (I use nano which can be install by running “dnf install nano”):
    nano /etc/default/grub
  4. Locate the line with the variable “GRUB_CMDLINE_LINUX”, and add “nomodeset=0” to the variables. Feel free to remove “rhgb” and “quiet” if you’d like text boot. Here’s an example of my line after editing (yours will look different):
    GRUB_CMDLINE_LINUX="resume=/dev/mapper/fedora_da--netbook01-swap rd.lvm.lv=fedora_da-netbook01/root rd.lvm.lv=fedora_da-netbook01/swap nomodeset=0"
  5. Save the file and exit the text editor (CTRL+x to quit, the press “y” and enter to save)
  6. At the bash prompt, execute the following command to regenerate the grub.conf file on the /boot partition from your new default file:
    grub2-mkconfig -o /boot/grub2/grub.cfg
  7. Restart your system, it should now boot!

Please Note: Always make sure you have a full system backup before modifying any system files!

Aug 252018
 
Fedora Logo

A fun fact that a lot of users still aren’t aware of, is that you can create Fedora and CentOS bootable media (a bootable USB stick) using the DVD/CD ISO image, and using the linux dd command.

So if you have an existing and running Linux install, you can use this method to quickly write an ISO file to a USB stick!


Here’s How!

  1. Get your USB stick handy, make sure it’s big enough to store the ISO file you want to download.
  2. Download your preferred ISO DVD or CD Image for Installation from CentOS or Fedora.
  3. Connect your USB stick, open a terminal session and run the following command to identify the device name of the USB stick (mine was sdb for /dev/sdb):
    [root@StephenW-X1 ~]# dmesg | grep removable
    [  171.890670] sd 1:0:0:0: [sdb] Attached SCSI removable disk
  4. Issue the following command to write the ISO image to the USB stick. Change the input filename, and output device name to reflect your own.
    [root@StephenW-X1 Downloads]# dd if=Fedora-Workstation-netinst-x86_64-28-1.1.iso of=/dev/sdb
    1193984+0 records in
    1193984+0 records out
    611319808 bytes (611 MB, 583 MiB) copied, 13.6777 s, 44.7 MB/s
  5. Your done!

Please Note:

  • Choosing the wrong /dev/sd[x] device can case you to write the ISO file to your hard drive, or another hard drive in your system. Make sure you select the right device name. If you’re unsure, don’t run the command.
  • You can also use the “Fedora Media Writer for Windows” available here: https://getfedora.org/fmw/FedoraMediaWriter-win32-4.1.1.exe to write an ISO image to USB if you’re running Windows.
Aug 222018
 

HPE Moonshot

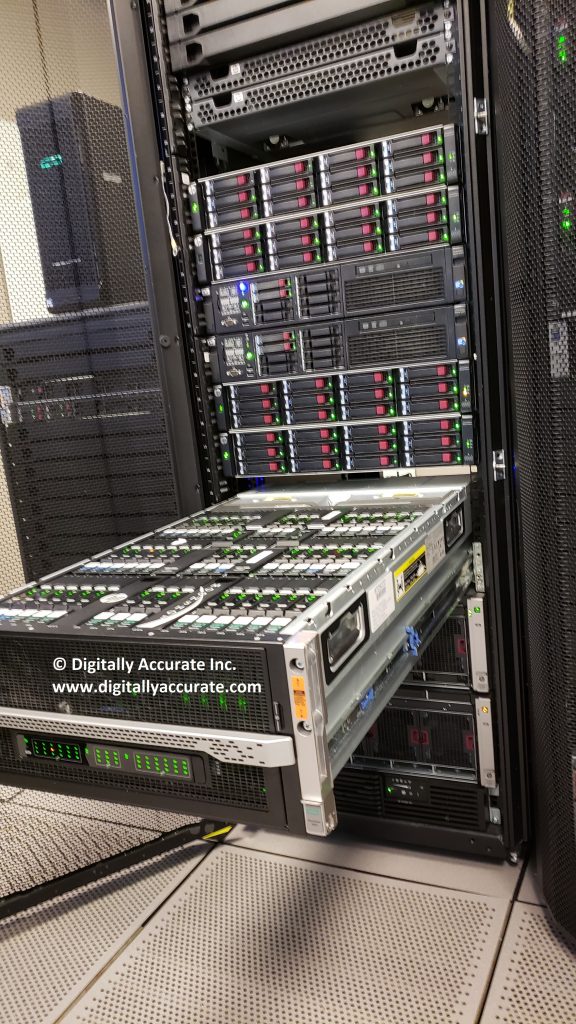
I had the pleasure of playing with a fully loaded HPE Moonshot 1500 Chassis, and an HPe Edgeline EL4000 Converged Edge System last month during my visit to HPe Headquarters in Toronto, Ontario. I like to think of this thing as the answer for high-density anything and everything!

HPE Moonshot 1500 Chassis

I’ve known about the HPE Moonshot portfolio for some time, however I didn’t understand how mammoth one of these chassis’ are until I saw it performing in real life.

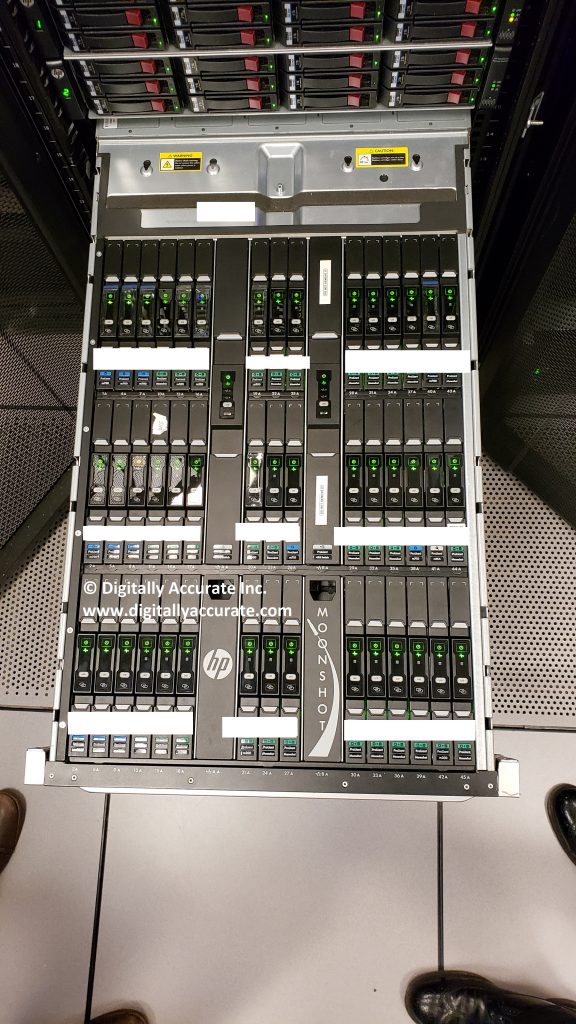
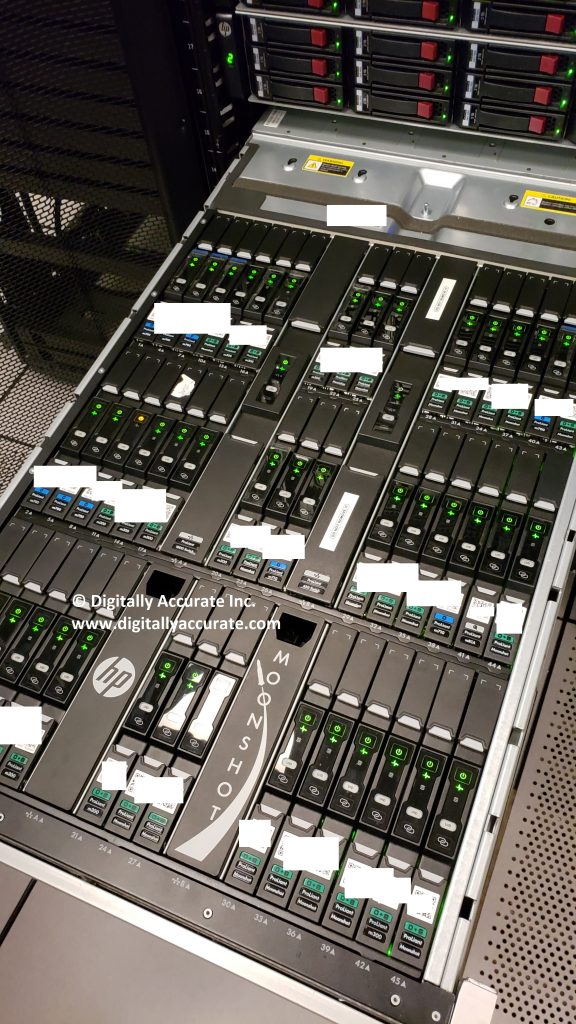
HPe Moonshot 1500 Chassis with 45 Cartridges

HPE Moonshot 1500 Chassis with 45 Cartridges

The HPE Moonshot 1500 Chassis supports up to 45 cartridges, and up to 4 SoC (System on Chip) OS instances per cartridge for a total of 180 OS instances in a 4.3U (5U for 1 x 1500 Chassis or 13U for 3 x 1500 Chassis) sized footprint. The chassis also supports up to 2 switches and 2 uplink modules in addition to the 45 cartridges.

Prime uses for HPE Moonshot 1500 (remember, high-density everything):

  • VDI (Virtual Desktop Infrastructure via VMware or Microsoft)
  • HDI (Hosted Desktop Infrastructure via Citrix Provisioning Server)
  • Server consolidation and Virtualization
  • SDDC (Software Defined Data Center)
  • HPC (High Performance Computing, both Virtualized and Non-Virtualized workloads)
  • Energy Efficient Compute
  • EUC (End User Computing – Software defined end user desktops without virtualization)
  • Video Transcoding
  • Analytics and Interpritation
  • IoT and AI
  • Custom workloads

As you can see, you can virtually load up whatever you’d like on it that requires a CPU (HPE Moonshot can run both x86 and ARM architectures depending on which cartridges are utilized).

The chassis is monitored and managed via the HPE Moonshot 1500 Chassis Management module and the HPE Moonshot Provisioning Manager.

HPE Edgeline EL4000 Converged Edge System

The HPE Edgeline EL4000 was designed (you probably guessed it) for the edge. Whether it be the enterprise edge, media edge, or IoT edge, the EL4000 is a perfect fit.

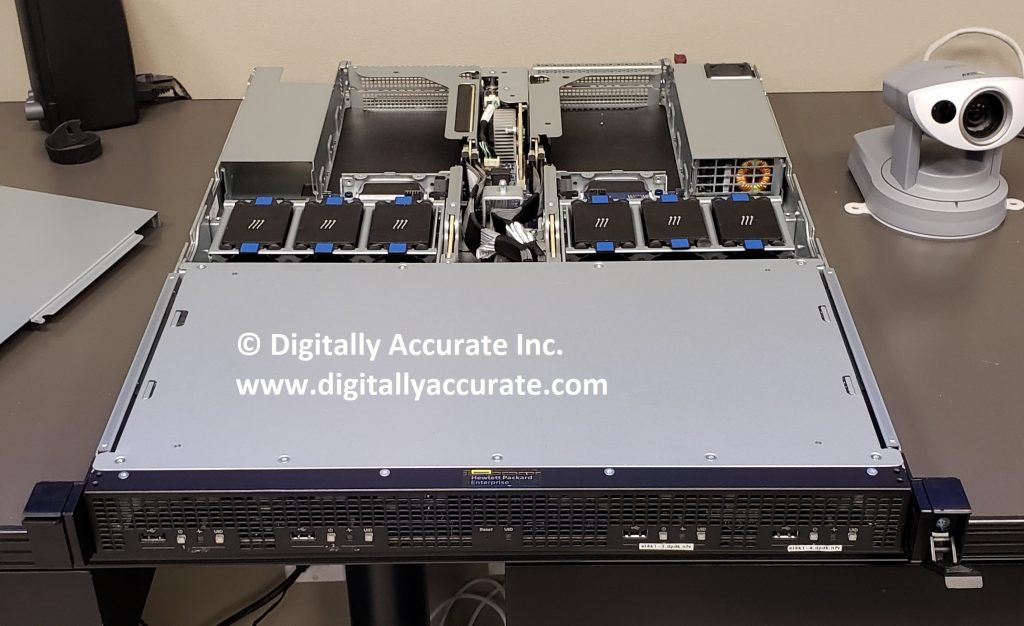
HPe Edgeline EL4000 Converged Edge System

HPE Edgeline EL4000 Converged Edge System

This bad boy supports up to 4 HPE Proliant Server Cartridge (m510 or m710x) compute nodes in a 1U package. It also supports up to 4 PCIe cards, or 4 PXIe modules assignable to any of the compute modules.

Prime uses for the HPE Edgeline EL4000:

  • Edge Computing (AI, IoT EDGE)
  • ROBO (Remote Office Branch Office)
  • Server Consolidation and Virtualization (ROBO)
  • VDI (Virtual Desktop Infrastructure)
  • HDI (Hosted Desktop Infrastructure)
  • Video Transcoding
  • Industrial applications (Machine monitoring, Condition Monitoring)
  • Edgeline data analytics
  • Industrial/Manufacturing Quality Control and Quality Assurance (Video Analytics and Interpretation)
  • SMB Applications

The El4000 has iLo (Integrated Lights Out) built in, and provides management and monitoring. This unit also supports GPU accelerator/compute cards such as the Nvidia P4 Graphics Accelerator (specifically an Nvidia Tesla P4 8GB Computational PCIe card).

HPE Moonshot Cartridges

With the flexibility of different cartridges, along with Moonshot being software defined, you can highly customize whatever workload you may be running.

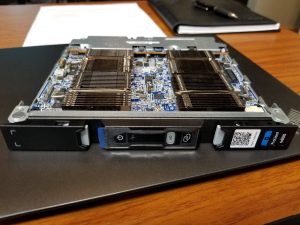
HPe Proliant m800 Moonshot Cartridge Front View

HPE Proliant m800 Moonshot Cartridge Front View

HPe Proliant m800 Moonshot Cartridge Side View

HPE Proliant m800 Moonshot Cartridge Side View

The following cartridges are currently available for the HPE Moonshot platform:

  • HPE Proliant m710p – Server or Desktop Virtualization, includes Intel Iris Pro P6300 graphics for VDI deployments (supported by VMware vSphere for vDGA passthrough and vSGA) or video transcoding.
  • HPE Proliant m710x – Server or Desktop Virtualization, includes Intel Iris Pro P580 graphics for VDI deployments (supported by VMware vSphere for vDGA passthrough and vSGA) or video transcoding.
  • HPE Proliant m700p – Designed for high-performance Citrix Mobile Workspaces (high-density EUC) for 4 desktops per cartridge with AMD Radeon HD 8000 graphics.
  • HPE Proliant m510 – Features the Xeon D processor targeting high performance, AI, analytics, machine learning, and IoT workloads.

As you can see there is quite some flexibility as far as the cartridges you can roll out. I get really excited when I think of VDI with Moonshot just because of the fact that the Intel Iris Pro P580, and P6300 are fully supported on VMware’s HCL for vDGA and vSGA graphics for vSphere 6.5 and 6.7.

There are also retired/discontinued cartridges (such as the HPE Proliant m800) which are beyond the scope of this blog post.

HPE Moonshot Networking

On the HPe Moonshot 1500 Chassis, networking is handled inside of the chassis via 1 or 2 network switch modules and uplink modules. You’ll then connect the uplinks from the uplink modules to your real physical network. You can connect to your network via QSFP+ or SFP+ connections using DAC (direct attached cables) or fiber cables with transceivers at speeds of 40Gb or 10Gb.

The Moonshot 1500 chassis supports the following switch modules:

  • Moonshot-45Gc Switch – 1Gb Switch connectivity for m510, m510-16c, m710x cartridges and works with the Moonshot 6 x SFP+ Uplink Module
  • Moonshot-45XGc Switch – 1Gb or 10Gb Switch connectivity for m510, m510-16c, m710x cartridges and works with the Moonshot 16 x SFP+ Uplink Module or the 4 QSFP+ Uplink Module
  • Moonshot-180XGc Switch – 1Gb or 10Gb Switch connectivity for m510, m510-16c, m710x cartridges, and 1Gb Switch connectivity for m700p and works with the Moonshot 16 x SFP+ Uplink Module or the 4 QSFP+ Uplink Module

On the HPE Edgeline EL4000, networking is handled via 2 x 10Gb SFP+ switched version, or a 8 x 10Gb QSFP+ pass-thru version. The unit also has a dedicated 1Gb RJ45 port for HPE iLo connectivity.

HPE Moonshot Storage

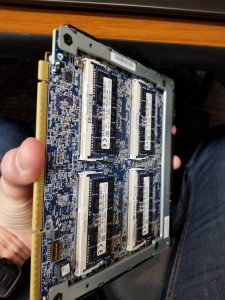
Each cartridge can contain it’s own dedicated storage up to 2TB. This is perfect for a HPE StoreVirtual VSA deployment or even basic direct attached storage. You can also connect HPE Moonshot to an HPE 3PAR SAN or an HPE Apollo 4500 storage system via the 10Gb network Fabric.

There’s a few options as to how you can plan your storage deployment with Moonshot:

  • DAS – Direct Attached Storage (in cartridge)
  • HPE 3PAR SAN or HPE Apollo 4500 Storage System
  • iSCSI/NFS (May or may not be supported depending on your workload)
  • VMware vSAN (May or may not be supported/certified)

As you can see, there’s quite a few options and possibilities as far as your storage deployment goes.

HPE Moonshot Pictures

Here’s some additional photos of the unit.

HPe Moonshot at HPe Center of Excellence

HPE Moonshot 1500 Chassis opened and running

HPe Moonshot 1500 Chassis with Cartridges

HPE Moonshot 1500 Chassis with Cartridges

And remember, if you’re interested in the HPE Moonshot product or any other products or solutions in HPE’s portfolio, please don’t hesitate to reach out to me or my company (Digitally Accurate Inc.) for more information as we are an HPE partner and design/configure/sell HPE solutions!

Aug 212018
 
Microsoft .NET Framework

You may notice on Windows Server 2012 R2, when applying Windows Updates that one or more .NET updates may fail with error code 0x80092004. This issue may affect all, or only some of your Windows Server 2012 R2 servers.

When troubleshooting this, you may notice numerous specific errors such as “Couldn’t find the hash of component: NetFx4-PenIMC”, or errors with a CAB file. These errors will probably come from update KB4054566 and KB4340558.

The Fix

To resolve this, we are going to download the updates MSU files from the Microsoft Update Catalog, and fully uninstall, then re-install the problematic updates.

Please Note: Always make sure you have a full backup before making modifications to your servers.

Please follow the instructions below:

  1. Create a folder called “updatefix” on the root of your C drive on the server
  2. Navigate to the Windows Update catalog at: https://www.catalog.update.microsoft.com/
  3. Search for KB4054566 and download the file for “Windows Server 2012 R2”, save it to the folder you created above called “updatefix” on the root of your C Drive. There should be one file in the download.
  4. Search for KB4340558 and download the files for “Windows Server 2012 R2”, save it to the folder you created above called “updatefix” on the root of your C Drive. There should be a total of 3 files in this download.
  5. Create a folder in the “updatefix” folder called “expanded”.
  6. Open an elevated command prompt, and run the following commands to extract the updates CAB files:
    expand -f:* "C:\updatefix\windows8.1-kb4338415-x64_cc34d1c48e0cc2a92f3c340ad9a0c927eb3ec2d1.msu" C:\updatefix\expanded\
    expand -f:* "C:\updatefix\windows8.1-kb4338419-x64_4d257a38e38b6b8e3d9e4763dba2ae7506b2754d.msu" C:\updatefix\expanded\
    expand -f:* "C:\updatefix\windows8.1-kb4338424-x64_e3d28f90c6b9dd7e80217b6fb0869e7b6dfe6738.msu" C:\updatefix\expanded\
    expand -f:* "C:\updatefix\windows8.1-kb4054566-x64_e780e6efac612bd0fcaf9cccfe15d6d05c9cc419.msu" C:\updatefix\expanded\
  7. Now let’s uninstall the problematic updates. Some of these commands may fail depending on which updates you have successfully installed. Run the following commands individually to remove the updates:
    dism /online /remove-package /packagepath:C:\updatefix\expanded\Windows8.1-KB4338424-x64.cab
    dism /online /remove-package /packagepath:C:\updatefix\expanded\Windows8.1-KB4338419-x64.cab
    dism /online /remove-package /packagepath:C:\updatefix\expanded\Windows8.1-KB4338415-x64.cab
    dism /online /remove-package /packagepath:C:\updatefix\expanded\Windows8.1-KB4054566-x64.cab
  8. Reboot your server.
  9. Now let’s cleanly install the updates. All of these commands should be successful when running. Run the following commands individually to install the updates:
    dism /online /add-package /packagepath:C:\updatefix\expanded\Windows8.1-KB4054566-x64.cab
    dism /online /add-package /packagepath:C:\updatefix\expanded\Windows8.1-KB4338415-x64.cab
    dism /online /add-package /packagepath:C:\updatefix\expanded\Windows8.1-KB4338419-x64.cab
    dism /online /add-package /packagepath:C:\updatefix\expanded\Windows8.1-KB4338424-x64.cab
  10. Reboot your server.
  11. You have now fixed the issue and all updates should now be cleanly installing via Windows Updates!

Leave a comment and let me know if this worked for you!

Aug 212018
 
VMware Horizon View Logo

Well, after using the VMware Horizon Client mobile app (for Android) for a year, I finally decided to do a little write up and review. I use the android client regularly on my Samsung Tab E LTE tablet, and somewhat infrequently on my Samsung Galaxy S9+ mobile phone (due to the smaller screen).

Let’s start off by briefly explaining what VMware Horizon View is, what the client does, and finally the review. I’ll be including a couple screenshots as well to give an idea as to how the interface and resolution looks on the tablet itself.

The VMware Horizon Client mobile app for android is available at: https://play.google.com/store/apps/details?id=com.vmware.view.client.android

What is VMware Horizon View

VMware Hoirzon View is a product and solution that enables VDI technology for a business. VDI stands for Virtual Desktop Infrastructure. When a business uses VDI, they virtualize their desktops and use either thin clients, zero clients, or the view client to access these virtualized desktops. This allows the business to utilize all the awesome technologies that virtualization brings (DRS, High Availability, Backup/DR, high performance, reduced hardware costs) and provide rich computing environments to their users. The technology is also particularly interesting in the fact that it provides amazing remote access capabilities as one can access their desktop very easily with the VMware View Client.

When you tie this on to an advanced security technology such as Duo’s MFA product, you can’t go wrong!

In special case or large environments, enormous cost savings can be realized when implementing VDI.

What is the VMware Horizon View Mobile client for Android

As mentioned above, to access one’s virtualized desktop a client is needed. While a thin client or zero client can be used, this is beyond the scope of this post as here we are only discussing the VMware View client for Android.

You can download the VMware View client for Android from the App store (link here).

The VMware Horizon View Mobile client for Android allows you to connect to your VDI desktop remotely using your Android based phone or tablet. Below is a screenshot I took with my Samsung Tab E LTE tablet (with the side bar expanded):

VMware Horizon View Client on Android Tablet

VMware Horizon View Client on Android Tablet

VMware Horizon View Mobile Client for Android Experience

Please Note: There is more of the review below the screenshots. Scroll down for more!

The app appears to be very lightweight, with an easy interface. Configuration of View Connections Servers, or UAG’s (Unified Access Gateways) is very simple. The login process performs with RADIUS and/or MFA as the desktop client would. In the examples below, you’ll notice I use Duo’s MFA/2FA authentication solution in combination with AD logins.

VMware Horizon View Mobile Client Android Server List

VMware Horizon View Mobile Client Android Server List

The interface is almost identical to the desktop client with very little differences. The configuration options are also very similar and allow customization of the app, with options for connection quality as an example.

VMware Horizon View Mobile Client Android Server Login

VMware Horizon View Mobile Client Android Server Login

VMware Horizon View Mobile Client Android Login Duo MFA

VMware Horizon View Mobile Client Android Login Duo MFA

As you can see above, the RADIUS and Duo Security Login prompts are fully functional.

VMware Horizon View Mobile Client Android Server List

VMware Horizon View Mobile Client Android Server List

VMware Horizon View Mobile Client Android Windows 10 VDI Desktop

VMware Horizon View Mobile Client Android Windows 10 VDI Desktop

The resolution is perfect for the tablet, and is very usable. The touch interface works extremely well, and text input works as good as it can. While this wouldn’t be used as a replacement for the desktop client, or a thin/zero client, it is a valuable tool for the mobile power user.

With how lightweight and cheap tablets are now, you could almost leave your tablet in your vehicle (although I wouldn’t recommend it), so that in the event of an emergency where you need to access your desktop, you’d be able to using the app.

Pros:

  • Fluid interface
  • Windows 10 touch functionality works great
  • Resolution Support
  • Samsung Dex is fully supported
  • Webcam redirection works
  • Works on Airplanes using in flight WiFi

Cons:

  • Bandwidth usage
  • Saving credentials via Fingerprint Scanner would be nice (on the S8+ and S9+)

My Usage

Being in IT, I’ve had to use this many times to log in and manage my vSphere cluster, servers, HPE iLo, check temperatures, and log in to customer environments (I prefer to log in using my VDI desktop, instead of saving client information on the device I’m carrying with me). It’s perfect for these uses.

I also regularly use VDI over LTE. Using VDI over mobile LTE connections works fantastic, however you’ll want to make sure you have an adequate data plan as the H.264 video stream uses a lot of bandwidth. Using this regularly over LTE could cause you to go over your data limits and incur additional charges.

Additional Information

Samsung Dex

The VMware Horizon View Mobile Client for Android also supports Samsung Dex. This means that if you have a Dex dock or the Dex pad, you can use the mobile client to provide a full desktop experience to a monitor/keyboard/mouse using your Samsung Galaxy phone. I’ll be doing a write up later to demo this (it works great).

VMware Horizon Client for Chrome OS

VMware also has a client for Chrome OS, so that you can use your Chromebook to connect to your VDI desktop. You can download VMware Horizon Client for Chrome OS here: https://chrome.google.com/webstore/detail/vmware-horizon-client-for/ppkfnjlimknmjoaemnpidmdlfchhehel

Aug 202018
 

An all too common problem is when users report e-mail delays ranging from 5 to 15 minutes. When troubleshing these types of issues, you’ll notice this commonly occurs when receiving e-mails from organizations that use Office 365. Specifically this occurs due to greylisting.

Why does this happen

You’re organization is using greylisting on your e-mail proxy/SMTP relay to reduce spam. Greylisting temporarily rejects the first send of an e-mail and waits for the sending server to re-transmit the message. This process usually takes around 5-15 minutes to complete. Greylisting is used because spammers won’t re-transmit the message, which leads to a massive reduction of spam messages coming through.

Once the sending server retransmits, the sending server IP address is added to your firewalls “safe senders” whitelist. From this point on the IP address (or server) will not be subject to greylisting (and any subsequent e-mails).

Office 365 has hundreds, if not thousands (possibly 10’s of thousands) of servers they use to transmit e-mail. The chance of multiple e-mails being sent from a single server is very slim, therefor greylisting is applied to every IP (server) that is sending e-mail because it’s different. Each e-mail from an Office 365 user can take 5-15 minutes, since a new server is used every time.

How to resolve

You’ll need to configure and add an exception to your e-mail proxy/SMTP relay/firewall. This exception can be based off domain, DNS name of sending server, or IP address ranges.

Scroll down for instructions on how to create an exception on a Sophos UTM.

Domain Exception

If you use domain based exceptions, you’ll need to configure these manually for each sending domain that you want your firewall to skip greylist checking. This is a very manual process, which requires lots of human intervention to continuously update your greylist exception.

DNS FQDN of MX Server

This method is the easiest, however most firewall or UTM’s will now allow these types of exceptions since a number of DNS queries will be needed everytime an e-mail comes in. One DNS query on the MX record, and then another DNS query on the DNS host contained in the MX record. If you can configure this type of exception, you’ll want to configure it as below:

*-com.mail.protection.outlook.com

IP Address Range

This is the best method. To create an IP address range exception, we’ll need a copy of all the IP address ranges or IP address spaces that Office 365 uses to send mail. This list can be found at: https://docs.microsoft.com/en-us/microsoft-365/enterprise/urls-and-ip-address-ranges?view=o365-worldwide.

We’ll need to create an exception that skips greylist checking on the IP addresses outlined in the above link. This will stop any greylist checking on e-mails from Office 365 servers.

In my case, I use a Sophos UTM firewall, and to create an exception I had to do the following:

  1. Log on to the Webmin interface.
  2. Select “Email Protection”, then “STMP” on the left hand side, then “Exceptions” tab at the top.

    Sophos UTM E-Mail and SMTP Exception List

    Sophos UTM E-Mail and SMTP Exception List

  3. Create a “New Exception List” and call it “Office 365 GreylistWhitelist”.
  4. Check the “Greylisting” box under “Antispam”, and then check the “For these source hosts/networks”.

    Sophos UTM SMTP Create Exception

    Sophos UTM SMTP Create Exception

  5. Click the “+” button, and call the Network Definition “Exchange365-EOP-Group”. Change the type to “Network Group”.
  6. Click the “+” button in the members section, and start adding the IP spaces. Repeat this for each IP space (in total I added 23). Each network name (IP address space) requires a unique name, I named mine “Exchange365-EOP1” through “Exchange365-EOP23”.

    Sophos UTM SMTP Configure Exception

    Sophos UTM SMTP Configure Exception

  7. Click Save on the Network Group, and click Save on the exception.
  8. Enable the Exception

    Sophos UTM SMTP Exception Rule

    Sophos UTM SMTP Exception Rule

  9. Completed! You’ve now made the exception and delays should no longer occur.
Aug 192018
 

I finally got around to mounting my Wilson weBoost Home 4G Cell Phone Booster Antenna on the roof. Here’s some pictures of the completed install. I’ve had this booster for a while and it’s worked great, however some new cell towers went up in the area, and I wanted to stop using the window mount and re aim the antenna.

Wilson weBoost Home 4G Cell Phone Booster Roof Outdoor Antenna

Wilson weBoost Home 4G Cell Phone Booster Roof Outdoor Antenna

For those of you wanting to read my original post on the Wilson weBoost Home 4G Cell Phone Booster Kit, installation, and a review, you can find it at https://www.stephenwagner.com/2017/06/01/cellmobile-phone-reception-issues-resolve-with-a-wilson-amplifier-cell-booster/.

The house that I live in, actually had a roof mounted satellite dish that was no longer in use (used before the provider ran coax in the area). The dish, roof mount, and coax were all in place, however the coax was cut so I couldn’t re-use it.

I was able to remove 2 of the bolts on the satelite dish to remove it from the pole mount, and proceeded to install the antenna on the pole using the outdoor mounting kit included with the cell booster. I was extremely pleased with the install.

See below for more pics:

Roof mounted Wilson weBoost Home 4G Cell Phone Booster Kit

Roof mounted Wilson weBoost Home 4G Cell Phone Booster Kit

Roof mounted Wilson weBoost Home 4G Cell Phone Booster Kit Cabling

Roof mounted Wilson weBoost Home 4G Cell Phone Booster Kit Cabling

Roof mounted Antenna pole mount

Roof mounted Antenna pole mount

The cabling goes through the pole, down to the eavestrough where I have it zip-stripped (yet elevated) along the roof until I get to the house’s siding. I was able to tuck it in the corner siding down to the wiring access panel for the house, then into the house through the hole.

After mounting it, it took around 30 minutes to aim it with the assistance of the “LTE Discover” Android app (available at https://play.google.com/store/apps/details?id=net.simplyadvanced.ltediscovery). Remember, when aiming your antenna, it’s important to unplug your booster for 5-10 seconds for it to fully reset for it to function with the new antenna position.

Again, make sure you check out my original post and review at https://www.stephenwagner.com/2017/06/01/cellmobile-phone-reception-issues-resolve-with-a-wilson-amplifier-cell-booster/!

Update – July 28th, 2019 – So here I am two years later. I live and swear by this signal booster. Since the original post, new towers have been erected in the area, however the coverage is still minimal and non-existant in the house. The roof mount (as discussed in the update above), as well as the signal booster provides me 100% full reception. The only issue I had is the power adapter (transformer) fried one day during a lightning storm. Replacing the power adapter resolved the issue and was an easy fix. For the 2 days I waited for the power adapter, I had no reception.

Aug 182018
 
CentOS Logo

Let’s say that you’re hosting someone’s equipment and they start to abuse their connection speed. Let’s say that you’re limited in your bandwidth, and you want to control your own bandwidth to make sure you don’t max out your own internet connection. You can take care of both of these problems by building your own traffic shaping network control device using CentOS and using the “tc” linux command.

In this post I’m going to explain what traffic shaping is, why you’d want to use traffic shaping, and how to build a very basic traffic shaping device to control bandwidth on your network.

What is traffic shaping

Traffic shaping is when one attempts to control a connection in their network to prioritize, control, or shape traffic. This can be used to control either bandwidth or packets. In this example we are using it to control bandwidth such as upload and download speeds.

Why traffic shaping

For service providers, when hosting customer’s equipment, the customer may abuse their connection or even max it out legitimately. This can put a halt on the internet connection if you share it with them, or cause bigger issues if it’s shared with other customers. In this example, you would want to implement traffic shaping to allot only a certain amount of bandwidth so they wouldn’t bring the internet connection or network to a halt.

For normal people (or a single business), as fast as the internet is today, it’s still very easy to max your connection out. When this happens you can experience packet loss, slow speeds, and interruption of services. If you host your own servers this can cause even a bigger issue with interruption of those services as well. You may want to limit your own bandwidth to make sure that you don’t bring your internet to a halt, and save some for other devices and/or users.

Another reason is just to implement basic QoS (Quality of Service) across your network, to keep usage and services in harmony and eliminate any from hogging the network connections up.

How to build your own basic traffic shaping device with CentOS and tc

In this post we will build a very simple traffic shaping device that limits and throttles an internet connection to a defined upload and download speed that we set.

You can do this with a computer with multiple NICs (preferably one NIC for management, one NIC for internet, and one NIC for network and/or the hosts to be throttled). If you want to get creative, there are also a number of physical network/firewall appliances that are x86 based, that you can install Linux on. These are very handy as they come with many NICs.

When I set this up, I used an old decommissioned Sophos UTM 220 that I’ve had sitting around doing nothing for a couple years (pic below). The UTM 220 provides 8 NICs, and is very easy to install Linux on to.

Sophos UTM 220 Running CentOS Linux

Sophos UTM 220 Running CentOS Linux

Please Note: The Sophos UTM 220 is just a fancy computer in a 1U rack mounted case with 8 NICs. All I did was install CentOS on it like a normal computer.

Essentially, all we’ll be doing is installing CentOS Linux, installing “tc”, configuring the network adapters, and then configuring a startup script. In my example my ISP provides me 174Mbps download, and 15Mbps upload. My target is to throttle the connection to 70Mbps download, and 8Mbps upload. I will allow the connection to burst to 80Mbps down, and 10Mbps up.

To get started:

  1. Install CentOS on the computer or device. The specifics of this are beyond the scope of this document, however you’ll want to perform a minimal install. This device is strictly acting as a network device, so no packages are required other than the minimal install option.
  2. During the CentOS install, only configure your main management NIC. This is the NIC you will use to SSH to, control the device, and update the device. No other traffic will pass through this NIC.
  3. After the install is complete, run the following command to enable ssh on boot:
    chkconfig sshd on
  4. Install “tc” by running the command:
    yum install tc
  5. Next, we’ll need to locate the NIC startup scripts for the 2 adapters that will perform the traffic shaping. These adapters are the internet NIC, and the NIC for the throttled network/hosts. Below is an example of one of the network startup scripts. You’re NIC device names will probably be different.
    /etc/sysconfig/network-scripts/ifcfg-enp2s0
  6. Now you’ll need to open the file using your favorite text editor and locate and set ONBOOT to no as shown below. You can ignore all the other variables. You’ll need to repeat this for the 2nd NIC as well.
    TYPE=Ethernet
    PROXY_METHOD=none
    BROWSER_ONLY=no
    BOOTPROTO=dhcp
    DEFROUTE=yes
    IPV4_FAILURE_FATAL=no
    IPV6INIT=yes
    IPV6_AUTOCONF=yes
    IPV6_DEFROUTE=yes
    IPV6_FAILURE_FATAL=no
    IPV6_ADDR_GEN_MODE=stable-privacy
    NAME=enp2s0
    UUID=xxxxxxxx-xxxx-xxx-xxxx-xxxxxxxxxxxx
    DEVICE=enp2s0
    ONBOOT=no
  7. Now we can configure the linux startup script to configure a network bridge between the two NICs above, and then configure the traffic shaping rules with tc. Locate and open the following file for editing:
    /etc/rc.d/rc.local
  8. Append the following text to the rc.local file:
    # Lets make that bridge
    brctl addbr bridge0
    
    # Lets add those NICs to the bridge
    brctl addif bridge0 enp5s0
    brctl addif bridge0 enp2s0
    
    # Confirm no IP set to NICs that are shaping
    ifconfig enp5s0 0.0.0.0
    ifconfig enp2s0 0.0.0.0
    
    # Bring the bridge online
    ifconfig bridge0 up
    
    # Clear out any existing tc policies
    tc qdisc del dev enp2s0 root
    tc qdisc del dev enp5s0 root
    
    # Configure new traffic shaping policies on the NICs
    # Set the upload to 8Mbps and burstable to 10mbps
    tc qdisc add dev enp2s0 root tbf rate 8mbit burst 10mbit latency 50ms
    # Set the download to 70Mbps and burstable to 80Mbps
    tc qdisc add dev enp5s0 root tbf rate 70mbit burst 80mbit latency 50ms
    
  9. Restart the linux box:
    shutdown -r now
  10. You now have a traffic shaping network device!

Final Thoughts

Please note that normally you would not place the script in the rc.local file, however we wanted something quick and simple. The script may not survive in the rc.local file when updates/upgrades are applied against on the Linux install, so keep this in mind. You’ll also need to test to make sure that you are throttling in the correct direction with the 2 NICs. Make sure you test this setup and allow time to confirm it’s working before putting it in a production network.