When upgrading from any version of VMware vCSA to version 7.0, you may encounter a problem during the migration phase and be asked to specifiy a new “Export Directory”.
I’ve seen this occur on numerous upgrades and often find the same culprit causing the issue. I’ve found a very simple fix compared to other solutions online.
The full prompt for this issue is: “Enter a new export directory on the source machine below”
The Problem
When you upgrade the vCenter vCSA, the process migrates all data over from the source appliance, to the new vCSA 7 appliance.
This data can include the following (depending on your selection):
Configuration
Configuration and historical data (events and tasks)
Configuration and historical data (events, tasks, and performance metric)
This data can accumulate, especially the VMware vSphere Update Manager.
In the most recent upgrade I performed, I noticed that the smallest option (configuration only) was around 8GB, which is way over the 4.7GB default limit.
In my diagnosis, I logged in to the SSH console of the source appliance, and noticed that the partitions containing the VUM data (which includes update files) was around 7.4GB. This is the “/storage/updatemgr/” partition.
I wasn’t sure if this was included, but the 8GB of configuration, minus the 7.4GB of VUM data, could technically get me to around 0.6GB for migration if this was in fact included.
In my environment, I have the default (and simple) implementation of VUM with the only customization being the HPE VIBs depot. I figured maybe I should blast away the VUM and start from scratch on VMware vCSA 7.0 to see if this fixes the issue.
The Fix
To fix this issue, I simply completely reset the VMware Update Manager Database.
For details on this process and before performing these steps, please see VMware KB 2147284.
Let’s get to it:
Close the migration window (you can reopen this later)
Log in to your vCSA source appliance via SSH or console
Run the applicable steps as defined in the VMware KB 2147284 to reset VUM (WARNING: commands are version specific). In my case on vCSA 6.5 I ran the following commands:
Open your web broswer and navigate to https://new-vcsa-IP:5480 and resume the migration. You will now notice a significant space reduction and won’t need to specify a new mount point.
That’s it! You have a shiny new clean VUM instance, and can successfully upgrade to vCSA 7.0 without having to specify a new mount point.
To reconfigure and restore any old configuration to VUM, you’ll do so in the “VMware Lifecycle Management” section of the VMware vCenter Server Appliance interface.
Alternatively, in the rare event it’s not related to the VUM data, you can set the export directory to somewhere in “/tmp/” which is another workaround this issue which may allow you to continue.
When you’re looking for additional or enhanced options to secure you’re business and enterprise IT systems, MFA/2FA can help you achieve this. Get away from the traditional single password, and implement additional means of authentication! MFA provides a great compliment to your cyber-security policies.
MFA is short for Multi Factor authentication, additionally 2FA is short for Two Factor Authentication. While they are somewhat the same, multi means many, and 2 means two. Additional security is provided with both, since it provides more means of authentication.
Traditionally, users authenticate with 1 (one) level of authentication: their password. In simple terms MFA/2FA in addition to a password, provides a 2nd method of authentication and identity validation. By requiring users to authentication with a 2nd mechanism, this provides enhanced security.
Why use MFA/2FA
In a large portion of security breaches, we see users passwords become compromised. This can happen during a phishing attack, virus, keylogger, or other ways. Once a malicious user or bot has a users credentials (username and password), they can access resources available to that user.
By implementing a 2nd level of authentication, even if a users password becomes compromised, the real (or malicious user) must pass a 2nd authentication check. While this is easy for the real user, in most cases it’s nearly impossible for a malicious user. If a password get’s compromised, nothing can be accessed as it requires a 2nd level of authentication. If this 2nd method is a cell phone or hardware token, a malicious user won’t be ale to access the users resources unless they steal the cell phone, or hardware token.
How does MFA/2FA work
When deploying MFA or 2FA you have the option of using an app, hardware token (fob), or phone verification to perform the additional authentication check.
After a user attempts to logs on to a computer or service with their username and password, the 2nd level of authentication will be presented, and must pass in order for the login request to succeed.
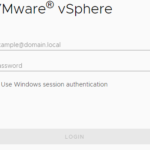
Please see below for an example of 2FA selection screen after a successful username and password:
Duo Security Windows Login MFA 2FA Prompt
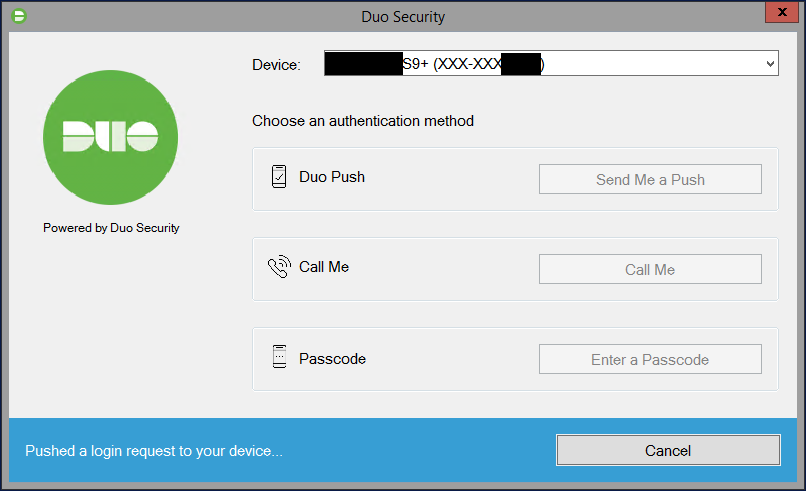
After selecting an authentication method for MFA or 2FA, you can use the following
2FA with App (Duo Push)
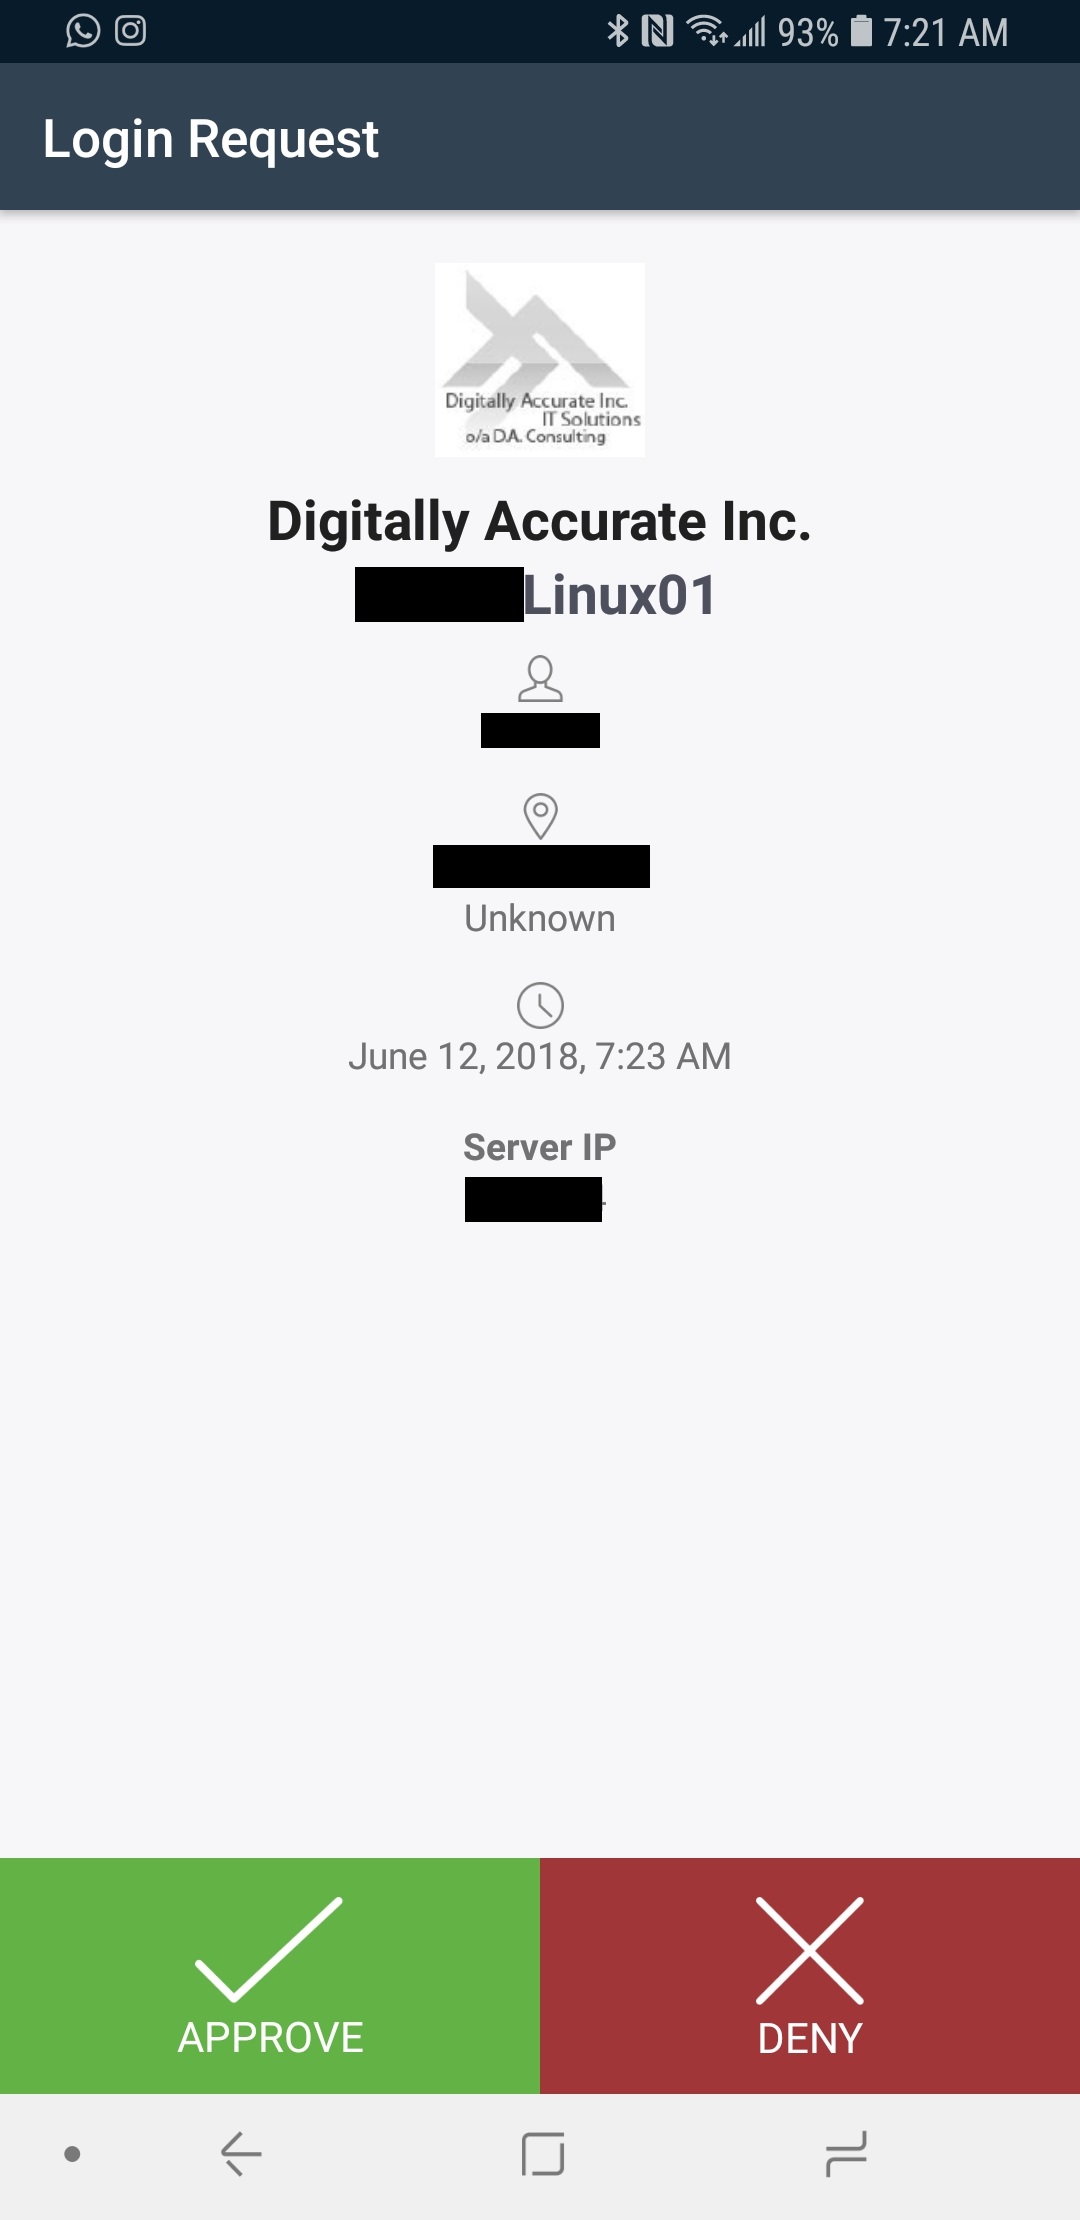
Duo Push sends an authentication challenge to your mobile device which a user can then approve or deny.
Please see below for an example of Duo Push:
Duo Push to Mobile App on Android
Once the user selects to approve or deny the login request, the original login will either be approved or denied. We often see this as being the preferred MFA/2FA method.
2FA with phone verification (Call Me)
Duo phone verification (Call Me) will call you on your phone number (pre-configured by your IT staff) and challenge you to either hangup to deny the login request, or press a button on the keypad to accept the login request.
While we rarely use this option, it is handy to have as a backup method.
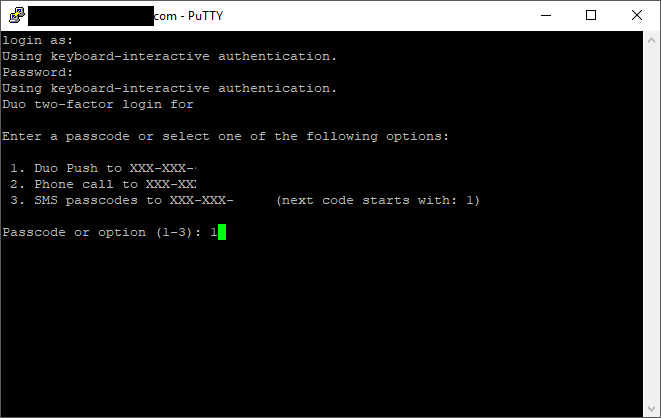
2FA with Hardware Token (Passcode)
Duo Passcode challenges are handled using a hardware token (or you can generate a passcode using the Duo App). Once you select this method, you will be prompted to enter the passcode to complete the 2FA authentication challenge. If you enter the correct passcode, the login will be accepted.
Here is a Duo D-100 Token that uses HOTP (HMAC-based One Time Password):
Duo D-100 HOTP Hardware Token
When you press the green button, a passcode will be temporarily displayed on the LCD display which you can use to complete the passcode challenge.
You can purchase Hardware Token’s directly from Digitally Accurate Inc by contacting us, your existing Duo Partner, or from Duo directly. Duo is also compatible with other 3rd party hardware tokens that use HOTP and TOTP.
2FA with U2F
While you can’t visibly see the option for U2F, you can use U2F as an MFA or 2FA authentication challenge. This includes devices like a Yubikey from Yubico, which plugs in to the USB port of your computer. You can attach a Yubikey to your key chain, and bring it around with you. The Yubikey simply plugs in to your USB port and has a button that you press when you want to authenticate.
When the 2FA window pops up, simply hit the button and your Yubikey will complete the MFA/2FA challange.
What can MFA/2FA protect
Duo MFA supports numerous cloud and on-premise applications, services, protocols, and technologies. While the list is very large (full list available at https://duo.com/product/every-application), we regularly deploy and use Duo Security for the following configurations.
Windows Logins (Server and Workstation Logon)
Duo MFA can be deployed to not only protect your Windows Servers and Workstations, but also your remote access system as well.
When logging on to a Windows Server or Windows Workstation, a user will be presented with the following screen for 2FA authentication:
Duo Security Windows Login MFA 2FA Prompt
Below you can see a video demonstration of DUO on Windows Login.
DUO works with both Windows Logins and RDP (Remote Desktop Protocol) Logins.
VMWare Horizon View Clients (VMWare VDI Logon)
Duo MFA can be deployed to protect your VDI (Virtual Desktop Infrastructure) by requiring MFA or 2FA when users log in to access their desktops.
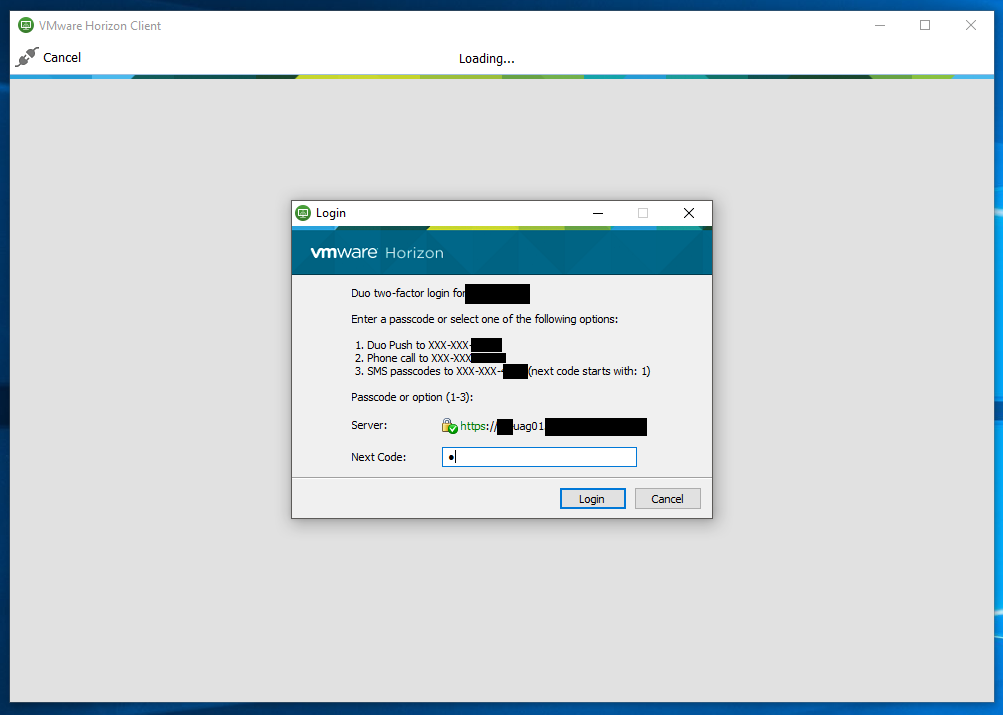
When logging on to the VMware Horizon Client, a user will be presented with the following screen for 2FA authentication:
Duo Security VMWare Horizon Client Login MFA 2FA Prompt
Below you can see a video demonstration of DUO on VMware Horizon View (VDI) Login.
Sophos UTM (Admin and User Portal Logon)
Duo MFA can be deployed to protect your Sophos UTM firewall. You can protect the admin account, as well as user accounts when accessing the user portal.
If you’re using the VPN functionality on the Sophos UTM, you can also protect VPN logins with Duo MFA.
Unix and Linux (Server and Workstation Logon)
Duo MFA can be deployed to protect your Unix and Linux Servers. You can protect all user accounts, including the root user.
We regularly deploy this with Fedora and CentOS (even FreePBX) and you can protect both SSH and/or console logins.
When logging on to a Unix or Linux server, a user will be presented with the following screen for 2FA authentication:
Duo Security CentOS Linux login MFA 2FA Prompt
Below you can see a video demonstration of DUO on Linux.
WordPress Logon
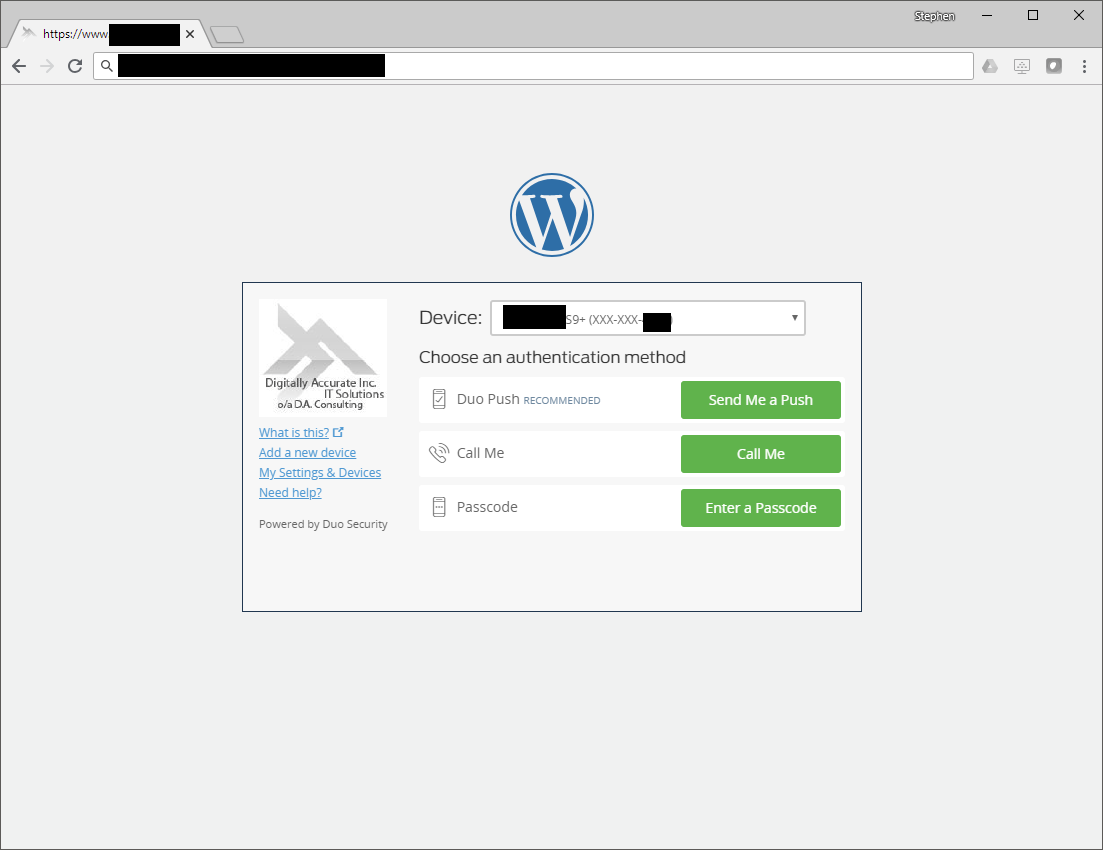
Duo MFA can be deployed to protect your WordPress blog. You can protect your admin and other user accounts.
If you have a popular blog, you know how often bots are attempting to hack and brute force your passwords. If by chance your admin password becomes compromised, using MFA or 2FA can protect your site.
When logging on to a WordPress blog admin interface, a user will be presented with the following screen for 2FA authentication:
Duo Security WordPress Login MFA 2FA Prompt
Below you can see a video demonstration of DUO on a WordPress blog.
How easy is it to implement
Implementing Duo MFA is very easy and works with your existing IT Infrastructure. It can easily be setup, configured, and maintained on your existing servers, workstations, and network devices.
Duo offers numerous plugins (for windows), as well as options for RADIUS type authentication mechanisms, and other types of authentication.
How easy is it to manage
Duo is managed through the Duo Security web portal. Your IT admins can manage users, MFA devices, tokens, and secured applications via the web interface. You can also deploy appliances that allow users to manage, provision, and add their MFA devices and settings.
Duo also integrates with Active Directory to make managing and maintaining users easy and fairly automated.
Need to add 5 SATA drives or SSDs to your system? The IO-PCE585-5I is a solid option!
The IO-PCE585-5I PCIe card adds 5 SATA ports to your system via a single PCIe x4 card using 2 PCIe lanes. Because the card uses PCIe 3.1a, this sounds like a perfect HBA to use to add SSD’s to your system.
This card can be used in workstations, DIY NAS (Network Attached Storage), and servers, however for the sake of this review, we’ll be installing it in a custom built FreeNAS system to see how the card performs and if it provides all the features and functionality we need.
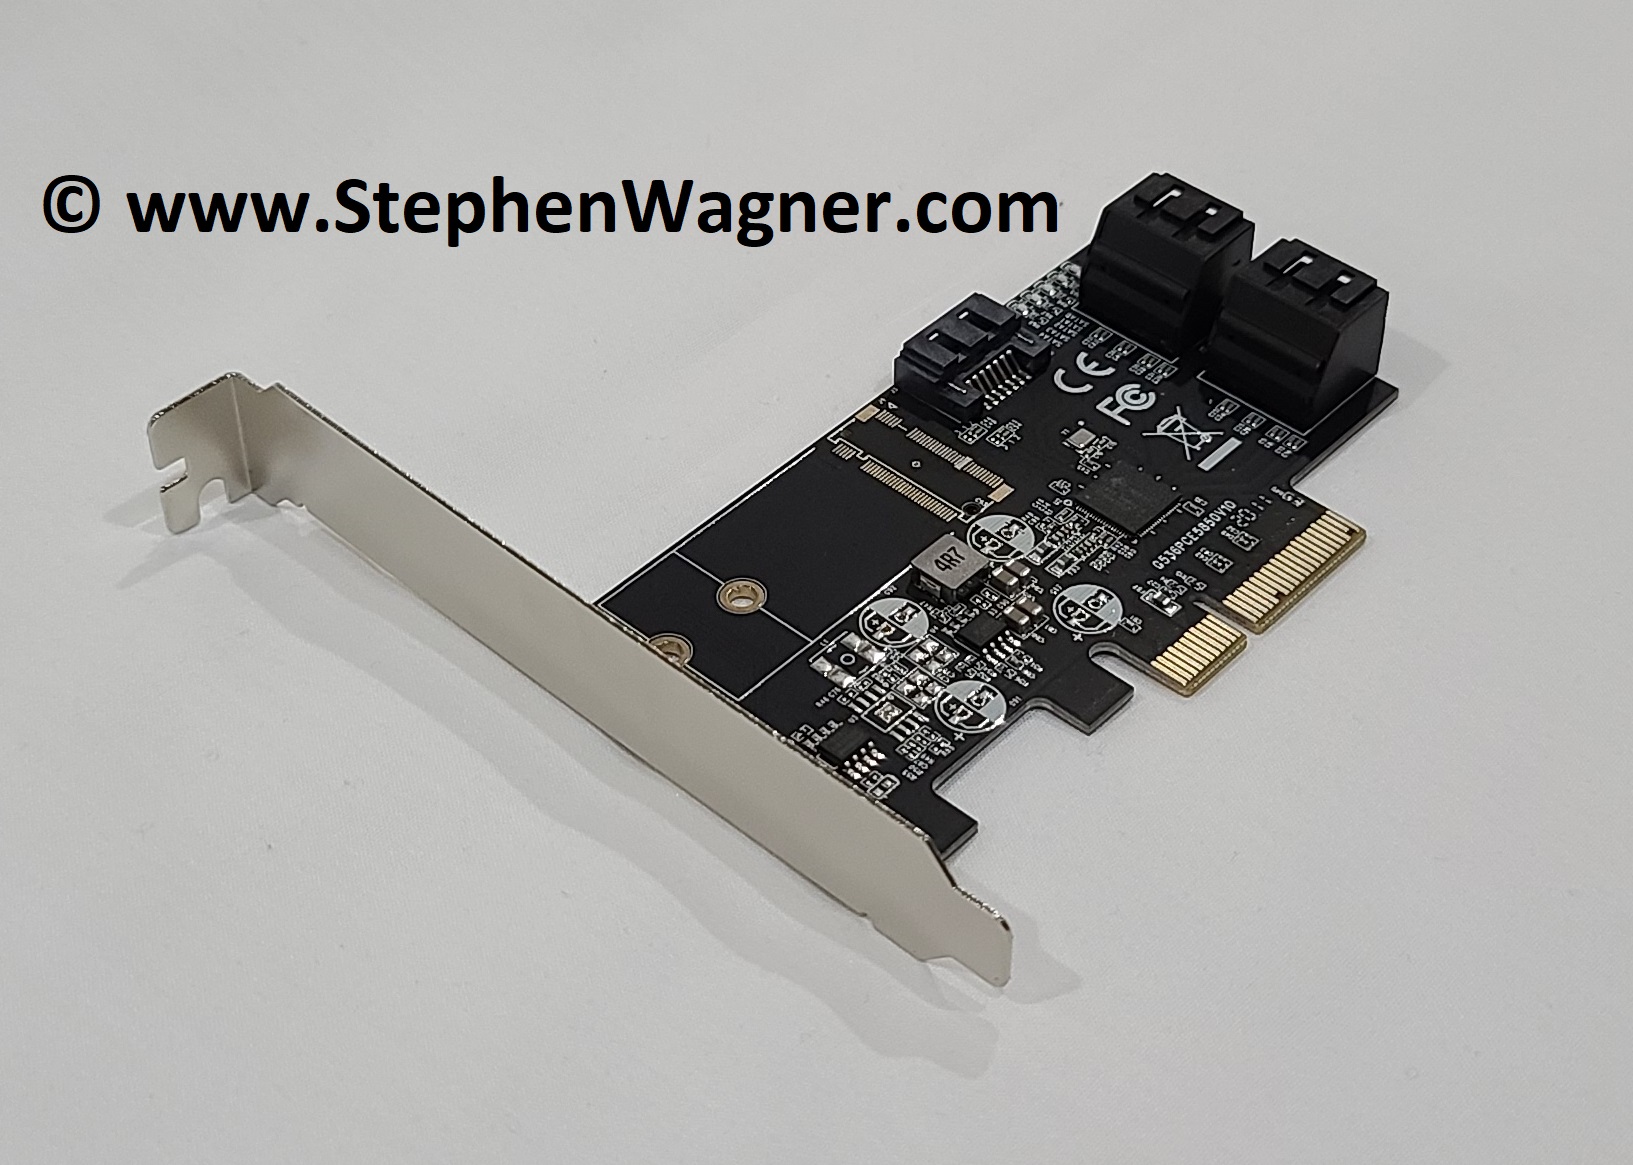
IOCREST IO-PCE585-5I PCIe Card
A big thank you to IOCREST for shipping me out this card to review, they know I love storage products! 🙂
Use Cases
The IO-PCE585-5I card is strictly an HBA (a Host Bus Adapter). This card provides JBOD access to the disks so that each can be independently accessed by the computer or servers operating system.
Typically HBAs (or RAID cards in IT mode) are used for storage systems to provide direct access to disks, so that that the host operating system can perform software RAID, or deploy a special filesystem like ZFS on the disks.
The IOCREST IO-PCE585-5I is the perfect card to accomplish this task as it supports numerous different operating systems and provides JBOD access of disks to the host operating system.
In addition to the above, the IO-PCE585-5I provides 5 SATA 6Gb/s ports and uses PCIe 3 with 2 PCIe lanes, to provide a theoretical maximum throughput close to 2GB/s, making this card perfect for SSD use as well!
Need more drives or SSDs? With the PCIe 2x interface, simply just add more to your system!
While you could use this card with Windows software RAID, or Linux mdraid, we’ll be testing the card with FreeNAS, a NAS system built on FreeBSD.
This card is also marketed as the SI-PEX40139 and IO-PEX40139 Part Numbers.
IO-PCE585-5I Specifications
Let’s get in to the technical details and specs on the card.
IO-PCE585-5I (IO-PEX40139) PCIe Card
According to the packaging, the IO-PCE585-5I features the following:
Supports up to two lanes over PCIe 3.0
Complies with PCI Express Base Specification Revision 3.1a.
Supports PCIe link layer power saving mode
Supports 5 SATA 6Gb/s ports
Supports command-based and FIS-based for Port Multipliers
Complies with SATA Specification Revision 3.2
Supports AHCI mode and IDE programming interface
Supports Native Command Queue (NCQ)
Supports SATA link power saving mode (partial and slumber)
Supports SATA plug-in detection capable
Supports drive power control and staggered spin-up
Supports SATA Partial / Slumber power management state
Supports SATA Port Multiplier
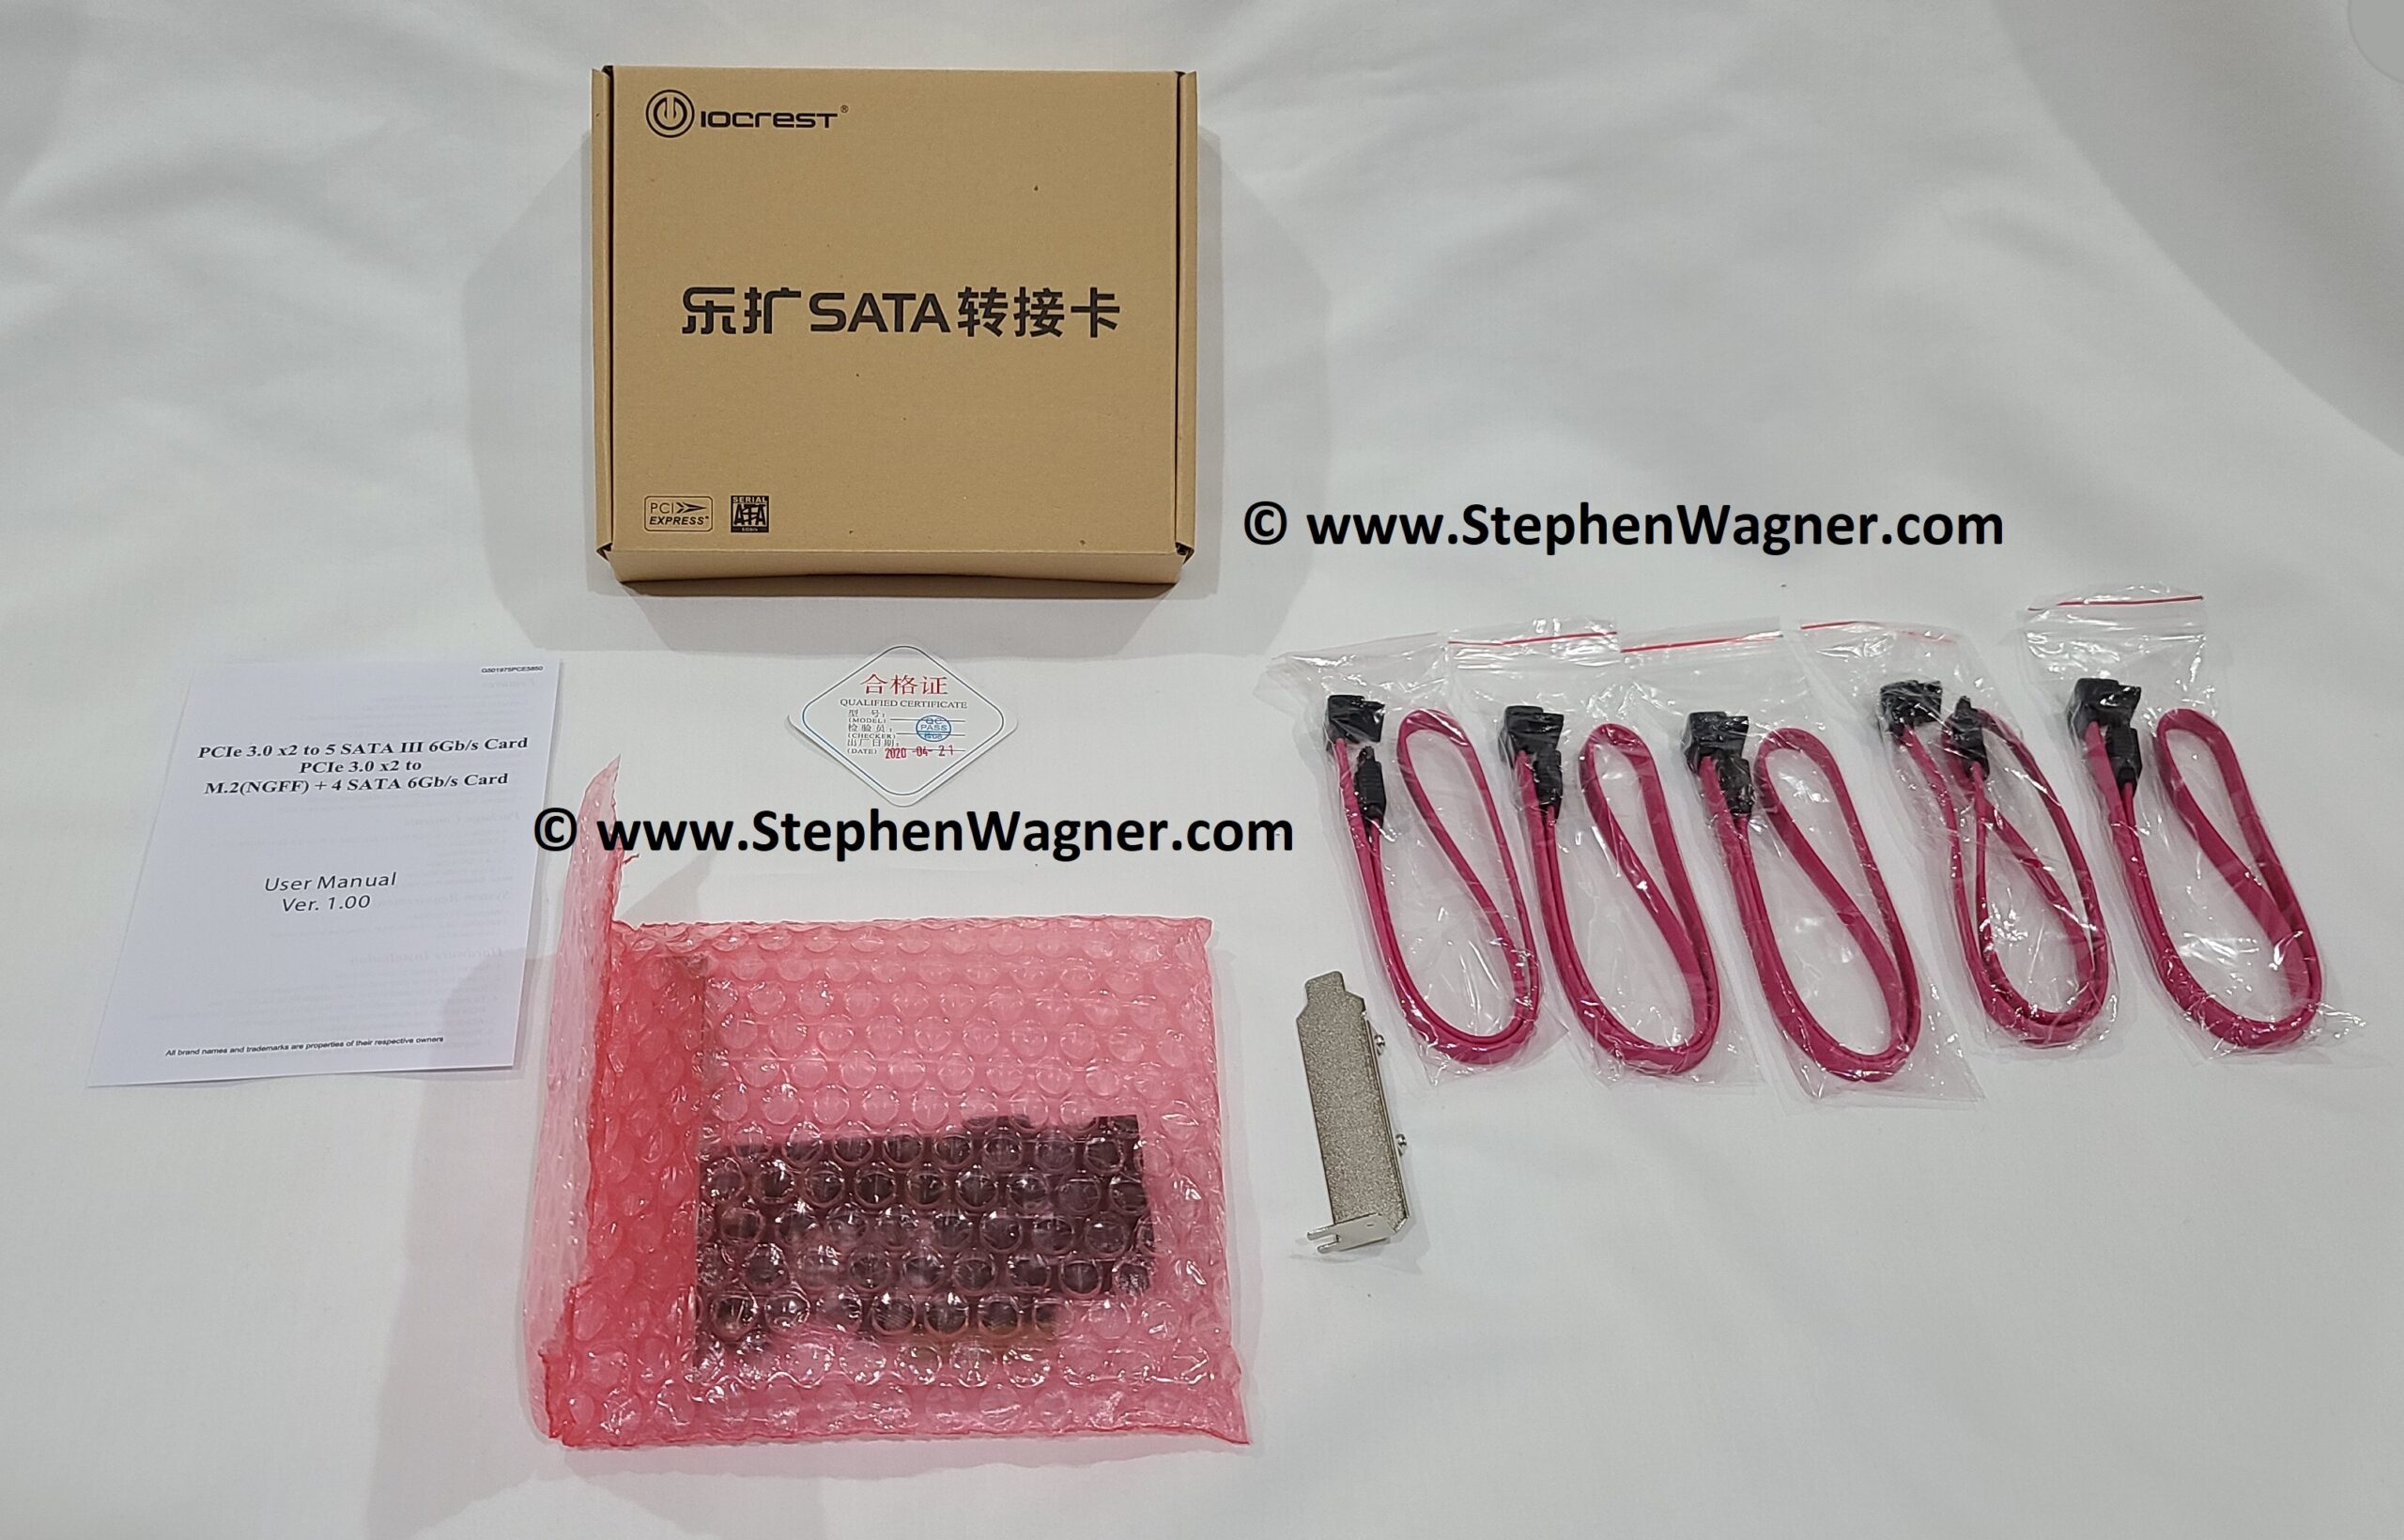
Whats included in the packaging?
1 × IO-PCE585-5I (IO-PEX40139) PCIe 3.0 card to 5 SATA 6Gb/s
1 × User Manual
5 × SATA Cables
1 x Low Profile Bracket
1 x Driver CD (not needed, but nice to have)
Unboxing, Installation, and Configuration
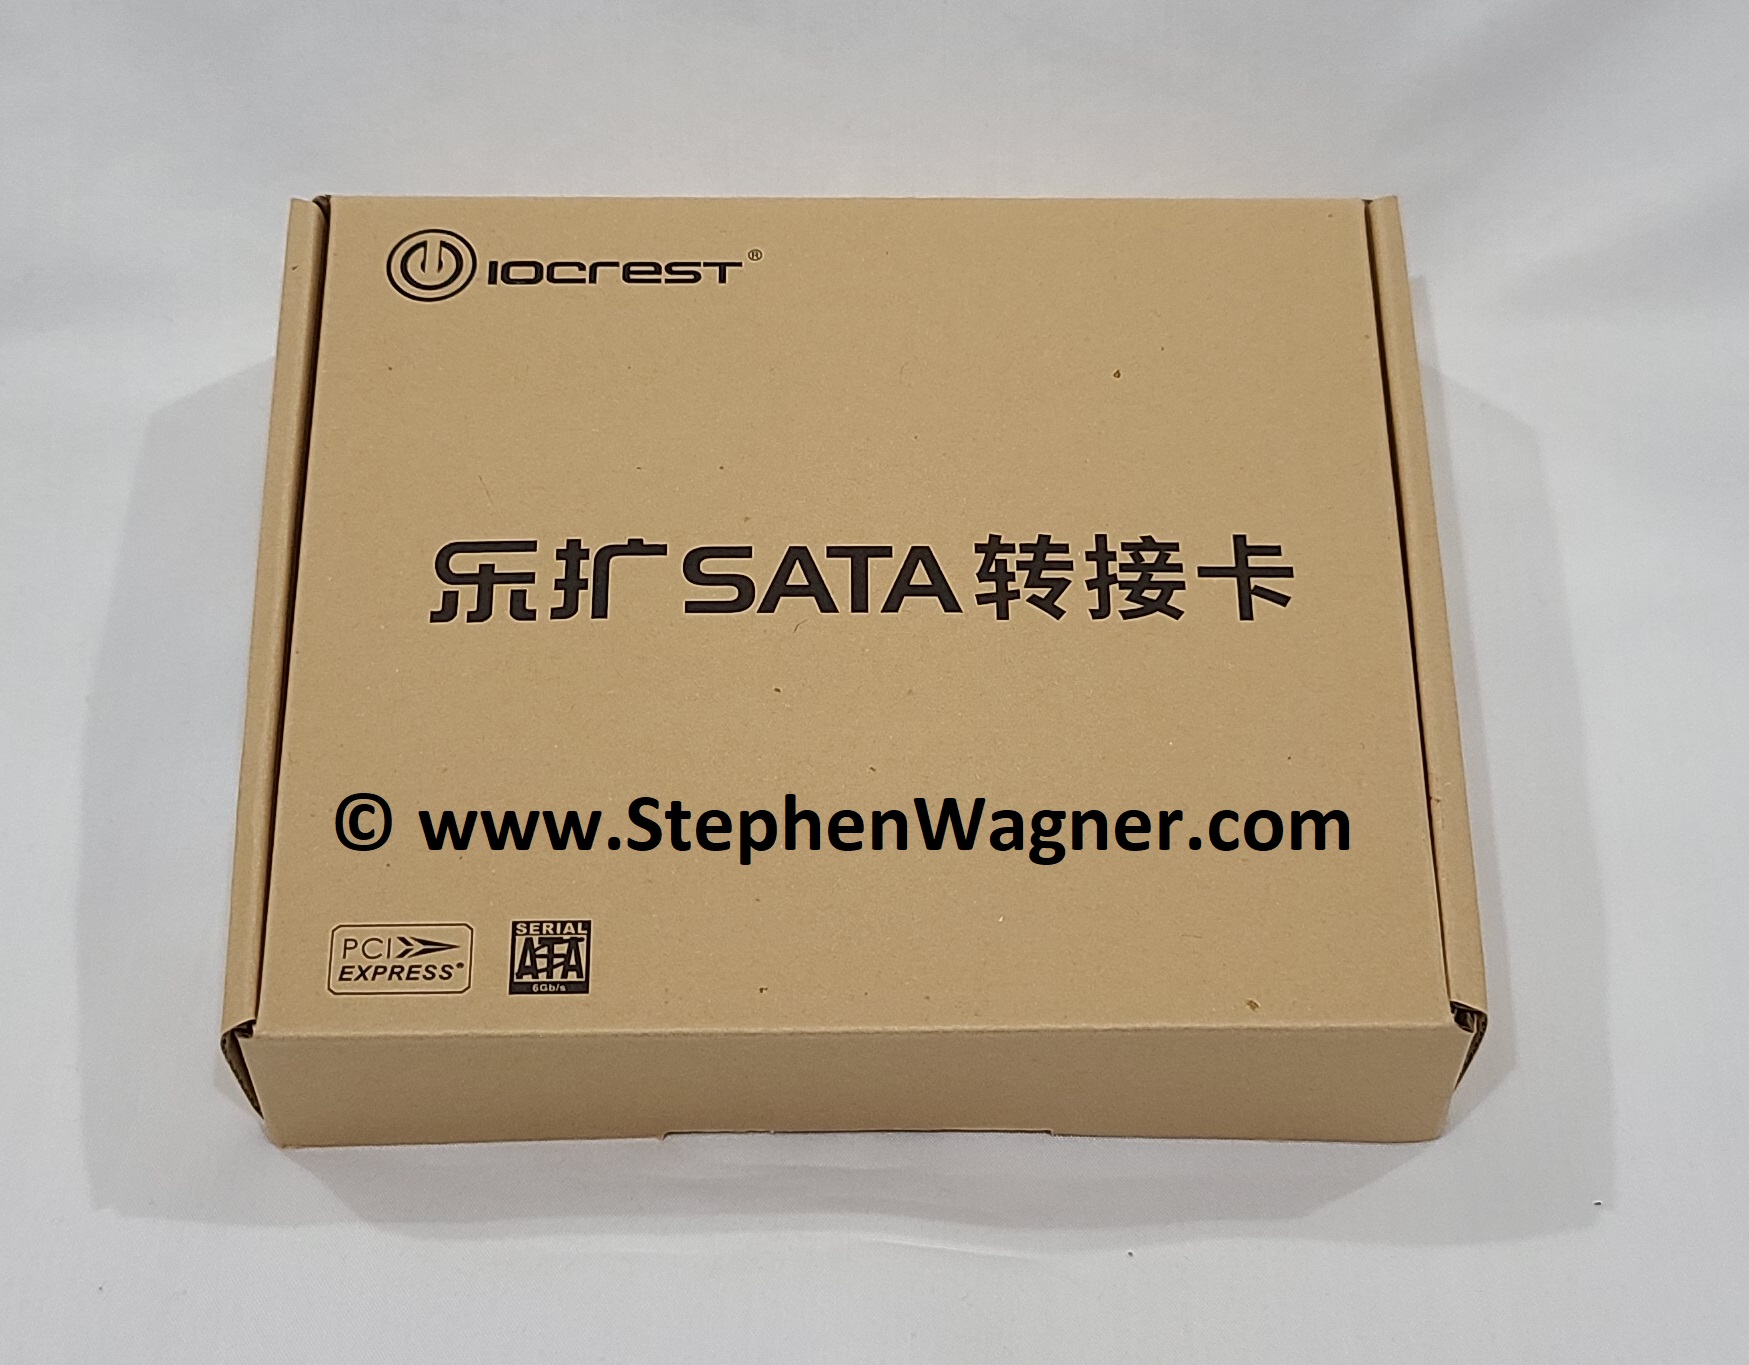
It comes in a very small and simple package.
IO-PCE585-5I Retail Box
Opening the box, you’ll see the package contents.
IO-PCE585-5I Box Contents Unboxed
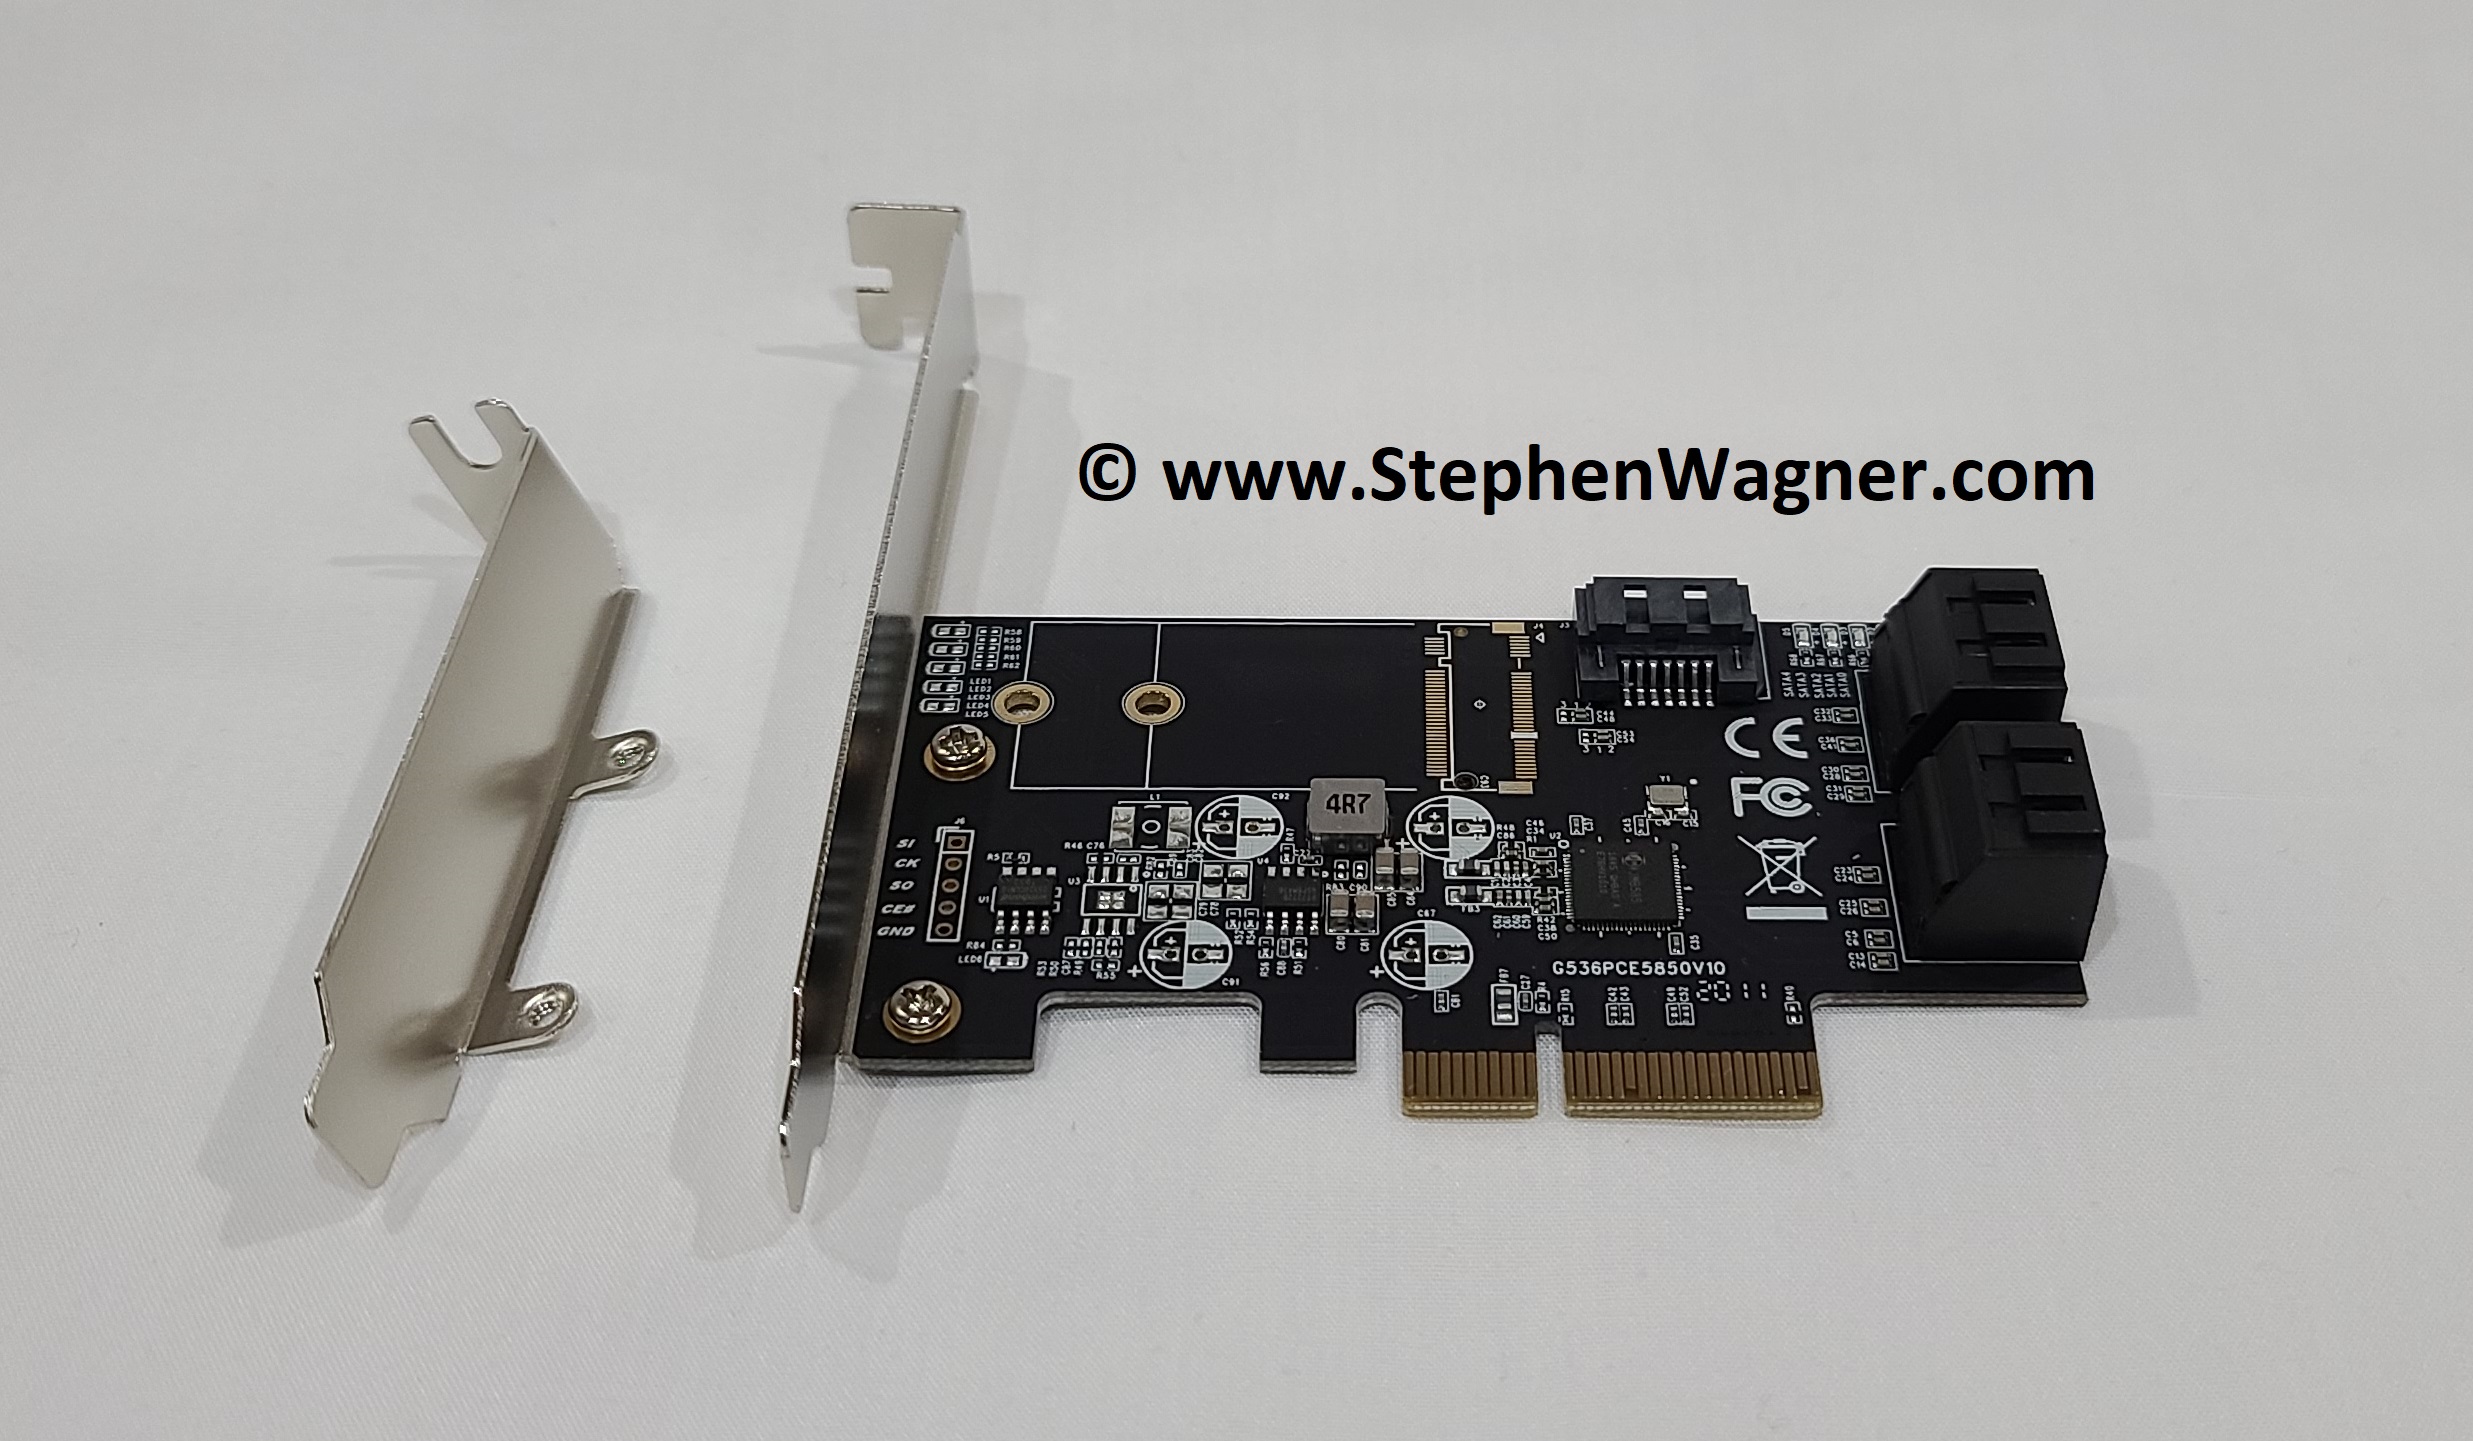
And finally the card. Please note that it comes with the full-height PCIe bracket installed. It also ships with the half-height bracket and can easily be replaced.
IO-PCE585-5I (SI-PEX40139) PCIe Card
Installation in FreeNAS Server and cabling
We’ll be installing this card in to a computer system, in which we will then install the latest version of FreeNAS. The original plan is to connect the IO-PCE585-5I to a 5-Bay SATA Hotswap backplane/drive cage full of Seagate 1TB Barracuda Hard Drives for testing.
The card installed easily, however we ran in to an issue when running the cabling. The included SATA cables have right angel connectors on the end that connects to the drive, which stops us from being able to connect them to the backplane’s connectors. To overcome this we could either buy new cables, or directly connect to the disks. I chose the latter.
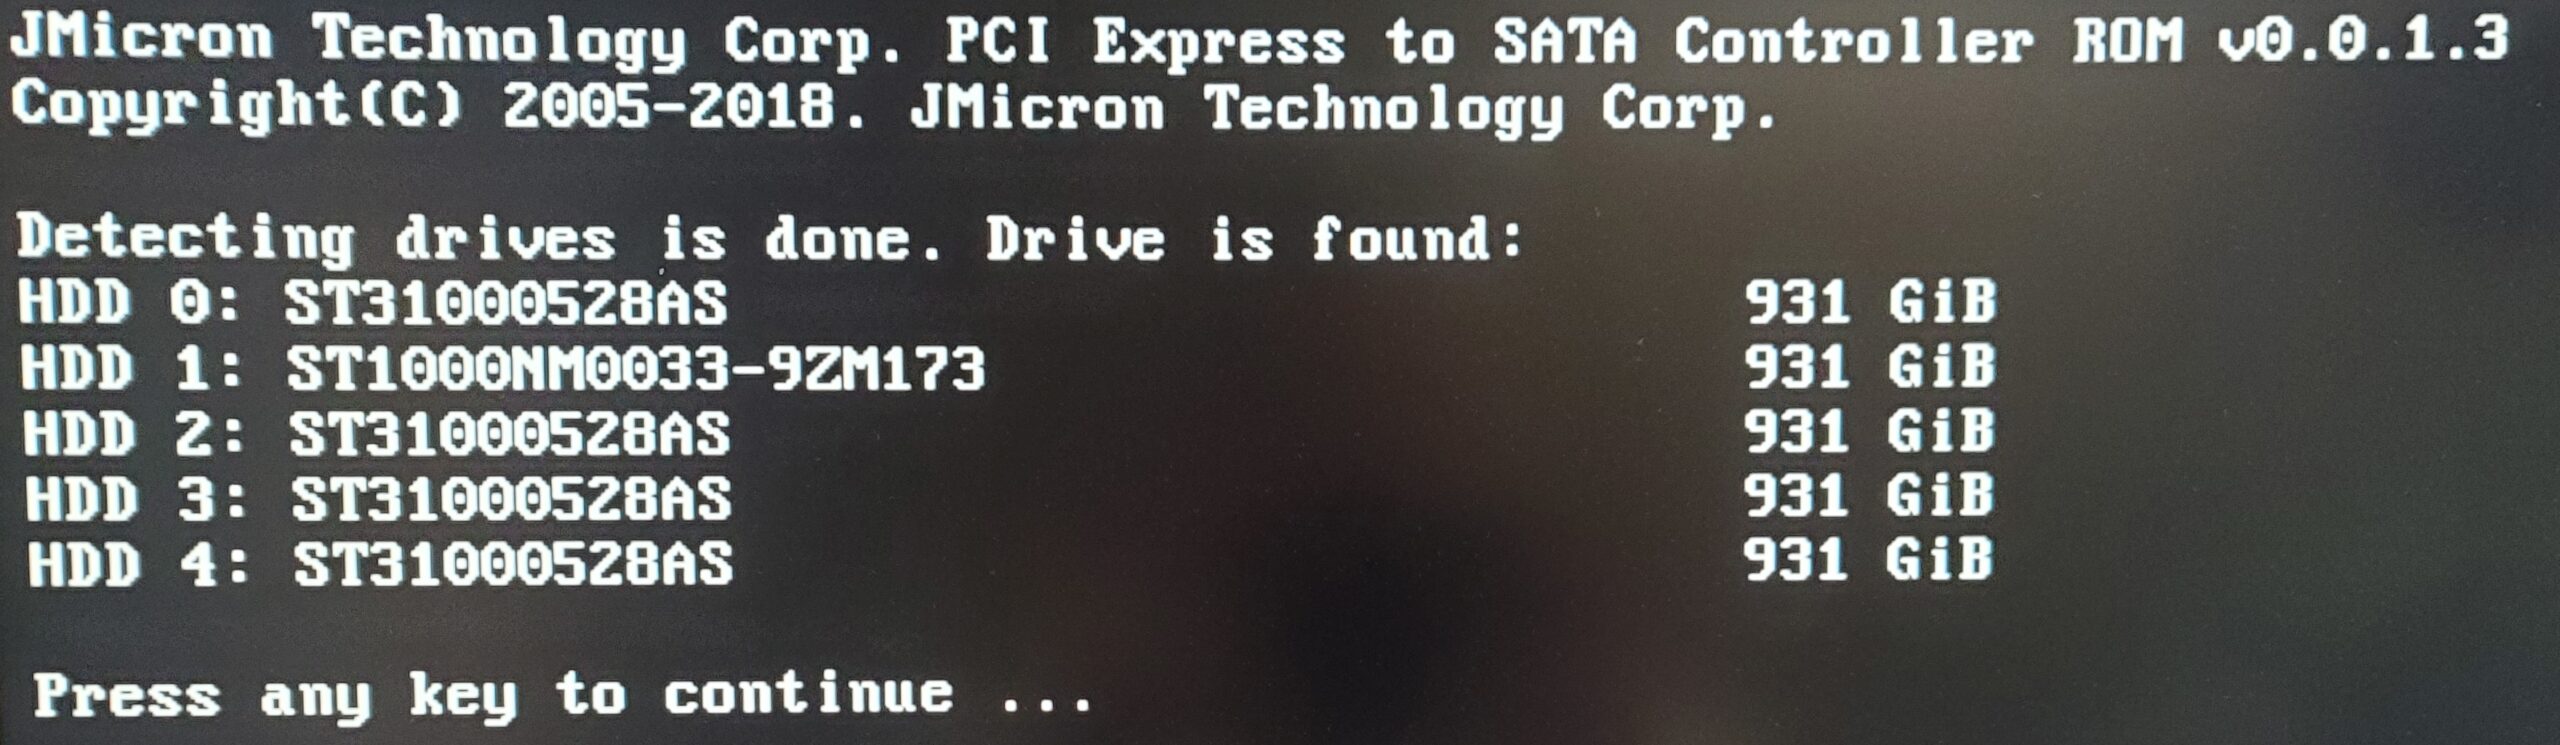
I installed the card in the system, and booted it up. The HBA’s BIOS was shown.
IO-PCE585-5I BIOS
I then installed FreeNAS.
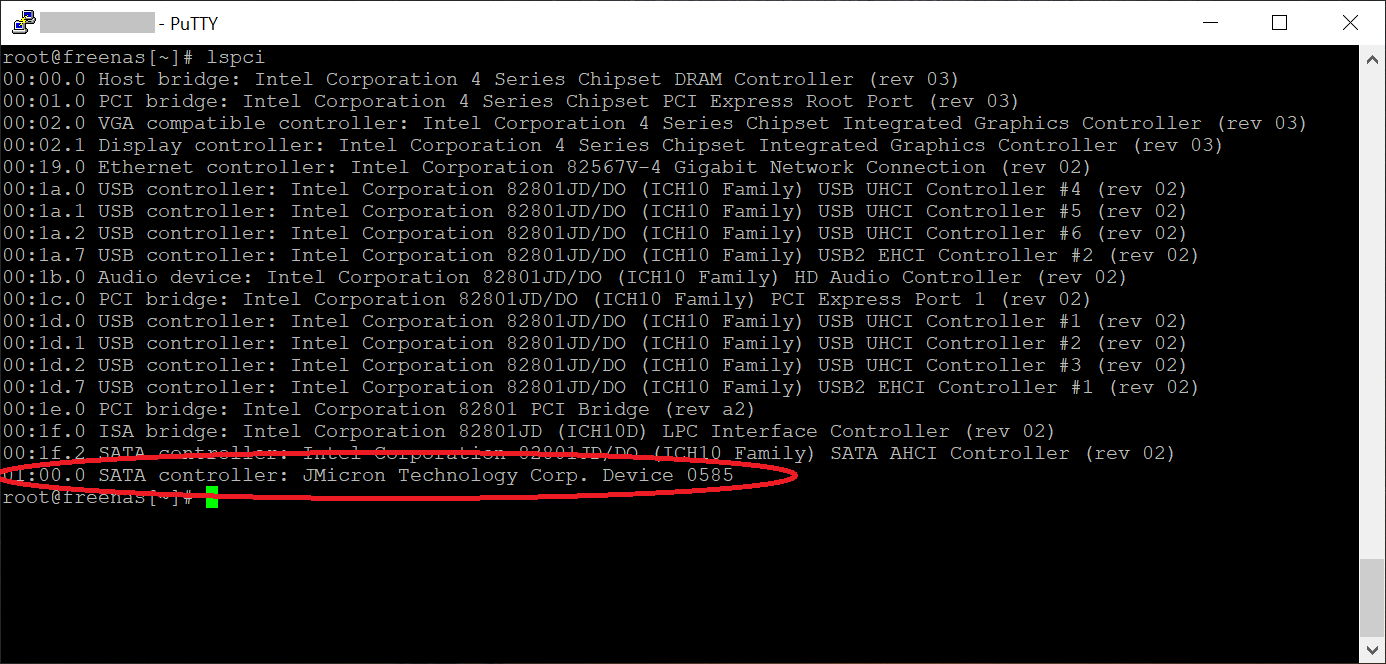
Inside of the FreeNAS UI the disks are all detected! I ran an “lspci” to see what the controller is listed as.
IO-PCE585-5I FreeNAS lspci
SATA controller: JMicron Technology Corp. Device 0585
I went ahead and created a ZFS striped pool, created a dataset, and got ready for testing.
Speedtest and benchmark
Originally I was planning on providing numerous benchmarks, however in every case I hit the speed limit of the hard disks connected to the controller. Ultimately this is great because the card is fast, but bad because I can’t pinpoint the exact performance numbers.
To get exact numbers, I may possibly write up another blog post in the future when I can connect some SSDs to test the controllers max speed. At this time I don’t have any immediately available.
One thing to note though is that when I installed the card in a system with PCIe 2.0 slots, the card didn’t run at the expected speed limitations of PCIe 2.0, but way under. For some reason I could not exceed 390MB/sec (reads or writes) when technically I should have been able to achieve close to 1GB/sec. I’m assuming this is due to performance loss with backwards compatibility with the slower PCIe standard. I would recommend using this with a motherboard that supports PCIe 3.0 or higher.
The card also has beautiful blue LED activity indicators to show I/O on each disk independently.
IO-PCE585-5I LED Activity Indicators
After some thorough testing, the card proved to be stable and worked great!
Additional Notes & Issues
Two additional pieces of information worth noting:
IO-PCE585-5I Chipset – The IO-PCE585-5I uses a JMicron JMB585 chipset. This chipset is known to work well and stable with FreeNAS.
Boot Support – Installing this card in different systems, I noticed that all of them allowed me to boot from the disks connected to the IO-PCE585-5I.
While this card is great, I would like to point out the following issues and problems I had that are worth mentioning:
SATA Cable Connectors – While it’s nice that this card ships with the SATA cables included, note that the end of the cable that connects to the drive is right-angled. In my situation, I couldn’t use these cables to connect to the 5 drive backplane because there wasn’t clearance for the connector. You can always purchase other cables to use.
Using card on PCIe 2.0 Motherboard – If you use this PCIe 3.0 card on a motherboard with PCIe 2.0 slots it will function, however you will experience a major performance decrease. This performance degradation will be larger than the bandwidth limitations of PCIe 2.0.
Conclusion
This card is a great option to add 5 hard disks or solid state drives to your FreeNAS storage system, or computer for that matter! It’s fast, stable, and inexpensive.
I would definitely recommend the IOCREST IO-PCE585-5I.
In the ever-evolving world of IT and End User Computing (EUC), new technologies and solutions are constantly being developed to decrease costs, improve functionality, and help the business’ bottom line. In this pursuit, as far as end user computing goes, two technologies have emerged: Hosted Desktop Infrastructure (HDI), and Virtual Desktop Infrastructure (VDI). In this post I hope to explain the differences and compare the technologies.
We’re at a point where due to the low cost of backend server computing, performance, and storage, it doesn’t make sense to waste end user hardware and resources. By deploying thin clients, zero clients, or software clients, we can reduce the cost per user for workstations or desktop computers, and consolidate these on the backend side of things. By moving moving EUC to the data center (or server room), we can reduce power requirements, reduce hardware and licensing costs, and take advantage of some cool technologies thanks to the use of virtualization and/or Storage (SANs), snapshots, fancy provisioning, backup and disaster recovery, and others.
See below for the video, or read on for the blog post!
And it doesn’t stop there, utilizing these technologies minimizes the resources required and spent on managing, monitoring, and supporting end user computing. For businesses this is a significant reduction in costs, as well as downtime.
What is Hosted Desktop Infrastructure (HDI) and Virtual Desktop Infrastructure (VDI)
Many IT professionals still don’t fully understand the difference between HDI and VDI, but it’s as sample as this: Hosted Desktop Infrastructure runs natively on the bare metal (whether it’s a server, or SoC) and is controlled and provided by a provisioning server or connection broker, whereas Virtual Desktop Infrastructure virtualizes (like you’re accustomed to with servers) the desktops in a virtual environment and is controlled and provided via hypervisors running on the physical hardware.
Hosted Desktop Infrastructure (HDI)
As mentioned above, Hosted Desktop Infrastructure hosts the End User Computing sessions on bare metal hardware in your datacenter (on servers). A connection broker handles the connections from the thin clients, zero clients, or software clients to the bare metal allowing the end user to see the video display, and interact with the workstation instance via keyboard and mouse.
Pros:
Remote Access capabilities
Reduction in EUC hardware and cost-savings
Simplifies IT Management and Support
Reduces downtime
Added redundancy
Runs on bare metal hardware
Resources are dedicated and not shared, the user has full access to the hardware the instance runs on (CPU, Memory, GPU, etc)
Easily provide accelerated graphics to EUC instances without additional costs
Reduction in licensing as virtualization products don’t need to be used
Cons:
Limited instance count to possible instances on hardware
Scaling out requires immediate purchase of hardware
Some virtualization features are not available since this solution doesn’t use virtualization
Additional backup strategy may need to be implemented separate from your virtualized infrastructure
Example:
If you require dedicated resources for end users and want to be as cost-effective as possible, HDI is a great candidate.
An example HDI deployment would utilize HPE Moonshot which is one of the main uses for HPE Moonshot 1500 chassis. HPE Moonshot allows you to provision up to 180 OS instances for each HPE Moonshot 1500 chassis.
Virtual Desktop Infrastructure virtualizes the end user operating system instances exactly how you virtualize your server infrastructure. In VMware environments, VMware Horizon View can provision, manage, and maintain the end user computing environments (virtual machines) to dynamically assign, distribute, manage, and broker sessions for users. The software product handles the connections and interaction between the virtualized workstation instances and the thin client, zero client, or software client.
Pros:
Remote Access capabilities
Reduction in EUC hardware and cost-savings
Simplifies IT Management and Support
Reduces downtime
Added redundancy
Runs as a virtual machine
Shared resources (you don’t waste hardware or resources as end users share the resources)
Easy to scale out (add more backend infrastructure as required, don’t need to “halt” scaling while waiting for equipment)
Can over-commit (over-provision)
Backup strategy is consistent with your virtualized infrastructure
Capabilities such as VMware DRS, VMware HA
Cons:
Resources are not dedicated and are shared, users share the server resources (CPU, Memory, GPU, etc)
Extra licensing may be required
Extra licensing required for virtual accelerated graphics (GPU)
Example:
If you want to share a pool of resources, require high availability, and/or have dynamic requirements then virtualization would be the way to go. You can over commit resources while expanding and growing your environment without any discontinuation of services. With virtualization you also have access to technologies such as DRS, HA, and special Backup and DR capabilities.
Both technologies are great and have their own use cases depending on your business requirements. Make sure you research and weigh each of the options if you’re considering either technologies. Both are amazing technologies which will compliment and enhance your IT strategy.
This website uses cookies to improve your experience. We'll assume you're ok with this, but you can opt-out if you wish.
Do you accept the use of cookies and accept our privacy policy? AcceptRejectCookie and Privacy Policy
Privacy & Cookies Policy
Privacy Overview
This website uses cookies to improve your experience while you navigate through the website. Out of these cookies, the cookies that are categorized as necessary are stored on your browser as they are essential for the working of basic functionalities of the website. We also use third-party cookies that help us analyze and understand how you use this website. These cookies will be stored in your browser only with your consent. You also have the option to opt-out of these cookies. But opting out of some of these cookies may have an effect on your browsing experience.