When using Omnissa Horizon (formerly VMware Horizon), you may note that NVENC offload is disabled when using RDSH with NVIDIA vGPU. This may also affect other VDI and Application Delivery platforms that use RDSH (Remote Desktop Session Hosts) and NVIDIA vGPU (Virtual GPU).
One of the key benefits of deploying NVIDIA vGPU with Omnissa Horizon, is being able to use the NVIDIA NvENC (NVIDIA Encoder) to hardware encode your VDI session. This is also known as H264/H265/HEVC/AV1 offload.
This means that the encoding and compression of the remoted video session is handled by the GPU, instead of the CPU, freeing up resources on the VM guest and host, reducing latency with encoding, and also providing a much better user experience.
The Observation
When deploying NVIDIA vGPU with vApps and Horizon Apps, you’ll note the following in the VMware Horizon Performance Tracker:
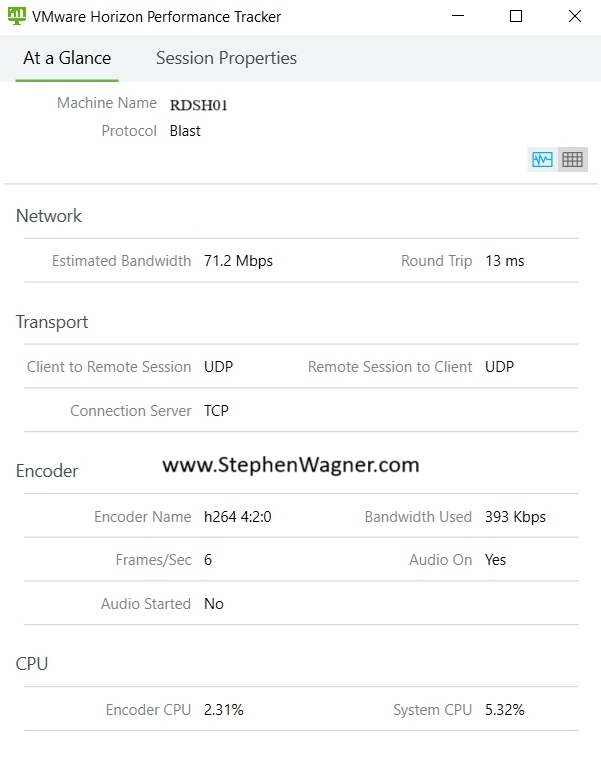
You can see above that the “Encoder Name” is using “h264 4:2:0”. This means that the CPU Software Based encoder is handing the encoding of the H264 BLAST Session. While the environment is 3D accelerated, the remoting protocol encoding is not hardware offloaded.
You’ll also note the following:
- VMware Horizon Agent High CPU Usage
- “nvidia-smi” on the host and VM does not report the encoder being used
This behavior is as expected due to the inability of RDS session hosts to be able to utilize NvENC. RDSH hosts utilize a software framebuffer for user environment and desktop delivery which cannot be used with NVENC.
Solution and/or Workaround
To work around this limitation, you have the option of using VDI desktops (in this case it would be preferable to use non-persistent Instant Clones) to deploy an “Application Pool” with vGPU enabled VMs.
Note that this is a major change to your solution architecture because pushing applications (and desktops) from Windows 10 or Windows 11 Guest VMs is a 1 to 1 relation, versus RDSH which supports many users to one VM.
Using Horizon, you could then push applications (not desktops) from these vGPU enabled Instant Clones, which would support NVENC and hardware offload, as shown in the example below:
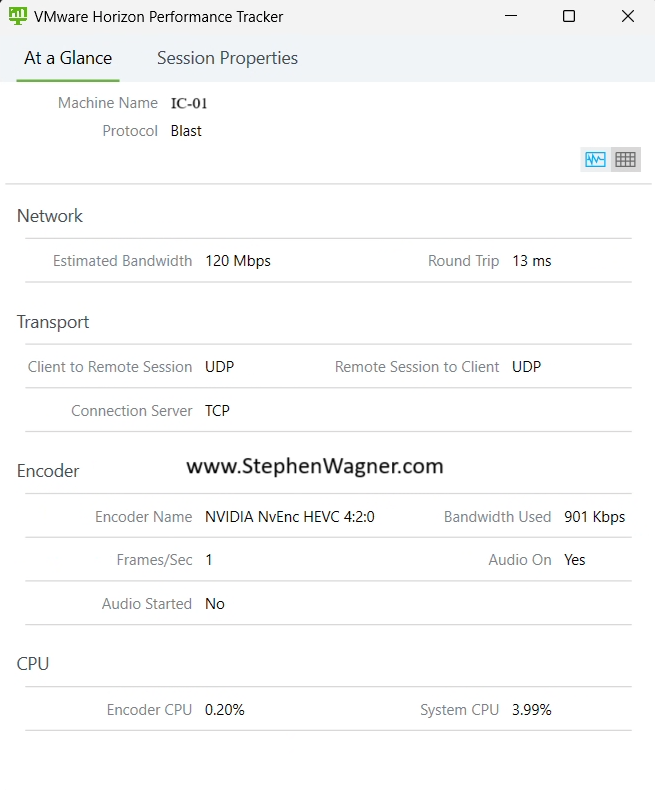
In the image above, you’ll note that the “Encoder Name” is “NVIDIA NvEnc HEVC 4:2:0” showing us that NvEnc hardware offload and encoding is functioning and being used.
Note, that using this method to deploy Horizon Apps will result in more framebuffer being required, however may be offset since a smaller framebuffer can be used with individual VMs versus a large framebuffer being assigned and attached to an RDSH host.