Here’s a few oldies I found while going through the millions of pictures I’ve taken over the years…
-
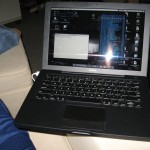
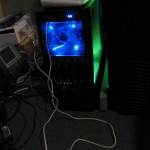
- XMMS-on-X-on-OSX
-
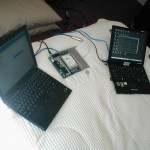
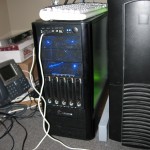
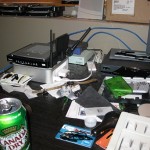
- Wifi Command Center
-
- Connection
-
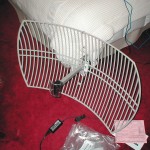
- Omni Antenna
Here’s a few oldies I found while going through the millions of pictures I’ve taken over the years…

As with most geeks, I’m a HUGE fan of custom firmware on embedded routers.
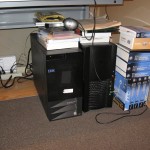
Recently I heard about Linksys releasing their new WRT610n. This sucker had 2 radios (First operating 2.4Ghz, the second running 5Ghz). In the past I have done alot of work with WDS mesh nets, etc… so I HAD to get my hands on a few of these. I went to the local tech retailer and picked up two of the V2.0s.
Since these are new devices, most of the 3rd party firmware development is fairly fresh. I don’t know too much about the specifics but from what I understand these units use the 2.6 kernel, whereas most of the past custom development has been done on the 2.4 kernels.
Anyways, I had quite a bit of fun messing around with these, testing some firmware, until finally at one point I accidently flashed the incorrect firmware and bricked the device.
Typically with these new routers, they actually have a built in “Recovery Mode” if you’d want to call it that. Typically if you have a good firmware installed and just accidently messed something up, you can:
1) Unplug power to device, disconnect all network cables.
2) Plug in Power to device
3) Wait a few seconds (2 seconds), and then press the reset button with a paperclip, I’d hold it for about 3 seconds and release.
4) Plug in computer to device, computer will receive an IP from a DHCP Server. Point browser to http://192.168.1.1
5) Use the “Management Firmware update” site that pops up to install the normal linksys firmware.
The above method helped me out a few times, however as stated earlier in this blog entry eventually I overwrote everything and flashed an incorrect image on to the device. (I was freaking out since the method above would NOT work)
Typically in the past you could TFTP a firmware image on boot and it would accept it, however this is no longer the case with the WRT610n. It will accept the firmware file, however it will NOT flash it to the flash on the device.
Here is how I recovered it:
Please note: If you do not know what you are doing, or do something wrong you could fry your device. The serial voltages on the device DO NOT match the voltages on your computer.
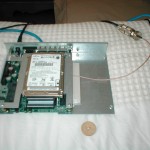
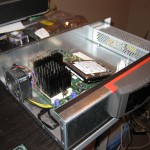
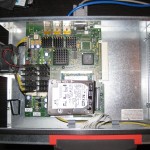
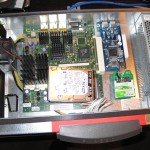
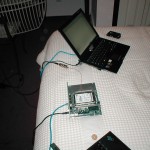
You’ll notice there are serial port pins inside of the internet port on the router. This port can provide serial terminal communications to the device and it’s CFE boot loader. Unfortunately I didn’t have the electronics to chip up a voltage regulator to hook it up to my PC, so instead I came up with a different solution. I used a WRT54GS to establish a serial console on the WRT610n.
As some of you know, most of the linksys device serial ports run on 3.3v. I have a bunch of WRT54GS’s lying around so I pulled one out, installed DD-WRT. After installing DD-WRT, I went ahead and used ipkg to install picocom, which is a serial terminal communications application. I essentially could SSH in to the router, then use picocom to initate serial communications (using 3.3v ofcourse).
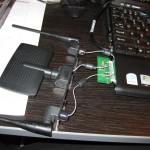
Unfortunately there is no special connector for the serial port inside of the internet port on the WRT610n. This is where I had to get creative…

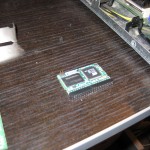
You’ll notice above that I simply just used a stripped telephone cable, and simply “touched” the RX and TX pins to the contacts on the board. Maybe you can figure out a better solution, I couldn’t!
Here is the other end:


The serial connection requires RX, TX, and ground. To establish the ground, I simply plugged a USB cable into the USB port on the WRT610n, and had the WRT54G ethernet housing touch it on the other end (ghetto, I know!).
After troubleshooting the contact points (kept having trouble with the wires staying on the board contacts, I finally got it to work. I SSH’ed into the WRT54G, opened up a picocom session on the serial port, and plugged in the power to the WRT610N, instantly I saw the CFE boot loader initializing and trying to run the firmware. I FINALLY had access to the bootloader on the WRT610n.
Now was the annoying part, it has been a while since I have done this so it may be flawed:
After confirming your serial connect is working, restart the device and tap “ctrl+c” numerous times to gain access to the CFE prompt. Issue the “flash -ctheader : flash1.trx” (without quotations) command, and then initiate a TFTP upload to the router using your desktop computer. The device should accept it, and boot the image. In my experiences I noticed that after doing this, and restarting the router it would go back to being bricked after first reboot. After performing the above flash, goto the web interface and use the “Firmware Upgrade” to re-flash the image. After completing this, all should be good!
Again, please note that I’m not sure if I used that command in the CFE. Other users have reported that it works. If not, google is your friend and you should be able to figure it out. The hard portion is getting serial access! Please feel free to post the commands you used in the comments so I can update this article.