
Let’s say that you’re hosting someone’s equipment and they start to abuse their connection speed. Let’s say that you’re limited in your bandwidth, and you want to control your own bandwidth to make sure you don’t max out your own internet connection. You can take care of both of these problems by building your own traffic shaping network control device using CentOS and using the “tc” linux command.
In this post I’m going to explain what traffic shaping is, why you’d want to use traffic shaping, and how to build a very basic traffic shaping device to control bandwidth on your network.
What is traffic shaping
Traffic shaping is when one attempts to control a connection in their network to prioritize, control, or shape traffic. This can be used to control either bandwidth or packets. In this example we are using it to control bandwidth such as upload and download speeds.
Why traffic shaping
For service providers, when hosting customer’s equipment, the customer may abuse their connection or even max it out legitimately. This can put a halt on the internet connection if you share it with them, or cause bigger issues if it’s shared with other customers. In this example, you would want to implement traffic shaping to allot only a certain amount of bandwidth so they wouldn’t bring the internet connection or network to a halt.
For normal people (or a single business), as fast as the internet is today, it’s still very easy to max your connection out. When this happens you can experience packet loss, slow speeds, and interruption of services. If you host your own servers this can cause even a bigger issue with interruption of those services as well. You may want to limit your own bandwidth to make sure that you don’t bring your internet to a halt, and save some for other devices and/or users.
Another reason is just to implement basic QoS (Quality of Service) across your network, to keep usage and services in harmony and eliminate any from hogging the network connections up.
How to build your own basic traffic shaping device with CentOS and tc
In this post we will build a very simple traffic shaping device that limits and throttles an internet connection to a defined upload and download speed that we set.
You can do this with a computer with multiple NICs (preferably one NIC for management, one NIC for internet, and one NIC for network and/or the hosts to be throttled). If you want to get creative, there are also a number of physical network/firewall appliances that are x86 based, that you can install Linux on. These are very handy as they come with many NICs.
When I set this up, I used an old decommissioned Sophos UTM 220 that I’ve had sitting around doing nothing for a couple years (pic below). The UTM 220 provides 8 NICs, and is very easy to install Linux on to.
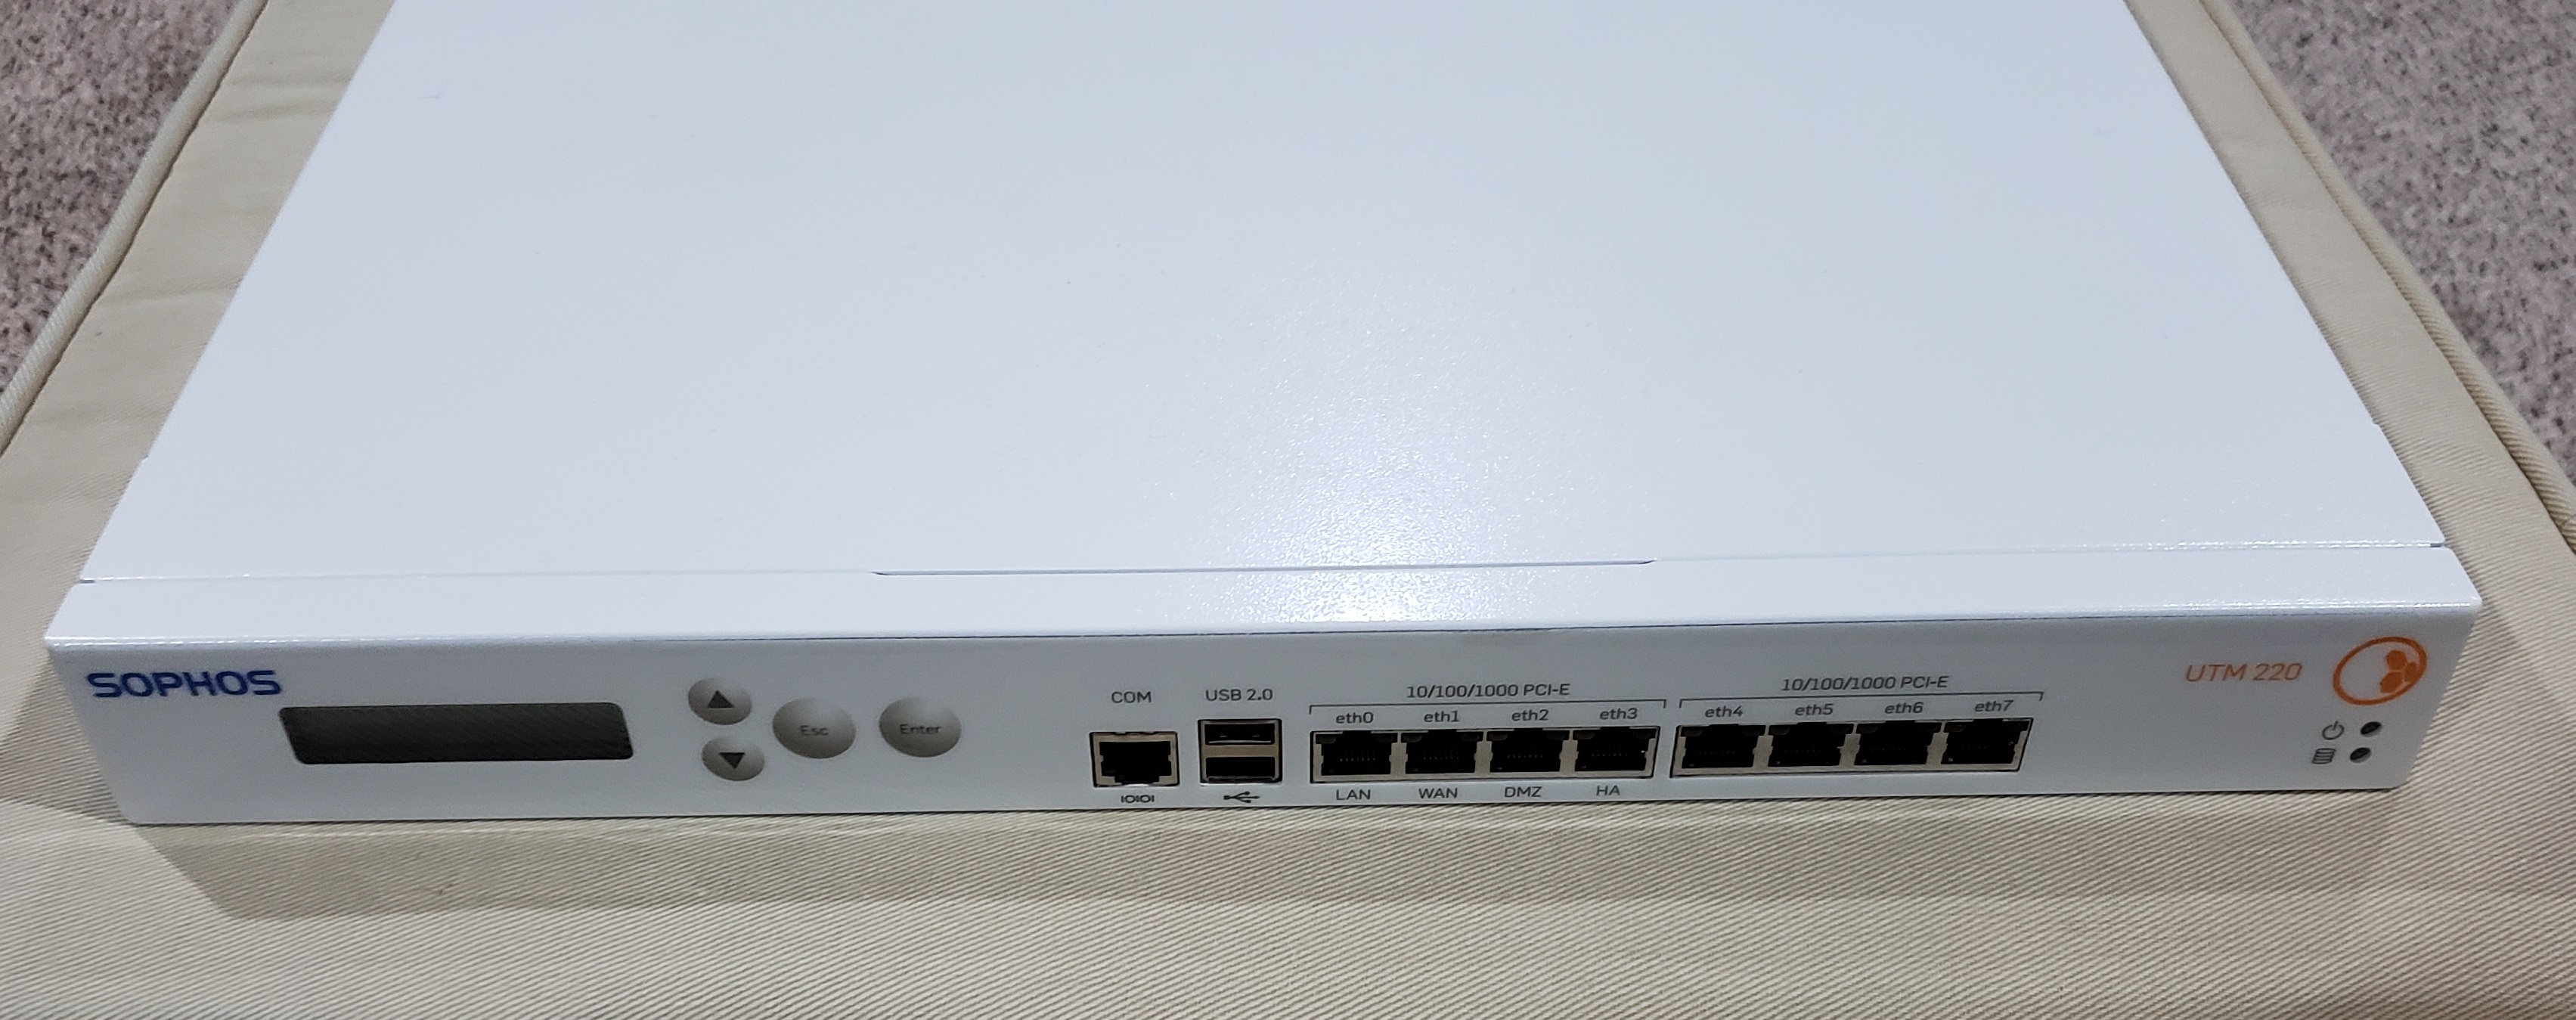
Sophos UTM 220 Running CentOS Linux
Please Note: The Sophos UTM 220 is just a fancy computer in a 1U rack mounted case with 8 NICs. All I did was install CentOS on it like a normal computer.
Essentially, all we’ll be doing is installing CentOS Linux, installing “tc”, configuring the network adapters, and then configuring a startup script. In my example my ISP provides me 174Mbps download, and 15Mbps upload. My target is to throttle the connection to 70Mbps download, and 8Mbps upload. I will allow the connection to burst to 80Mbps down, and 10Mbps up.
To get started:
- Install CentOS on the computer or device. The specifics of this are beyond the scope of this document, however you’ll want to perform a minimal install. This device is strictly acting as a network device, so no packages are required other than the minimal install option.
- During the CentOS install, only configure your main management NIC. This is the NIC you will use to SSH to, control the device, and update the device. No other traffic will pass through this NIC.
- After the install is complete, run the following command to enable ssh on boot:
chkconfig sshd on
- Install “tc” by running the command:
yum install tc
- Next, we’ll need to locate the NIC startup scripts for the 2 adapters that will perform the traffic shaping. These adapters are the internet NIC, and the NIC for the throttled network/hosts. Below is an example of one of the network startup scripts. You’re NIC device names will probably be different.
/etc/sysconfig/network-scripts/ifcfg-enp2s0
- Now you’ll need to open the file using your favorite text editor and locate and set ONBOOT to no as shown below. You can ignore all the other variables. You’ll need to repeat this for the 2nd NIC as well.
TYPE=Ethernet
PROXY_METHOD=none
BROWSER_ONLY=no
BOOTPROTO=dhcp
DEFROUTE=yes
IPV4_FAILURE_FATAL=no
IPV6INIT=yes
IPV6_AUTOCONF=yes
IPV6_DEFROUTE=yes
IPV6_FAILURE_FATAL=no
IPV6_ADDR_GEN_MODE=stable-privacy
NAME=enp2s0
UUID=xxxxxxxx-xxxx-xxx-xxxx-xxxxxxxxxxxx
DEVICE=enp2s0
ONBOOT=no
- Now we can configure the linux startup script to configure a network bridge between the two NICs above, and then configure the traffic shaping rules with tc. Locate and open the following file for editing:
/etc/rc.d/rc.local
- Append the following text to the rc.local file:
# Lets make that bridge
brctl addbr bridge0

# Lets add those NICs to the bridge
brctl addif bridge0 enp5s0
brctl addif bridge0 enp2s0

# Confirm no IP set to NICs that are shaping
ifconfig enp5s0 0.0.0.0
ifconfig enp2s0 0.0.0.0

# Bring the bridge online
ifconfig bridge0 up

# Clear out any existing tc policies
tc qdisc del dev enp2s0 root
tc qdisc del dev enp5s0 root

# Configure new traffic shaping policies on the NICs
# Set the upload to 8Mbps and burstable to 10mbps
tc qdisc add dev enp2s0 root tbf rate 8mbit burst 10mbit latency 50ms
# Set the download to 70Mbps and burstable to 80Mbps
tc qdisc add dev enp5s0 root tbf rate 70mbit burst 80mbit latency 50ms
- Restart the linux box:
shutdown -r now
- You now have a traffic shaping network device!
Final Thoughts
Please note that normally you would not place the script in the rc.local file, however we wanted something quick and simple. The script may not survive in the rc.local file when updates/upgrades are applied against on the Linux install, so keep this in mind. You’ll also need to test to make sure that you are throttling in the correct direction with the 2 NICs. Make sure you test this setup and allow time to confirm it’s working before putting it in a production network.
This is bull**** and it has wrong info .
TC only work at one direction you cant limit upload/download .
Hi Sebastian,
In this configuration, the device has 2 NICs that are bridged and it’s acting as a “man-in-the-middle” traffic limiting device that gets installed between 2 systems. It has a NIC going in each direction, therefor we can configure and limit each NIC, which give us bidirectional (upload and download) traffic shaping.
Cheers,
Stephen
Stephen is right — whether bridging or just using forwarding (which I prefer), you can limit the outgoing packets in each direction which gives effective control of both directions. In cases with multiple local networks with different priorities, you can use mangle to direct them into the proper queues as well with -j CLASSIFY.