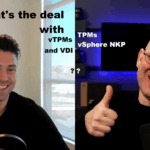
Jul 132025
 

Recently I came across a new issue and scenario in an environment where when trying to perform a vLCM function like remediation or staging, resulted in vLCM Remediation Stuck at 2%.

When this occured, all the systems on the VMware vCenter Appliance were functioning with no errors or failed tasks. If you start the process and it gets stuck on 2%, it can sit there for over an hour without failing.

Before we jump in to this issue, let’s first review the process that occurs with vLCM. I will simply this for purposes of explaining what occurs.

Normally, when kicking off a vLCM action such as remediation, you’d see a workflow similar to this when starting vLCM remediation:

  1. VMware vSphere Task Created: “Remediate Cluster” (if remediating a cluster)
  2. Compliance Check on vSphere cluster
  3. Remediation of Hosts
    1. ESXi Host VM Evacuation (Requires DRS)
    2. ESXi Host Enters Maintenance Mode
    3. ESXi Host updates applied
    4. Restart (if required)
    5. ESXi Host Exits Maintenance Mode
  4. Compliance Check
  5. vLCM continues to remaining hosts in the cluster or completes if no hosts remaining

The Issue

When this issue occurs, both vLCM Remediation and vLCM Staging will result in the task (item #1) listed above “Remediate Cluster” or “Staging Cluster” getting stuck at 2%, and none of the steps in the workflow after that occur.

The process gets stuck before compliance check, or even maintenance mode.

The Solution

After troublehsooting, reviewing logs, all I could see was some timeouts inside of the vLCM logs on the vCenter Server appliance (vCSA).

Seeing timeouts with no additional information to work with, I turned to reviewing the network configuration on the vCenter server and ESXi hosts.

It turns out that the vCenter server was pointed to the single DNS server that was offline. After correcting and updating the DNS settings on the vCenter appliance, the issue was compltely resolved.

“It’s always DNS”

Jun 222025
 
Stephen Wagner and Joe Cooper talk about AI Development and Prototyping using NVIDIA vGPU, NIMs, and VDI to delivery high powered AI workstations.

Joe Cooper and I (Stephen Wagner), talk about AI Prototyping and AI Development with NVIDIA vGPU powered Virtualized Workstations.

Using NVIDIA vGPU technology, NIMs (NVIDIA Inference Microservices), and VDI you can enable high powered, private, and secure AI Development Workstations.

These environments can be spun up on your VMware infrastructure using NVIDIA datacenter GPUs, NVIDIA NIMs, and using Omnissa Horizon or Citrix for delivery.

Thanks for watching!

Jun 222025
 

When upgrading VMware ESXi hosts using VMware vCenter, and vLCM (vSphere Lifecycle Management), you may notice a failure to upgrade and remediate with vLCM and vGPU on ESXi.

This error appears in tasks as a general failure. Inside of vLCM when monitoring remediation, you’ll see an error in regards to a service, module, or VIB that is currently in use which blocks the update and/or upgrade.

vGPU and vLCM remediation

Cause

I suspect this is occuring with vGPU release 18.3 (host driver 570.158.02) due to the fact that the host driver has a version change, however the GPU monitoring and management daemon does not (stays at 570.148.06). Since the GPU daemon isn’t touched, the services do not stop, which keeps the NVIDIA ESXi vGPU host driver loaded in the kernel, stopping the vLCM remediation from completeling.

Resolution

I tried a number of different things to resolve this, such as stopping services, re-attempting, then attempting to unload the NVIDIA vGPU kernel driver, however none of these provided a quick fix.

To resolve this issue, I stopped all the NVIDIA services, uninstalled the vGPU host driver and management daemon, restarted the host, checked compliance, and then remediated the host. Remediation completes succesfully.

Steps to perform these actions:

  1. Place the host in maintenance mode
  2. SSH in to the ESXi host
  3. Run the following command to identify the NVIDIA driver and GPU management daemon:
    • esxcli software vib list | grep -i NVD
  4. This will return the NVIDIA VIBs, example below:
    • NVD-VMware_ESXi_8.0.0_Driver
    • nvdgpumgmtdaemon
  5. Stop the NVIDIA vGPU and related services using the following commands (some of these may already be stopped):
    • /etc/init.d/nvdGpuMgmtDaemon stop
    • /etc/init.d/gpuManager stop
    • /etc/init.d/xorg stop
  6. Uninstall the NVIDIA vGPU Host Driver, and Management daemon using the following commands:
    • esxcli software vib remove -n NVIDIA-VMware_ESXi_8.0_Host_Driver
    • esxcli software vib remove -n nvdgpumgmtdaemon
  7. Reboot the host
  8. Check vLCM Compliance (don’t forget to skip this)
  9. Remediate the host

After performing these steps, you’ll be able to succesfully remediate the host resulting in upgraded NVIDIA vGPU drivers.

Jun 212025
 

A friendly reminder that it’s time to upgrade (or start planning) since VMware vSphere 7 is reaching end of life on October 2nd, 2025. This means that if you’re running VMware vSphere 7 in your environment, VMware will no longer release updates, security patches, and/or provide support for your environment.

Please note: You will require an active subscription to be entitled to, and also have access to the updates and upgrades. You’ll also want to check the interopability and HCLs to make sure your hardware is supported.

Upgrade Path for VMware vSphere Standard, vSphere Enterprise Plus)

It’s never been a better time to upgrade (literally) with the pending EOL. For customers running VMware vSphere Standard (VVS) or those with with VMware vSphere Enterprise Plus subscriptions, your upgrade path will be to vSphere 8.

Upgrade Path for VMware vSphere Foundation, VMware Cloud Foundation

For customers who are currently licensed for VMware vSphere Foundation (VVF), or VMware Cloud Foundation (VCF) subscriptions and licensing, you’ll be able to either upgrade to vSphere 8 products, or the nice and shiny new VMware vSphere Foundation 9 (VVF 9), or VMware Cloud Foundation 9 (VCF 9).

Upgrading VMware vCenter Server

You’ll always want to upgrade your VMware vCenter instance first (except when using VCF, as the procedures are different and out of the scope of this post). Just a reminder that this is a generally easy process where, using the installer, a new VM is deployed using the vCenter Server Installer ISO. The workflow then migrates and upgrades your data to the new appliance, shutting down the old.

Always make sure to perform a VAMI file-based backup, in addition to a snapshot of the previous vCSA appliance. I usually disabled DRS and HA before the backup/snapshot as well, as this allows easier recovery in the event of a failed vCenter upgrade.

Upgrading VMware ESXi Hosts

When it comes to your VMware ESXi hosts (as I recommend to customers), use vLCM (VMware Lifecycle Management) and Image Based Updates if possible as this makes the upgrade a breeze (and supports QuickBoot). Note that baselines updates are deprecated.

If the hardware in your cluster comes from a single vendor (example, HPE, Cisco, Dell), you can use cluster based (and cluster focused) vLCM Image based updates.

Screenshot of VMware vLCM image based update configuration screen.

When you change your cluster to Image based Updates (irreversable for the cluster once created), you’ll be able to choose your target ESXi version, specify the Vendor add-on, and then customize additional components (such as adding the NVIDIA vGPU Host Driver and GPU Management daemon, storage plugins, etc).

After creating your image, you’ll then be able to apply it to your hosts. This can be used for minor updates, and also larger upgrades (such as VMware ESXi 7 to 8).

Nov 232024
 

In some scenarios, you may encounter an issue where the Veeam WAN Accelerator service fails to start.

This will cause backup and backup copy jobs to fail that use the Veeam WAN Accelerator, which is how this issue is usually first diagnosed.

In this post I’ll explain the problem, what can cause it, and how to resolve the issue.

The Problem

When this issue occurs, and when a Backup or Backup Copy job runs, it will usually first fail with the following error from the Veeam console:

Error: The RPC server is unavailable. RPC function call failed. Function name: [InvokerTestConnection]. Target machine: [IP.OF.WAN.ACC:6464].

Failed to process (VM Name).

See below for a screenshot of the example:

Veeam Backup Copy Job Failing due to Veeam WAN Accelerator Service failing

From the error above, the next step is usually to check the logs to find out what’s happening. Because this Backup Copy job uses the WAN accelerator, we’ll look at the log for the Veeam WAN Accelerator Service.

Svc.VeeamWANSvc.log

[23.11.2024 11:46:24.251] <  3440> srv      | RootFolder = V:\VeeamWAN
[23.11.2024 11:46:24.251] <  3440> srv      | SendFilesPath = V:\VeeamWAN\Send
[23.11.2024 11:46:24.251] <  3440> srv      | RecvFilesPath = V:\VeeamWAN\Recv
[23.11.2024 11:46:24.251] <  3440> srv      | EnablePerformanceMode = true
[23.11.2024 11:46:24.255] <  3440> srv      | ERR |Fatal error
[23.11.2024 11:46:24.255] <  3440> srv      | >>  |boost::filesystem::create_directories: The system cannot find the path specified: "V:\"
[23.11.2024 11:46:24.255] <  3440> srv      | >>  |Unable to apply settings. See log for details.
[23.11.2024 11:46:24.255] <  3440> srv      | >>  |An exception was thrown from thread [3440].
[23.11.2024 11:46:24.255] <  3440> srv      | Stopping service...
[23.11.2024 11:46:24.256] <  3440> srv      | Stopping retention thread...
[23.11.2024 11:46:24.257] <  4576>          | Thread started.  Role: 'Retention thread', thread id: 4576, parent id: 3440.
[23.11.2024 11:46:24.258] <  4576>          | Thread finished. Role: 'Retention thread'.
[23.11.2024 11:46:24.258] <  3440> srv      | Waiting for a client('XXX-Veeam-WAN:6165')
[23.11.2024 11:46:24.258] <  3440> srv      | Stopping server listening thread.
[23.11.2024 11:46:24.258] <  3440> srv      |   Stopping command handler threads.
[23.11.2024 11:46:24.258] <  3440> srv      |   Command handler threads have stopped.
[23.11.2024 11:46:24.258] <  4580>          | Thread started.  Role: 'Server thread', thread id: 4580, parent id: 3440.

In the Veeam WAN Service log file above, you’ll note a fatal error where the service is unable to find the paths configured, which caused the service to halt and stop.

In some configurations, iSCSI is used to access Veeam backup repository storage hosted on iSCSI targets. Furthermore, in some iSCSI configurations special vendor plugins are used to access the iSCSI storage, and configure items like MPIO (multipath input output), which can take additional time to initialize.

In this scenario, the Veeam WAN Accelerator Service was starting before the Windows iSCSI service, MPIO Service, and Nimble Windows Connection Manager plugin had time to initialize, resulting in the WAN accelerator failing because it couldn’t find the directories it was expecting.

The Solution

To resolve this issue, we want the Veeam WAN Accelerator Service to have a delayed start on the Windows Server operating system bootup sequence.

  1. Open Windows Services
  2. Select “Veeam WAN Accelerator Service”
  3. Change “Startup Type” to “Automatic (Delayed Start)”
  4. Click “Apply” to save, and then click “Start” to start the service.

As per the screenshot below:

Veeam WAN Accelerator Service Properties

The Veeam WAN Accelerator Service will now have a delayed start on system bootup, allowing the iSCSI initiator to establish and mount all iSCSI Target block devices, before starting the WAN service.