May 142021
 

Welcome to Episode 02 of The Tech Journal Vlog at StephenWagner.com

In this episode

What I’ve done this week

  • 10ZiG Unboxing (10ZiG 4610q and 10ZiG 6110)
  • Thin Client Blogging and Video Creation
  • VDI Work (Instant Clones, NVME Flash Storage Server)

Fun Stuff

  • HPE Discover 2021 – June 22 to June 24 – Register for HPE Discover at https://infl.tv/jtHb
  • Firewall with 163 day uptime and no updates?!?!?
  • Microsoft Exchange Repeated Pending Reboot Issue
  • Microsoft Exchange Security Update KB5001779 (and CU18 to CU20)

Life Update

  • Earned VMware vExpert Status in February!
  • Starlink in Saskatchewan, Alberta (Canada)
    • VDI over Starlink, low latency!!!
    • Use Cases (Oil and Gas Facilities, etc)

Work Update

  • HPE Simplivity Upgrade (w/Identity Store Issues, Mellanox Firmware Issues)

New Blog Posts

Current Projects

  • 10ZiG 4610q Thin Client Content
  • 10ZiG 6110 Thin Client Content
  • VMware Horizon Instant Clones Guides and Content

Don’t forget to like and subscribe!
Leave a comment, feedback, or suggestions!

May 122021
 

When attempting to install a Microsoft Exchange Cumulative Update, the readiness checker may fail and stop you from proceeding with the upgrade and installation.

You will be presented with the following error, or one similar:

There is a pending reboot from a previous installation of a Windows Server role or feature. Please restart the computer and then run Setup again.

After restarting the server, and re-attempting to install the Exchange CU, it will continue to present this and stop you from proceeding with the installation.

The Problem

There’s a few different things that can cause this. I experienced this issue when trying to upgrade Exchange 2016 CU18 to Exchange 2016 CU20. This issue can also happen when upgrading from Microsoft Exchange 2019 CU versions, as well as earlier versions of Exchange 2013.

I found a few posts online referencing to delete two registry keys, “UpdateExeVolatile” and “PendingFileRenameOperations”, however these didn’t exist for me.

The Fix

I figured I’d try to install a feature, specifically something small that I may or may not ever use, to see if it would work and to see if it would clear whatever flag had been set for the pending restart.

First, I left the Exchange CU installer window open on the prerequisite check, opened the Server Manager and installed the TFTP Client. After finishing, I hit retry and it continued to fail.

I restarted the server, ran the CU installer again which got stuck on the pending restart. This time I closed the Exchange CU upgrade, installed the “Telnet Client” feature, opened the CU upgrade again, and it finally worked and proceeded!

Screenshot of Exchange Pending Reboot Feature Install workaround
Exchange Pending Reboot Feature Install workaround

So with the above in mind, to bypass this issue you must:

  1. Restart Server
  2. Launch Exchange CU Installer
  3. Wait for readiness check to fail (warning of a pending reboot), close installer
  4. Install a feature with the Server Manager, such as “TFTP Client” or “Telnet Client”
  5. Open Exchange CU Installer
  6. Install Microsoft Exchange Cumulative Update successfully!

Hope this helps! Leave a comment and let me know if it worked for you!

Feb 282020
 
Image of Small Business Server software box

Is it time to upgrade and migrate from Microsoft Windows Small Business Server to a new platform? Need help with the migration?

Windows Server 2008 (which is part of SBS) has reached it’s end of life. It’s now time to upgrade. I can help! I provide Small Business Server migration consulting services!

SBS Migration and Consulting Services

With over 50 Small Business Server migrations under my belt, I can assist, perform, and provide consulting services if your company or organization is looking to migrate from Microsoft Small Business Server to a new platform.

For more information on Small Business Server consulting services and help with migrations, please see: https://www.stephenwagner.com/hire-stephen-wagner-it-services/

Small Business Server Experience/Services

  • SBS Migration (SBS to SBS)
  • SBS to Full Microsoft Windows Server
  • SBS to Microsoft Exchange (2016, 2019)
  • SBS to Office 365
  • SBS to Microsoft Azure
  • SBS to 3rd party platforms
  • SBS Consulting and Advice
  • File and Print Server SBS Migration
  • Certificate Services Migration
  • SharePoint Services Migration
  • SBS Server decommission

Contact me for more Information

Feel free to contact me for assistance at https://www.stephenwagner.com/hire-stephen-wagner-it-services/.

Whether you need someone to complete and perform the migration, assist, plan, or just advise and check over things, I can help!

Oct 062019
 

Today I wanted to do a brief post addressing Microsoft Exchange Backup and Disaster Recovery.

In the past week I’ve had over 30 people reach out to me via chat looking for help and advice in situations where:

  • A Cumulative Update Failed
  • Exchange Services will not start
  • Hardware Failure Occurred

In all of these cases the admins took a snapshot of their Exchange virtual machine (in Hyper-V or ESXi/VMware), and then restored it to the previous point when the failure occurred. This completely broke their Exchange install and possibly made it unrecoverable.

The above example is what you DO NOT want to do.

Microsoft Exchange Aware Backups

As per: https://docs.microsoft.com/en-us/exchange/high-availability/disaster-recovery/disaster-recovery?view=exchserver-2019

Exchange Server supports only Exchange-aware, VSS-based backups. Exchange Server includes a plug-in for Windows Server Backup that enables you to make and restore VSS-based backups of Exchange data. To back up and restore Exchange Server, you must use an Exchange-aware application that supports the VSS writer for Exchange Server, such as Windows Server Backup (with the VSS plug-in), Microsoft System Center 2012 – Data Protection Manager, or a third-party Exchange-aware VSS-based application.

You must use an Exchange-aware backup and/or disaster recovery application/software suite. These applications are aware of Exchange and designed to perform proper backups of Exchange, the mailboxes, and configuration. Not only do they backup the mailbox database and the VM running Exchange, but they also backup the system state and configuration of Microsoft Exchange.

Simply performing a VM snapshot is not supported and can break your Exchange installation.

Note that the configuration for Microsoft Exchange is stored inside of Active Directory, and not on the actual Exchange Server. Restoring the Exchange Server to a previous snapshot will cause a configuration synchronization gap between the Active Directory configuration and the mailbox database on the Exchange Server.

Options for Backup

There are plenty of options to perform Microsoft Exchange-aware backups.

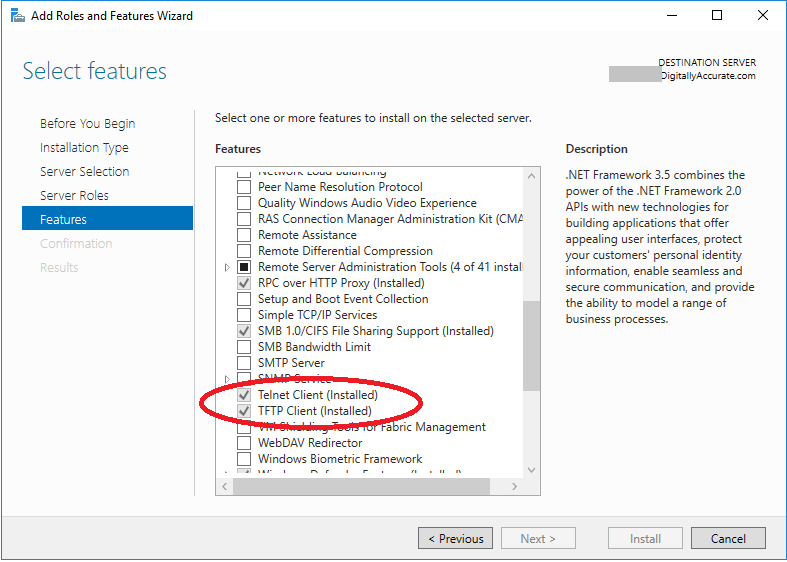
If you’re looking for something free and easy, you could use the built-in Windows Server Backup function on Microsoft Windows Server. It’s perfect for special migration and upgrade jobs, homelabs, and small/micro sized businesses.

For larger organizations, I’ve used, setup, implemented, and managed the following backup applications:

There’s no excuse for not having a backup, especially if you call yourself a professional. You should always have a full working backup, especially before performing any type of maintenance, updates, or upgrades to your environment.

Microsoft Exchange Issues and Failures

Additionally, in the event of an issue, the solution isn’t always to restore from backup.

In most cases when something fails, it’s best practice to troubleshoot and correct the issue, instead of blasting away Exchange and restoring from backups.

Most Exchange installs can be saved simply by following standard troubleshooting procedures. Even if an Exchange Cumulative Update fails, you can fix what caused it to fail, and then re-run the installer/upgrader to attempt to recover! No backup restore needed!

Aug 092019
 
IIS Logo Image

You may find yourself unable to download attachments on an e-mail message you received on your Android or Apple iPhone from your Microsoft Exchange Server. In my case, this presented a “Unable to download.” with a retry option. Retrying would not work.

If the attachment is larger (over 10MB), this is most likely due to a limit enforced on the Activesync site in IIS on your Exchange Server. In this post I’m going to tell you why this happens, and how to fix it!

The Problem

Microsoft Exchange uses IIS (Internet Information Server) for numerous services including ActiveSync. ActiveSync provides the connectivity to your mobile device for your Exchange access.

IIS has numerous limits configured to stop massive bogus requests, reduce DDOS attacks, and other reasons.

The Fix

To resolve this and allow the attachment to download, we need to modify two configuration values inside of the web.config file on IIS.

Below are the values we will be modifying:

  • MaxDocumentDataSize – Maximum file (message) data size for transfer. “Sets the maximum data size that we will fetch (range or othewise)”
  • maxRequestLength – “Specifies the limit for the input stream buffering threshold, in KB. This limit can be used to prevent denial of service attacks that are caused, for example, by users posting large files to the server. The default is 4096 KB.” (as per here)

These settings are configured in the following file:

C:\Program Files\Microsoft\Exchange Server\V15\ClientAccess\Sync\web.config

Before modifying the variables, please make a copy or backup of the web.config file so you can restore.

After you make a backup, open the file in notepad (right click -> run as administrator), and open the web.config file.

Simply search for the two values listed above, and change them. In my case, I tripled the “MaxDocumentDataSize”, and the “maxRequestLength” values. Examples from my “web.config” file are below:

add key="MaxDocumentDataSize" value="30720000"
httpRuntime maxRequestLength="30720" fcnMode="Disabled"

After changing these, run the following command from an elevated (as administrator) command prompt to restart IIS:

iisreset

And bam, you’re good to go!

May 142019
 

There may be a point in time where you may wish to clear and rebuild the search index catalog on your Microsoft Exchange 2016 Server. This will cause the server to rebuild the search index from scratch.

In my case, for the past month or so Outlook 2019 (Office 365) clients connecting to an on-premise Microsoft Exchange 2016 Server, have been seeing the message “We’re having trouble fetching results from the server…”. The user can click on “Let’s look on your computer instead.” and the search will complete.

When troubleshooting this issue, I tried all of the following:

  • Clearing and rebuilding the Search index on the client computers
  • Deleted the OST files to re-create the local cached copy on the client computers
  • Restarting the Exchange Server
  • Restarting the Client Computers
  • Analyzing the Event Log for any errors (none)

None of the above helped in troubleshooting.

We're having trouble fetching results from the server...
Outlook: “We’re having trouble fetching results from the server…”

Because of this, I decided to clear and rebuild the Search Index catalog for the mailbox database on the Exchange Server.

To check the status and to see if your index is corrupt, run the following command:

Get-MailboxDatabaseCopyStatus |  ft ContentIndexState

“ContentIndexState” will report as “Corrupt” if it is corrupt, or “Healthy” if it is healthy.

[PS] C:\Windows\system32>Get-MailboxDatabaseCopyStatus |  ft ContentIndexState

ContentIndexState
-----------------
          Healthy

My server reported as healthy, but I still chose to run the instructions below to rebuild the index.

Instructions

To do delete and re-create your Exchange Server Mailbox Database Search Index Catalog, please perform the following instructions.

Please Note: This is only for Exchange servers that are not part of a DAG. Do not perform these steps if your server is part of an Exchange cluster. Always make sure you have a complete backup of your server.

  1. Log on to your Exchange server.
  2. From the Start Menu, expand “Microsoft Exchange Server 2016”, and right-click on “Exchange Management Shell”, and select “Run as Administrator”.
    Administrative Exchange Management Shell
  3. Type the following commands to stop required search services.
    Stop-Service MSExchangeFastSearch
    Stop-Service HostControllerService
  4. Open a file browser (you may need Administrative privilege) and navigate to your Exchange mailbox directory.
    C:\Program Files\Microsoft\Exchange Server\V15\Mailbox\Mailbox Database NumberNumberNumber
  5. You’ll see a folder inside of the mailbox folder with a GUID type name with Single at the end. Delete or move this (preferred is move to alternate location). I’ve put an example below.
    12854239C-1823-8c32-ODJQ-SSDFK123CSDFG.1.Single

    This is the folder you want to move/delete.
  6. Go back to the “Exchange Management Shell”, and run the following commands to start the services.
    Start-Service MSExchangeFastSearch
    Start-Service HostControllerService
  7. As mentioned above, you can check the status of the rebuild by running the “Get-MailboxDatabaseCopyStatus” command, and looking at the “ContentIndexState” status.

That’s it! After running the command, you may notice your server will experience heavy CPU usage due to Exchange rebuilding the search index.

After rebuilding the search index, I noticed that my Outlook clients were able to successfully search on the server without having to select “Let’s look on your computer instead.”.

Feb 192019
 

Upgrading to Exchange 2016 CU12 may fail when using Let’s Encrypt SSL Certificates

On a Microsoft Exchange 2016 Server, utilizing Let’s Encrypt SSL Certificates, an upgrade to Cumulative Update 12 may fail. This is due to security permissions on the SSL certificate.

I later noticed that this occurs on all cumulative updates when using the Let’s Encrypt SSL certificates. This includes Exchange 2016 CU13 and CU14.

The CU install will fail, some services may function, but the server will not accept e-mail, or allow connections from Microsoft Outlook, or ActiveSync devices. PowerShell and EAC will not function.

The issue can be identified on this failure log:

[02/18/2019 19:24:28.0862] [2] Beginning processing Install-AuthCertificate
[02/18/2019 19:24:28.0867] [2] Ending processing Install-AuthCertificate
[02/18/2019 19:24:28.0868] [1] The following 1 error(s) occurred during task execution:
[02/18/2019 19:24:28.0868] [1] 0. ErrorRecord: Could not grant Network Service access to the certificate with thumbprint XXXXXXXXXXXXXXXXXXXXXXXXXXXXXXXXXXXX because a cryptographic exception was thrown.
[02/18/2019 19:24:28.0868] [1] 0. ErrorRecord: Microsoft.Exchange.Management.SystemConfigurationTasks.AddAccessRuleCryptographicException: Could not grant Network Service access to the certificate with thumbprint XXXXXXXXXXXXXXXXXXXXXXXXXXXXXXXXXXXX because a cryptographic exception was thrown. ---> System.Security.Cryptography.CryptographicException: Access is denied.
at Microsoft.Exchange.Security.Cryptography.X509Certificates.TlsCertificateInfo.CAPIAddAccessRule(X509Certificate2 certificate, AccessRule rule)
at Microsoft.Exchange.Security.Cryptography.X509Certificates.TlsCertificateInfo.AddAccessRule(X509Certificate2 certificate, AccessRule rule)
at Microsoft.Exchange.Management.SystemConfigurationTasks.ManageExchangeCertificate.EnableForServices(X509Certificate2 cert, AllowedServices services, String websiteName, Boolean requireSsl, ITopologyConfigurationSession dataSession, Server server, List`1 warningList, Boolean allowConfirmation, Boolean forceNetworkService)
--- End of inner exception stack trace ---
at Microsoft.Exchange.Configuration.Tasks.Task.ThrowError(Exception exception, ErrorCategory errorCategory, Object target, String helpUrl)
at Microsoft.Exchange.Configuration.Tasks.Task.WriteError(Exception exception, ErrorCategory category, Object target)
at Microsoft.Exchange.Management.SystemConfigurationTasks.InstallExchangeCertificate.EnableForServices(X509Certificate2 cert, AllowedServices services)
at Microsoft.Exchange.Management.SystemConfigurationTasks.InstallExchangeCertificate.InternalProcessRecord()
at Microsoft.Exchange.Configuration.Tasks.Task.b__91_1()
at Microsoft.Exchange.Configuration.Tasks.Task.InvokeRetryableFunc(String funcName, Action func, Boolean terminatePipelineIfFailed)
[02/18/2019 19:24:28.0883] [1] [ERROR] The following error was generated when "$error.Clear();
Install-ExchangeCertificate -services "IIS, POP, IMAP" -DomainController $RoleDomainController
if ($RoleIsDatacenter -ne $true -And $RoleIsPartnerHosted -ne $true)
{
Install-AuthCertificate -DomainController $RoleDomainController
}
" was run: "Microsoft.Exchange.Management.SystemConfigurationTasks.AddAccessRuleCryptographicException: Could not grant Network Service access to the certificate with thumbprint XXXXXXXXXXXXXXXXXXXXXXXXXXXXXXXXXXXX because a cryptographic exception was thrown. ---> System.Security.Cryptography.CryptographicException: Access is denied.
at Microsoft.Exchange.Security.Cryptography.X509Certificates.TlsCertificateInfo.CAPIAddAccessRule(X509Certificate2 certificate, AccessRule rule)
at Microsoft.Exchange.Security.Cryptography.X509Certificates.TlsCertificateInfo.AddAccessRule(X509Certificate2 certificate, AccessRule rule)
at Microsoft.Exchange.Management.SystemConfigurationTasks.ManageExchangeCertificate.EnableForServices(X509Certificate2 cert, AllowedServices services, String websiteName, Boolean requireSsl, ITopologyConfigurationSession dataSession, Server server, List`1 warningList, Boolean allowConfirmation, Boolean forceNetworkService)
--- End of inner exception stack trace ---
at Microsoft.Exchange.Configuration.Tasks.Task.ThrowError(Exception exception, ErrorCategory errorCategory, Object target, String helpUrl)
at Microsoft.Exchange.Configuration.Tasks.Task.WriteError(Exception exception, ErrorCategory category, Object target)
at Microsoft.Exchange.Management.SystemConfigurationTasks.InstallExchangeCertificate.EnableForServices(X509Certificate2 cert, AllowedServices services)
at Microsoft.Exchange.Management.SystemConfigurationTasks.InstallExchangeCertificate.InternalProcessRecord()
at Microsoft.Exchange.Configuration.Tasks.Task.b__91_1()
at Microsoft.Exchange.Configuration.Tasks.Task.InvokeRetryableFunc(String funcName, Action func, Boolean terminatePipelineIfFailed)".
[02/18/2019 19:24:28.0883] [1] [ERROR] Could not grant Network Service access to the certificate with thumbprint XXXXXXXXXXXXXXXXXXXXXXXXXXXXXXXXXXXX because a cryptographic exception was thrown.
[02/18/2019 19:24:28.0883] [1] [ERROR] Access is denied.
[02/18/2019 19:24:28.0883] [1] [ERROR-REFERENCE] Id=CafeComponent___ece23aa8c6744163B617570021d78090 Component=EXCHANGE14:\Current\Release\Shared\Datacenter\Setup
[02/18/2019 19:24:28.0895] [1] Setup is stopping now because of one or more critical errors.
[02/18/2019 19:24:28.0895] [1] Finished executing component tasks.
[02/18/2019 19:24:28.0925] [1] Ending processing Install-CafeRole
[02/18/2019 19:35:09.0688] [0] CurrentResult setupbase.maincore:396: 0
[02/18/2019 19:35:09.0689] [0] End of Setup

The Fix

Unfortunately because Exchange is not working, you won’t be able to use Powershell or the EAC to configure SSL certs.

To resolve this, open up the IIS Manager, right click on the Exchange Web Site, click “Edit Bindings”

IIS Exchange Edit Bindings

Once the “Edit Bindings” windows is open, you’ll want to open BOTH https bindings, and click “Edit”, and then change the SSL Certificate from the Let’s Encrypt SSL cert, to the self-signed Exchange certificate that ships on the brand new install. The self-signed certification most likely will be labelled as the computer name.

Exchange SSL Bindings

If you configured the Let’s Encrypt SSL certificate on the “Exchange Backend” IIS site, you’ll also need to repeat these steps on that as well.

You can now restart the server, run the “setup.exe” on CU12 again, and it will attempt to continue and repair Exchange 2016 Cumulative Update 12.

Final Note

After the update is complete, you’ll want to restart the server. You’ll notice that the acme script, whether run automatically or manually, will not set the Let’s Encrypt certificate up again (because it’s not due for renewal). You’ll need to run the letsencrypt.exe file, and force an auto renewal which will kick off the Exchange configuration scripts (or you can manually set the certificate if you’re comfortable applying Exchange SSL certificates via PowerShell.

Additional Resources

Oct 282018
 

I have noticed an issue when after upgrading Microsoft Exchange 2016 CU10 to Exchange 2016 CU11, services may fail to start. This issue can be intermittent, where some restarts are able to start more services, and others restarts fewer. I have observed this on 2 separate Exchange upgrades, both were CU10 to CU11.

The Problem

Recently, a customer had an issue where a Microsoft Exchange security update bricked their entire Exchange CU10 installation. Files were missing and services would not start (even after manually re-configuring all system services to their prior settings, and force starting). To fix this, we weighed our options and decided the best course of action would be to attempt the latest CU (CU11). This is because each Microsoft Exchange Cumulative update is actually a full installer that completely removes the old version, and installs the new version cleanly.

After installing CU11 we were able to rescue the Exchange installation (services could now start, and functioned), however numerous errors and warnings were now present, and we also noticed that there were some new issues with services.

One service in particular called “Net.Tcp Port Sharing Service”, would occasionally not start in time and cause all the Exchange Services not to start (Exchange is dependent on this services). Other times, this service would start, however random Exchange services would timeout.

Some of the errors and warnings included:

Event ID 7000
Source: Service Control Manager
Description:
The MSComplianceAudit service failed to start due to the following error: 
The service did not respond to the start or control request in a timely fashion.

Event ID 7009
Source: Service Control Manager
Description:
A timeout was reached (30000 milliseconds) while waiting for the MSComplianceAudit service to connect.

Event ID 7000
Source: Service Control Manager
Description:
The MSExchangeRepl service failed to start due to the following error: 
The service did not respond to the start or control request in a timely fashion.

Event ID 7009
Source: Service Control Manager
Description:
A timeout was reached (30000 milliseconds) while waiting for the MSExchangeRepl service to connect.

I also observed that on a few restarts, the services that failed would eventually end up restarting 10-15 minutes later (this only occurred 50% of the time).

Originally I was concerned and believed these issues were related to the original issues the customer experienced, however I upgraded my own Exchange 2016 server to CU11 and experienced the same problems (my instance was a clean fully functioning install). I also attempted to upgrade .NET to version 4.7.2 to see if this had any effect, but it did not.

When you go in to services (services.msc) and manually start the services, Exchange functions perfectly and everything works.

The Solution

As of yet, I don’t have a proper solution. I did however notice that with my customer’s environment, after it was left to sit overnight (around 8 hours), that subsequent restarts actually were able to start the majority of the services properly. It almost seemed as if it just needed time to fix itself. I’m not sure if this is because of IO load, or some type of Exchange database maintenance, but I’m waiting to see if it clears up on my instance as well after an amount of time. I’ll be keeping this post updated.

UPDATE – October 29th: I’ve confirmed for the 2nd time that the issue resolves at least 6-8 hours after the upgrade. At the end of the day I restarted my machine and everything was functioning properly.

If you are experiencing this issue, or can make a comment on it, please leave a comment on this post!

Additional Resources

Oct 162018
 

In this post, I’ll be going over how to add additional and/or alternative UPN suffixes to your Active Directory. I’ll also be going over why you may require this inside of your environment.

This is also a follow up post to the article here: https://www.stephenwagner.com/2016/09/23/outlook-2016-exchange-2013-password-prompts-upn-and-samaccountname-troubles/ as Microsoft has deleted the KB 243629 article which contained the original instructions.

Why

There is a number of reasons why you may want to do this:

  1. You’re migrating to a newer version of Microsoft Outlook 2016, and require the users UPN to match the users e-mail address for auto-configure to function.
  2. Your internal domain is is a “domain.local” domain, however you want users to log in with a “domain.com” domain.
  3. You are implementing a line of business application or other piece of software that requires user’s UPNs to match their e-mail addresses.
  4. You’re performing a migration.

How

Let’s get to it! Here’s how to add an alternative UPN suffix to an Active Directory domain:

  1. Log on to your domain controller.
  2. Open “Active Directory Domains and Trusts”
  3. On the left hand side of the new window, right click on “Active Directory Domains and Trusts”, and select “Properties” (as shown below).

    Active Directory Domains and Trusts Window

    Active Directory Domains and Trusts Window


  4. Type in your new domain suffix in to the “Alternative UPN suffixes” box, and then click “Add”. As shown below.

    Add Alternative UPN suffix

    Add Alternative UPN suffix


  5. Click “Apply” and then close out of the windows.

The new UPN suffix should be available via “Active Directory Users and Computers” and you should be able to set it to users.

You can also configure the user accounts via the Exchange Administration Center (EAC). See below for an example:

Exchange Administration Center UPN Suffix

Exchange Administration Center UPN Suffix


Jan 142018
 

The Problem

In the latest updates and versions of Microsoft Office 2016, I found a bug where when a user adds a new on-premise Microsoft Exchange 2016 account, it will repeatedly prompt for a username and password and ultimately fail if you hit cancel (no matter how many times you enter credentials). This was on the internal LAN on a domain joined workstation.

I did the usual checks:

  • Check Virtualdirectory configuration on Exchange
  • Check Virtualdirectory configuration on IIS (Internet Information Services)
  • Check Autodiscover DNS entries, InternalURL and ExternalURL configuration
  • Check for SCP inside of domain

All the of the above came back fine and were configured properly.

I have numerous other Outlook 2016 clients configured and working (installed as older versions, but have been updated), so I used those to troubleshoot (same scenario, domain joined on internal LAN and external WAN). After spending 10 hours ripping apart everything, confirming configuration, I noticed that when using the “Test Email Autoconfiguration…” (holding CTRL while right clicking on Outlook tray icon), that the e-mail clients had a skewed order for checking autodiscovery.

The e-mail clients were actually trying to authenticate with Office365 before my own on-premise Exchange Server (domain SCP or autodiscover records). This is absolutely bizarre! After spending 2 hours googling (I couldn’t find anything), I finally stumbled across this document and found an interesting piece of information:

https://support.microsoft.com/en-ca/help/3211279/outlook-2016-implementation-of-autodiscover

“Outlook uses a set of heuristics to determine whether the user account provided comes from Office 365. If Outlook determines confidently that you are an O365 user, a try is made to retrieve the Autodiscover payload from the known O365 endpoints (typically https://autodiscover-s.outlook.com/autodiscover/autodiscover.xml or https://autodiscover-s.partner.outlook.cn/autodiscover/autodiscover.xml). If this step does not retrieve a payload, Outlook moves to step 5.”

WTF?!?!?

So while this doesn’t explain why this happened, it explains what’s happening. I believe this is what’s happening as my working clients are trying to Autodisocver with Office365 first…

I went ahead an created a registry value to control the policy for “ExcludeExplicitO365Endpoint“. After configuring the registry key, I noticed that Autodiscover was now functioning properly and checking SCP and autodiscover DNS records first. I have no idea why the “heuristics” determined I was an Office365 user, but I’m not (I do have access to Office365 as a partner, but don’t use it and don’t have it configured). This may effect other partners, or users that utilize some O365 services…

The Fix

To fix this issue, create a text file and copy/paste this text below.

Windows Registry Editor Version 5.00

[HKEY_CURRENT_USER\Software\Microsoft\Office\16.0\Outlook\AutoDiscover]
"ExcludeExplicitO365Endpoint"=dword:00000001

Then save it, and rename it as ExcludeExplicitO365Endpoint.reg and run it (this will import the applicable registry key). ONLY DO THIS if you are using an Exchange On-Premise account, and not a Office365 or hosted exchange account.

Keep in mind that autodiscover also queries the domain root (domain.com), before querying the autodiscover host (autodiscover.domain.com). If you want to stop both the Office365 autodiscover and the root domain autodiscover challenge, use the following below:

Windows Registry Editor Version 5.00

[HKEY_CURRENT_USER\Software\Microsoft\Office\16.0\Outlook\AutoDiscover]
"ExcludeExplicitO365Endpoint"=dword:00000001
"ExcludeHttpsRootDomain"=dword:00000001

You’ll notice that we also set “ExcludeHttpsRootDomain” to “1” which stops it from checking the root domain.

After this, the issue was completely fixed. If you know what you’re doing, you can also use Outlook GPO settings and deploy this to a vast number of systems using Group Policy.

Additional Note (added November 2nd, 2018)

While reading numerous documents covering autodiscovery, I also came across an article that went in to detail with particulars as to how Mapi over HTTP functions. Even with the above, when accessing Outlook externall from the domain, you may still notice a single password prompt for the first time you log in externally.

After reading through documentation, I found that this is most likely because the first user account login (the very first time the user logged in on the computer), the username format of “DOMAIN\Username” was used, and not the UPN. The documentation mentioned that this may fail the negotiation, which will require a single password prompt on autodiscovery. This issue can be avoided by using the users UPN ([email protected]) to log in for the first time on the system.

Please note that the UPN must match the user’s e-mail address.