Sep 202021
 

Welcome to Episode 03.1 of The Tech Journal Vlog (Special Episode on VMware Horizon 8 Version 2106)

In this episode – VMware Horizon 8 Version 2106

This is a special episode dedicated to the release of VMware Horizon View 8, version 2106.

What’s new

In the video, I cover what’s new in the 2106 release.

My Favorite Changes & Enhancements:

  • Audio recording support for 48Khz Audio via RTAV, defaults to 16Khz
    • Persistence on Audio quality recording settings across sessions
    • Sample Rate can be configured via GPO
  • VMware Horizon Linux Client supports Microsoft Teams Optimization
    • Linux Based Zero Clients should add functionality shortly (10ZiG already has!)
  • Raspberry Pi 4 Support!!!!
    • Also supports RTAV

Other interesting changes and enhancements:

  • UI Change on VMware Horizon Client
  • Instant Clones now support SysPrep: Instant Clones with Parent
    • No duplicate SIDs when using SysPrep
  • Ability to use 6 x 4K Displays
  • No Longer have to re-install VMware Horizon Agent after VMware Tools Upgrade
  • Forgot to mention: Support added for USB Redirection with Xbox Gaming Controllers

Additional Items:

  • VMware OSOT Optimization tool Versioning now matches Horizon
    • Removal of Custom Templates
  • VMware VDI Base Image Creation Guide has been updated
    • New guide on automating the VMware VDI Base Image Creation added

Links Mentioned in this post:

Don’t forget to like and subscribe!

Leave a comment, feedback, or suggestions!

Sep 182021
 

Welcome to Episode 03 of The Tech Journal Vlog at StephenWagner.com

In this episode

Fun Stuff

  • Homelab Video Demo (https://youtu.be/oaZv2hpQKac)
  • Telus Fiber 1G Internet (for Business)
    • Sophos UTM Dual WAN Balancing
  • Synology
    • Synology Diskstation DS1621+
    • DSM 7.0
    • Synology C2 Cloud Backup

Work Update

  • VDI Consulting
    • VDI Golden Images for Non-Persistent VDI
  • DUO MFA/2FA
    • Implementations of DUO with Horizon
  • Exchange Projects
  • IT Director as a Service 🙂

Life Update

  • Back at the Gym
  • Travel is Back (Regina, Vancouver)

New Blog Posts

Current Projects

  • Synology DS1621+
  • AMD S7150 x2 MxGPU
  • NVME Storage Server Project
  • 10ZiG Thin Clients

Don’t forget to like and subscribe!
Leave a comment, feedback, or suggestions!

Aug 062021
 
Office 365 Logo

When you deploy and install Microsoft Office 365 to a VDI environment, especially with non-persistent VDI (such as VMware Horizon Instant clones), special considerations must be followed.

In this guide I will teach you how to deploy Office 365 in a VDI environment, both with persistent and non-persistent (Instant Clones) VDI Virtual Machines. This guide was built using VMware Horizon, however applies to all VDI deployments including Citrix XenServer and WVD (Windows Virtual Desktops). Additionally this works on both Windows 10, and Windows 11.

By the time you’re done reading this guide, you’ll be able to fully deploy Office 365 to your VDI environment.

I highly recommend reading Microsoft’s Overview of shared computer activation for Microsoft 365 apps.

Guide Index

What’s required

To deploy Office 365 in a VDI Environment, you’ll need:

  • VMware Horizon deployment (or equivalent other product)
  • Microsoft Office 365 ProPlus licensing (See below for specifics on licensing)
  • Microsoft Azure SSO (via PRT or Seamless SSO) for Microsoft 365 and Office 365 Single sign-on
  • Microsoft Office Deployment Tool (Available here)
  • Microsoft Office Customization Tool (Available here)
  • Microsoft Office 365 GPO ADMX Templates (Available here)
  • Roaming Profiles or Profile Management software (like FSLogix)

Licensing

In order to properly use Shared Computer Activation with Office 365 in your VDI environment you’ll need one of the following products:

  • Microsoft 365 Apps for Enterprise (formerly known as Office 365 ProPlus)
  • Office 365 E3
  • Office 365 E5
  • Microsoft 365 Business Premium

All 4 of these products include and support “Shared Computer Activation“.

Microsoft 365 Standard, Office 365 Business, Office 365 Business Premium, and Office 365 Business Essentials cannot be used as they do not include or support Shared Computer Activation.

An exception is made for Microsoft 365 Business Premium which actually includes Microsoft 365 Apps for Business, but doesn’t support enabling “Shared Computer Activation” via Group Policy Object and SCA must be enabled using the XML configuration file method.

What is Shared Computer Activation (SCA)

Shared computer activation is an optional activation method built inside of Office 365 and Microsoft 365, designed to control and manage activations on shared computers. Originally this technology was used for Office 365 on RDS (Remote Desktop Servers) to handle multiple users since Office 365 is activated and licensed per user.

Later, this technology was modified to handle Office 365 activations in non-persistent VDI environments. When utilizing SCA (Shared Computer Activation), when a user runs and activates Office 365, an activation token is generated and saved. These activation tokens are saved to a network location that the users has access to which allows the user to roam.

Due to the nature of non-persistent VDI, a user will always be logging in to a system they have never logged in to before. When Office 365 is deployed properly, it will call out to and look for the roaming activation token to automatically activate Office 365 without calling out to Microsoft’s servers.

This is also handy with persistent VDI, where you can have a roaming activation token be used on multiple desktop pools as it follows the users.

These activation tokens once generated are valid for 30 days and remove the need to activate Office during that timeframe. As expiration nears, Office will automatically reach out to Microsoft’s servers and attempt to renew the licensing activation token.

You’ll want to make sure that you have implemented Azure AD Connect and SSO (Single Sign-On) properly along with the correct GPOs (covered later in this post) for auto-activation to function without prompting users to sign-in to activate. For more information, check out my post on Understanding Microsoft Azure AD SSO with VDI.

If you have not using SCA, you’ll need to follow additional special steps to have roaming profiles include the licensing directory, however I do not recommend using that method. The licensing information (and activation) without SCA is stored in the following directory:

%localappdata%\Microsoft\Office\16.0\Licensing

You can configure Shared Computer Activation and the location of the roaming activation token using Group Policy, the local registry, or the configuration.xml file for the Office Deployment Tool.

Shared Computer Activation is ONLY required for non-persistent VDI. If you are using persistent VDI where users are assigned a desktop they are frequently using, shared computer activation is not necessary and does not need to be used.

Even though Shared Computer Activation is not required for persistent desktops, I might still recommend using it if you have users using multiple desktop pools, or you’re regularly changing your persistent desktop golden image and refreshing the environment.

Later in the document, we’ll cover configuring Share Computer Activation.

Deploying and Installing Office 365 to the VDI Environment

The steps to deploy and install Office 365 to VDI vary depending if you’re using persistent or non-persistent VDI. In both types of deployments you’ll want to make sure that you use the Office Deployment Tool which uses an XML file for configuration to deploy the application suite.

You can either modify and edit the Office 365 configuration.xml file manually or you can use the “Office Customization Tool” available at: https://config.office.com/

Office Deployment Tool and Office Customization Tool

Using the Office Deployment Tool and the Office Customization Tool, you can customize your Office 365 installation to your specific needs and requirements.

Using the tool, you can create a configuration.xml and control settings like the following:

  • Architecture (32-bit or 64-bit)
  • Products to install (Office Suites, Visio, Project, and additional products)
  • Products to exclude
  • Update Channel
  • Language Settings and Language Packs
  • Installation Options (Installation Source and configurable items)
  • Upgrade Options
  • Licensing and Activation (EULA acceptance, KMS/MAK, User based vs Shared Computer Activation vs Device Activation)
  • Application Preferences

Once you have a configuration.xml file from the Office Customization Tool, you can use the Office Deployment Tool to deploy and install Office 365 using those customizations and configuration.

The configurations you use will vary depending on your VDI deployment type which I will get in to below.

Installing Office 365 with Persistent VDI

To deploy Office 365 with persistent VDI, Shared Computer Activation is not required.

You will however, want to use the Office Deployment Tool to prepare the base image for automated pools, or manually install Office 365 in to the VDI Virtual Machine.

See below for the instructions on Installing Office 365 on Persistent VDI:

  1. First you’ll need to download the Office Deployment Tool from this link: https://go.microsoft.com/fwlink/p/?LinkID=626065. You save this wherever.
  2. Create a directory that you can work in and store the Office 365 installation files.
  3. Open the file you downloaded from the Microsoft Download site, extract the files in to the working directory you created in step 2.
  4. Open a Command Prompt, and change in to that working directory.
  5. You can either use the included XML files as is (for default settings), modify them manually, or use the Office ustomization Tool.
  6. If you want to use SCA (Shared Computer Activation) make sure the following lines are added to the file right above the final line (right above):
    <Display Level="None" AcceptEULA="True" />
    <Property Name="SharedComputerLicensing" Value="1" />
    These variables enable Shared Computer Activation and disable automatic activation. Save the XML file.
  7. We’re now going to run the tool and download the Office installation files using the xml from above by running the following command (if you modified the XML file and/or changed the filename, use the filename you saved it as):
    setup.exe /download configuration.xml
  8. There will be no output and it will take a while so be patient.
  9. We can now install Office 365 using your XML configuration by running the following command (if you modified the XML file and/or changed the filename, use the filename you saved it as):
    setup.exe /configure configuration.xml

Office 365 should now install silently, and then afterwards you should be good to go!

If you did not use SCA, the product will need to be activated manually or automatically via GPO.

If you did use SCA, you’ll want to use the GPOs to configure first-run activation, as well as the location of the roaming activation tokens.

In both scenarios above, after installation is successful you’ll want to configure Office 365 for VDI.

Please note: With persistent VDI, you’ll want to make sure that you leave the Office 365 updating mechanism enabled as these VMs will not be destroyed on logoff. The behavior will match that of a typical workstation as far as software updates are concerned.

Even if you are using persistent VDI, I highly recommend you read the notes below on installing Office 365 on non-persistent VDI as you may want to incorporate that configuration in to your deployment.

Installing Office 365 with Non-Persistent (Instant Clones) VDI

To deploy Office 365 with non-persistent VDI, things are a little different than with persistent. Shared Computer Activation is recommended and required if you’re not using profile capture software like FSLogix. You can however still use SCA with FSLogix.

We’ll use the Office Deployment Tool to prepare the base image. Using the tool, we’ll want to make sure we exclude the following applications from the XML file:

  • Microsoft Teams
  • OneDrive

Using the Office 365 installer for the above products will cause issues as the software gets installed in the user profile instead of the operating system itself.

These applications have their own separate special “All User” installation MSI files that we need to use to install to the base image.

We’ll use the Office Customization Tool (OCT) at https://config.office.com/ to create a configuration XML file for our Non-Persistent Office 365 deployment.

Below is an example of the XML file generated from the Office Customization Tool for Instant Clones (Non-Persistent VDI) Virtual Machines:

<Configuration ID="XXXXXXXX-XXXX-XXXX-XXXX-XXXXXXXXXXXX">
  <Add OfficeClientEdition="64" Channel="Current">
    <Product ID="O365ProPlusRetail">
      <Language ID="en-us" />
      <ExcludeApp ID="Groove" />
      <ExcludeApp ID="Lync" />
      <ExcludeApp ID="OneDrive" />
      <ExcludeApp ID="Publisher" />
      <ExcludeApp ID="Teams" />
      <ExcludeApp ID="Bing" />
    </Product>
  </Add>
  <Property Name="SharedComputerLicensing" Value="1" />
  <Property Name="SCLCacheOverride" Value="0" />
  <Property Name="FORCEAPPSHUTDOWN" Value="FALSE" />
  <Property Name="DeviceBasedLicensing" Value="0" />
  <Updates Enabled="FALSE" />
  <Display Level="None" AcceptEULA="TRUE" />
</Configuration>

You’ll notice I chose not to include Groove, Lync, Publisher, and Bing Search. This is because these are not used in my environment. I’d recommend excluding applications you don’t require in your base image.

You’ll also notice that I chose to disable Office 365 updates as these get managed and handled inside of the base image and we don’t want the instant clones attempting to update Office as the VMs are deleted on logoff. We also choose to accept the EULA for users so they are not prompted.

After we have our configuration XML file, we’ll proceed to installing Office 365 on the non-persistent base image:

  1. Create a directory that you can work in and store the Office 365 installation files.
  2. Open the file you downloaded from the Office Deployment Tool on the Microsoft Download site, extract the files in to the working directory you created in step 2.
  3. Copy the XML file created above from the Office Customization Tool in to this directory.
  4. Open a Command Prompt, and change in to that working directory.
  5. Confirm that SCA (Shared Computer Activation) is enabled by viewing the XML configuration file. You should see the following text:
    <Display Level="None" AcceptEULA="True" />
    <Property Name="SharedComputerLicensing" Value="1" />
  6. We’re now going to run the tool and download the Office installation files using the xml from above by running the following command:
    setup.exe /download non-persistentVDI.xml
  7. There will be no output and it will take a while so be patient.
  8. We can now install Office 365 using your XML configuration by running the following command:
    setup.exe /configure non-persistentVDI.xml

Office 365 should now install silently.

For the skipped applications (Teams, OneDrive) we’ll install these applications separately. Go ahead and download the MSI installers from below and follow the instructions below:

Installers:

Installing Microsoft Teams on VDI

At present there is the old Classic teams client, and the new Microsoft Teams client, which both support VDI installation.

Classic Teams is going End of Support June 30th 2024. I highly recommend deploying New teams for New VDI deployments and/or desktop pools.

See below for a summary, and further down links to more details blog posts which I have created.

Installing Microsoft Classic Teams for VDI

To Install the Classic Microsoft Teams on non-persistent VDI using the MSI file above, run the following command on the base image:

msiexec /i C:\Location\Teams_windows_x64.msi ALLUSER=1 ALLUSERS=1

Using this method will install for all users in per-machine mode, and will also disable auto-updates for non-persistent environments.

Installing New Microsoft Teams for VDI

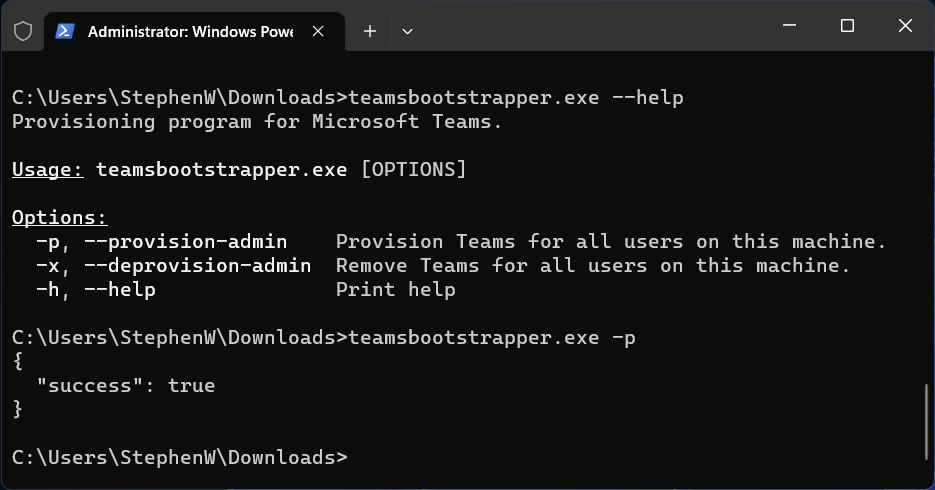
To install the new Microsoft Teams client on non-persistent VDI using the New Teams Bootstrapper, run the following command on the base image:

teamsbootstrapper.exe -p

Additionally, navigate to the following registry location:

HKEY_LOCAL_MACHINE\SOFTWARE\Microsoft\Teams

And create a new DWORD called “disableAutoUpdate” and set to a value of “1”, which will disable auto-updates for non persistent VDI images.

For more information and detailed guides, please see the following:

Installing OneDrive on VDI

Microsoft has a guide on how to install the OneDrive Sync app per machine (for use with non-persistent VDI).

To install Microsoft OneDrive on non-persistent VDI using the EXE file above, run the following command on the base image:

OneDriveSetup.exe /allusers

After installing, open the Windows Task Scheduler and disable the following OneDrive update task:

OneDrive Per-Machine Standalone Update Task

Additionally, open the Windows services and disable the OneDrive update service:

OneDrive Updater Service

Updating Office 365 in a VDI Environment

In persistent VDI environments, the auto-update mechanism will be enabled and activated (unless you chose to disable it), and Office will update as it does with normal windows instances. You can modify and/or control this behavior using the Microsoft Office ADMX Templates and Group Policy.

In non-persistent VDI environments the updating mechanism will be disabled (as per the XML configuration example above). To update the base image you’ll need to run the “setup.exe” again with the “download” and “configure” switch, so make sure you keep your configuration XML file.

Here is an example of the Office 365 Update process on a non-persistent VDI base image. We run the following commands on the base image to update Office 365:

  1. setup.exe /download non-persistentVDI.xml
  2. setup.exe /configure non-persistentVDI.xml

The commands above will download and install the most up to date version of Office 365 using the channel specified in the XML file. You then deploy the updated base image.

Configuring Microsoft Office 365 for the VDI Environment

Once Office 365 is installed in the base image (or VM), we can begin configuring Office 365 for the VDI environment.

To configure and centrally manage your O365 deployment, we’ll want to use GPOs (Group Policy Objects). This will allow us to configure everything including “first run configuration” and roll out a standardized configuration to users using both persistent and non-persistent VDI.

In order to modify GPOs, you’ll need to either launch the Group Policy Management MMC from a domain controller, or Install RSAT (Remote Server Administration Tools) on Windows 10 to use the MMC from your local computer or workstation.

You’ll probably want to create an OU (Organizational Unit) if you haven’t already for your VDI VMs (separate for persistent and non-persistent VDI) inside of Active Directory, and then create a new Group Policy Object and apply it to that OU. In that new GPO, we’ll be configuring the following:

We’ll be configuring the following “Computer Configuration” items:

  1. Microsoft Office – Licensing Configuration
  2. Microsoft Office – Update Configuration
  3. Microsoft OneDrive – Known Folders, Use OneDrive Files On-Demand
  4. Windows – Group Policy Loopback Processing Mode

We’ll also be configuring the following “User Configuration” items:

  1. Microsoft Office – First Run Configuration
  2. Microsoft Office – Block Personal Microsoft Account Sign-in
  3. Microsoft Office – Subscription/Licensing Activation
  4. Microsoft Outlook – Disable E-Mail Account Configuration
  5. Microsoft Outlook – Exchange account profile configuration
  6. Microsoft Outlook – Disable Cached Exchange Mode

Below we’ll cover the configuration

We’ll start with the Computer Configuration Items.

Microsoft Office – Licensing Configuration

If you’re using SCA (Shared Computer Activation) for licensing, we need to specify where to store the users activation tokens. You may have configured a special location for these, or may just store them with your user profiles.

First we need to enable Shared Computer Activation. Navigate to:

Computer Configuration -> Policies -> Administrative Templates -> Microsoft Office 2016 (Machine) -> Licensing Settings

And set “Use shared computer activation” to Enabled.

If you’re using FSLogix and redirecting the profile to a VHD file, you don’t need to perform the steps below. If you’re not using FSLogix and are not using a profile redirection mechanism, we’ll need to set “Specify the location to save the licensing token used by shared computer activation”. We’ll set this to the location where you’d like to store the roaming activation tokens. As an example, to store to the roaming User Profile share, I’d set it to the following:

\\PROFILE-SERVER\UserProfiles$\%USERNAME%

Microsoft Office – Update Configuration

If you’re usBecause this is a VDI environment, we want automatic updating disabled since IT will manage the updates.

We’ll want to disable updated by navigating to:

Computer Configuration -> Policies -> Administrative Templates -> Microsoft Office 2016 (Machine) -> Updates

And set “Enable Automatic Updates” to Disabled.

We’ll also set “Hide option to enable or disable updates” to Enabled to hide it from the users.

Microsoft OneDrive – Known Folders, Use OneDrive Files On-Demand

There’s some basic configuration for OneDrive that we’ll want to configure as we don’t want our users profile folders being copied or redirected to OneDrive. We also want OneDrive to be used with Files On-Demand so that users OneDrive contents aren’t cached/copied to the VDI user profiles.

This configuration is ONLY if you are using OneDrive and/or have it installed.

We’ll navigate over to:

Computer Configuration -> Policies -> Administrative Templates -> OneDrive

And set the following GPO objects:

  • “Prevent users from moving their Windows known folders to OneDrive” to Enabled
  • “Prevent users from redirecting their Windows known folders to their PC” to Enabled
  • “Prompt users to move Windows known folders to OneDrive” to Disabled
  • “Silently move Windows known folders to OneDrive” to “Disabled”
  • “Silently sign in users to the OneDrive sync app with their Windows credentials” to “Enabled”
  • “Use OneDrive Files On-Demand” to Enabled

We’ve new configured OneDrive for VDI Users.

Windows – Group Policy Loopback Processing Mode

Since we’ll be applying the above “Computer Configuration” GPO settings to users when they log on to the non-persistent Instant Clone VDI VMs, we’ll need to activate Loopback Processing of Group Policy (click the link for more information). This will allow use to have the “Computer Configuration” applied during User Logon and have higher precedence over their existing User Settings.

We’ll navigate to the following:

Computer Configuration -> Policies -> Administrative Templates -> System -> Group Policy

And set “Configure user Group Policy loopback processing mode” to Enabled, and “Mode” to Merge.

We’ve fully configured the Computer Configuration in the GPO. We will now configure the User Configuration items.

Microsoft Office – First Run Configuration

As most of you know, when running Microsoft Office 365 for the first time, there are numerous windows, movies, and wizards for the first time run. We want to disable all of this so it appears that Office is pre-configured to the user, this will allow them to just log on and start working.

We’ll head over to:

User Configuration -> Policies -> Administrative Templates -> Microsoft Office 2016 -> First Run

And set the following items:

  • “Disable First Run Movie” to Enabled
  • “Disable Office First Run on application boot” to Enabled

Microsoft Office – Block Personal Microsoft Account Sign-in

Since we’re paying for and want the user to use their Microsoft 365 account and not their personal M365/O365 accounts, we’ll stop them from being able to add personal Microsoft Accounts to Office 365.

Head over to:

User Configuration -> Policies -> Administrative Templates -> Microsoft Office 2016 -> Miscellaneous

And set “Block signing into Office” to Enabled, and then set the additional option to “Organization ID only”

Microsoft Office – Subscription/Licensing Activation

We don’t want the activation window being shown to the user, nor the requirement for it to be configured, so we’ll configure Office 365 to automatically activate using SSO (Single Sign On).

Navigate to:

User Configuration -> Policies -> Administrative Templates -> Microsoft Office 2016 -> Subscription Activation

And then set “Automatically activate Office with federated organization credentials” to Enabled.

This will automatically activate Office 365 for the VDI user.

Microsoft Outlook – Disable E-Mail Account Configuration

We’ll be configuring the e-mail profiles for the users so that no initial configuration will be needed. Again, just another step to let them log in and get to work right away.

Inside of:

User Configuration -> Policies -> Administrative Templates -> Microsoft Outlook 2016 -> Account Settings -> E-mail

And we’ll set the following:

  • “Prevent Office 365 E-mail accounts from being configured within a simplified Interface” to Disabled
  • “Prevent Outlook from interacting with the account settings detection service” to Enabled

Microsoft Outlook – Exchange account profile configuration

When using Exchange, we’ll want your users Outlook Profile to be auto-configured for their Exchange account so we’ll need to configure the following setting.

Navigate to:

User Configuration -> Policies -> Administrative Templates -> Microsoft Outlook 2016 -> Account Settings -> Exchange

And set “Automatically configure profile based on Active Directory Primary SMTP address” to Enabled.

After setting this, it will automatically add the Exchange Account when they open Outlook and they’ll be ready to go! Note, that there is an additional setting with a similar name appended with “One time Only”. Using the One time Only will not try to apply the configuration on all subsequent Outlook runs.

Microsoft Outlook – Disable Cached Exchange Mode

If you’re using persistent VDI, hosted exchange, or FSLogix, you won’t want to configure this item.

When using on-premise Exchange with VDI, we don’t want users cached Outlook mailboxes (OST files) stored on the roaming profile, or the Instant Clone. We can stop this by disabling Exchange caching.

Navigate to:

User Configuration -> Policies -> Administrative Templates -> Microsoft Outlook 2016 -> Account Settings -> Exchange -> Cached Exchange Mode

And we’ll set the two following settings:

  • “Cached Exchange Mode (File | Cached Exchange Mode)” to Disabled
  • “Use Cached Exchange Mode for new and existing Outlook profiles” to Disabled

This will configure Exchange to run in “Online Mode”.

Microsoft Office Common Identity Registry – For Roaming Profiles

If you’re using Roaming profiles and folder redirection with non-persistent VDI and instant clones, the user may be prompted repeatedly on new logins to log in to their Office 365 account (with a login prompt) even though SCA is configured and working. This setting is not required when using FSLogix.

When troubleshooting this, one may think that the issue is related to SCA, when it is actually not. This prompt is occurring because of authentication issues with Office 365.

To correct this issue, we’ll need to add a registry configuration to the GPO that will delete a key on login.

User Configuration -> Preferences -> Windows Settings -> Registry

We’ll create a new registry GPO item, that will “delete” the key path below inside of “HKEY_CURRENT_USER”:

SOFTWARE\Microsoft\Office\16.0\Common\Identity

This will delete the Identity key on login, and allow Office 365 to function. This may not be needed if using FSLogix or other profile management suites.

Deploying the Base Image

At this point you can push and deploy the base image and have users log in to the VDI environment and Office 365 should be fully functioning.

Please keep in mind there are different methods for deploying and configuring Office 365 depending on what application delivery and profile management software you may be using. This is just a guide to get you started!

Jul 162021
 

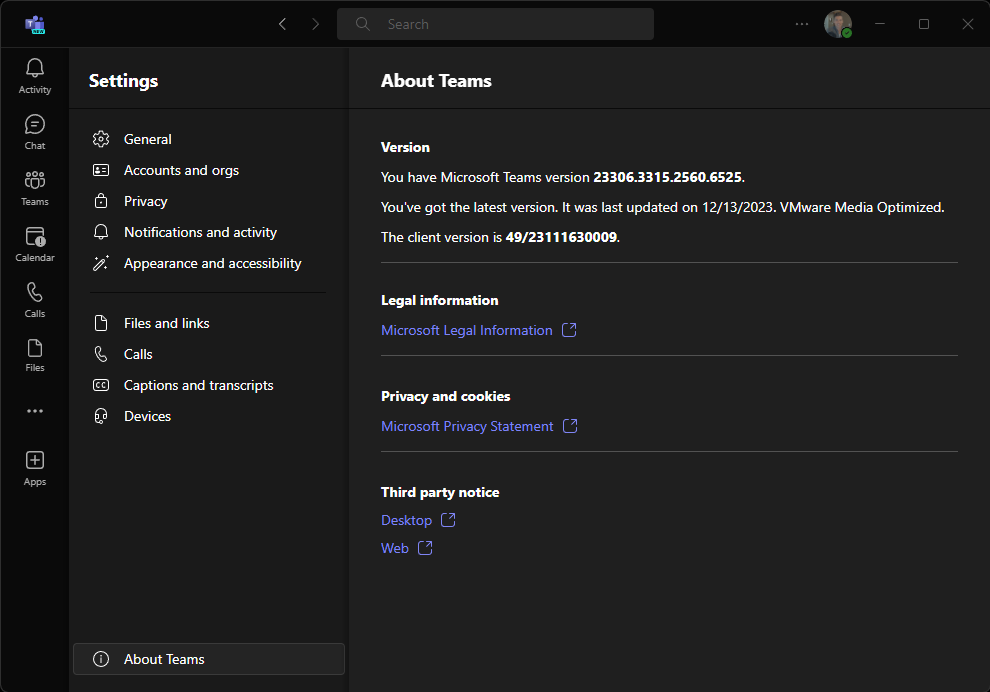
Well, it’s official, according to the release notes for VMware Horizon 2106, VMware now supports Media Optimization for Microsoft Teams on the VMware Horizon Linux Client.

This is great news for zero clients, as most VDI Zero Clients are based of embedded Linux. As soon as major vendors update their firmware to the latest VMware Horizon Client, we should start seeing Microsoft Teams Optimization on VDI Zero Clients.

To support this, you’ll need to have the proper configuration implemented. Make sure you check out my guide on Microsoft Teams VDI Optimization for VMware Horizon.

For the full release notes, click here.

May 152021
 
Image of an AMD S7150 X2 MxGPU GPU Graphics Card

The AMD S7150 x2 PCIe MxGPU is a Graphics card designed for multi-user (MxGPU) virtualized environments (VDI). Installing an AMD S7150 x2 MxGPU allows you to provision virtual GPUs to Virtual workstations to enable 3D acceleration for applications like engineering, gaming, or pretty much anything that requires accelerated graphics.

Being a big fan of VDI and having my own VDI homelab, I just had to get my hands on one of these cards to experiment with, and learn. It’s an older card that was released in February of 2016, but it’s perfect for the homelab enthusiast.

I secured one and here’s a story about how I got it working on an unsupported 1U HPE DL360p Gen8 Server.

AMD S7150 x2 Specifications

The S7150x2 features 2 physical GPUs, each with 8GB of Video RAM, while the little brother “S7150”, has one GPU and 8GB of Video RAM.

For cooling, the S7150x2 requires the server to cool the card (it has no active cooling or fans), whereas the S7150 is available as both active (with fan) cooling, and passive cooling.

This card supports older versions of VMware ESXi 6.5 and also some versions of Citrix XenServer.

AMD MxGPU Overview

A picture of an AMD S7150 x2 PCIe mxGPU Card
AMD S7150 x2 PCIe mxGPU Card

The AMD MxGPU technology, uses a technology called SR-IOV to create Virtual Functions (VFs) that can be attached to virtual machines.

The S7150 x2, with it’s 2GPUs can actually be carved up in to 32 (16 per GPU) VFs, providing 32 users with 3D accelerated graphics.

Additionally, you can simply passthrough the individual GPUs to VMs themselves without using SR-IOV and VFs, providing 2 users with vDGA PCIe Passthrough 3D Accelerated graphics. vDGA stands for “Virtual Dedicated Graphics Acceleration”.

Please Note: In order to use MxGPU capabilities, you must have a server that supports SR-IOV and be using a version of VMware that is compatible with the MxGPU drivers and configuration utility.

The AMD FirePro S7150 x2 does not have any video-out connectors or ports, this card is strictly designed to be used in virtual environments.

The AMD S7150 x2 connected to a HPE DL360p Gen8 Server

As most of you know, I maintain a homelab for training, learning, testing, and demo purposes. I’ve had the S7150 x2 for about 7 months or so, but haven’t been able to use it because I don’t have the proper server.

Securing the proper server is out of the question due to the expense as I fund the majority of my homelab myself, and no vendor has offered to provide me with a server yet (hint hint, nudge nudge).

I do have a HPE ML310e Gen8 v2 server that had an NVidia Grid K1 card which can physically fit and cool the S7150 x2, however it’s an entry-level server and there’s bugs and issues with PCIe passthrough. This means both vDGA and MxGPU are both out of the question.

Image of a AMD S7150 X2 side by side with an Nvidia GRID K1 GPU Graphics Card
AMD S7150 X2 side by side with an Nvidia GRID K1 GPU Graphics Card

All I have left are 2 x HPE DL360P Gen 8 Servers. They don’t fit double width PCIe cards, they aren’t on the supported list, and they can’t power the card, but HEY, I’m going to make this work!

Connecting the Card

To connect to the Server, I purchased a “LINKUP – 75cm PCIe 3.0 x16 Shielded PCI Express Extension Cable”. This is essentially just a really, very long PCIe extension ribbon cable.

I connected this to the inside of the server, gently folded the cable and fed it out the back of the server.

Picture of a Server with PCIe Extension Ribbon Cable to an external GPU
Server with PCIe Extension Ribbon Cable to an external GPU

I realized that when the cable came in contact with the metal frame, it actually peeled the rubber off the ribbon cable (very sharp), so be careful if you attempt this. Thankfully the cable is shielded and I didn’t cause any damage.

Cooling the Card

Cooling the card was one of the most difficult tasks. I couldn’t actually even test this card when I first purchased it, because after powering up a computer, the card would instantly get up to extremely hot temperatures. This forced me to power down the system before the OS even booted.

I purchased a couple 3D printed cooling kits off eBay, but unfortunately none worked as they were for Nvidia cards. Finally one day I randomly checked, and I finally found a 3D printed cooling solution specifically for the AMD S7150 x2.

Image of a AMD S7150 X2 Cooling Shroud and Fan
AMD S7150 X2 Cooling Shroud and Fan

As you can see, the kit included a 3D printed air baffle and a fan. I had to remove the metal holding bracket to install the air baffle.

I also had to purchase a PWM fan control module, as the fan included with the kit runs at 18,000 RPM. The exact item I purchased was a “Noctua NA-FC1, 4-Pin PWM Fan Controller”.

Image of an CFM Fan Control Module
CFM Fan Control Module

Once I installed the controller, I was able to run some tests adjusting the RPM while monitoring the temperatures of the card, and got the fan to a speed where it wasn’t audible, yet was able to cool and keep the GPUs between 40-51 degrees Celsius.

Powering the Card

The next problem I had to overcome was to power the card with it being external.

To do this, I purchased a Gigabyte P750GM Modular Power Supply. I chose this specific PSU because it’s modular and I only had to install the cables I required (being the 6-pin power cable, 8-pin power cable, ATX Power Cable (for PSU on switch), and a CFM fan power connector).

Picture of a Gigabyte P750GM Modular Power Supply (PSU)
Gigabyte P750GM Modular Power Supply (PSU)

As you can see in the picture below, I did not install all the cabling in the PSU.

Image of a Modular PSU Connected to AMD S7150 x2
Modular PSU Connected to AMD S7150 x2

As you can see, if came together quite nicely. I also had to purchase an ATX power on adapter, to short certain pins to power on the PSU.

Picture of ATX PSU Jump Adapter
ATX PSU Jump Adapter

I fed this cable under the PSU and it is hanging underneath the desk out of the way. Some day I might make my own adapter, so I can remove the ATX power connector but unfortunately the PIN-outs on the PSU don’t match the end of the ATX connector cable.

Image of Side view of external S7150 x2 GPU on Server
Side view of external S7150 x2 GPU on Server

It’s about as neat and tidy as it can be, being a hacked up solution.

Using the card

Overall, by the time I was done connecting it to the server, I was pretty happy with the cleaned up final result.

AMD S7150 x2 connected to HPE Proliant DL360p Gen8 Server

After booting the system, I noticed that VMware ESXi 6.5 detected the card and both GPUs.

Screenshot of AMD S7150 X2 PCIe Passthru ESXi 6.5
AMD S7150 X2 PCIe Passthru ESXi 6.5

You’ll notice that on the server, the GPUs show up as an “AMD Tonga S7150”.

Before I started to play around with the MxGPU software, I wanted to simply pass through an entire GPU to a VM for testing. I enabled ESXi Passthru on both GPUs, and restarted the server.

So far so good!

I already had a persistent VDI VM configured and ready to go, so I edited the VM properties, and attached one of the AMD S7150 x2 GPUs to the VM.

Screenshot of Attached S7150 x2 Tonga GPU to vSphere VDI VM PCIe Passthru
Attached S7150 x2 Tonga GPU to vSphere VDI VM PCIe Passthru

Booting the VM I was able to see the card and I installed the AMD Radeon FirePro drivers. Everything just worked! “dxdiag” was showing full 3D acceleration, and I confirmed that hardware h.264 offload with the VMware Horizon Agent was functioning (confirmed via BLAST session logs).

That was easy! 🙂

Issues

Now on to the issues. After spending numerous days, I was unable to get the MxGPU features working with the AMD Radeon FirePro drivers for VMware ESXi. However, thanks for a reader named TonyJr, I was able to solve this, but more on that later (keep reading).

Even though I had the drivers and the scripts installed, it was unable to create the VFs (Virtual Functions) with SR-IOV. From research on the internet with the limited amount of information there is, I came to believe that this is due to an SR-IOV bug on the Gen8 platform that I’m running (remember, this is completely and utterly NOT SUPPORTED).

If anyone is interested, the commands worked and the drivers loaded, but it just never created the functions on reboot. I also tried using the newer drivers for the V340 card, with no luck as the module wouldn’t even load.

Here is an example of the configuration script:

[root@DA-ESX03:/vmfs/volumes/5d40aefe-030ee1d6-df44-ecb1d7f30334/files/mxgpu] sh mxgpu-install.sh -c
Detected 2 SR-IOV GPU
0000:06:00.0 Display controller VGA compatible controller: AMD Tonga S7150 [vmgfx0]
0000:08:00.0 Display controller VGA compatible controller: AMD Tonga S7150 [vmgfx1]
Start configuration....
Do you plan to use the Radeon Pro Settings vSphere plugin to configure MxGPU? ([Y]es/[N]o, default:N)n
Default Mode
Enter the configuration mode([A]uto/[H]ybrid,default:A)a
Auto Mode Selected
Please enter number of VFs:(default:4): 2
Configuring the GPU 1 ...
0000:06:00.0 VGA compatible controller: AMD Tonga S7150 [vmgfx0]
GPU1=2,B6
Configuring the GPU 2 ...
0000:08:00.0 VGA compatible controller: AMD Tonga S7150 [vmgfx1]
GPU2=2,B8
Setting up SR-IOV settings...
Done
pciHole.start = 2048
pciHole.end = 4543
Eligible VMs:
DA-VDIWS01
DA-VDIWS02
DA-VDIUbuntu01
DA-MxGPU
PCI Hole settings will be added to these VMs. Is this OK?[Y/N]n
User Exit
The configuration needs a reboot to take effect

To automatically assign VFs, please run "sh mxgpu-install.sh -a" after system reboot
[root@DA-ESX03:/vmfs/volumes/5d40aefe-030ee1d6-df44-ecb1d7f30334/files/mxgpu]

And as mentioned, on reboot I would only be left with the actual 2 physical GPUs available for passthru.

I also tried using “esxcfg-module” utility to configure the driver, but that didn’t work either.

esxcfg-module -s "adapter1_conf=9,0,0,4,2048,4000" amdgpuv
esxcfg-module -s "adapter1_conf=9,0,0,2,4096,4000 adapter2_conf=11,0,0,2,4096,4000" amdgpuv

Both combinations failed to have any effect on creating the VFs. It was unfortunate, but I still had 2 separate GPUs that I could able to passthrough to 2 VDI VMs which is more than enough for me.

Issues (Update June 19 2022)

Thanks to “TonyJr” leaving a comment, I was able to get the MxGPU drivers functioning on the ESXi host.

To get SR-IOV and the drivers to function, I had to perform the following:

  1. Log on to the BIOS
  2. Press Ctrl+A which unlocked a secret Menu called “SERVICE OPTIONS”
  3. Open “SERVICE OPTIONS”
  4. Select “PCI Express 64-Bit BAR Support”, choose “Enable” and then reboot the server.

Upon reboot, the ESXi instance had actually already sliced up the S7150 MxGPU using the options I tried configuring above. It’s all working now!

Ultimately I tweaked the settings to only slice one of the two GPUs in to 2 VFs, leaving me with a full GPU for passthrough, as well as 2 VFs from the other GPU. Thanks TonyJr!

Horizon View with the S7150 x2

Right off the bat, I have to say this works AMAZING! I’ve been using this for about 4 weeks now without any issues (and no fires, lol).

As mentioned above, because of my issues with SR-IOV on the server I couldn’t utilize MxGPU, but I do have 2 full GPUs each with 8GB of VRAM each that I can passthrough to VDI Virtual Machines using vDGA. Let’s get in to the experience…

Similar to the experience with the Nvidia GRID K1 card, the S7150 x2 provides powerful 3D acceleration and GPU functionality to Windows VDI VMs. Animations, rendering, gaming, it all works and it’s all 3D accelerated!

I’ve even tested the S7150 x2 with my video editing software to edit and encode videos. No complaints and it works just like a desktop system with a high performance GPU would. Imagine video editing on the road with nothing but a cheap laptop and the VMware Horizon client software!

The card also offloads encoding of the VMware BLAST h.264 stream from the CPU to the GPU. This is what actually compresses the video display feed that goes from the VM to your VMware View client. This provides a smoother experience with no delay or lag, and frees up a ton of CPU cycles. Traditionally without a GPU to offload the encoding, the h.264 BLAST stream uses up a lot of CPU resources and bogs down the VDI VM (and the server it’s running on).

Unfortunately, I don’t have any engineering, mapping, or business applications to test with, that this card was actually designed for, but you have to remember this card was designed to provide VDI users with a powerful workstation experience.

It would be amazing if AMD (and other vendors) released more cards that could provide these capabilities, both for the enterprise as well as enthusiasts and their homelab.

May 142021
 

Welcome to Episode 02 of The Tech Journal Vlog at StephenWagner.com

In this episode

What I’ve done this week

  • 10ZiG Unboxing (10ZiG 4610q and 10ZiG 6110)
  • Thin Client Blogging and Video Creation
  • VDI Work (Instant Clones, NVME Flash Storage Server)

Fun Stuff

  • HPE Discover 2021 – June 22 to June 24 – Register for HPE Discover at https://infl.tv/jtHb
  • Firewall with 163 day uptime and no updates?!?!?
  • Microsoft Exchange Repeated Pending Reboot Issue
  • Microsoft Exchange Security Update KB5001779 (and CU18 to CU20)

Life Update

  • Earned VMware vExpert Status in February!
  • Starlink in Saskatchewan, Alberta (Canada)
    • VDI over Starlink, low latency!!!
    • Use Cases (Oil and Gas Facilities, etc)

Work Update

  • HPE Simplivity Upgrade (w/Identity Store Issues, Mellanox Firmware Issues)

New Blog Posts

Current Projects

  • 10ZiG 4610q Thin Client Content
  • 10ZiG 6110 Thin Client Content
  • VMware Horizon Instant Clones Guides and Content

Don’t forget to like and subscribe!
Leave a comment, feedback, or suggestions!

May 042021
 
Zoom Logo

Looking at setting up Zoom for VDI in your Virtual Desktop Infrastructure?

In this post, I will guide you on how to deploy Zoom for VDI and the Zoom VDI Plugin in your VMware Horizon View VDI Infrastructure. There is also a Zoom VDI Plugin for Citrix XenDesktop and WVD (Windows Virtual Desktop) in addition to VMware Horizon.

While these instructions are targeted for VMware Horizon VDI environments, the process is very similar for Citrix XenDesktop.

Please make sure to read Zoom’s documentation on “Getting started with VDI“, and Zoom’s “VDI Client Features Comparison“, to understand the differences in the Zoom clients.

Requirements

To get started, you’ll need the following:

  • Zoom for VDI MSI Installer (Available here)
  • Zoom VDI Plugin Installer (Available here)
  • Zoom Active Directory GPO ADMX Template (Available here)
  • Zoom VDI Registry Settings (Available here)
  • VMware Horizon client on Windows or compatible Thin Client
  • VDI Desktop or Base Image
  • Endpoints must have internet access

Background

Just like with Microsoft Teams, before Zoom’s VDI client, VMware’s RTAV (Real-time Audio-Video) was used to handle multimedia. This offloaded audio and video to the VMware Horizon Client utilizing a dedicated channel over the connection to optimize the data exchange. With minor tweaks (check out my post on enhancing RTAV webcam with VMware Horizon), this actually worked quite well with the exception of microphone quality on the end-users side, and high bandwidth requirements.

Using Zoom for VDI and the Zoom VDI Plugin, Zoom will offload (and a more optimized way than RTAV) video encoding and decoding from the VDI Virtual Machine and the endpoint will directly communicate with Zoom’s infrastructure. And, just like Microsoft Teams Optimization, this is one less hop for data, one less processing point, and one less load off your server infrastructure.

When using Zoom for VDI, there are some limitations. Please review Zoom’s application comparison.

Deploying Zoom for VDI

There are two components involved in deploying Zoom for VDI.

  • Zoom for VDI Application on VDI Virtual Machine (or Image)
  • Zoom VDI Plugin installed on the client system connecting to the VDI session (Computer, Thin Client, Zero Client)

It’s pretty straight forward. We just need to have the Zoom for VDI application installed on the VDI Virtual Machine (and/or base image), and have the plugin installed on the computer or thin client that we are connecting with.

Zoom for VDI About Screenshot

Zoom is highly configurable both with a GPO (Group Policy Object) and registry settings. Please make sure you load up the Zoom Active Directory ADMX Templates and configure them appropriately for your environment and deployment.

More information on the Zoom Active Directory ADMX Template is available at Zoom’s “Group Policy Options for the Windows desktop client and Zoom Rooms“. You can also find information on Zoom’s VDI Client Registry settings here.

These GPOs are needed especially for non-persistent VDI (Instant Clones) for autoconfiguration and SSO (Single Sign On) when the user opens the application and to tweak numerous other configurables.

Zoom for VDI Application Installation on VDI VM or Base Image

For the first part of deployment, we’ll need to install the Zoom for VDI application inside of our VDI VM or bundle it inside of our Base Image (if you’re using instant clones).

Since this is an MSI file, it’s easy to deploy. For a list of full MSI switches, please visit Zoom’s “Mass Installation and Configuration for Windows” document.

Installation

To deploy in your existing infrastructure using persistent desktop pools, you can deploy the MSI via Group Policy Objects.

To deploy in your existing infrastructure using non-persistent desktop pools (Instant Clones), you can install Zoom for VDI in your base image, and then re-push the image/snapshot.

To manually install on an existing VDI Virtual Machine, you can double click the MSI, or run the following command:

msiexec /package ZoomInstallerVDI.msi

And that’s it! Make sure you have your Zoom GPO and/or registry settings configured as well.

Zoom VDI Plugin Installation on Client Computer or Thin Client

For the second part of deployment, we need to load the Zoom VDI Plugin on the connecting client computer and/or thin client.

The Zoom for VDI plugin is available for numerous different operating system and thin clients such as Windows, Mac, Mac (ARM), Linux (CentOS, Ubuntu), HP ThinPro Thin clients, Dell ThinOS Thin clients, and more!

Client Plugin Installation

The steps will vary depending on the computer or device you’re connecting with so you’ll want to download the appropriate plugin and install it.

As an example, to install the Zoom VDI Plugin manually on a Windows Client running VMware Horizon View Client:

  1. Download the appropriate Zoom for VDI plugin
  2. Install
  3. Restart

It’s actually that easy. You can also deploy the MSI file via Active Directory GPO or your application and infrastructure management platform if you’re installing it on to a large number of systems.

Conclusion

As you can see, it’s pretty easy to get up and running with Zoom for VDI. When deploying VDI, make sure you give your users the tools and applications they need to be productive. Including Zoom for VDI in your deployment is a no-brainer!

One last thing I want to mention is that you can have both the traditional Zoom Desktop and Zoom for VDI application installed at the same time. In my own high performance environment, I chose to have and use both due to the limitation of the Zoom for VDI application. When using the traditional Zoom Desktop application, VMware RTAV will be used if configured, and still works great!

Leave a comment!

May 032021
 

This guide will show you to install Microsoft (Classic) Teams and deploy Microsoft Teams VDI Optimization on VMWare Horizon for Manual Pools, Automated Pools, and Instant Clone Pools, for use with both persistent and non-persistent VDI. This guide works for Microsoft Teams on Windows 10 and Windows 11, including the new Windows 11 22H2.

Please see my post Deploy and install the New Teams for VDI to learn how to deploy the new Teams client for VDI. The Classic client will go end of support on June 30, 2024.

Please make sure to check out Microsoft’s documentation on “Teams for Virtualized Desktop Infrastructure“, and VMware’s document “Microsoft Teams Optimization with VMware Horizon” for more information.

I also have a guide on how to Deploy, Install, and Configure Microsoft Office 365 in a VDI Environment, so make sure you check it out!

Requirements

To get started, you’ll need the following:

  • Microsoft Teams MSI Installer (Available here: 64-Bit, 32-Bit)
  • VMware Horizon Client (Available here)
  • VDI Desktop or VDI Base Image
  • Ability to create and/or modify GPOs on domain
  • VMware Horizon GPO Bundle

Background

Before Microsoft Teams VDI Optimization, VMware’s RTAV (Real-Time Audio-Video) was generally used. This offloaded audio and video to the VMware Horizon Client utilizing a dedicated channel over the connection to optimize the data exchange. With minor tweaks (check out my post on enhancing RTAV webcam with VMware Horizon), this actually worked quite well with the exception of microphone quality on the end-users side, and high bandwidth requirements.

Starting with Horizon View 7.13 and Horizon View 8 (2006), VMware Horizon now supports Microsoft Teams Optimization. This technology offloads the Teams call directly to the endpoint (or client device), essentially drawing over the VDI VM’s Teams visual interface and not involving the VDI Virtual Machine at all. The client application (or thin client) handles this and connects directly to the internet for the Teams Call. One less hop for data, one less processing point, and one less load off your server infrastructure.

Microsoft Teams Optimization uses WebRTC to function.

Deploying Microsoft Teams Optimization on VMware Horizon VDI

There are two components required to deploy Microsoft Teams Optimization for VDI.

  • Microsoft Specific Setup and Configuration of Microsoft Teams
  • VMware Specific Setup and Configuration for Microsoft Teams

We’ll cover both in this blog post.

Microsoft Specific Setup and Configuration of Microsoft Teams Optimization

First and foremost, do NOT bundle the Microsoft Teams install with your Microsoft 365 (Office 365) deployment, they should be installed separately.

We’re going to be installing Microsoft Teams using the “per-machine” method, where it’s installed in the Program Files of the OS, instead of the usual “per-user” install where it’s installed in the user “AppData” folder.

Non-persistent (Instant Clones) VDI requires Microsoft Teams to be installed “Per-Machine”, whereas persistent VDI can use both “Per-Machine” and “Per-User” for Teams. I use the “Per-Machine” for almost all VDI deployments. This allows you to manage versions utilizing MSIs and GPOs.

Please Note that when using “Per-Machine”, automatic updates are disabled. In order to upgrade Teams, you’ll need to re-install the newer version. Take this in to account when planning your deployment. If you use the per-user, it will auto-update.

For Teams Optimization to work, your endpoints and/or clients MUST have internet access.

Let’s Install Microsoft Teams (VDI Optimized)

For Per-Machine (Non-Persistent Desktops) Install, use the following command:

msiexec /i C:\Location\Teams_windows_x64.msi ALLUSER=1 ALLUSERS=1

For Per-User (Persistent VDI) Install, you can use the following command:

msiexec /i C:\Location\Teams_windows_x64.msi ALLUSERS=1

If in the event you need to uninstall Microsoft Teams to deploy an upgrade, you can use the following command:

msiexec /passive /x C:\Location\Teams_windows_x64.msi

And that’s it for the Microsoft Specific side of things!

VMware Specific Setup and Configuration for Microsoft Teams Optimization

When it comes to the VMware Specific Setup and Configuration for Microsoft Teams Optimization, it’s a little bit more complex.

VMware Horizon Client Installation

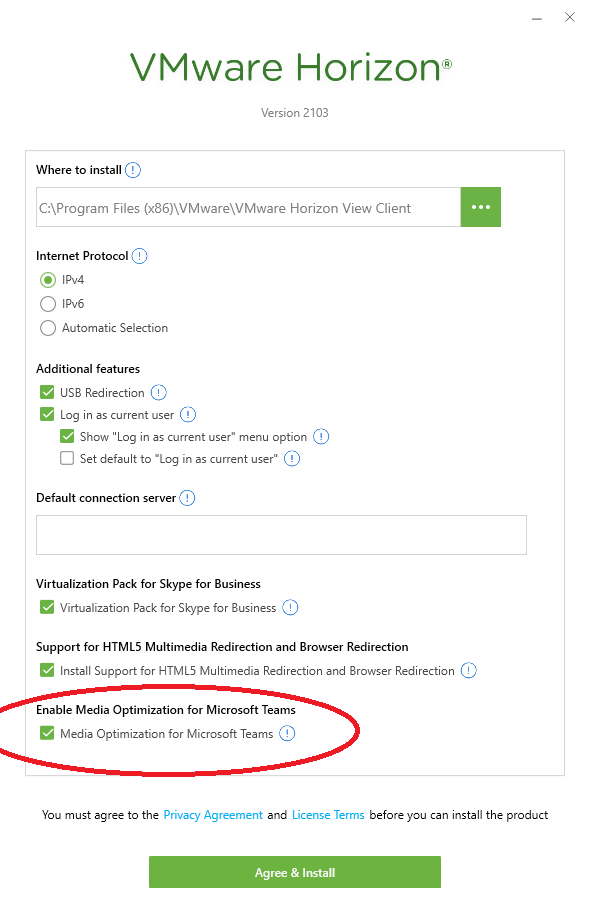
When installing the VMware Horizon Client, the Microsoft Teams optimization feature should be installed by default. However, doing a custom install, make sure that “Media Optimization for Microsoft Teams” is enabled (as per the screenshot below):

Screenshot of VMware View Client Install with Microsoft Teams Optimization
VMware View Client Install with Microsoft Teams Optimization

Group Policy Object to enable WebRTC and Microsoft Teams Optimization

You’ll only want to configure GPOs for those users and sessions where you plan on actually utilizing Microsoft Teams Optimization. Do not apply these GPOs to endpoints where you wish to use RTAV and don’t want to use Teams optimization, as it will enforce some limitations that come with the technology (explained in Microsoft’s documentation).

We’ll need to enable VMware HTML5 Features and Microsoft Teams Optimization (WebRTC) inside of Group Policy. Head over and open your existing VDI GPO or create a new GPO. You’ll need to make sure you’ve installed the latest VMware Horizon GPO Bundle. There are two switches we need to set to “Enabled”.

Expand the following, and set “Enable HTML5 Features” to “Enabled”:

Computer Configuration -> Policies -> Administrative Templates -> VMware View Agent Configuration -> VMware HTML5 Features -> Enable VMware HTML5 Features

Next, we’ll set “Enable Media Optimization for Microsoft Teams” to “Enabled”. You’ll find it in the following:

Computer Configuration -> Policies -> Administrative Templates -> VMware View Agent Configuration -> VMware HTML5 Features -> VMware WebRTC Redirection Features -> Enable Media Optimization for Microsoft Teams

And that’s it, you’re GPOs are now configured.

If you’re running a persistent desktop, run “gpupdate /force” in an elevated command prompt to grab the updated GPOs. If you’re running a non-persistent desktop pool, you’ll need to push the base image snapshot again so your instant clones will have the latest GPOs.

Confirming Microsoft Teams Optimization for VDI

There’s a simple and easy way to test if you’re currently running Microsoft Teams Optimized for VDI.

  1. Open Microsoft Teams
  2. Click on your Profile Picture to the right of your Company Name
  3. Expand “About”, and select “Version”
Screenshot of Microsoft Teams - About and Version to check Teams Optimization for VDI
Microsoft Teams – About and Version to check Teams Optimization for VDI

After selecting this, you’ll see a toolbar appear horizontally underneath the search, company name, and your profile picture with some information. Please see the below examples to determine if you’re running in 1 of 3 modes.

The following indicates that Microsoft Teams is running in normal mode (VDI Teams Optimization is Disabled). If you have configured VMware RTAV, then it will be using RTAV.

Screenshot indicator of Microsoft Teams VDI Optimization disabled
Microsoft Teams VDI Optimization disabled

The following indicates that Microsoft Teams is running in VDI Optimized mode (VDI Teams Optimization is Enabled showing “VMware Media Optimized”).

Screenshot indicator of Microsoft Teams VDI Optimization enabled
Microsoft Teams VDI Optimization enabled

The following indicates that Microsoft Teams is configured for VDI Optimization, however is not functioning and running in fallback mode. If you have VMware RTAV configured, it will be falling back to using RTAV. (VDI Teams Optimization is Enabled but not working showing “VMware Media Not Connected”, and is using RTAV if configured).

Screenshot of Microsoft Teams VDI Optimization Fallback
Microsoft Teams VDI Optimization Fallback

If you’re having issues or experiencing unexpected results, please go back and check your work. You may also want to review Microsoft’s and VMware’s documentation.

Conclusion

This guide should get you up and running quickly with Microsoft Teams Optimization for VDI. I’d recommend taking the time to read both VMware’s and Microsoft’s documentation to fully understand the technology, limitations, and other configurables that you can use and fine-tune your VDI deployment.

May 022021
 
Ubuntu Orange Logo

In this post, I’m going to provide instructions and a guide on how to install the Horizon Agent for Linux on Ubuntu 20.04 LTS. This will allow you to run and connect to an Ubuntu VDI VM with VMware Horizon View.

In the past I’ve created instructions on how to do this on earlier versions of Ubuntu, as well as RedHat Linux, but it’s getting easier than ever and requires less steps than previous guides.

I decided to create the updated tutorial after purchasing an AMD S7150 x2 and wanted to get it up and running with Ubuntu 20.04 LTS and see if it works.

Screenshot of VMware Horizon for Linux on Ubuntu 20.04 LTS
VMware Horizon for Linux on Ubuntu 20.04 LTS

I also highly recommend reading the documentation made available for VMware Horizon: Setting Up Linux Desktops in Horizon.

Requirements

  • VMware Horizon View 8 (I’m running version 2103)
  • Horizon Enterprise or Horizon for Linux Licensing
  • Horizon VDI environment that’s functioning and working
  • Ubuntu 20.04 LTS Installer ISO (download here)
  • Horizon Agent for Linux (download here)
  • Functioning internal DNS

Instructions

  1. Create a VM on your vCenter Server, attached the Ubuntu 20.04 LTS ISO, and install Ubuntu
  2. Install any Root CA’s or modifications you need for network access (usually not needed unless you’re on an enterprise network)
  3. Update Ubuntu as root
    apt update
    apt upgrade
  4. Install software needed for VMware Horizon Agent for Linux as root
    apt install openssh-server python python-dbus python-gobject open-vm-tools-desktop
  5. Install your software (Chrome, etc.)
  6. Install any vGPU or GPU Drivers you need before installing the Horizon Agent
  7. Install the Horizon Agent For Linux as root (Enabling Audio, Disabling SSO)
    ./install_viewagent.sh -a yes -S no
  8. Reboot the Ubuntu VM
  9. Log on to your Horizon Connection Server
  10. Create a manual pool and configure it
  11. Add the Ubuntu 20.04 LTS VM to the manual desktop pool
  12. Entitle the User account to the desktop pool and assign to the VM
  13. Connect to the Ubuntu 20.04 Linux VDI VM from the VMware Horizon Client

And that’s it, you should now be running.

As for the AMD S7150 x2, I noticed that Ubuntu 20.04 LTS came with the drivers for it called “amdgpu”. Please note that this driver does not work with VMware Horizon View. After installing “mesa-utils”, running “glxgears” and “glxinfo” it did appear that 3D Acceleration was working, however after further investigation it turned out this is CPU rendering and not using the S7150 x2 GPU.

You now have a VDI VM running Ubuntu Linux on VMware Horizon View.

May 012021
 

Do you have a VMware Horizon View VDI environment and some power users you’d like to optimize? I’ve got some optimizations that you can easily apply via the VMware Horizon GPO (Group Policy Object) bundle.

These are performance optimizations and configurations that I have rolled out for my own persistent desktop to optimize the experience for myself. These optimizations may use more resources to provide a better experience for power users.

Please note that these optimizations are not meant to be deployed for large numbers of users unless you have the resources to handle it. Always test these settings before rolling out in to production.

VMware Horizon GPO Bundle

As part of any VMware Horizon View deployment, you should have installed the VMware Horizon GPO Bundle. This is a collection of ADMX GPO (Group Policy Object) templates that you can upload to your domain controllers and use to configure various aspects of your VMware Horizon deployment.

These GPOs can be used to configure both the server, VDI VMs, VMware Horizon Clients, and various configurables with the protocols (including VMware Blast) being used in your deployment such as VMware BLAST, PCoIP, and RDP.

Below, you’ll find some of my favorite customizations and optimizations that I use in my own environment to enhance my experience.

For more information on the VMware Horizon GPO Bundle, please visit the VMware Horizon Documentation – Using Horizon Group Policy Administrative Template Files.

In this post, I’ll be covering the following:

  1. VMware Blast: Framerate
  2. VMware Blast: H. 264 Quality
  3. VMware Blast: Max Session Bandwidth kbit/s Megapixel Slope
  4. VMware Horizon Client Configuration: Allow display scaling
  5. VMware Horizon Client Configuration/View USB Configuration: Allow keyboard and Mouse (HID) Devices
  6. VMware View Agent Configuration/View RTAV Configuration/View RTAV Webcam Settings
  7. VMware View Agent Configuration/VMware HTML5 Features/Enable VMware HTML5 Features
  8. VMware View Agent Configuration/VMware HTML5 Features/VMware HTML5 Multimedia Redirection
  9. VMware View Agent Configuration/VMware HTML5 Features/VMware WebRTC Redirection Features

Let’s begin!

VMware Blast: Framerate

Do you have a GPU for your VDI session and extra bandwidth? If so, let’s crank that framerate up for a smoother experience! Configuring this variable will increase the default framerate to 60 fps (frames per second).

Computer Configuration -> Policies -> Administrative Templates -> VMware Blast -> Max Frame Rate

Let’s set this to “Enabled” and set it to 60.

VMware Blast: H. 264 Quality

If you have a GPU to offload H. 264 and the available bandwidth, you can change this setting to reduce the

Computer Configuration -> Policies -> Administrative Templates -> VMware Blast -> H. 264 Quality

There are two values for this setting, “H. 264 Maximum QP” and “H. 264 Minimum QP”. These control how much processing and compression is used on the VMware Blast h. 264 session.

To increase the quality (and bandwidth usage) of the session, you can decrease these to reduce the amount of compression. In my case I reduced both by “5” from their default values which made a big change.

VMware Blast: Max Session Bandwidth kbit/s Megapixel Slope

This setting will increase the amount of available bandwidth for the Horizon Blast h.264 video stream.

Computer Configuration -> Policies -> Administrative Templates -> VMware Blast -> Max Session Bandwidth kbit/s Megapixel Slope

The default is “6200” and I recommend playing with this a little to find out what suits you best depending on the other changes you made, especially with the 2 items above.

You can try doubling, tripling, or quadrupling this value depending on what’s required and how much available bandwidth you have.

VMware Horizon Client Configuration: Allow display scaling

Users are usually connecting from all sorts of devices, including laptops, tablets, and more. When connecting to a VDI session with a laptop or tablet that is using display scaling because it has a high native resolution, it may be extremely difficult to read any text because scaling is disabled on the VDI session.

To allow display scaling in the VDI session, we need to enable it via GPO on both the “Computer Configuration” and “User Configuration”.

Computer Configuration -> Policies -> Administrative Templates -> VMware Horizon Client Configuration -> Allow display scaling

And we’ll set “Allow Display Scaling” to “Enabled”.

User Configuration -> Policies -> Administrative Templates -> VMware Horizon Client Configuration -> Allow display scaling

And we’ll also set that “Allow Display Scaling” to “Enabled”.

Configuring this will allow you to configure display scaling on the VMware Horizon View client. After enabling this, it automatically configures scaling to match what I have configured on my connecting workstation (such as my Microsoft Surface Tablet, or my Lenovo X1 Carbon laptop). You also have the ability to manually configure the scaling on the session.

VMware Horizon Client Configuration/View USB Configuration: Allow keyboard and Mouse Devices

While you never want to use USB Redirection for keyboards and mice, you may need to use USB redirection for various HID (Human Interface Devices) that appear as keyboards or mice. You may need to enable this to make the following devices work:

  • 2FA/MFA Security Tokens
  • Security Keys
  • One Touch Tokens

In my case, I had a Yubico Yubikey security key that I needed passed through using USB Redirection (more on that here) to authenticate 2FA sessions inside of my VDI session.

To enable the passthrough of keyboards and mice (HID) devices, change the following.

Computer Configuration -> Policies -> Administrative Templates -> VMware Horizon Client Configuration -> View USB Configuration -> Allow keyboard and Mouse Devices

We’re going to go ahead and set “Allow keyboard and Mouse Devices” to “Enabled”.

VMware View Agent Configuration/View RTAV Configuration/View RTAV Webcam Settings

Using a webcam with VMware Horizon and RTAV (Real Time Audio Video), you may notice a slow frame rate and low resolution on your webcam going through the VDI session.

Here, we’re going to increase the fps (frames per second) and resolution of RTAV for VMware Horizon.

Computer Configuration -> Policies -> Administrative Templates -> VMware View Agent Configuration -> View RTAV Configuration -> View RTAV Webcam Settings

We’re going to “Enable” the following and set the values below:

Max frames per second = 25
Resolution - Default image resolution height in pixels = 600
Resolution - Default image resolution width in pixels = 800
Resolution - Max image height in pixels = 720
Resolution - Max image width in pixels = 1280

You’ll now notice a clearer and higher resolution webcam running at a faster framerate.

VMware View Agent Configuration/VMware HTML5 Features/Enable VMware HTML5 Features

There’s numerous HTML5 optimizations that VMware has incorporated in to the latest versions of VMware Horizon View. These include, but are not limited to:

  • HTML5 Multimedia Redirection
  • Geolocation Redirection
  • Browser Redirection
  • Media Optimization for Microsoft Teams

We want all this good stuff, so we’ll head over to the following:

Computer Configuration -> Policies -> Administrative Templates -> VMware View Agent Configuration -> VMware HTML5 Features -> Enable VMware HTML5 Features

We’ll set “Enable VMware HTML5 Features” to “Enabled”.

I highly recommend reading up and briefing yourself on HTML5 Multimedia Redirection, along with over Remote Desktop Features over on the VMware Horizon 2013 Documentation – Configurating Remote Desktop Features.

VMware View Agent Configuration/VMware HTML5 Features/VMware HTML5 Multimedia Redirection

So there’s this little thing called “HTML5 Multimedia Redirection”, where when configured and the plugins are installed, VMware Horizon will essentially redirect HTML5 based multimedia from the VDI session to your local system to handle.

This offload makes video extremely crisp and smooth, however comes with some concerns, security risks, and learning on your part. When you enable this, you only want to do so for trusted websites.

Computer Configuration -> Policies -> Administrative Templates -> VMware View Agent Configuration -> VMware HTML5 Features -> VMware HTML5 Multimedia Redirection

In this location, we need to set “Enable VMware HTML5 Multimedia Redirection” to “Enabled”. After this, we need to configure the URL list for domains and websites that we will allow HTML5 Multimedia Redirection to work with.

To do this, we’ll set “Enable URL list for VMware HTML5 Multimedia Redirection” to “Enabled”, and then add YouTube to the exception list to allow HTML5 Multimedia Redirection for YouTube. In the URL list, we will add:

https://www.youtube.com/*

And that’s it!

VMware View Agent Configuration/VMware HTML5 Features/VMware WebRTC Redirection Features

We’re all using Microsoft Teams these days, and while Microsoft Teams does have VDI optimization, you need to enable what’s needed on the VMware Horizon side of things to make it work.

To do this, head over to:

Computer Configuration -> Policies -> Administrative Templates -> VMware View Agent Configuration -> VMware HTML5 Features -> VMware WebRTC Redirection Features

We’ll set “Enable Media Optimization for Microsoft Teams” to “Enabled”.

In order for Microsoft Teams VDI optimization to function, there are steps involved with the installation which aren’t covered in this post. For these steps, make sure you check out my guide on Microsoft Teams VDI Optimization for VMware Horizon.

Conclusion

Leave a comment and let me know if these helped you, or if you have any optimizations or tweaks you’d like to share with the community!