As most of you know (or didn’t), Adobe Flash reached it’s End of Life on December 31st 2020, and as of January 12th 2021 does not function at all!
Since Adobe is no longer supporting Flash, they are blocking and disabling all Flash content beginning January 12 2021 from web browsers including Chrome.
For IT folks, this causes big problems when managing, maintaining, or dealing with older systems that use Adobe Flash, such as older versions of VMware vSphere, vCenter/vCSA, and VMware Horizon. This is because the admin interfaces utilize Adobe Flash. This will also apply to other software and systems.
The Problem
Up until now while approaching the end of life date, special steps were required to allow Adobe Flash because of security concerns.
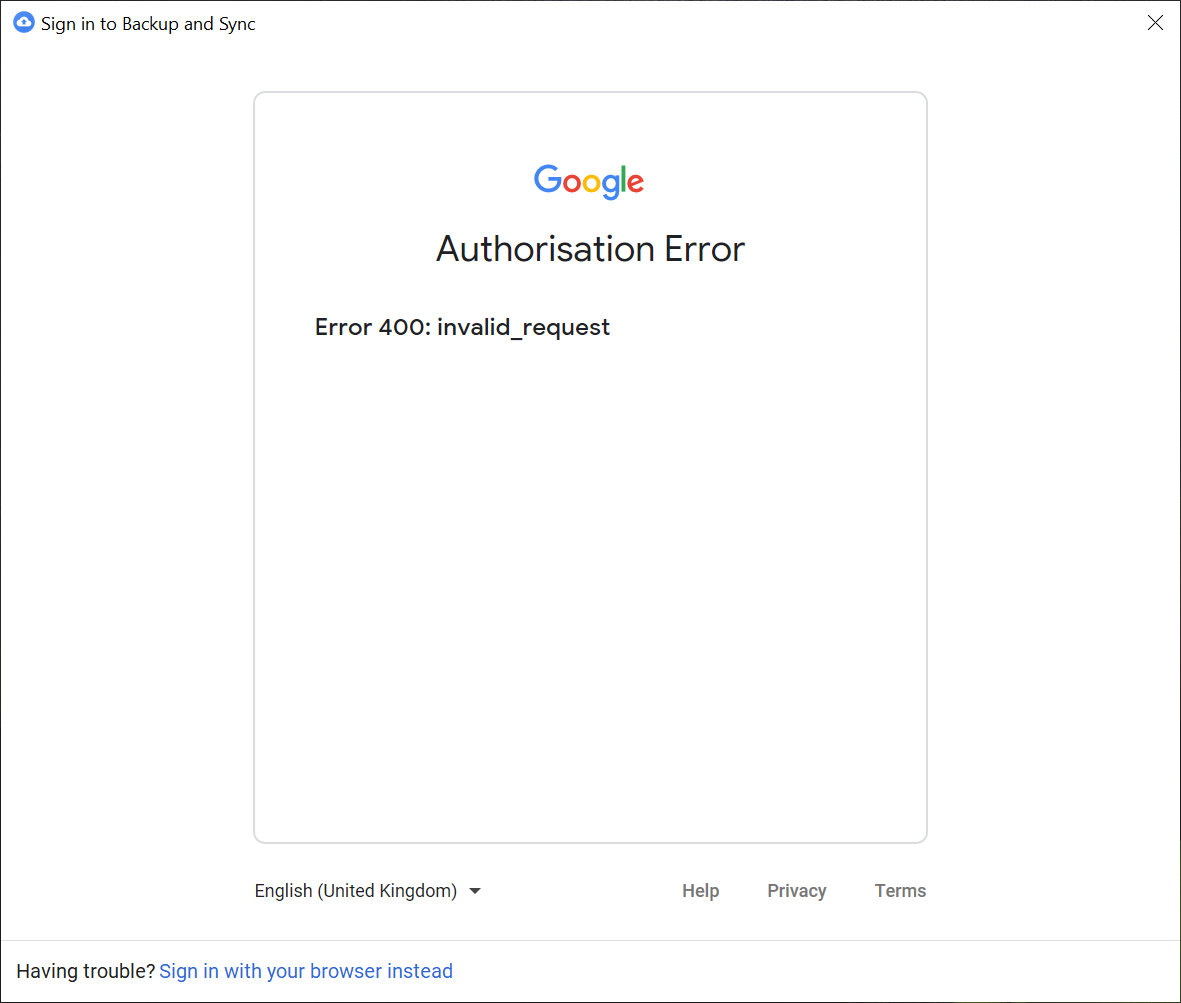
As of January 12, 2021 these steps no longer work. Even when choosing to “Allow” flash, Adobe will deliberately block it. You’ll see something similar to below.
The Workaround
This workaround should only be used for emergency situations as you should truly try to reduce your dependence on Flash.
In order for this workaround, you will need Chrome Version 87 or earlier. Version 88 does not include Adobe Flash.
On Windows, you’ll need to create a file called “mms.cfg” in the following path:
C:\Users\USERNAME\AppData\Local\Google\Chrome\User Data\Default\Pepper Data\Shockwave Flash\System\
On a Mac, you’ll need to create a file called “mms.cfg” in the following path:
/Users/USERNAME/Library/Application Support/Google/Chrome/Default/Pepper Data/Shockwave Flash/System/
Make sure you replace “USERNAME” with your own account.
On Linux, you’ll need to create a file called “mms.cfg” in the following path:
~/.config/google-chrome/Default/Pepper Data/Shockwave Flash/System/
The contents of the “mms.cfg” file should be as follows.
EnableAllowList = 1
AllowListUrlPattern = http://COMPUTERNAME/
AllowListUrlPattern = https://IP.ADDRESS/
AllowListUrlPattern = *://server.domain.com/
Feel free to add as many “AllowListUrlPattern” items as you require. These URL patterns are sites you’re allowing to run flash on.
To access a URL:
- After creating this file and populating it, open up Chrome
- Navigate to the page you want to view
- Click on the “Secure”, “Not Secure”, or the padlock to the left of the URL tab.
- Change “Adobe Flash” from “Ask” to “Allow”, then close the popup.
- Click on “Refresh” when Chrome prompts
- A new pop-up will open saying Flash is out of date. DO NOT UPDATE, click on “Run once without updating”.
And you’re set! Leave a comment and let me know if it worked for you.
For more information on Adobe Flash End of Life and End of Support, click here.
For more information on the workaround, view the “Enterprise Enablement” section of the Adobe Flash Player Administration guide.