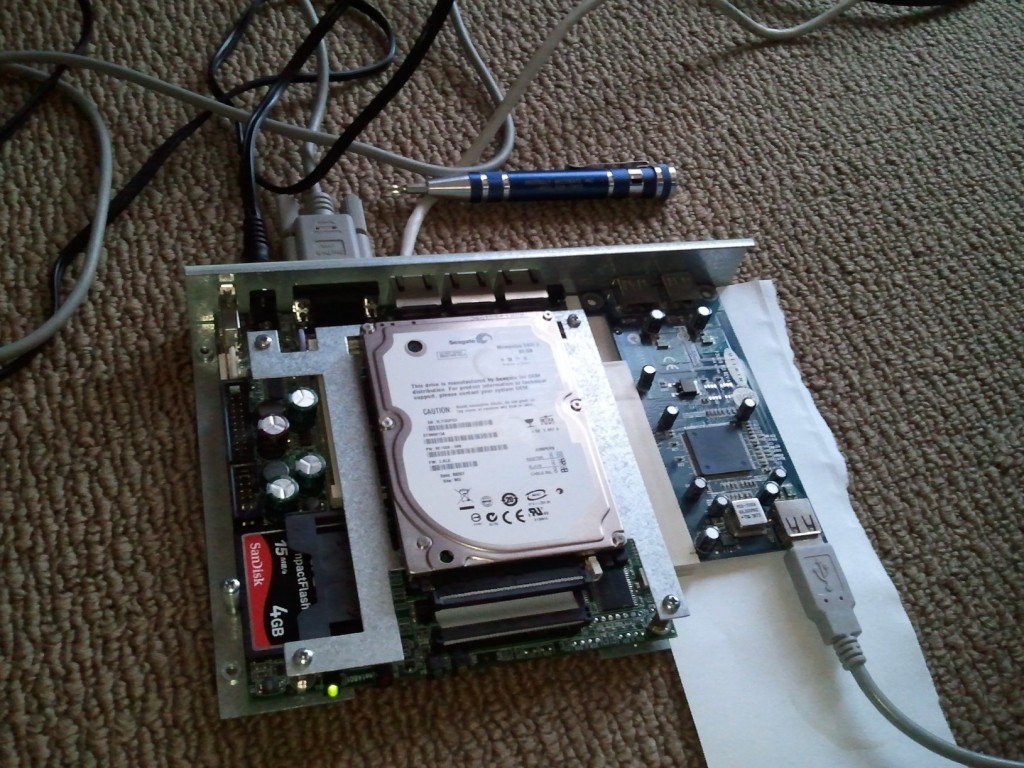
In this “how to” we will go over installing Ubuntu 10.04 TLS on a Soekris Net4801 SBC (Single board computer).
To accomplish this, we will be network booting the Net4801 since it does not have any installation type storage (no cd-rom, and USB ports are not bootable), also since the Net4801 does not have a video card, or keyboard, we will be performing the installation over a serial console.
You can use this guide to perform the same function on other SBCs or other devices (even a standard server). The methods in the guide to both network boot, and provide a serial console are not mutual specific and can be done on their own (example, you don’t need to network boot to install using a serial console, or vice versa).
In this how to, we are using the Soekris Net4801 since it’s a small, interesting little computer which is designed as a somewhat open platform for router, wireless, and numerous other types of development and production type uses. The Net4801 specifications are available here: http://soekris.com/products/net4801.html.
The instructions I provide are using software and systems I have available to myself. Your environment may be different so remember that Google is your friend. The concepts will be the same.
Requirements
To get started, we need:
- 1 X Soekris Net4801
- 1 X Computer with a serial port
- 1 X Serial DB-9 Null Modem Cable
- 1 X Linux or Windows computer running TFTP server and web server
When network booting the Ubuntu installer, you can either install directly off the internet (which requires simply networking booting, and following the installation instructions) or you can provide the installer the installation files which may speed things up if you are on a slow connection. For the purpose of enlightening whoever is reading this, we are going to provide the installer the files.
How to Install Ubuntu over PXE netboot
1) Install a TFTP Server
The first thing we have to do is create the environment necessary to network boot the Net4801. In my case I have a CentOS 6 server. I installed the tftp server by issuing “yum install tftp-server*”. After this is complete we open up /etc/xinetd.d/tftp and change the disable value to no. Go ahead and restart xinetd by typing “/etc/init.d/xinetd restart”.
We now have a TFTP server providing everything inside of /var/lib/tftpboot.
2) Configure the DHCP Server to provide PXE boot info to PXE clients
In my case, I have a Windows Server 2008 R2 box providing DHCP to my network. I simply log on to the server, and open the DHCP Server GUI. I browse to my network scope, and right click on “Scope Options” and hit “Configure Options”. We need to specify two options: First is “066 Boot Server Host Name” which we set to the IP address of the TFTP Server, and second “067 Bootfile Name” which we set to “pxelinux.0”. That’s it! When the PXE client boots it will receive this information.
3) Configure netboot files
If you have the Ubuntu alternative CD, you can copy over everything inside of the install/netboot directory to /var/lib/tftpboot.
If you don’t have the Ubuntu CD, change your working directory to /var/lib/tftpboot, and type “wget ftp://ubuntu.arcticnetwork.ca/pub/ubuntu/ubuntu/dists/lucid/main/installer-i386/current/images/netboot/netboot.tar.gz”. After this, type “tar zxvf netboot.tar.gz”. This will extract the netboot components to the directory.
When this is completed, this will provide the network installer for Ubuntu. Since we are using a serial terminal to install Ubuntu on the Net4801, we now have to configure the bootloader, and installer to use the serial console.
Inside of the /var/lib/tftpboot directory, open pxelinux.cfg/default using your favorite editor. Add these two lines to the top of the file:
console 0
serial 0 19200 0
Save and close. We have just instructed the bootloader to use the first serial port on the system to provide console. Next we need to configure the kernel to input/output to the serial port aswell.
Open ubuntu-installer/i386/boot-screens/text.cfg in your editor. We are going to remove and add a few things to the “append” line under the “install label”. We are going to remove the word quiet, and replace it with console=ttyS0,19200. After completed it should look like this:
default install
label install
menu label ^Install
menu default
kernel ubuntu-installer/i386/linux
append vga=normal initrd=ubuntu-installer/i386/initrd.gz -- console=ttyS0,19200 earlyprint=serial,ttyS0,19200
Now that this is complete, the kernel will now input/output to the serial console.
4) Install sources (you can skip this, but please read)
If you are installing from the internet, you can simply skip this step. If you have the Ubuntu alternative CD, or CD Image, and want to install from those sources, this is what we need to do. In my case, I had the ubuntu .iso file.
On my CentOS server, I have Apache httpd installed. I have the .iso file in /root/. I type “mkdir /var/www/html/mount” to create a directory called mount inside of the web root. I then make sure I’m in /root/ when typing “mount cd-image-name.iso /var/www/html/mount -o loop” which mounts the CD Image to the mount directory.
We have now successfully mounted the CD image to the web server.
5) Network Boot the Soekris Net4801 via PXE
We now have the environment configured, it’s finally time to network boot the Net4801. Keep in mind, with a serial connection, one of the only problems you’ll run into is a) configuring software (ie. Linux, Grub, Bootloders) to use it, and b) speed settings. We’ve addressed the first issue already with configuration files, however we need to setup speed values on both the BIOS for the Net4801, and speed value for the client (in my case PuTTY). While you can use a whole range, I like to use 19200. It’s friendly, and I never have any issues 🙂
Hook up the Net4801 to your computer’s serial port using your Null Modem Serial cable. Open up PuTTY, and instead of using SSH, use Serial, and set the speed to 19200. I beleive this is the default for a fresh out of the box Net4801, and start the connection. Power on the Net4801 and you should see the startup text.
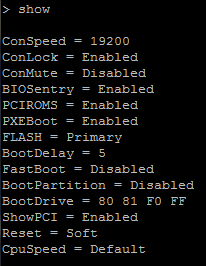
So right now, the connection is working, but I thought I’d go over a few things. Hit Ctrl + P while the BIOS is posting, and type show.
These are variables you can configure on the Net4801. A few to remember are: a) ConSpeed – Serial port speed, has to match on both sides b) Flash – Either Primary or Secondary, this specifies whether it is Master or Slave on the IDE Channel, just like traditional older IDE based computers. c) BootDrive – This is standard booting order, 80 = IDE Master, 81 = IDE Slave, F0 = PXE Network boot.
Anyways, that’s that. So now we want to network boot. While in the ComBios command console, type in “Boot F0”. This will initiate the network boot. Things might look a bit weird at first, however eventually it will prompt you for something, simply type “install” and hit enter. After the kernel boots, the Ubuntu text installation should start. Now it’s easy and normal.
FINAL NOTES
The Soekris Net4801’s processor is a i586 class processor. Ubuntu dropped support for i586 as of 10.10 and later. This is why I chose 10.04 LTS.
There are issues with the installer on the Net4801. Issue being, after specifying network configuration, once it starts to download the initial installer components, the installer will freeze. Usually the screen goes blank for up to 45 minutes when it is working, however when this issue occurs, it will permanently freeze. 10 Months ago I narrowed down what was causing this, however have forgotten. I think it has something to do with just having a IDE drive connected to the Soekris, I think it started working when switching to Compact Flash for internal storage.
POST-INSTALL CONFIGURATION
After installing, I noticed a bunch of weird things like ureadahead and plymouth crashing on startup (due to lack of resources). Also, some things were not showing up on the serial console which I wanted to (this is because everyone want’s GUI’s these days).
Few recommendations on cleaning up your install:
1) Disable AppArmor – It’s a waste of resources
Type “sudo update-rc.d -f apparmor remove”
2) Configure GRUB – Get the proper stuff going to the console
Open /etc/default/grub in your favorite editor, remove everything and paste this:
GRUB_DEFAULT=0
GRUB_HIDDEN_TIMEOUT_QUIET=true
GRUB_TIMEOUT=3
GRUB_DISTRIBUTOR=`lsb_release -i -s 2> /dev/null || echo Debian`
GRUB_CMDLINE_LINUX_DEFAULT="noplymouth text nosplash"
GRUB_CMDLINE_LINUX="console=ttyS0,19200 earlyprint=serial,ttyS0,19200"
GRUB_TERMINAL=console
GRUB_TERMINAL=serial
GRUB_SERIAL_COMMAND="serial --unit=0 --speed=19200 --stop=1"
That disables plymouth, configures a text console, and shows GRUB on boot. After this is done, run “update-grub” and “update-initramfs -u”.
3) Set time – I don’t know why but my system lost it’s time, maybe my battery is going, for some reason this wasn’t automatic.
Type “ntpdate time.windows.com”
4) Compiler and Building stuff – If you’re going to compile anything, run this, or skip this
Type “apt-get install fakeroot build-essential libncurses5 libncurses5-dev libelf-dev asciidoc binutils-dev”
Have any questions, feel free to leave a comment.


