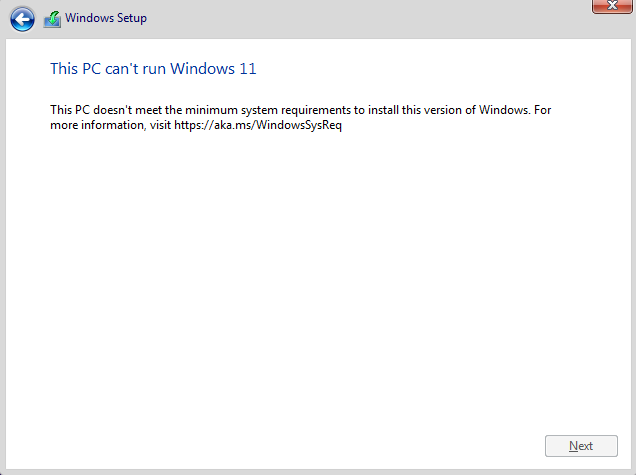
It’s been coming for a while: The requirement to deploy VMs with a TPM module… Today I’ll be showing you the easiest and quickest way to create and deploy Virtual Machines with vTPM with NKP (Native Key Provider) on VMware vSphere!
As most of you know, Windows 11 has a requirement for Secureboot as well as a TPM module. It’s with no doubt that we’ll also possibly see this requirement with future Microsoft Windows Server operating systems.
While users struggle to deploy TPM modules on their own workstations to be eligible for the Windows 11 upgrade, ESXi administrators are also struggling with deploying Virtual TPM modules, or vTPM modules on their virtualized infrastructure.
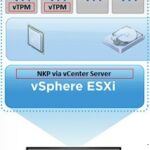
With the Native Key Provider (NKP) on VMware vSphere, you can easily deploy a key provider, enabling vTPM (Virtual Trusted Key Platform) enabled Virtual Machines.
What is a TPM Module?
TPM stands for Trusted Platform Module. A Trusted Platform Module, is a piece of hardware (or chip) inside or outside of your computer that provides secured computing features to the computer, system, or server that it’s attached to.
This TPM modules provides things like a random number generator, storage of encryption keys and cryptographic information, as well as aiding in secure authentication of the host system.
In a virtualization environment, we need to emulate this physical device with a Virtual TPM module, or vTPM.
What is a Virtual TPM (vTPM) Module?
A vTPM module is a virtualized software instance of a traditional physical TPM module. A vTPM can be attached to Virtual Machines and provide the same features and functionality that a physical TPM module would provide to a physical system.
vTPM modules can be can be deployed with VMware vSphere, and can be used to deploy Windows 11 on ESXi.
Deployment of vTPM modules, require a Key Provider on the vCenter Server.
For more information on vTPM modules, see VMware’s “Virtual Trust Platform Module Overview” documentation.
Deploying vTPM (Virtual TPM Modules) on VMware vSphere with NKP
In order to deploy vTPM modules (and VM encryption, vSAN Encryption) on VMware vSphere, you need to configure a Key Provider on your vCenter Server.
Previously (but still an option), this would be accomplished with a Standard Key Provider utilizing a Key Management Server (KMS), however this required a 3rd party KMS server and is what I would consider a complex deployment.
VMware has made this easy as of vSphere 7 Update 2 (7U2), with the Native Key Provider (NKP) on the vCenter Server.
The Native Key Provider, allows you to easily deploy technologies such as vTPM modules, VM encryption, vSAN encryption, and the best part is, it’s all built in to vCenter Server.
Enabling VMware Native Key Provider (NKP)
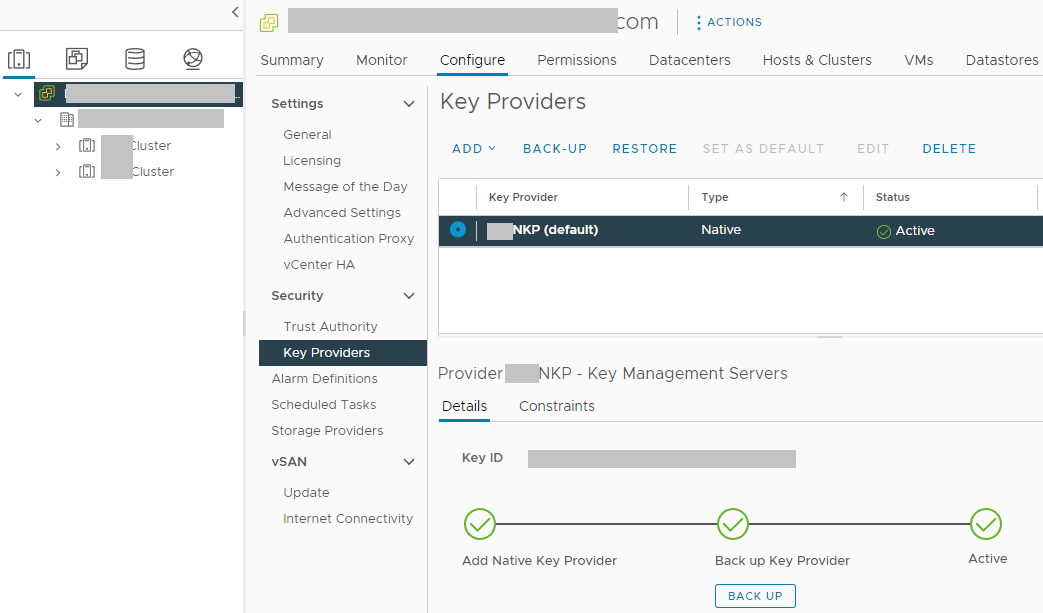
To enable NKP across your vSphere infrastructure:
- Log on to your vCenter Server
- Select your vCenter Server from the Inventory List
- Select “Key Providers”
- Click on “Add”, and select “Add Native Key Provider”
- Give the new NKP a friendly name
- De-select “Use key provider only with TPM protected ESXi hosts” to allow your ESXi hosts without a TPM to be able to use the native key provider.
In order to activate your new native key provider, you need to click on “Backup” to make sure you have it backed up. Keep this backup in a safe place. After the backup is complete, you NKP will be active and usable by your ESXi hosts.
There’s a few additional things to note:
- Your ESXi hosts do NOT require a physical TPM module in order to use the Native Key Provider
- Just make sure you disable the checkbox “Use key provider only with TPM protected ESXi hosts”
- NKP can be used to enable vTPM modules on all editions of vSphere
- If your ESXi hosts have a TPM module, using the Native Key Provider with your hosts TPM modules can provide enhanced security
- Onboard TPM module allows keys to be stored and used if the vCenter server goes offline
- If you delete the Native Key Provider, you are also deleting all the keys stored with it.
- Make sure you have it backed up
- Make sure you don’t have any hosts/VMs using the NKP before deleting
You can now deploy vTPM modules to virtual machines in your VMware environment.