When deploying automated desktop pools with NVIDIA vGPU on VMware Horizon with an NVIDIA A2 GPU, you may notice provisioning fails with an error.
Error during Provisioning Cloning of VM VM-NAME-01 has failed: Fault type is UNKNOWN_FAULT_FATAL - No GPU capable host available for provisioning VM-NAME-01 with profile nvidia_a2-4q. Please refer to VMware KB 59271 for more details.Further, when visiting VMware KB 59271 and performing the instructions, provisioning still continues to fail.

Essentially, at present there is no “supported” to resolve this issue without applying the fix listed in this post. Additionally, if you’re a VMware customer with an active support agreement, I would recommend opening a ticket with VMware Support so that it can be addressed in a future release.
The Problem
The NVIDIA A2 GPU is fairly new, along with VMware vSphere support. Even newer, is the support for vGPU and VMware Horizon, requiring the latest drivers (vGPU Drivers versions 14.2 released August 2022) to enable vGPU profiles for the card.
After troubleshooting this, I noted that the “graphic-profiles.properties” file in “C:\Program Files\VMware\VMware View\Server\broker\conf” did not contain any NVIDIA A2 vGPU Profiles. Additionally, the file available on the VMware KB was also missing these profiles.
The Fix
To fix this, I referenced the NVIDIA vGPU User Guide to note the vGPU profiles allowed on the card, and created my own entries for the configuration file.
After adding these entries, restarting the server (or service), I was able to provision NVIDIA A2 enabled vGPU desktop pools.
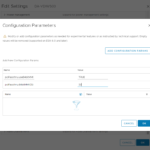
To resolve this issue, add the following entries to your “graphic-profiles.properties” file in “C:\Program Files\VMware\VMware View\Server\broker\conf” (note, the contents of the file is case-sensitive):
# NVIDIA A2 Profiles
# Q-Series Virtual GPU Types for NVIDIA A2
nvidia_a2-16q=1
nvidia_a2-8q=2
nvidia_a2-4q=4
nvidia_a2-2q=8
nvidia_a2-1q=16

# B-Series Virtual GPU Types for NVIDIA A2
nvidia_a2-2b=8
nvidia_a2-1b=16

# C-Series Virtual GPU Types for NVIDIA A2
nvidia_a2-16c=1
nvidia_a2-8c=2
nvidia_a2-4c=4

# A-Series Virtual GPU Types for NVIDIA A2
nvidia_a2-16a=1
nvidia_a2-8a=2
nvidia_a2-4a=4
nvidia_a2-2a=8
nvidia_a2-1a=16
After restarting the server or services, you should now be able to use the NVIDIA A2 vGPU profiles with VMware Horizon automated (vGPU) desktop pools.
You should be able to use this fix for other new vGPU cards that have been recently released where the profiles have not been configured for Horizon. VMware is likely to fix this in future released of VMware Horizon.