When it comes to troubleshooting login times with non-persistent VDI (VMware Horizon Instant Clones), I often find delays associated with printer drivers not being included in the golden image. In this post, I’m going to show you how to add a printer driver to an Instant Clone golden image!
Printing with non-persistent VDI and Instant Clones
In most environments, printers will be mapped for users during logon. If a printer is mapped or added and the driver is not added to the golden image, it will usually be retrieved from the print server and installed, adding to the login process and ultimately leading to a delay.
Due of the nature of non-persistent VDI and Instant Clones, every time the user goes to login and get’s a new VM, the driver will then be downloaded and installed each of these times, creating a redundant process wasting time and network bandwidth.
To avoid this, we need to inject the required printer drivers in to the golden image. You can add numerous drivers and should include all the drivers that any and all the users are expecting to use.
An important consideration: Try using Universal Print Drivers as much as possible. Universal Printer Drivers often support numerous different printers, which allows you to install one driver to support many different printers from the same vendor.
How to add a printer driver to an instant clone golden image
Below, I’ll show you how to inject a driver in to the Instant Clone golden image. Note that this doesn’t actually add a printer, but only installs the printer driver in to the Windows operating system so it is available for a printer to be configured and/or mapped.
Let’s get started! In this example we’ll add the HP Universal Driver. These instructions work on both Windows 10 and Windows 11 (as well as Windows Server operating systems):
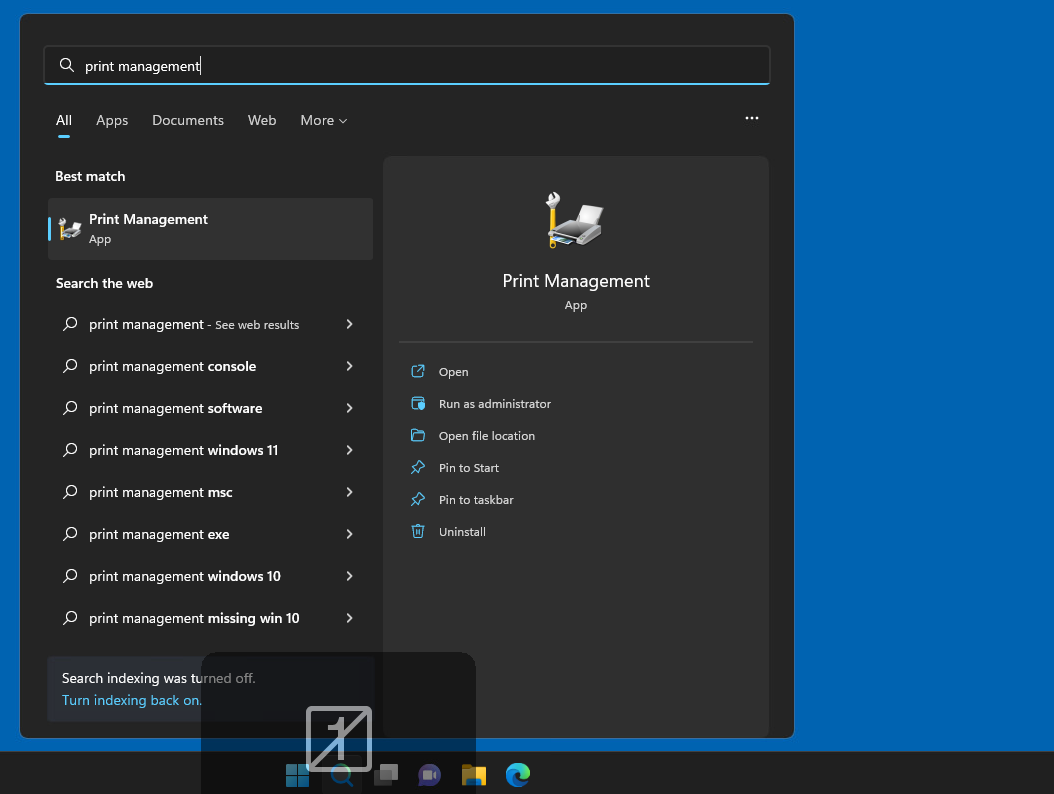
Click Start, type in “Print Management” and open the “Print Management”. You can also click Start, Run, and type “printmanagement.msc”.
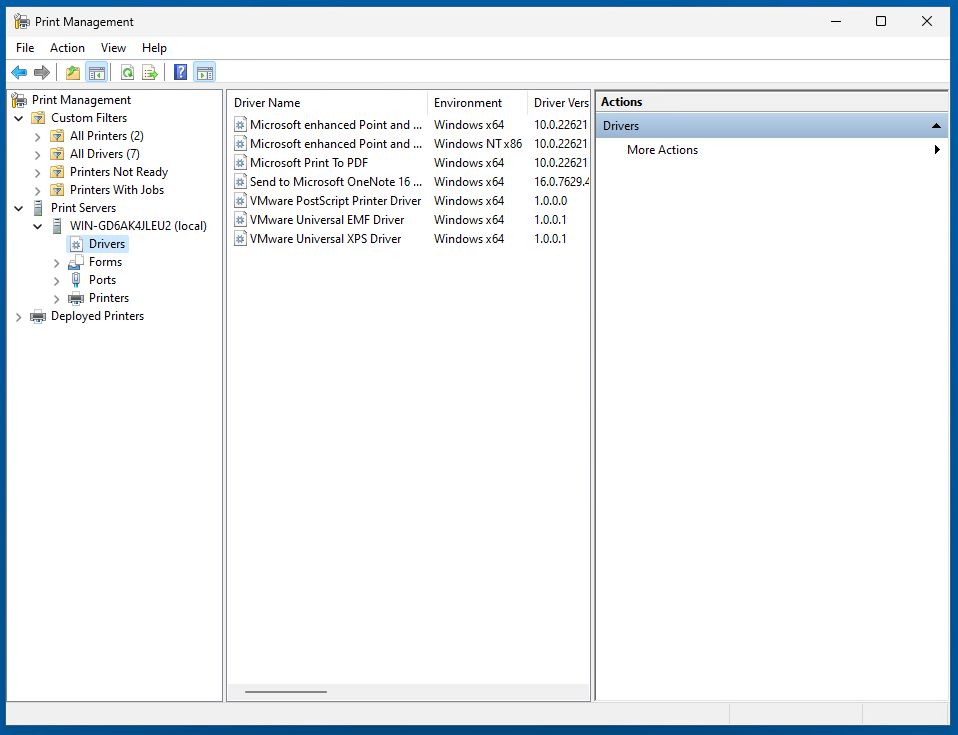
On the left hand side, expand “Print Servers”, then expand your computer name, and select “Drivers”.
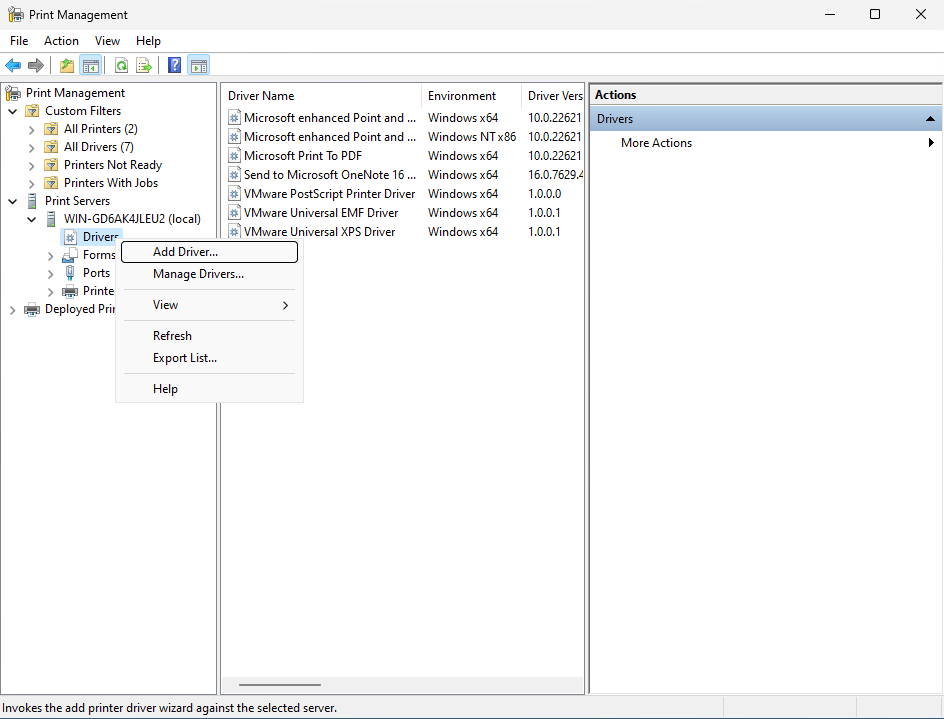
Right click on “Drivers” and select “Add Driver”.
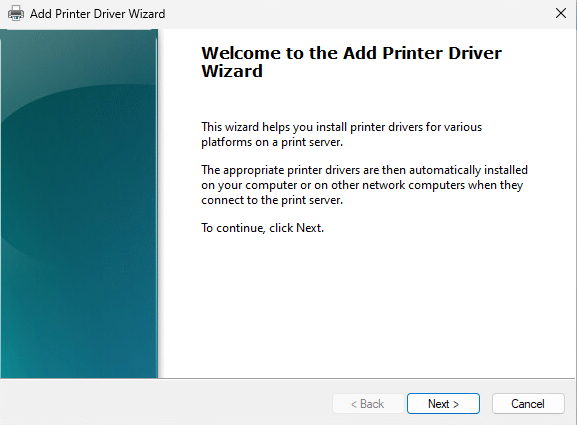
When the “Welcome to the Add Printer Driver Wizard” opens, click Next.
Leave the default for the architecture. It should default to the architecture of the golden image.
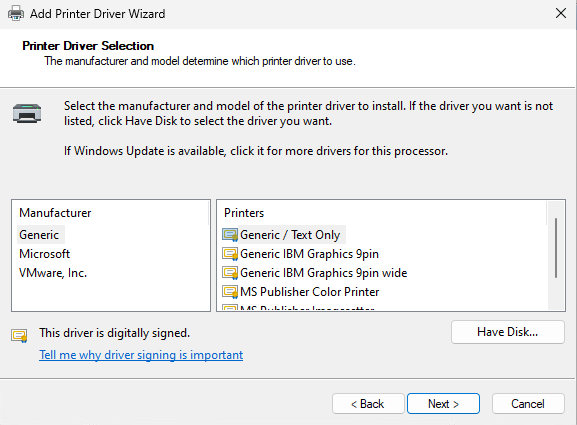
When you are at the “Printer Driver Selection” stage, click on “Have Disk”.
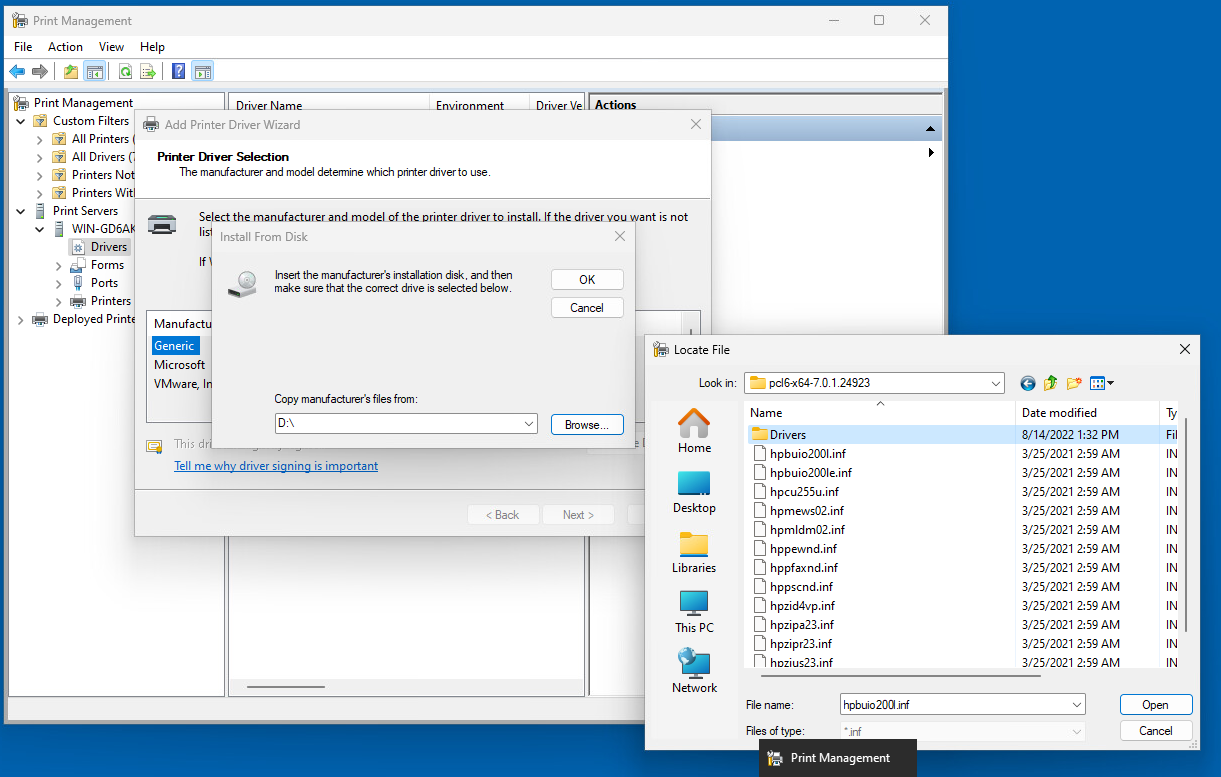
Browse to the location of your printer driver. In this example, we navigate to the extracted HP Universal Print Driver.
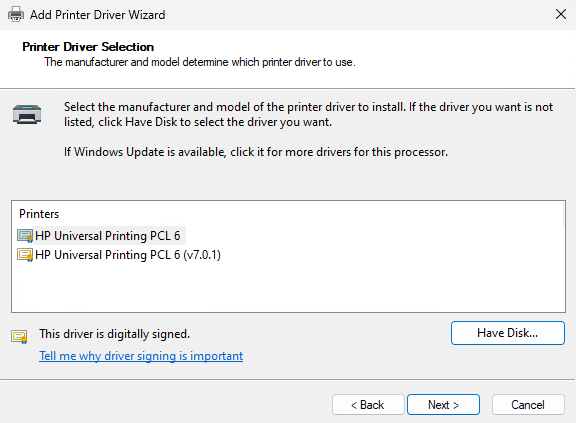
Select the driver you want to install.
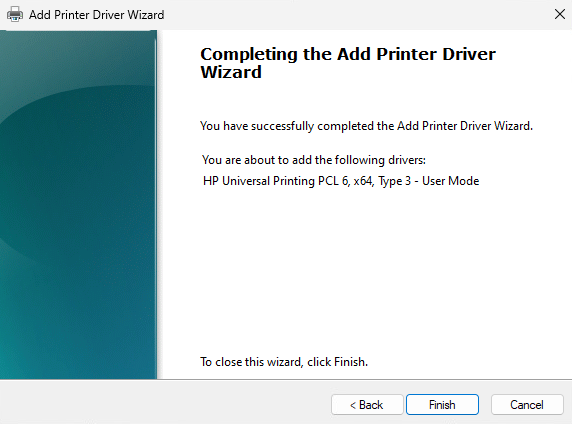
Click on Finish to complete the driver installation.
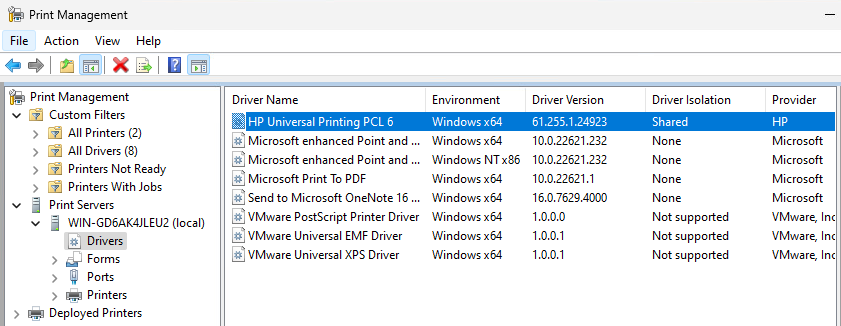
The driver you installed should now appear in the list as it has been installed in to the operating system and is now available should a user add a printer, or have a printer automatically mapped.
Printer Driver installed on Non-Persistent Instance Clone Golden Image
Now seal, snap, and deploy your image, and you’re good to go!
Many of you may be not aware of the Azure AD Connect 1.x End of Life on August 31st, 2022. What this means is that as of August 31st, 2022 (later this month), you’ll no longer be able to use Azure AD Connect 1.4 or Azure AD Connect 1.6 to sync your on-premise Active Directory to Azure AD.
It’s time to plan your upgrade and/or migration!
This is catching a lot of System Administrators by surprise. In quite a few environments, Azure AD connect was implemented on older servers that haven’t been touched (except for Windows Updates) in the years that they’ve been running, because Azure AD Connect “just works”.
Azure AD Connect End of Life
Azure AD Connect has to major releases that are being used right now, being 1.x and 2.x.
Version 1.x which is the release going end of life is the first release, generally seen installed on older Windows Server 2012 R2 systems (or even earlier versions).
Version 2.x which is the version you *should* be running, does not support Windows Server 2012. Azure AD Connect 2.x can only be deployed on Windows Server 2016 or higher.
For a lot of you, there is no easy in-place upgrade unless you have 1.x installed on Windows Server 2016 or higher. If you are running 1.x on Server 2016 or higher, you can simply do an in-place upgrade!
If you’re running Windows Server 2012 R2 or earlier, because 2.x requires Server 2016 or higher, you will need to migrate to another system running a newer version of Windows Server.
However, the process to migrate to a newer server is simpler and cleaner than most would suspect. I highly recommend reviewing all the Microsoft documentation (see below), but a simplified overview of the process is as follows:
Deploy new Windows Server (version 2016 or higher)
Export Configuration (JSON file) from old Azure AD Connect 1.x server
Install the latest version of Azure AD Connect 2.x on new server, load configuration file and place in staging mode.
Enable Staging mode on old server (this stops syncing of old server)
Disable Staging mode on new server (this starts syncing of new server)
Decommission old server (uninstall Azure AD Connect, unjoin from domain)
As always, I highly recommend having an “Alternative Admin” account on your Azure AD. If you lose the ability to sync or authenticate against Azure AD, you’ll need a local Azure AD admin account to connect and manage and re-establish the synchronization.
As we approach the date, I wanted to write a post sharing Why I’m looking forward to VMware Explore 2022 and share what I hope to get from the conference and experience.
As most of you know, VMware Explore 2022 (formerly known as VMware VMworld) is taking place this month in San Francisco at the Moscone Center August 29th, 2022 to September 1st, 2022.
As some of you know, I regularly write about virtualization technologies, in particular VMware. VMware products are not only involved in the work that I do, but part of a personal hobby and passion. I was an early adopter of Virtualization, and on top of that, VDI (Virtual Desktop Infrastructure) has become a personal obsession of mine.
Because of the content I’ve written online, I’ve had the pleasure of helping others with these technologies. Over the years this has brought me new friendships, business customers, and given me a sense of participation in the larger community, ultimately leading to me achieving my VMware vExpert status, as well as being a part of the VMware vExpert EUC sub program.
Even though I’ve been in tech since becoming an adult, I’ve actually never had the opportunity to visit a large-scale conference in person in my entire life. VMware Explore 2022 will be my first in-person tech conference!
So why am I going? What do I hope to get from it? What are my reasons for attending?
Essentially there’s 3 big reasons why I’m going to be attending:
Community
Knowledge
Business
Let’s dive in to each one…
Community
As mentioned above, I’ve had the pleasure of being a part of the VMware vExpert program for the past couple years. During this time, it has helped my content reach new audiences, I’ve had the chance to converse and talk with the top industry experts, I’ve also had the chance to learn more about the technologies I love, and it’s given a sense of belonging and participating in something “big”.
Blogging has been a passion of mine for as long as I can remember, with the first post on this blog going back to April 11th, 2010. Blogging has allowed me to not only share my knowledge, but also participate and contribute to the community. This has helped me meet new people, network, learn even more, and also help others pursue their passions and goals with technology.
Attending VMware Explore 2022 will help me take this a step further to actually meet some of those in the community face to face. I love meeting new people, and this will allow me to engage with those who have stumbled across my blog, and it will also allow me to meet those who are leaders with the community and hopefully even learn some new things from them.
I’ve already started working on my list of people to meetup with!
Knowledge
In addition to the knowledge I hope to learn from others in the community, VMware Explore 2022 has over 600 technical sessions (some even hosted by fellow vExperts) where you can learn more about the technologies you use everyday, as well as technologies you’re considering or planning on using in the future.
In particular, a few products and solutions I want to increase my knowledge with are:
VMware Workspace One
VMware Horizon Cloud Service
VMware vSphere+
In addition to the above, I’m sure I’ll be expanding my knowledge on things I wasn’t even planning on… You could say the point of the conference is to “Explore”!
Business
VMware products and solutions have been an important part of the solutions and offerings my business provides. In addition, those products and solutions are also the foundations of many businesses and organizations key IT infrastructure.
These conferences are great to network, discuss business, find new potential clients and vendors, and also connect with those that you already do business with!
In the last 4 years the amount of international consulting I’ve been providing has increased exponentially on a year over year basis. And while it’s been amazing experience and I’ve had the chance to help many organizations with their VMware infrastructure, the only complaint I have is that I can’t meet face-to-face and shake hands with those customers as much as I’d like to. We have Zoom and Teams, but it’s not the same thing…
One thing I’m really looking forward to, is finally meeting quite a few of those customers face-to-face for the first time. I’m sure we’ll even have a few stories after attending a few (or many) of the VMware Explore parties that happen during that week.
Additionally, many major vendors sponsor VMware Explore and will have booths at the event, so I’m looking forward to meeting and shaking hands with some of my favorite vendors!
All in all, I think it’s going to be a great time and I’m really excited to attend. I hope to see you there!
I purchased the new Lenovo X13s Windows on ARM laptop, and wanted to share my first impressions with the device. I plan on creating a full review in a later post, however I wanted to provide some insight on my initial first impressions, as these can be a game changer or deal breaker for most people considering purchasing this laptop.
I’m going to break this blog post up in to a few key sections that were the most important, and most noticeable when first getting my hands on this device.
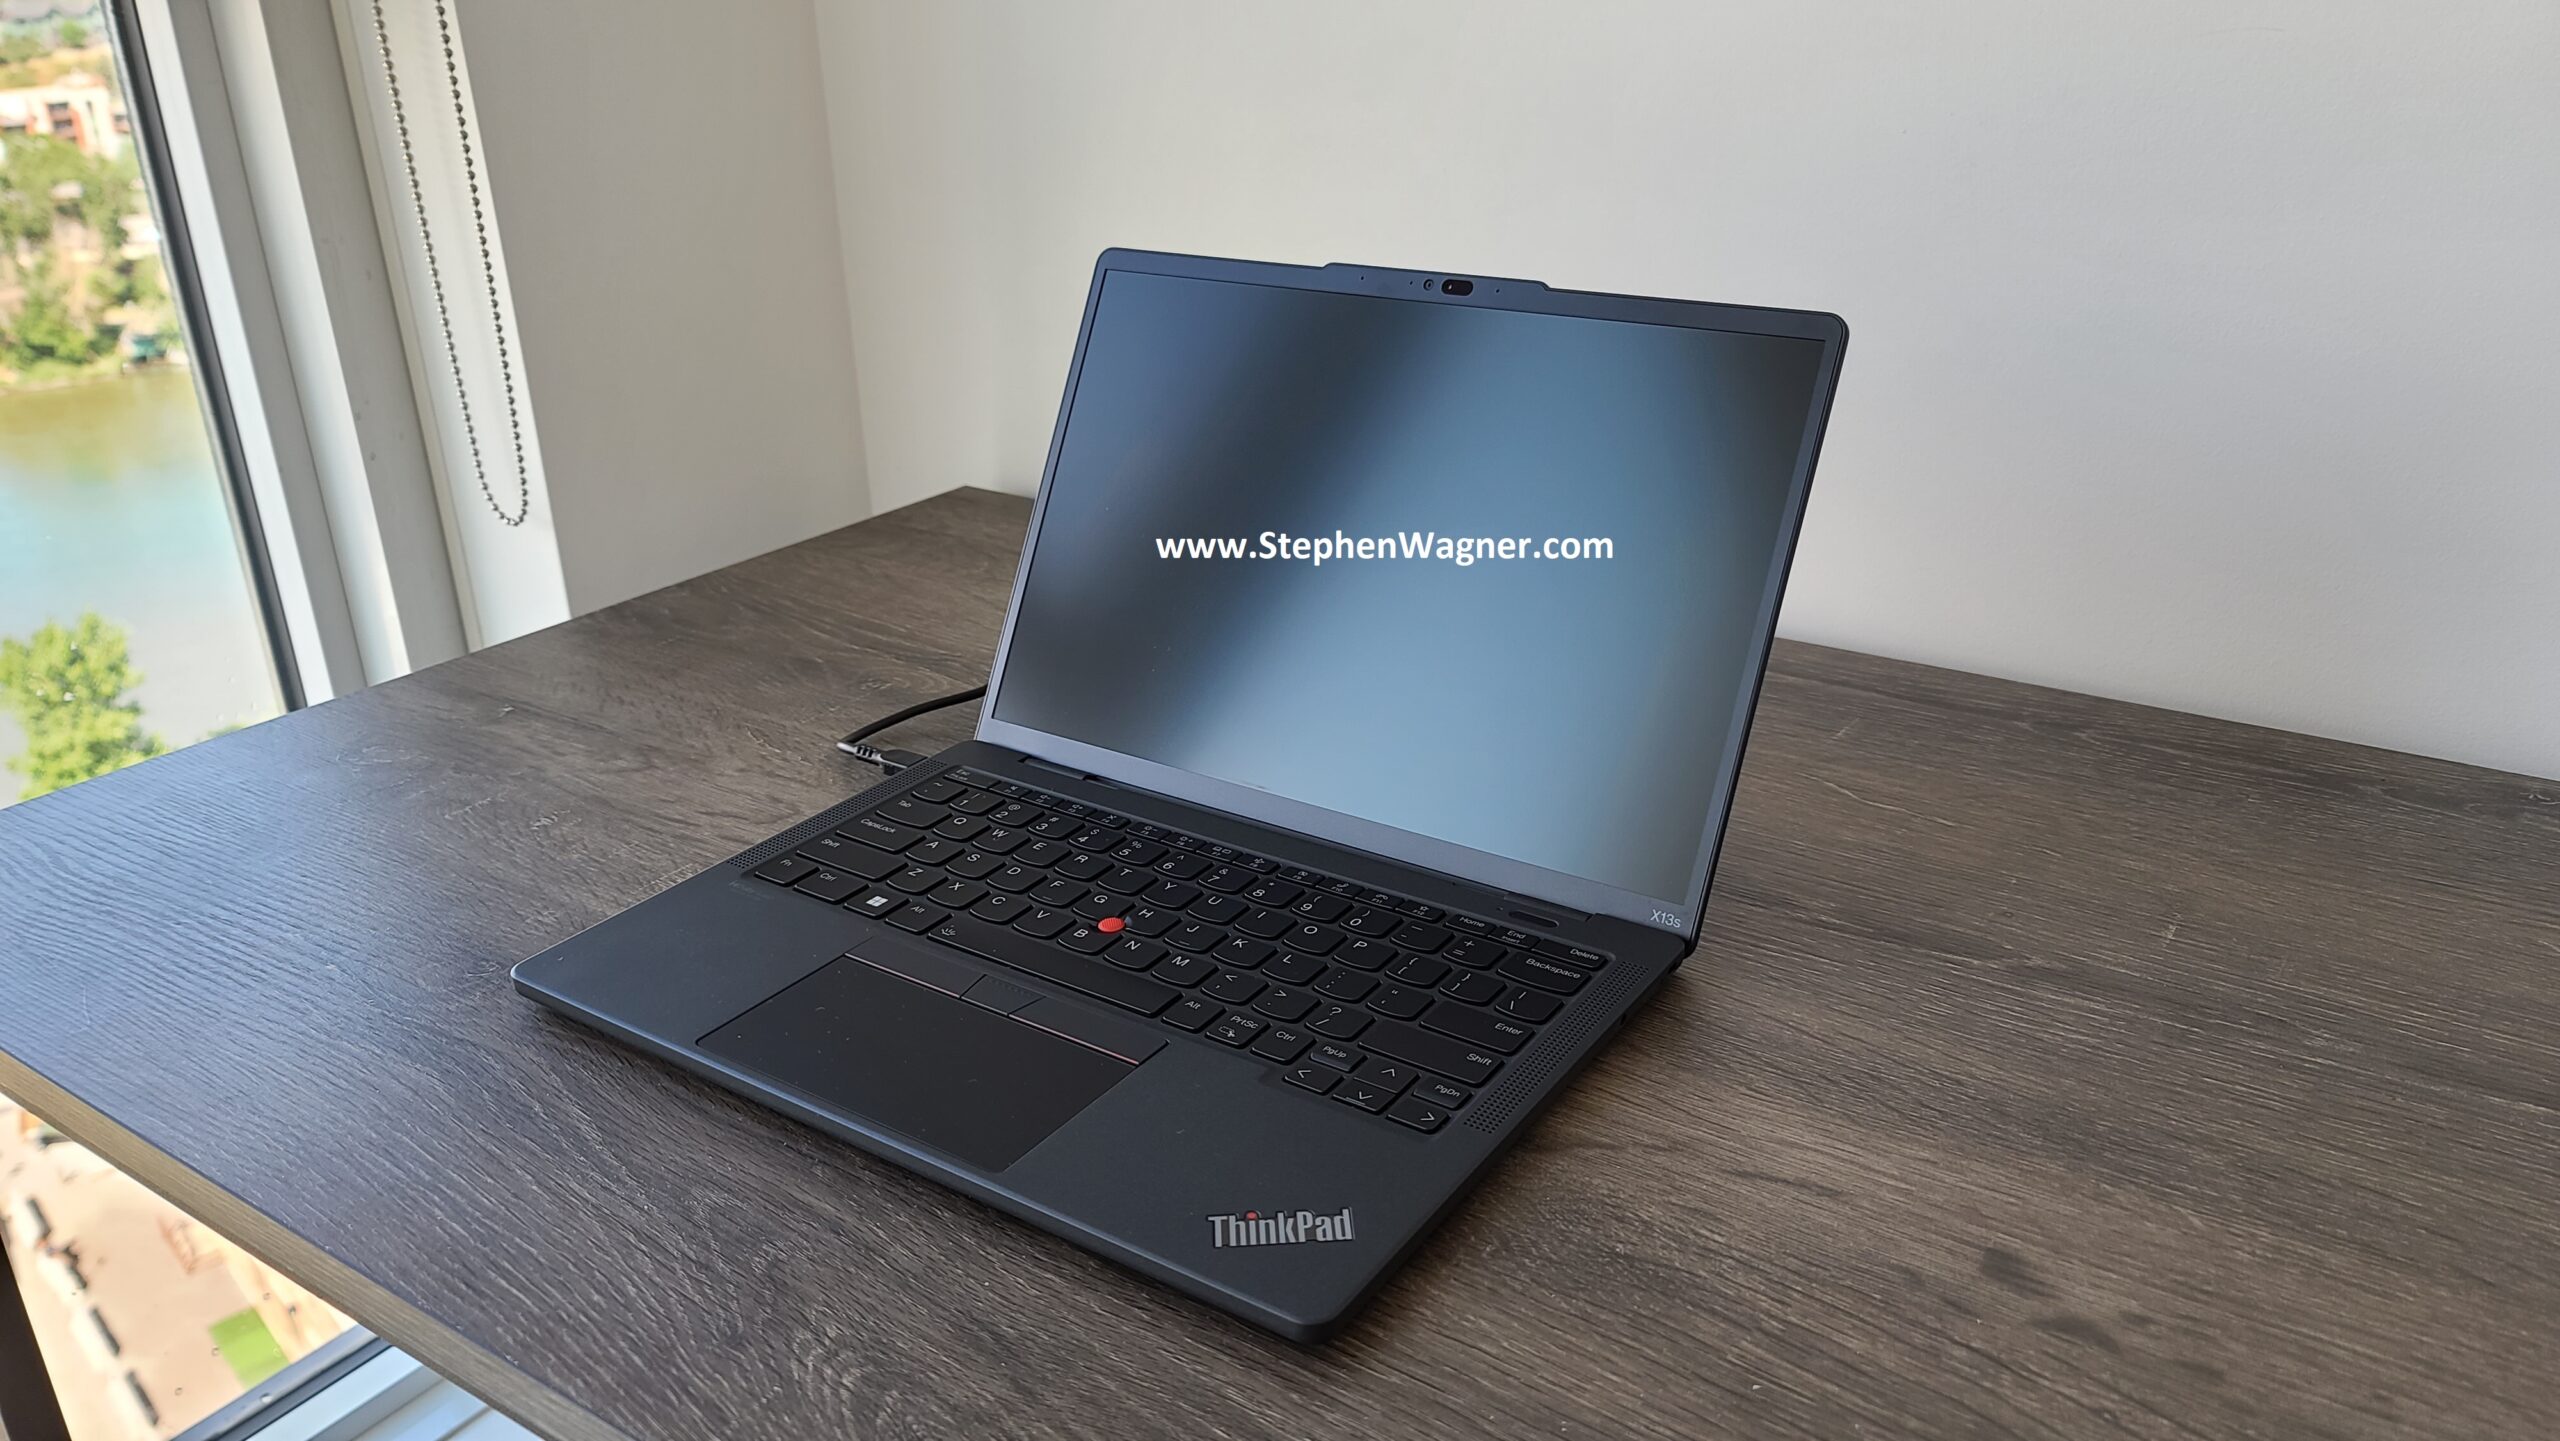
Lenovo Thinkpad X13s
I’ll be limiting this post to the first impressions as much as possible saving the rest for the full review.
Pre-purchase expectations and initial thoughts
With lots of travel approaching, and with an aging laptop (Lenovo X1 Carbon Gen-2013), I needed to purchase a new laptop that I could use that would fit my requirements:
WWAN (Preferably 5G)
Good Battery Life
Good Performance
Stylish
Application Use
VDI – VMware Horizon Client
Microsoft Office
IT Applications (Putty, WinSCP, RDP)
Microsoft Teams
Zoom
You can see that my usage is similar to the business road warrior professional, with an IT add-on. I’m usually always connected to a VDI session, and also spend 50-100% of the day on Zoom or Microsoft Teams meetings.
With full knowledge about ARM architecture, and the new laptops and devices that have been released, I decided to take a big risk and try one of the new Windows on ARM laptops, specially the Lenovo X13s.
ARM laptops generally provide great performance, really good battery life, and an “always on” ready to go environment.
Specifications
I’ll be saving the tech spec deep dive for the full review, however I wanted to provide some basic information on the specifications of the model I purchased.
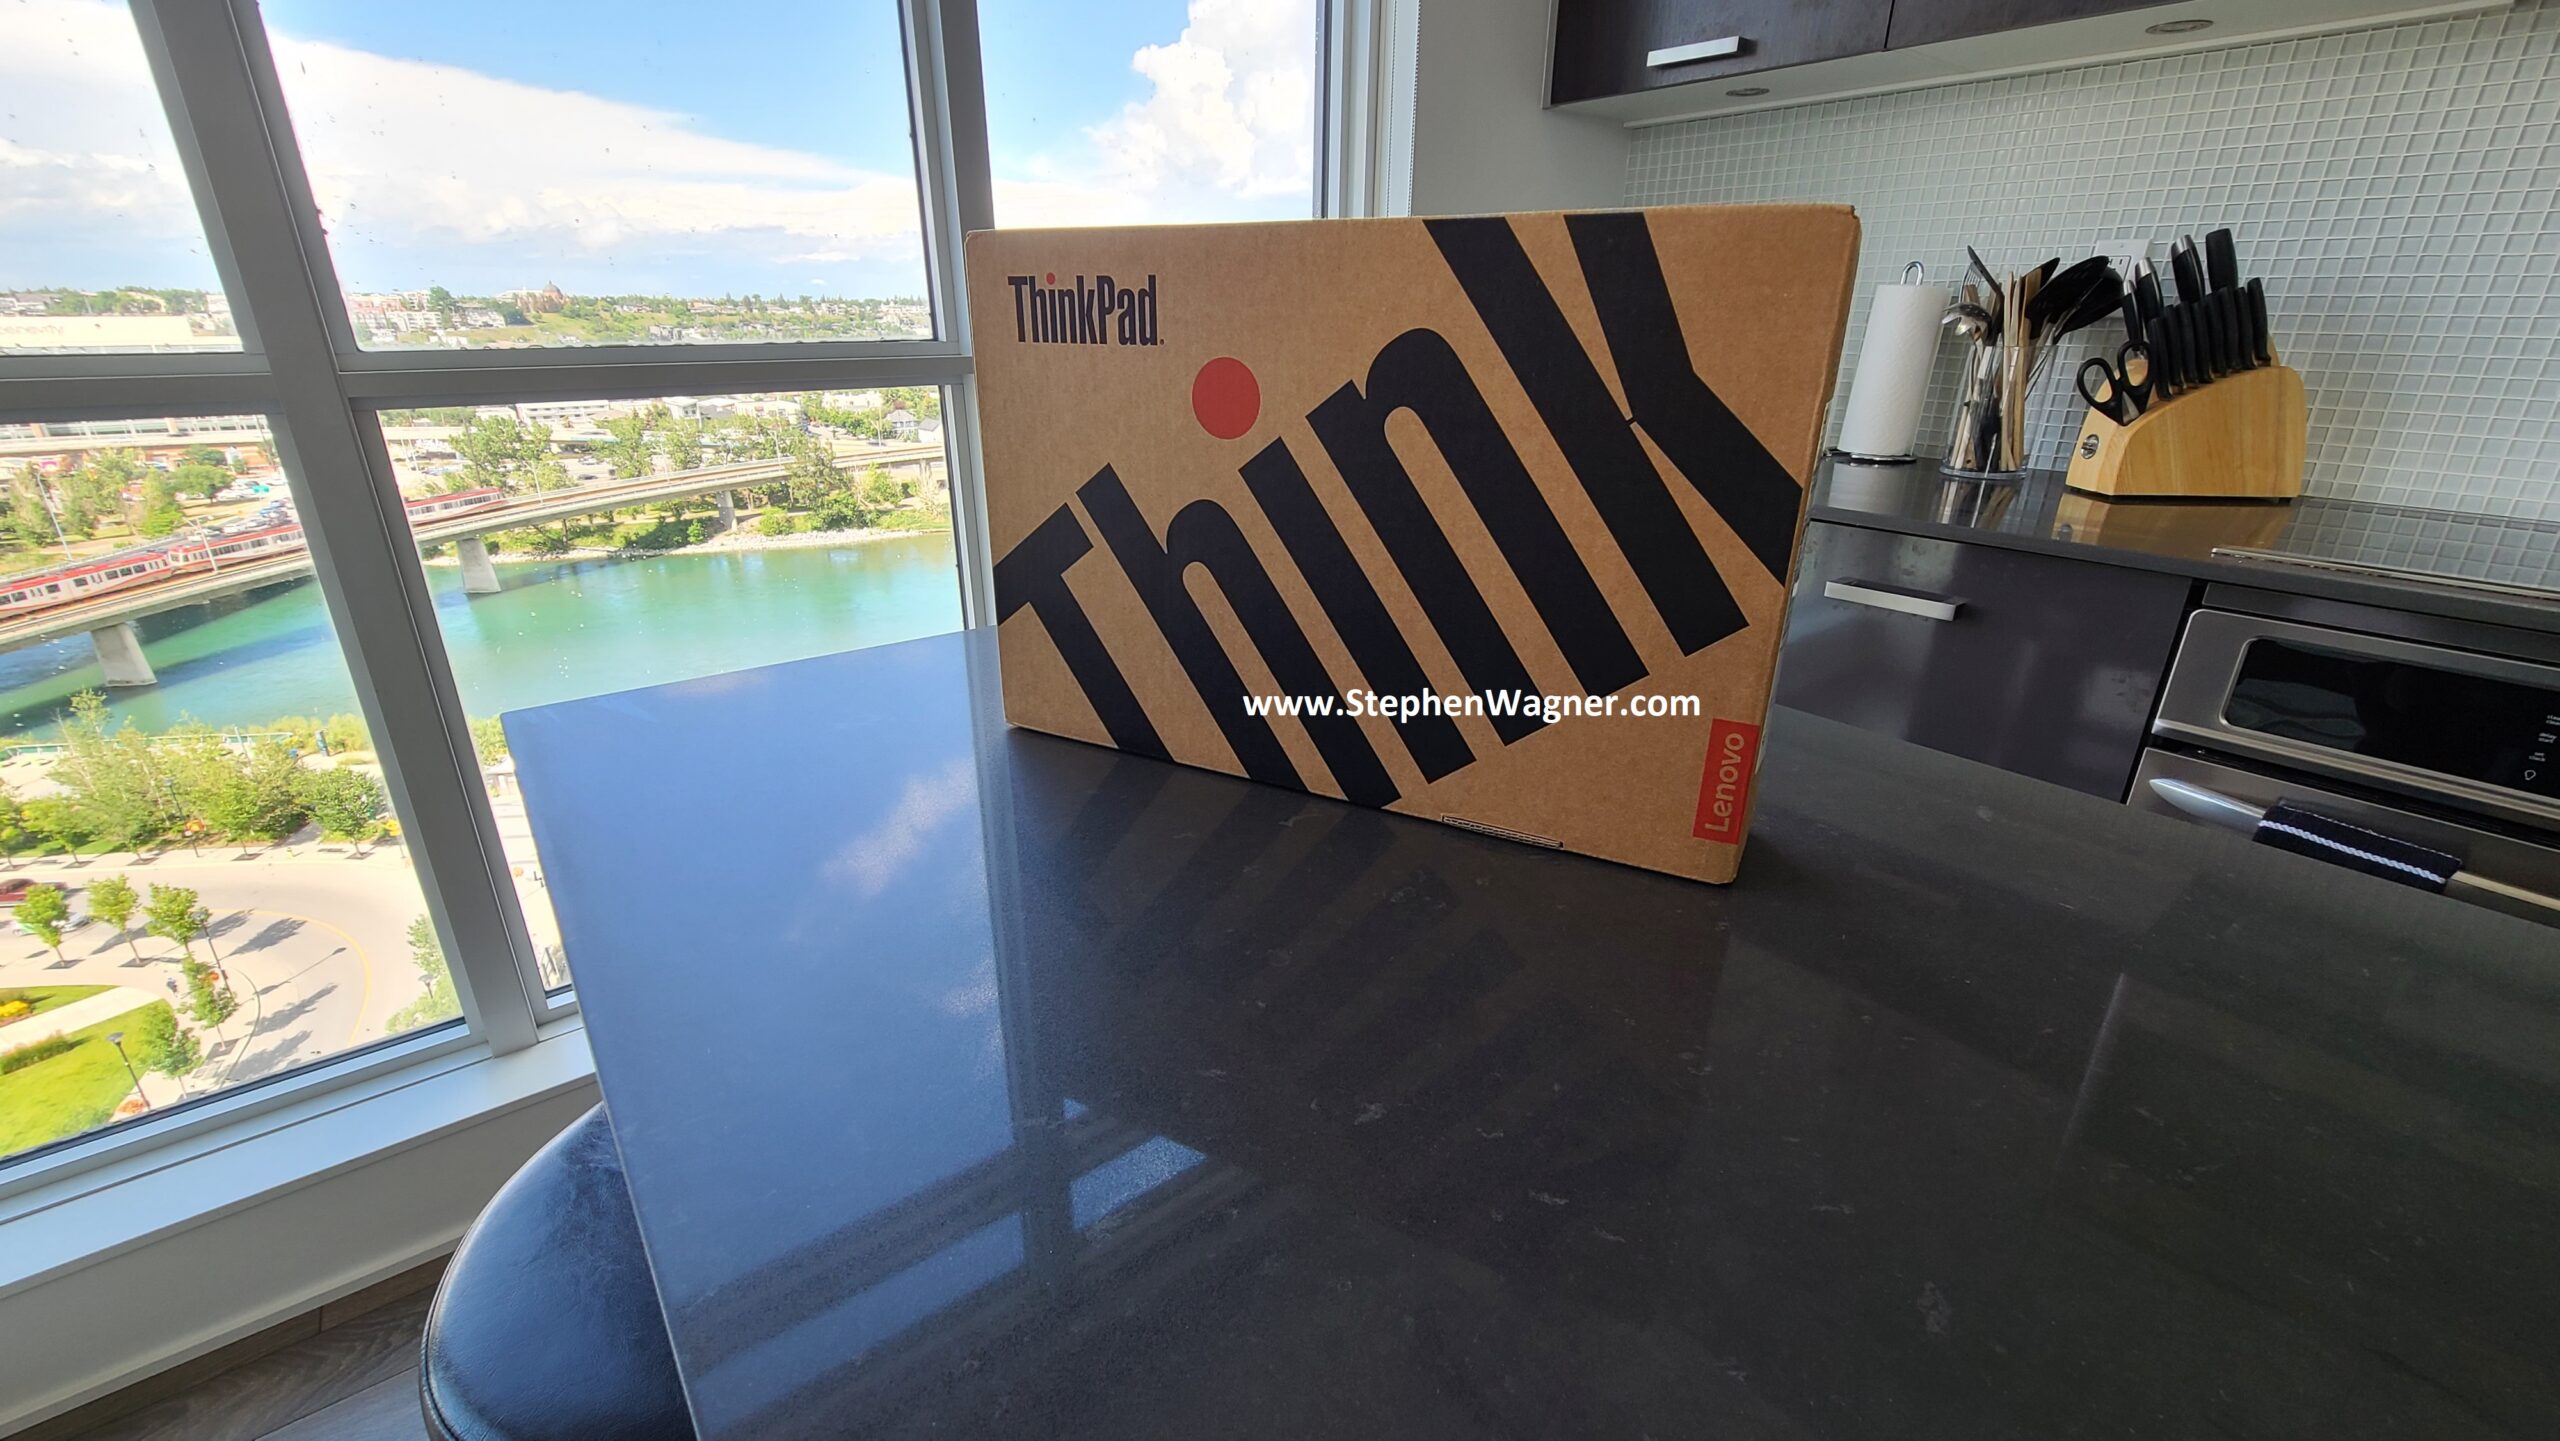
Lenovo X13s in Box
Part Number: 21BX0008US
CPU: Snapdragon® 8cx Gen 3 Compute Platform (3.00 GHz up to 3.00 GHz)
I specifically wanted a large SSD, lots of RAM, and definitely the 5G WWAN modem built in. I purchased the highest configured model without going custom (to take advantage of special pricing and promotions).
First Impressions
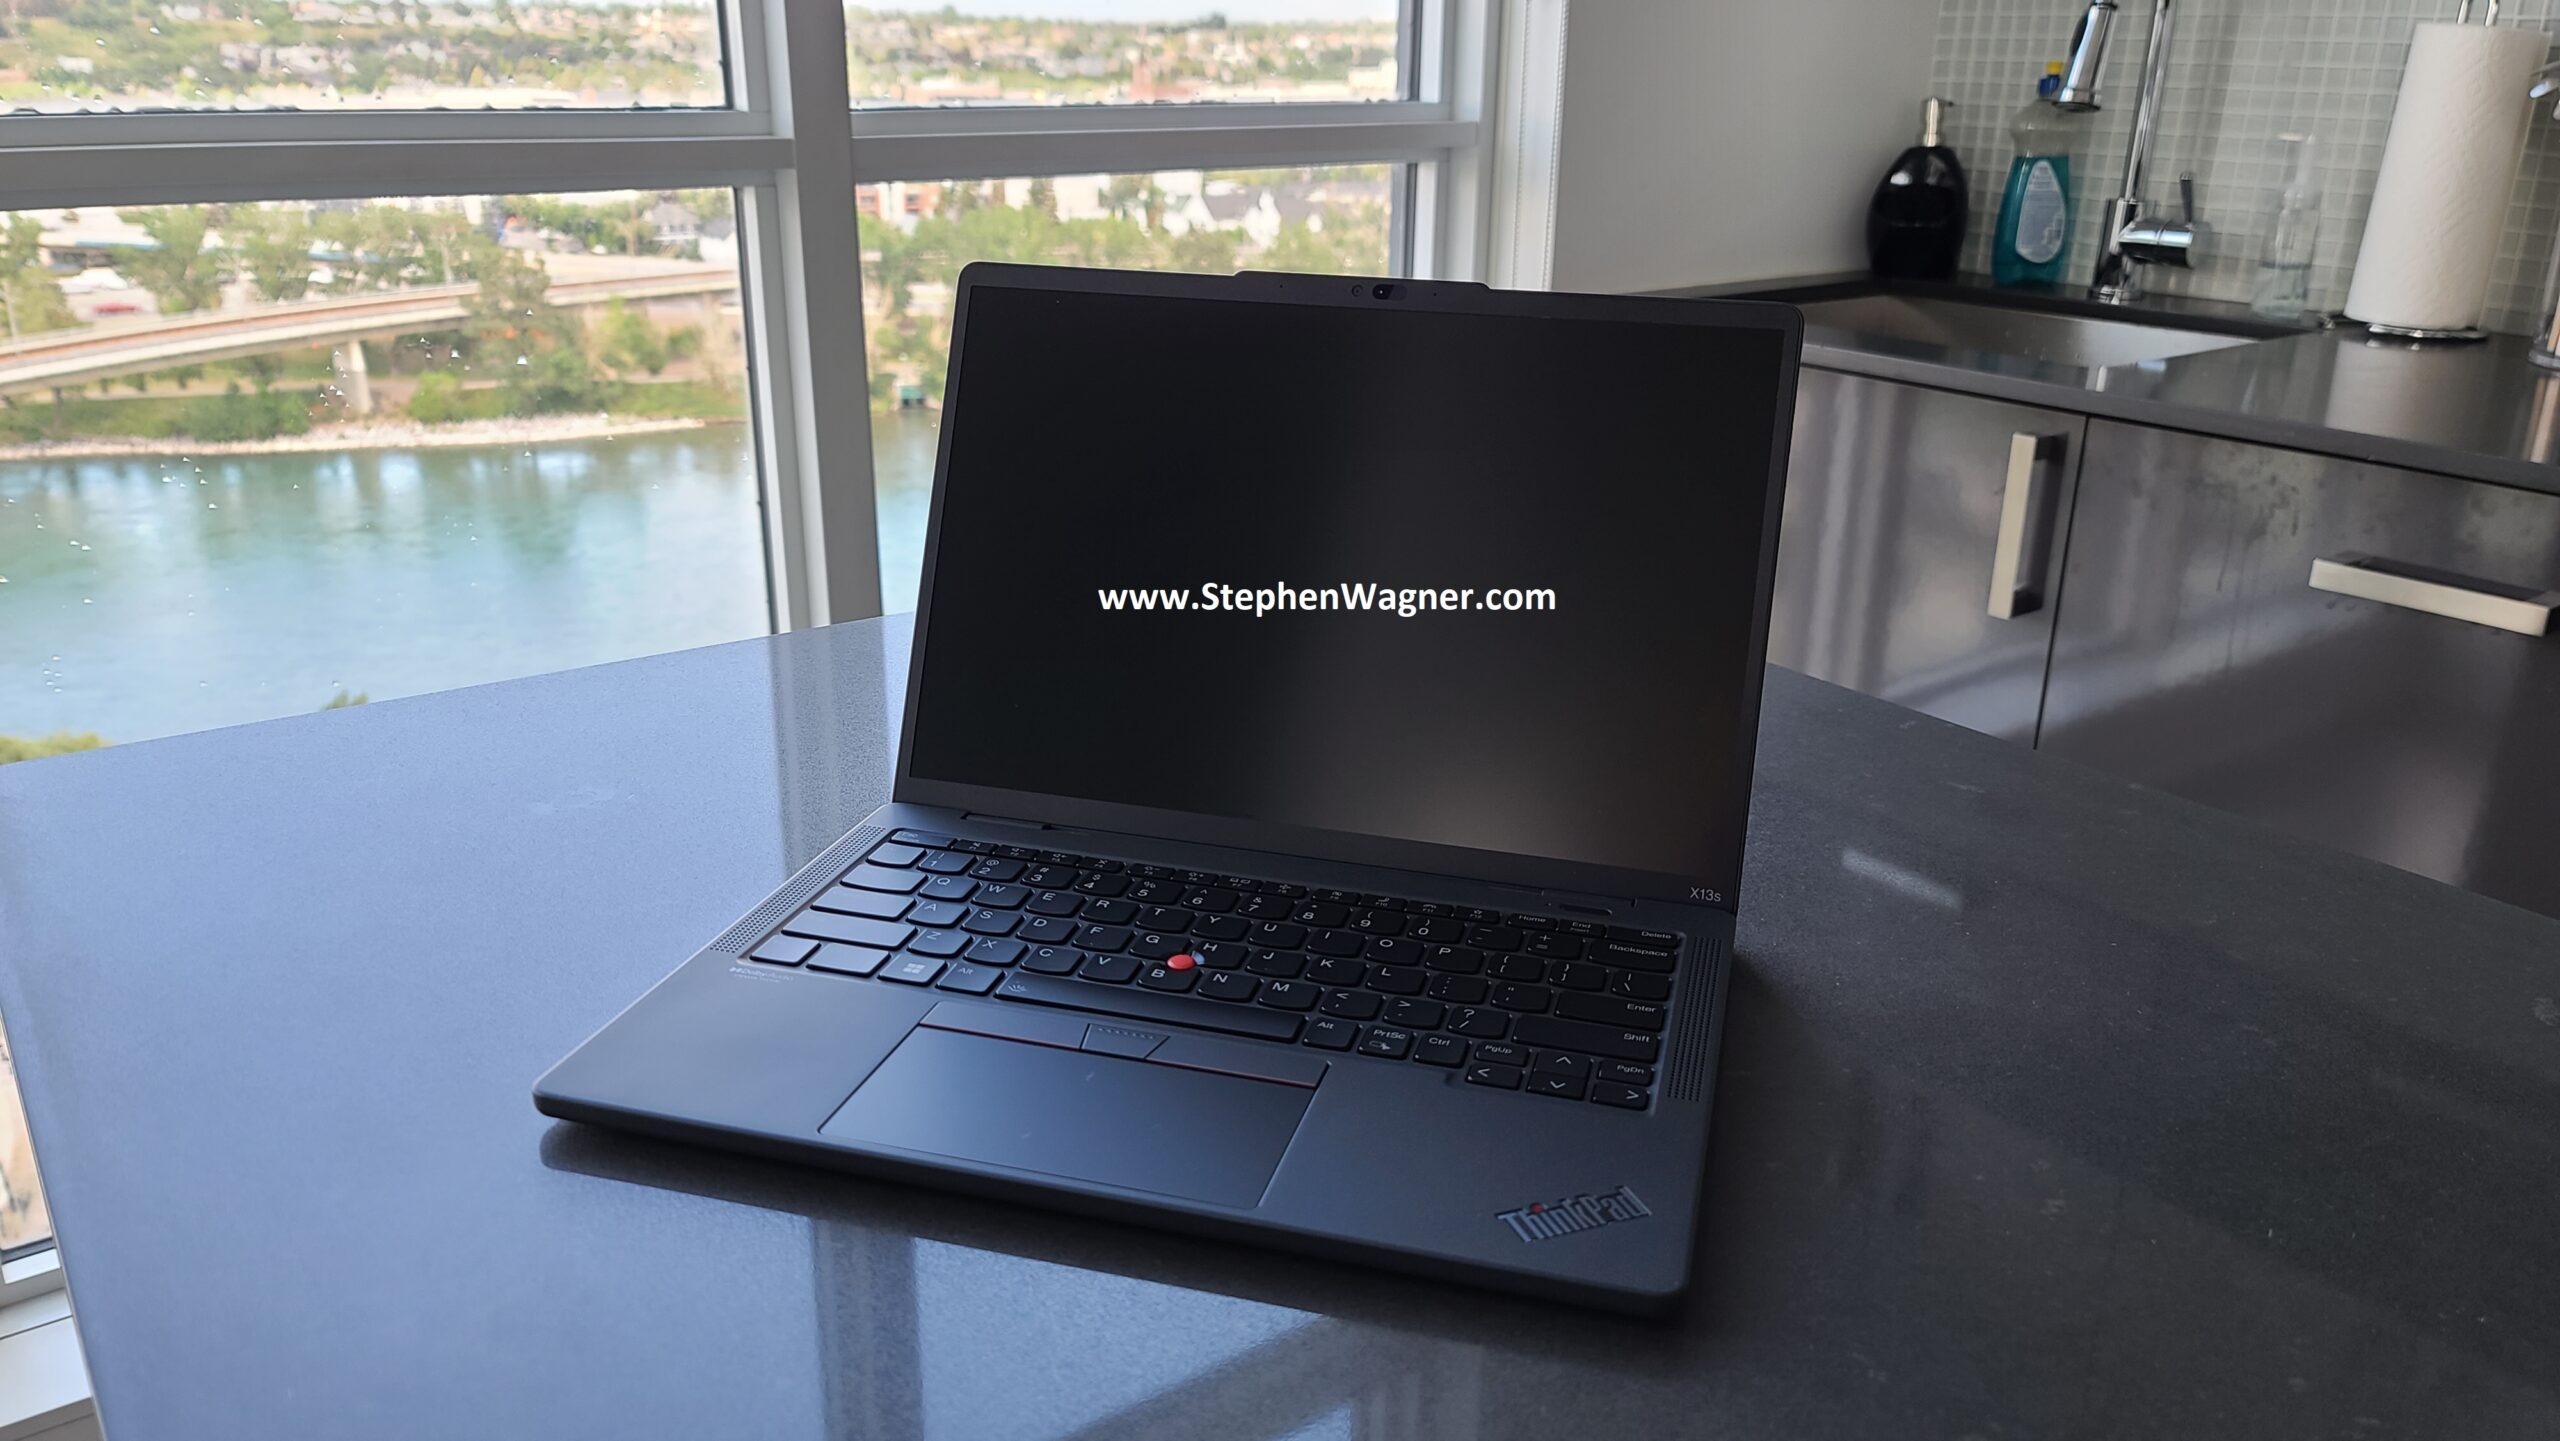
Design
Receiving the laptop, the first things that really stick out are the size, texture (quality of materials), thinness, and no fan ports. It’s a very beautifully designed laptop.
Lenovo X13s
While it is smaller than I expected, it does not feel cheap. The materials used with this laptop give it the same quality and feel as the X1 Carbon.
Physical Size
For whatever reasons, I was expecting something the same size as my original X1 Carbon, however the X13s is thinner and has a slightly smaller width and height in comparison.
Originally I thought this was going to be a problem, but after using the laptop, I’m absolutely in love with the size of this. As far as portability and usability, based on first impressions, this thing has both!
Keyboard
Surprisngly, because of the smaller size of the laptop, I’ve actually found is very easy to type quickly. I’ve noticed that on all the of laptops I’ve owned, as well as desktop keyboards, I can type the fasted on the X13s, because of the size of the keyboard as well as the layout and feel.
Keystrokes feel and sounds amazing, with a perfectly built keyboard. I honestly have no complaints…
Display
The display is absolutely beautiful. Even though I thought there is an option for a 400-knit display, my model has the 300-knit because I wanted the touchscreen.
Visibility in my apartment with all the windows open on a sunny day, I can see everything crisply on this display.
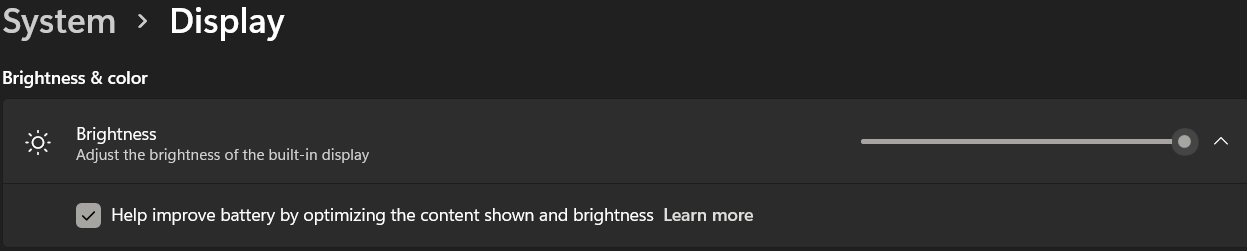
The only thing I noticed is that when viewing black/gray scale content (most of my UI and apps are in dark mode), it looks like the backlight dims and sometimes text becomes faded. You can still see everything fine, however this causes for an odd effect when the screen content changes to something with white or color.
To fix this, uncheck “Help improved battery by optimizing the content shown and brightness” in settings:
Display auto-dimming for battery
After unchecking this option, everything is perfect!
Battery
The battery on this unit is absolutely blowing my mind. In 4 days of usage, I’ve never used a laptop that can hold up to this and barely use any battery.
Comparing this to my old X1 in 4 days of usage, I probably would have had to charge it 3-4 times. The X13s just keeps going and going and going.
Very impressed with this, as it’s going to help with travel and staying connected on the go.
Speakers and Sound
The sound is fantastic, and playing music sounds great. The laptop includes a sound system enhanced with Dolby.
I’m not much of an audiophile, but I have to say I was impressed with the volume and quality of audio that comes from the laptop.
Termperature
This laptop has no fans or air ducts. One would think this would make up for a laptop that runs up hot, but I have to say I haven’t really noticed any hot temperatures except for when I first booted it up and did Windows Updates, Lenovo Updates, Microsoft Office installer, and a bunch of other things.
Even under extremely heavy load during the installs, the heat generated was actually less than what I would have expected, or experienced with my old Lenovo X1 Carbon.
Windows 11 for ARM64 (Windows on ARM)
For the most part, if you didn’t understand what Windows on ARM was, processor architectures, or the difference between this laptop and others, you’d notice absolutely nothing different from a normal laptop (except maybe if you were gaming).
I have to say that Microsoft knocked it out of the park with the development of Windows 11 on ARM, and it’s definitely 100% ready for primetime use, both for regular users as well as enterprise/business users.
The one thing I can’t comment on is gaming. While I haven’t done any testing (as I don’t game much), there may be additional considerations as far as stability and performance, or even capabilities of gaming.
Applications
When it comes to applications, while the X13s does support x86 and x64 emulation, you should always try to run native ARM/ARM64 applications. Running applications native to the architecture will provide the best performance as well as battery life.
After getting going, I noticed the following applications had native ARM64 support:
Microsoft Office
Microsoft Teams
Zoom
Putty
Edge (built off Chromium)
I also loaded numerous applications that are x86/x64 and emulated:
VMware Horizon Client
Chrome
WinSCP
All the above applications, both ARM and x86/x64 run fantastic without any problems. I was concerned that the whole emulation error would be a mess but I’ve seriously had no problems.
Performance
I can’t say enough how snappy Windows 11 on ARM and the X13s is. I never thought I’d say it, but this is the fastest performing Windows 11 system I’ve used when it comes to responsiveness of the OS and applications.
Connectivity
The built-in 5G connectivity was super easy to setup. The laptop can use an eSIM or traditional physical SIM. I had the experience of using both at different points (because of issues with my cell phone provider).
The eSIM was super easy to setup and you can manage multiple different profiles. I simply purchased an eSIM, and scanned the QR code with the webcam.
When I had to switch to the physical SIM (because my provider doesn’t support 5G with eSIMs), I simply popped the SIM tray and install the card.
It’s very easy to not only switch between eSIM profiles, but also switch between the eSIM and normal SIM. This is great if you’re travelling to other countries as you can easily switch between your local providers eSIM, and install a foreign SIM to use local data.
You speed will vary depending on provider, but I was able to achieve full speed that was expected my provider, and I was pleasantly surprised with better than expected low latencies, which is great for VDI which I use regularly.
Always on
Because of the ARM processor, Windows is “always on”. There’s no resume from suspend time, just like your ARM based cell/mobile phone.
The laptop is virtually always on and ready to go when I need to work.
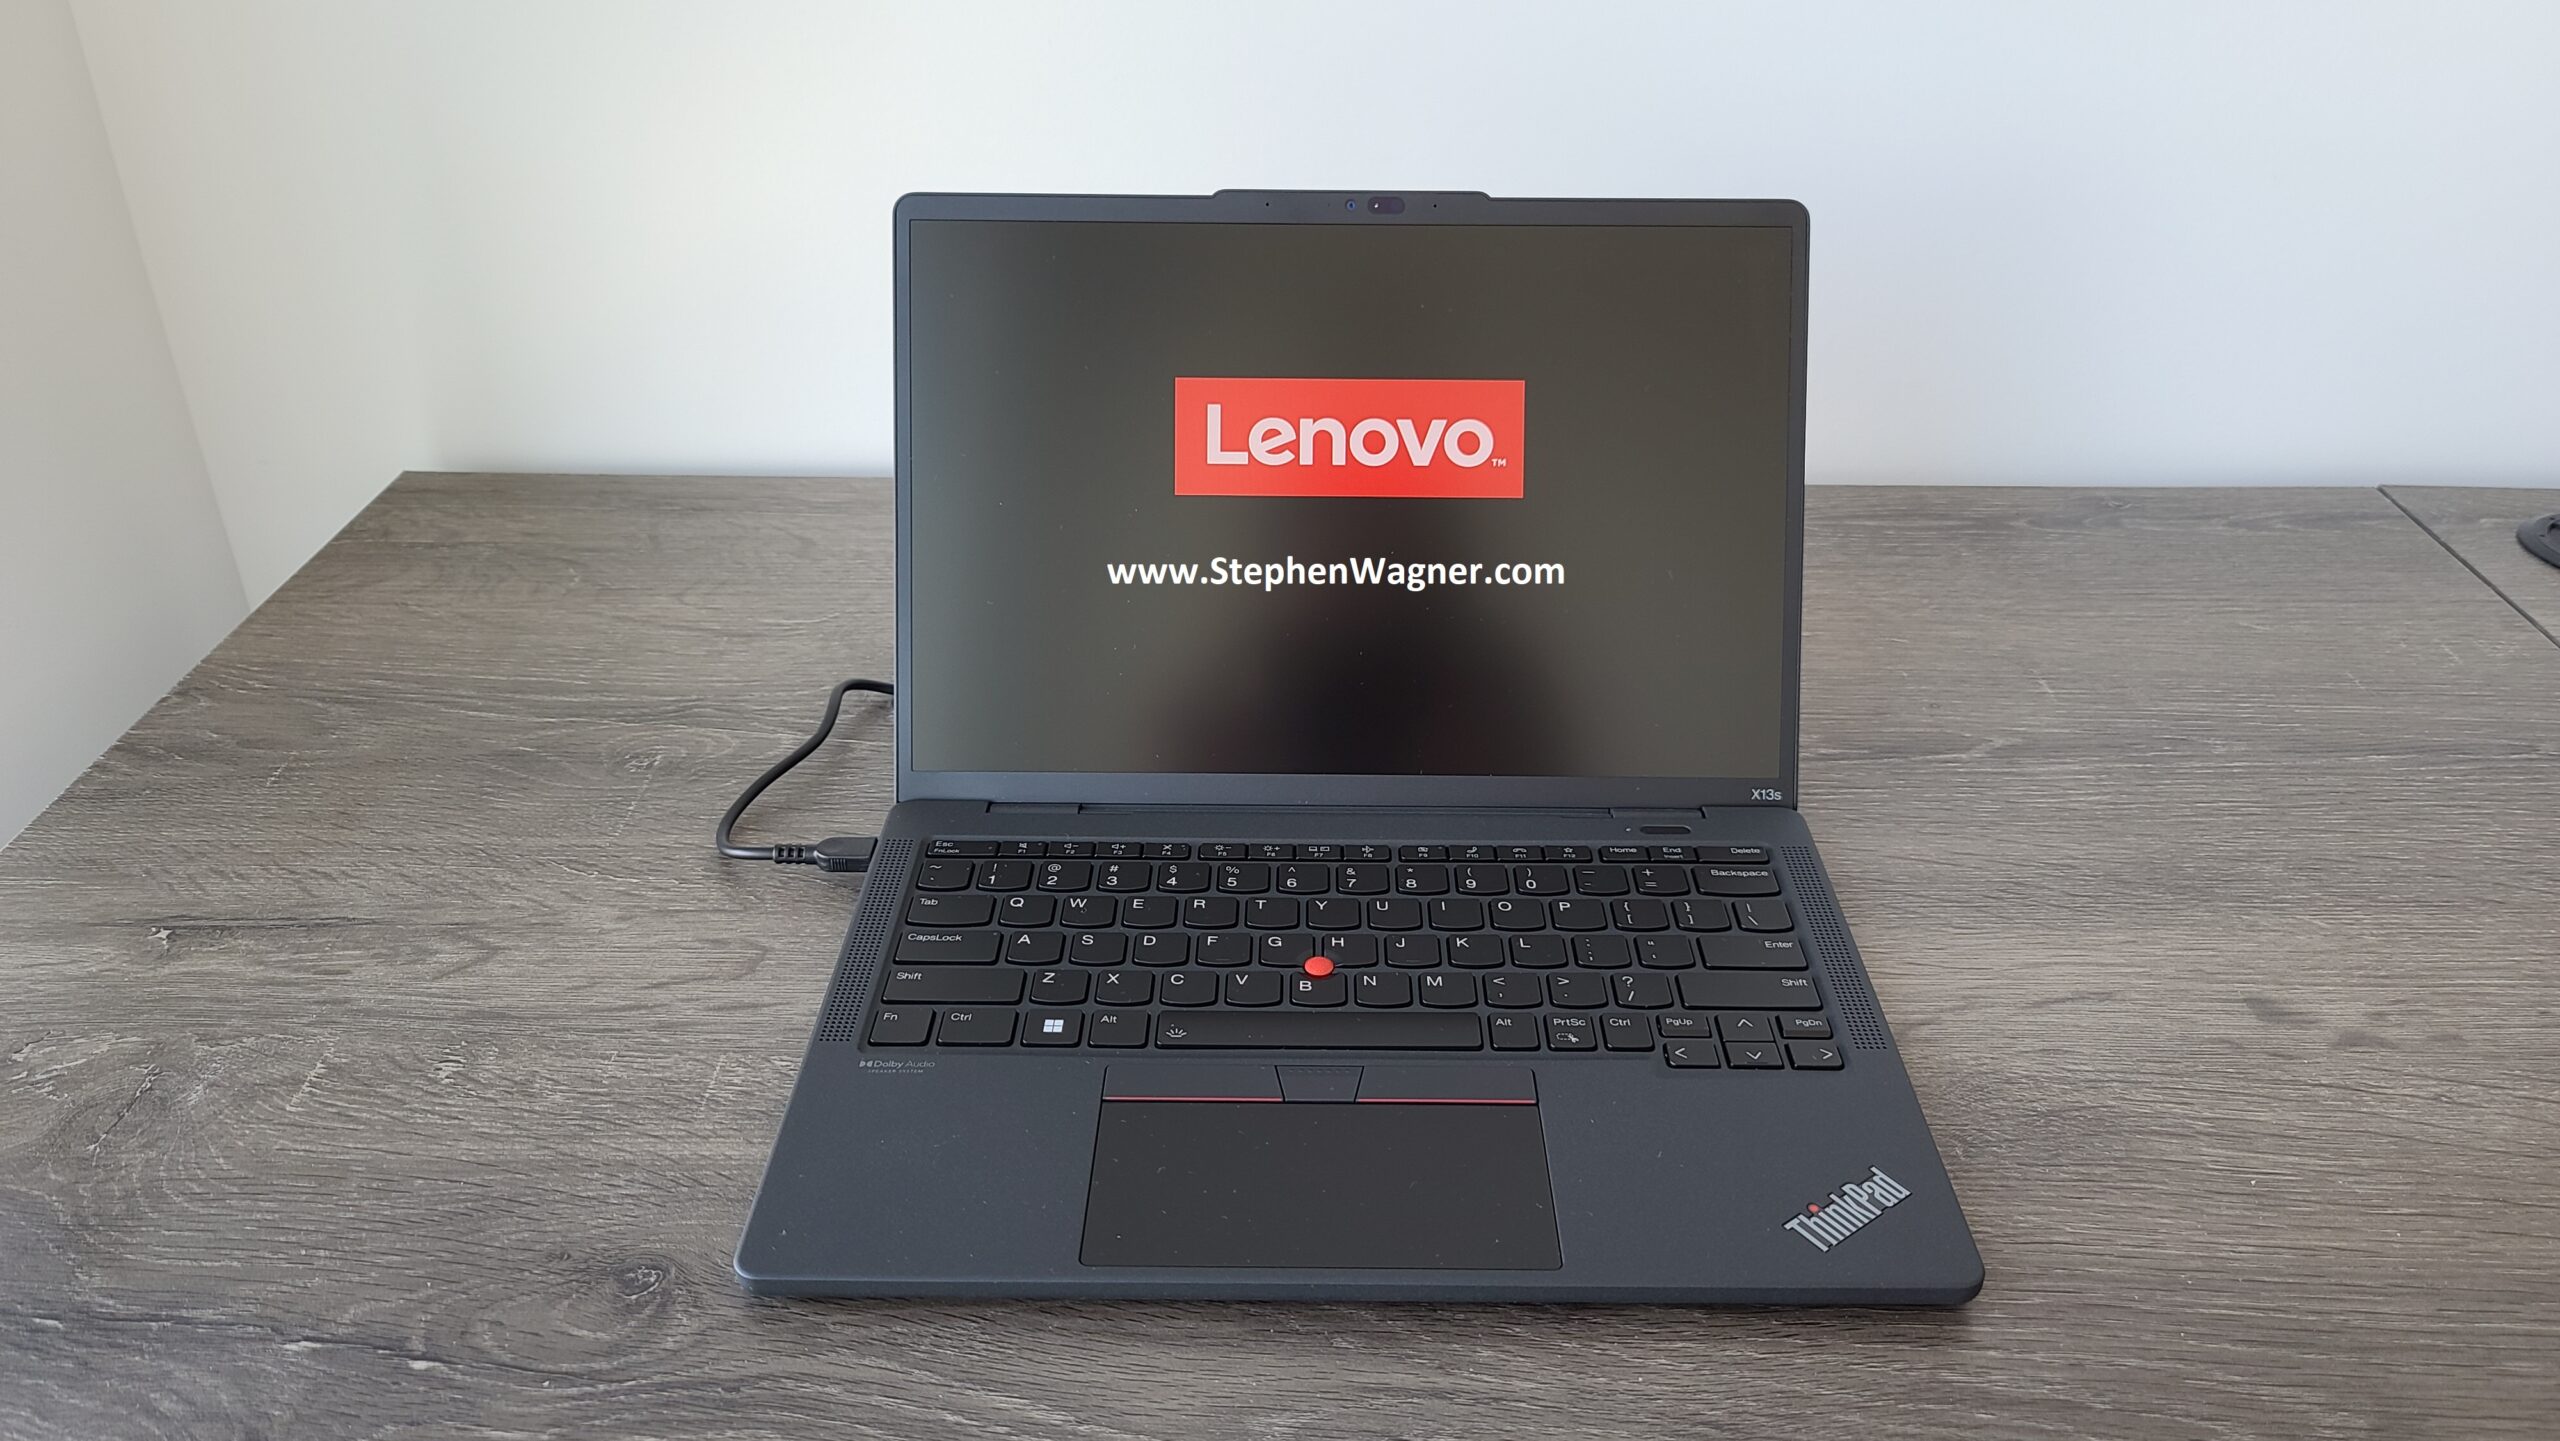
Overall First Impressions
Overall, my first impressions with this laptop have been fantastic and this laptop is exceeding my best expectations. Windows 11 on ARM is definitely a serious contender when it comes to choosing the right laptop/notebook.
Lenovo X13s Powered On
The OS is snappy, everything works the way you’d expect on Windows, and so far I’m very happy with the investment I made when purchasing this laptop. I can’t wait to do some travelling with this to start using it to it’s full potential.
Add in 5G always-on connectivity, and it feels like this thing is unstoppable…
It’s been coming for a while: The requirement to deploy VMs with a TPM module… Today I’ll be showing you the easiest and quickest way to create and deploy Virtual Machines with vTPM with NKP (Native Key Provider) on VMware vSphere!
As most of you know, Windows 11 has a requirement for Secureboot as well as a TPM module. It’s with no doubt that we’ll also possibly see this requirement with future Microsoft Windows Server operating systems.
While users struggle to deploy TPM modules on their own workstations to be eligible for the Windows 11 upgrade, ESXi administrators are also struggling with deploying Virtual TPM modules, or vTPM modules on their virtualized infrastructure.
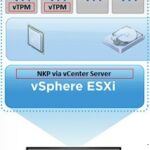
With the Native Key Provider (NKP) on VMware vSphere, you can easily deploy a key provider, enabling vTPM (Virtual Trusted Key Platform) enabled Virtual Machines.
What is a TPM Module?
TPM stands for Trusted Platform Module. A Trusted Platform Module, is a piece of hardware (or chip) inside or outside of your computer that provides secured computing features to the computer, system, or server that it’s attached to.
This TPM modules provides things like a random number generator, storage of encryption keys and cryptographic information, as well as aiding in secure authentication of the host system.
In a virtualization environment, we need to emulate this physical device with a Virtual TPM module, or vTPM.
What is a Virtual TPM (vTPM) Module?
A vTPM module is a virtualized software instance of a traditional physical TPM module. A vTPM can be attached to Virtual Machines and provide the same features and functionality that a physical TPM module would provide to a physical system.
vTPM modules can be can be deployed with VMware vSphere, and can be used to deploy Windows 11 on ESXi.
Deployment of vTPM modules, require a Key Provider on the vCenter Server.
Deploying vTPM (Virtual TPM Modules) on VMware vSphere with NKP
In order to deploy vTPM modules (and VM encryption, vSAN Encryption) on VMware vSphere, you need to configure a Key Provider on your vCenter Server.
Previously (but still an option), this would be accomplished with a Standard Key Provider utilizing a Key Management Server (KMS), however this required a 3rd party KMS server and is what I would consider a complex deployment.
VMware has made this easy as of vSphere 7 Update 2 (7U2), with the Native Key Provider (NKP) on the vCenter Server.
The Native Key Provider, allows you to easily deploy technologies such as vTPM modules, VM encryption, vSAN encryption, and the best part is, it’s all built in to vCenter Server.
Enabling VMware Native Key Provider (NKP)
To enable NKP across your vSphere infrastructure:
Log on to your vCenter Server
Select your vCenter Server from the Inventory List
Select “Key Providers”
Click on “Add”, and select “Add Native Key Provider”
Give the new NKP a friendly name
De-select “Use key provider only with TPM protected ESXi hosts” to allow your ESXi hosts without a TPM to be able to use the native key provider.
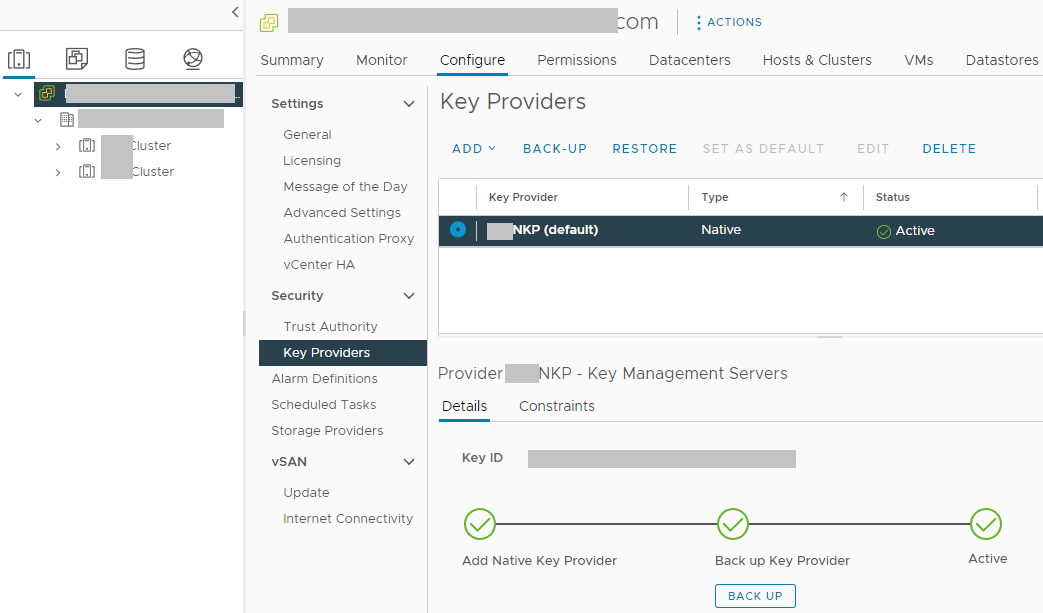
In order to activate your new native key provider, you need to click on “Backup” to make sure you have it backed up. Keep this backup in a safe place. After the backup is complete, you NKP will be active and usable by your ESXi hosts.
VMware vCenter with Native Key Provider (NKP) Configured
There’s a few additional things to note:
Your ESXi hosts do NOT require a physical TPM module in order to use the Native Key Provider
Just make sure you disable the checkbox “Use key provider only with TPM protected ESXi hosts”
NKP can be used to enable vTPM modules on all editions of vSphere
If your ESXi hosts have a TPM module, using the Native Key Provider with your hosts TPM modules can provide enhanced security
Onboard TPM module allows keys to be stored and used if the vCenter server goes offline
If you delete the Native Key Provider, you are also deleting all the keys stored with it.
Make sure you have it backed up
Make sure you don’t have any hosts/VMs using the NKP before deleting
You can now deploy vTPM modules to virtual machines in your VMware environment.
This website uses cookies to improve your experience. We'll assume you're ok with this, but you can opt-out if you wish.
Do you accept the use of cookies and accept our privacy policy? AcceptRejectCookie and Privacy Policy
Privacy & Cookies Policy
Privacy Overview
This website uses cookies to improve your experience while you navigate through the website. Out of these cookies, the cookies that are categorized as necessary are stored on your browser as they are essential for the working of basic functionalities of the website. We also use third-party cookies that help us analyze and understand how you use this website. These cookies will be stored in your browser only with your consent. You also have the option to opt-out of these cookies. But opting out of some of these cookies may have an effect on your browsing experience.