As promised in my previous post which covered my first impressions, here are some pictures and video of the 10ZiG 5948q zero client in action! In the videos I demonstrate video playback as well as the USB redirection capabilities of the 10ZiG Zero Client and VMware Horizon View. Scroll down to the bottom for videos!
If you’re interesting in 10ZiG products and looking to buy, don’t hesitate to reach out to me for information and/or a quote! We can configure and sell 10ZiG Zero Clients (and thin clients), help with solution design and deployment, and provide consulting services! We sell and ship to Canada and the USA!
Pictures
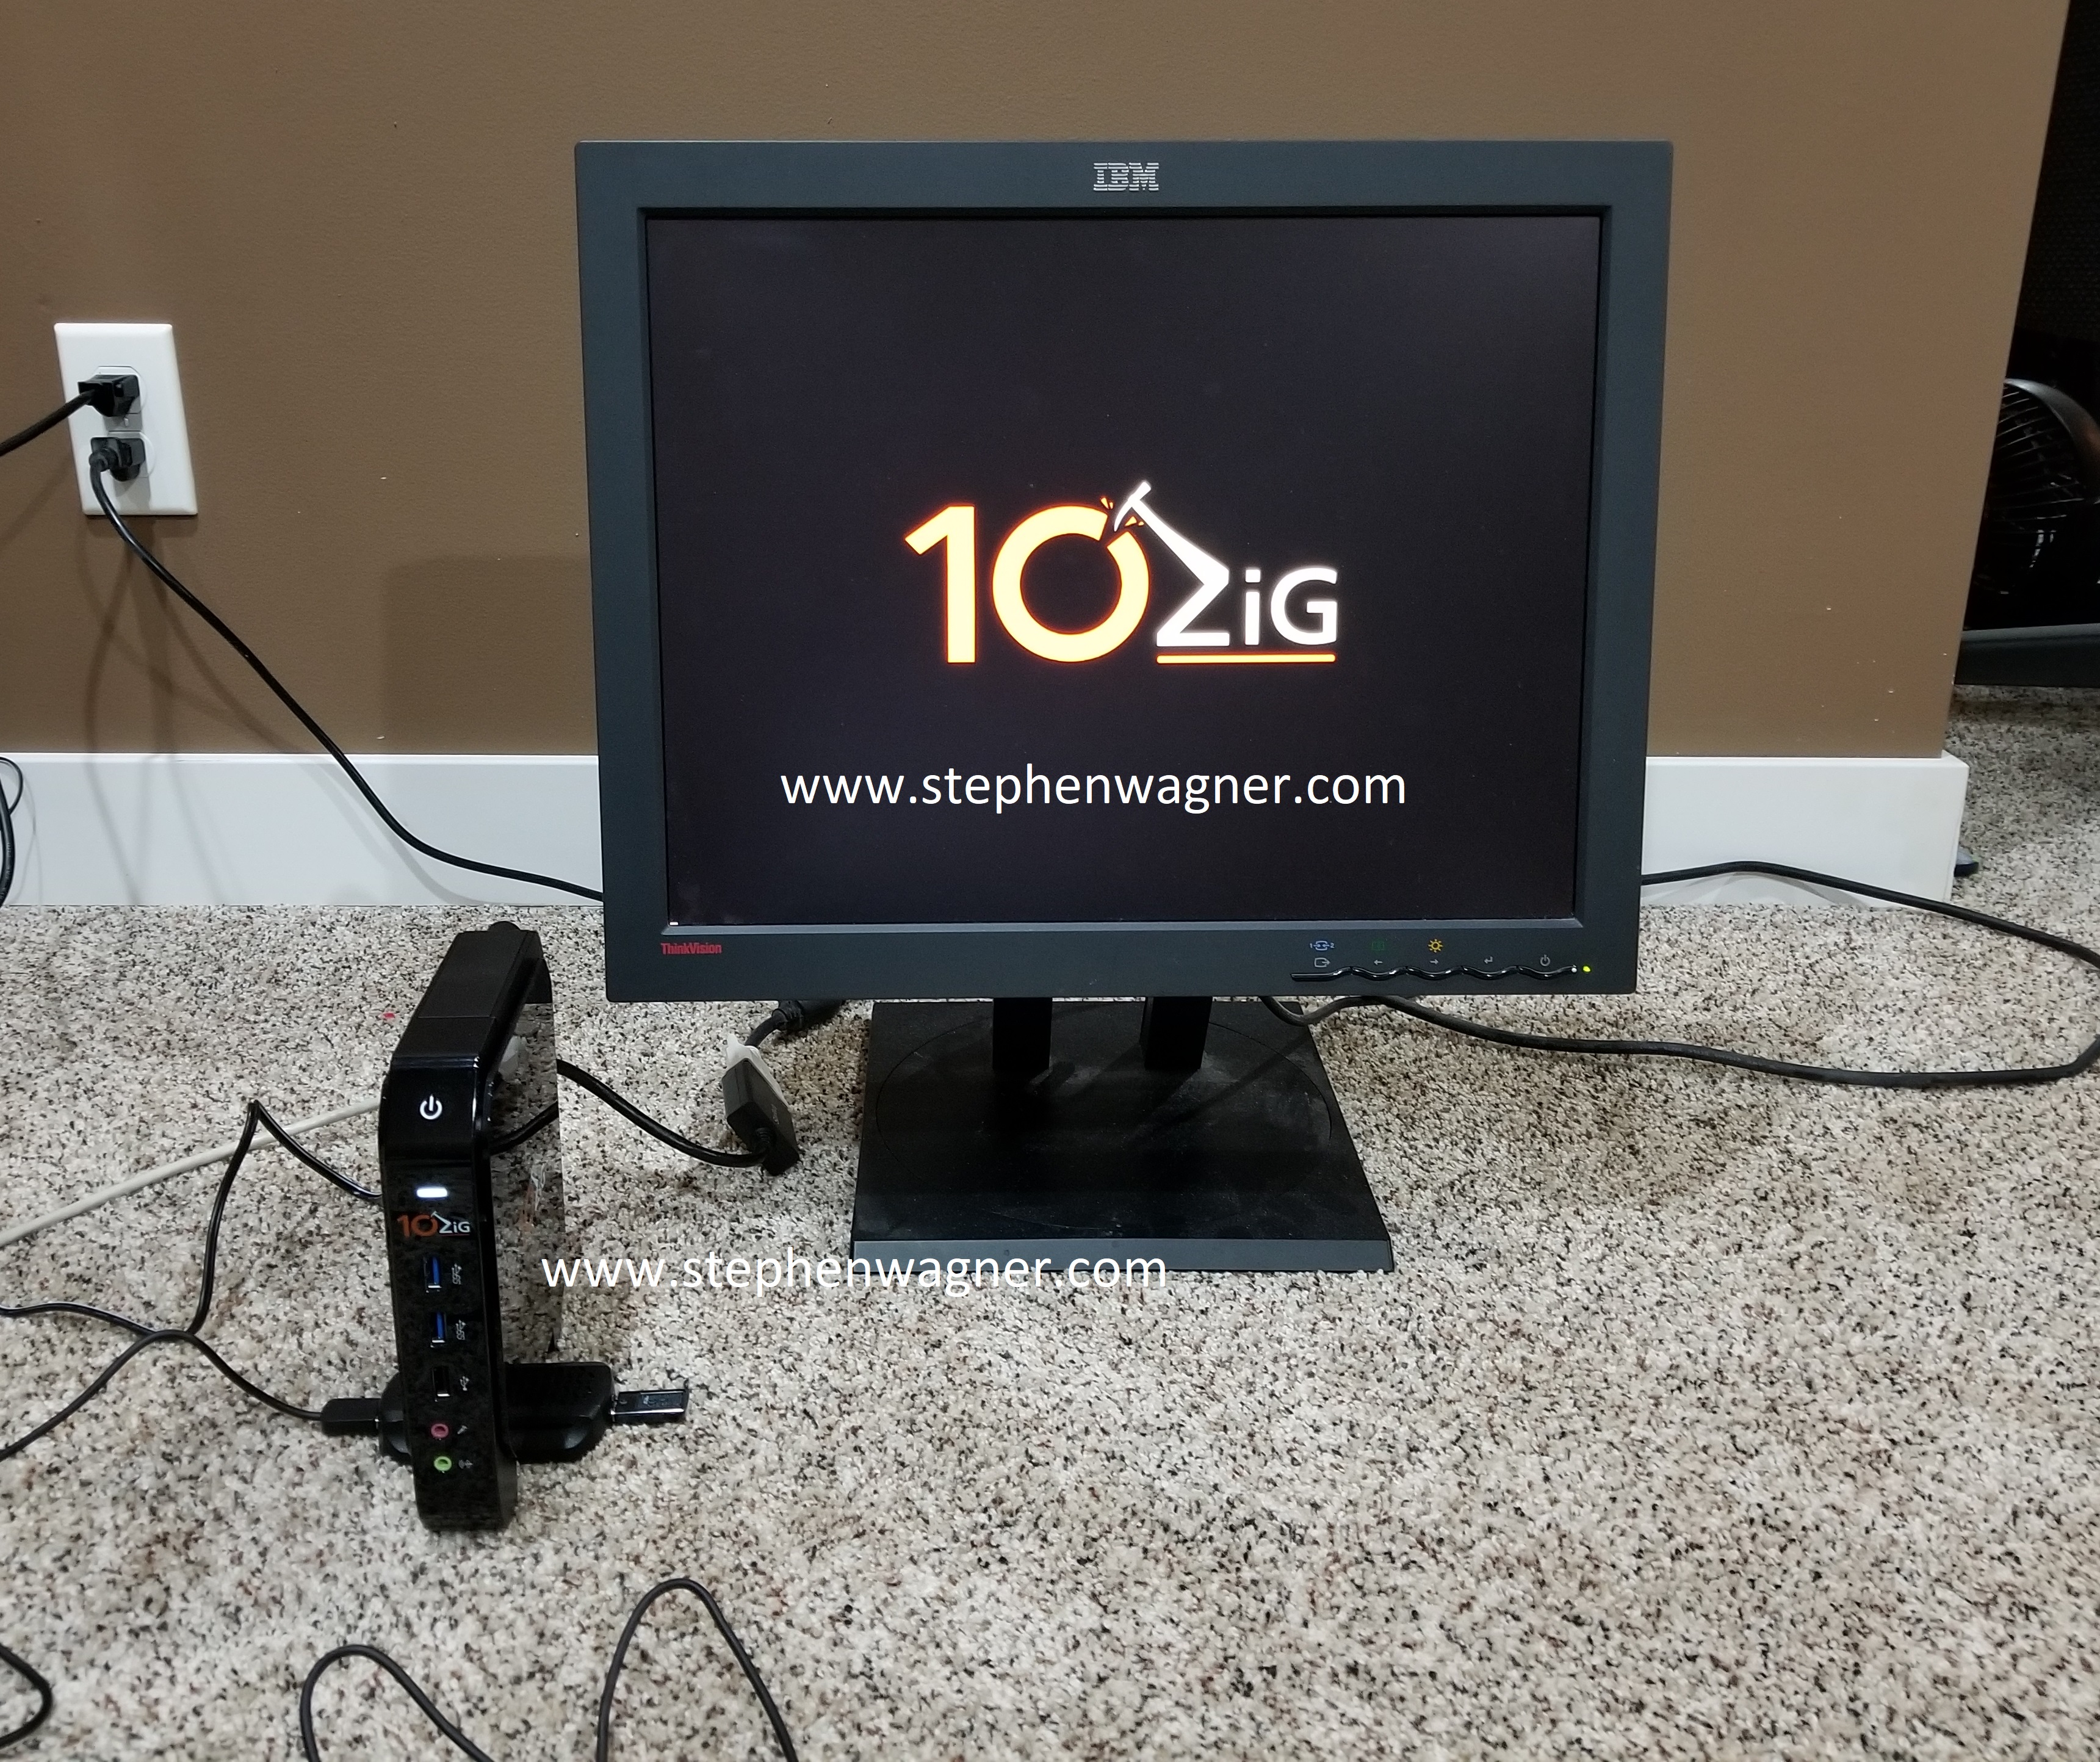
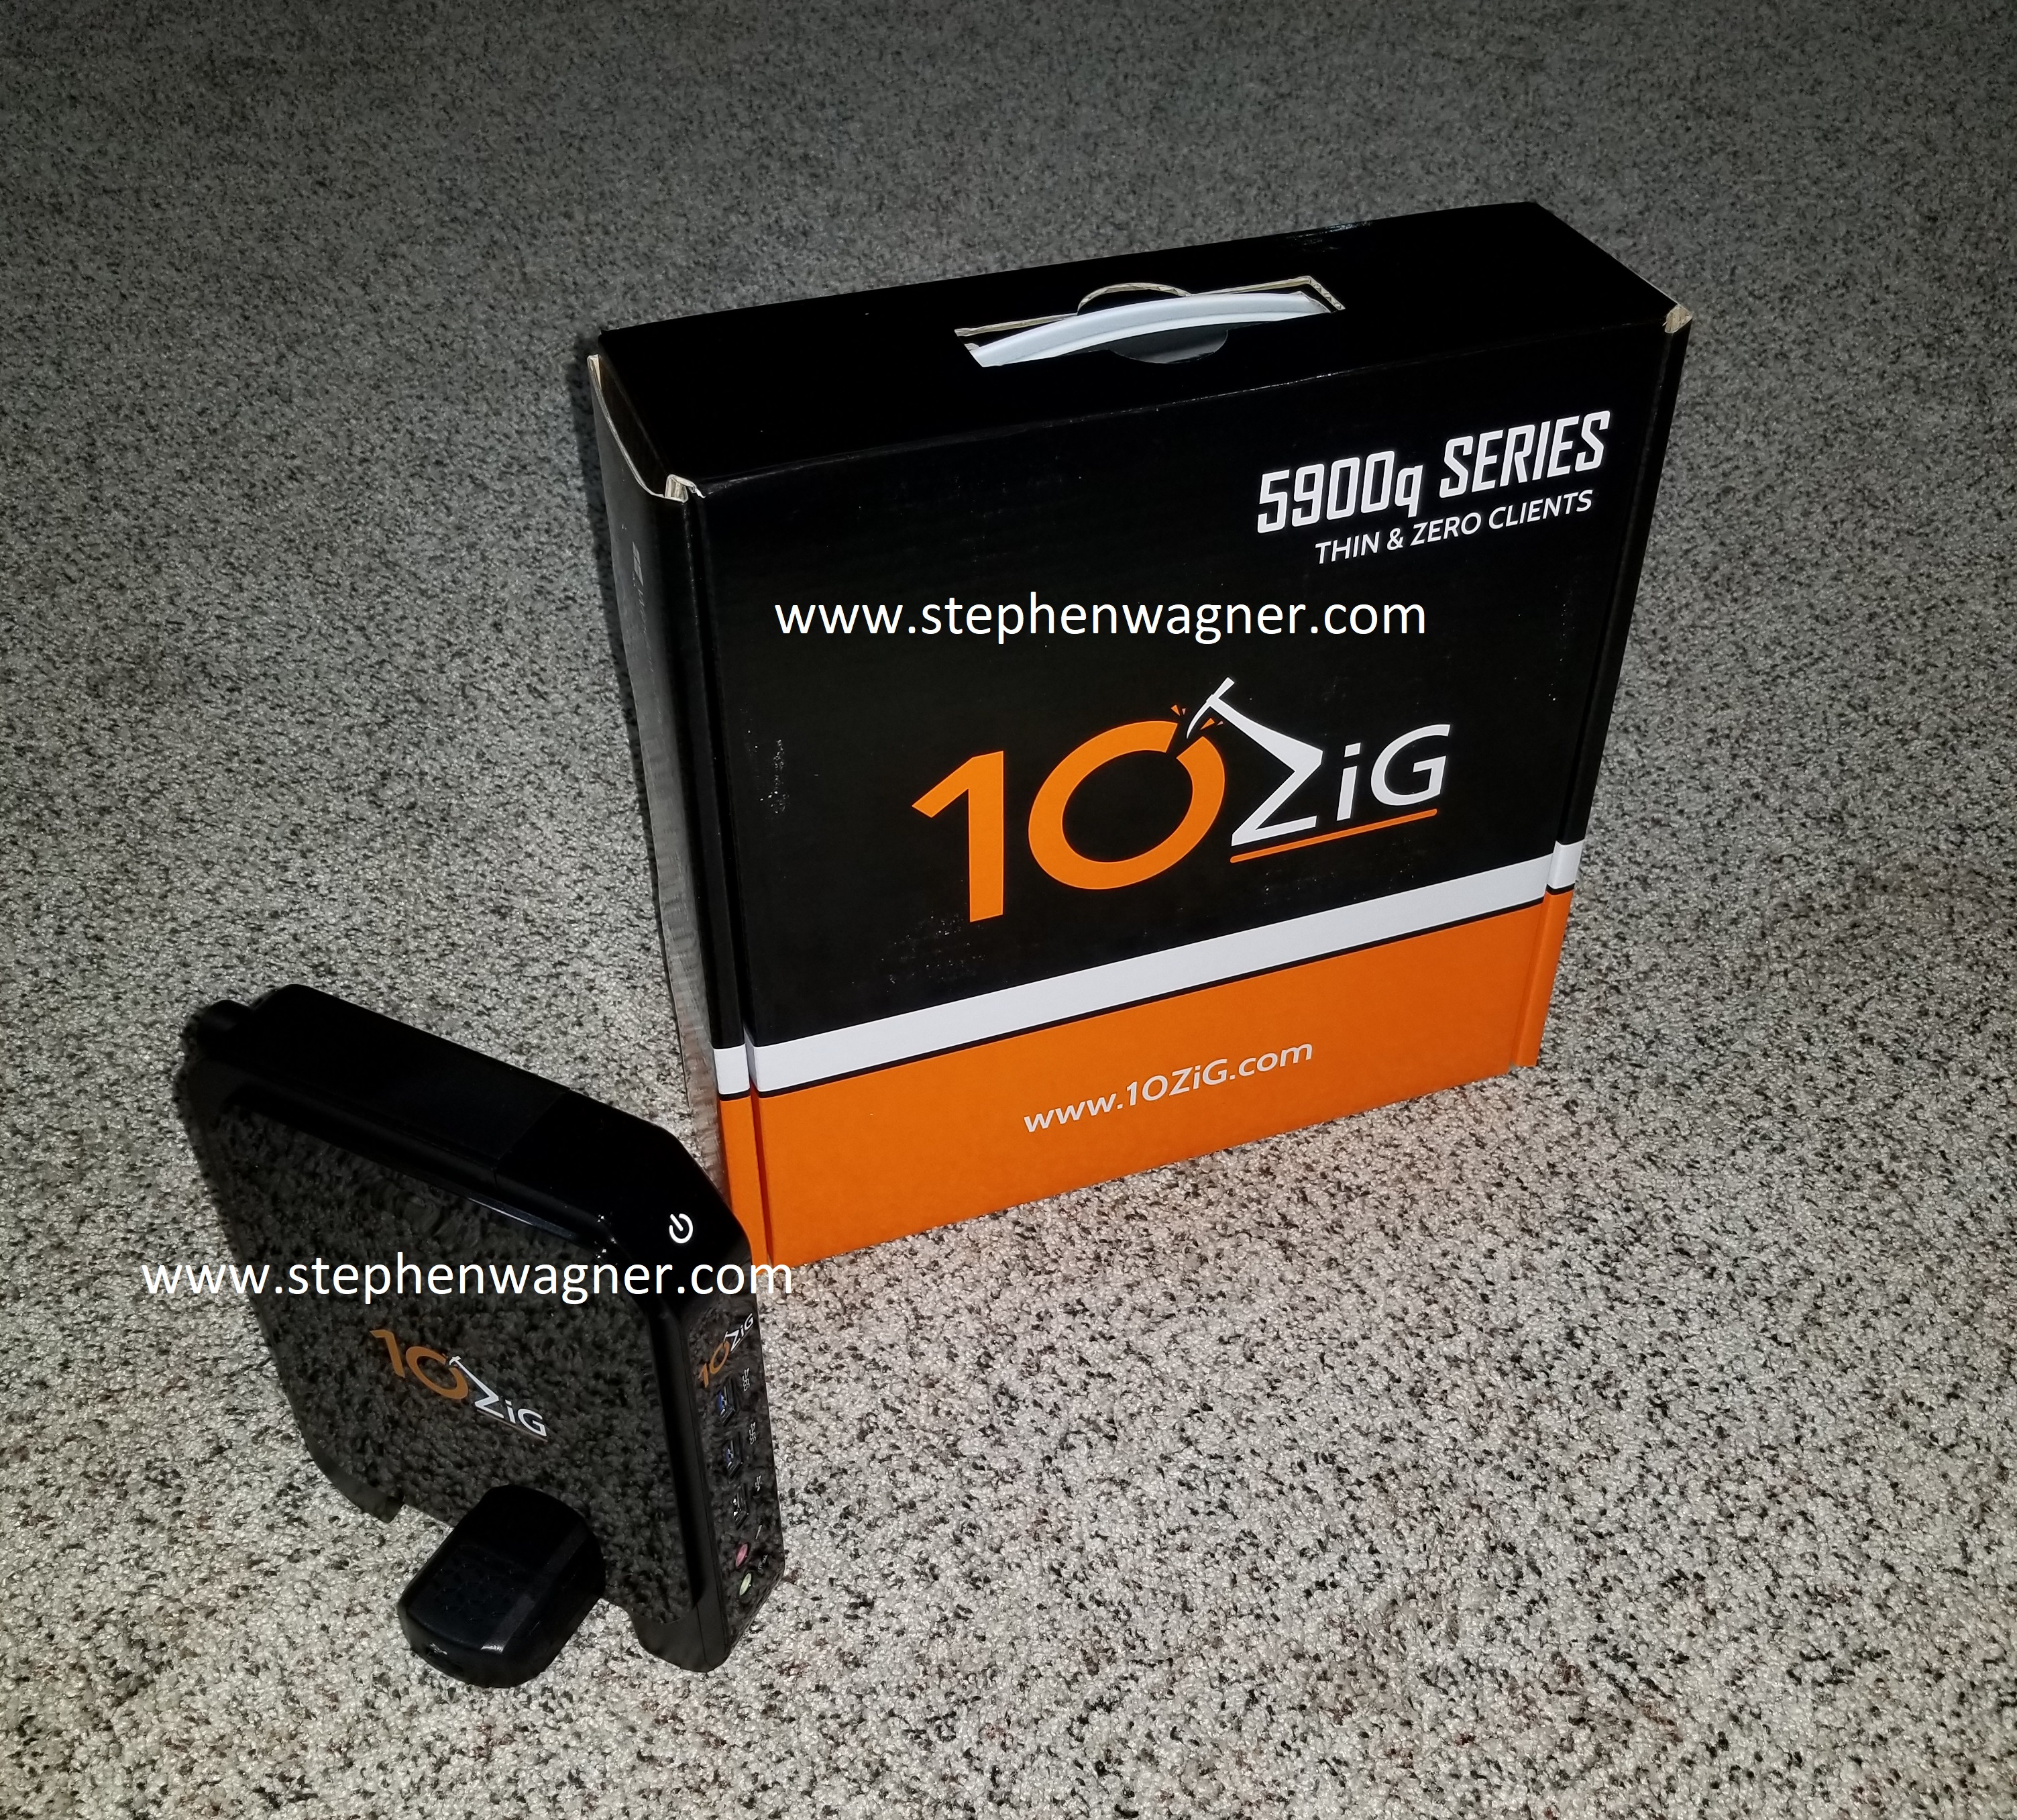
10ZiG 5948q Zero Client
10ZiG 5948qv Zero Client VMware Horizon View
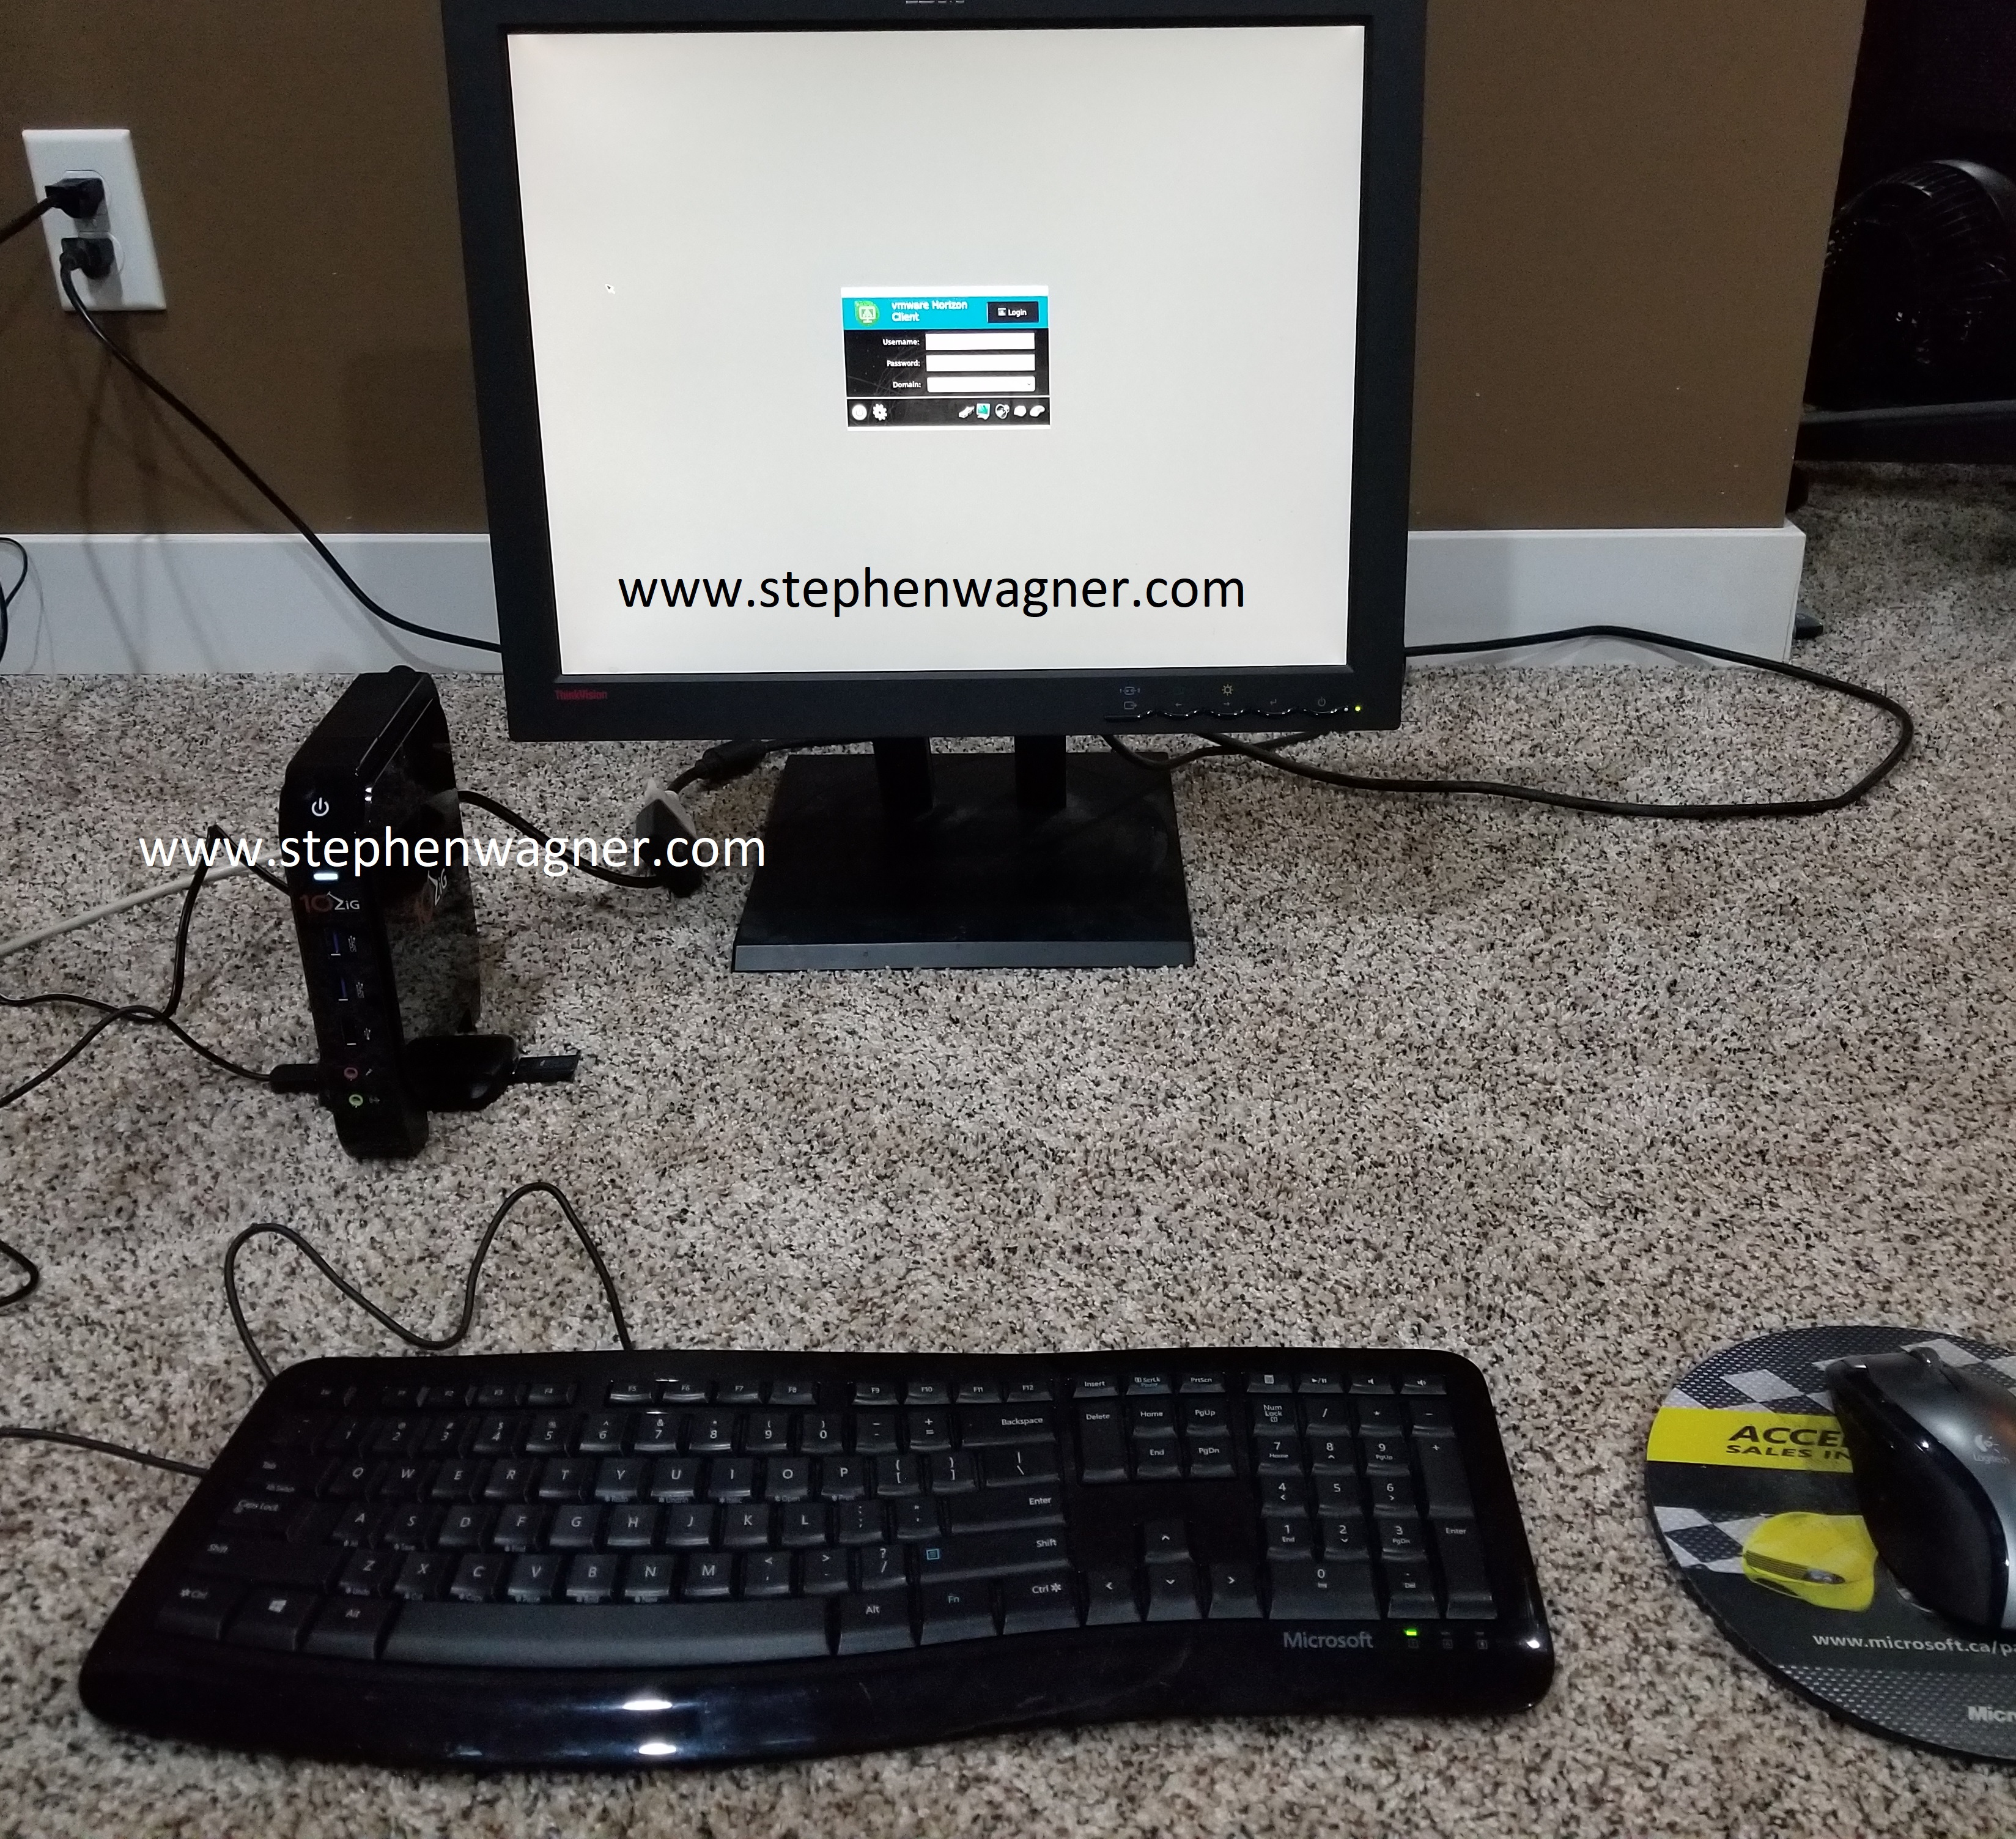
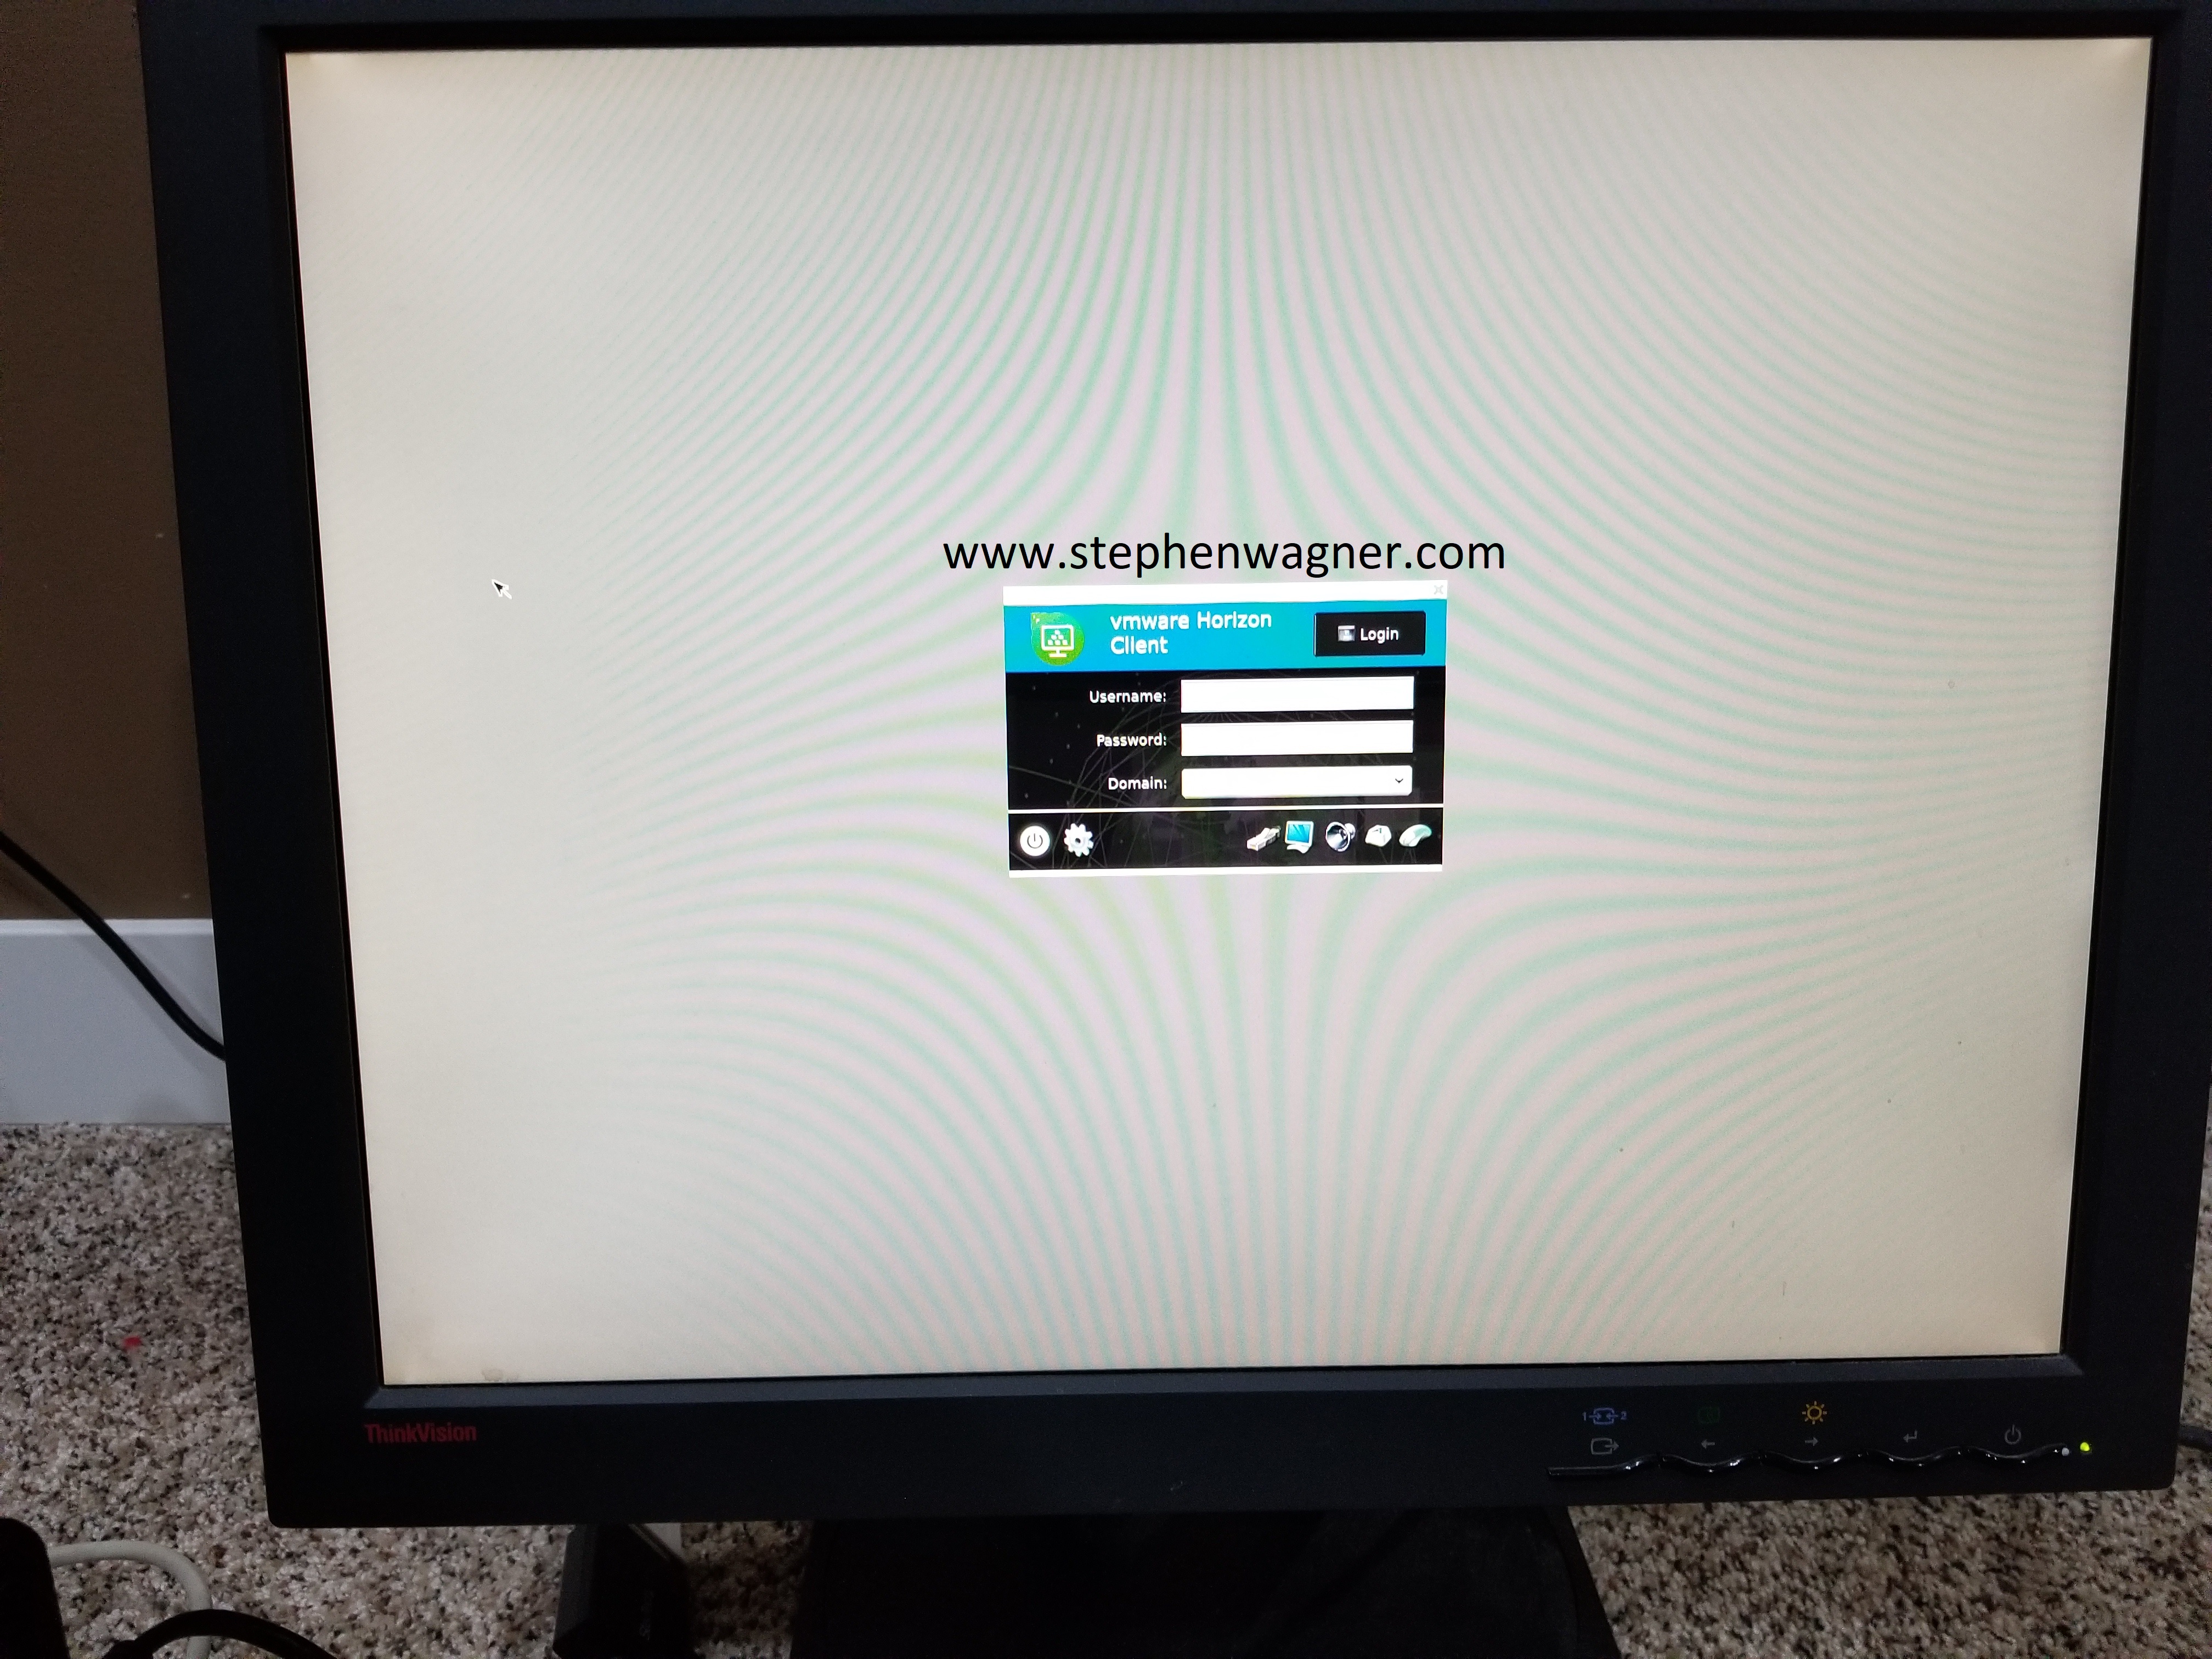
10ZiG 5900 Series Zero Client VMware Horizon View Login
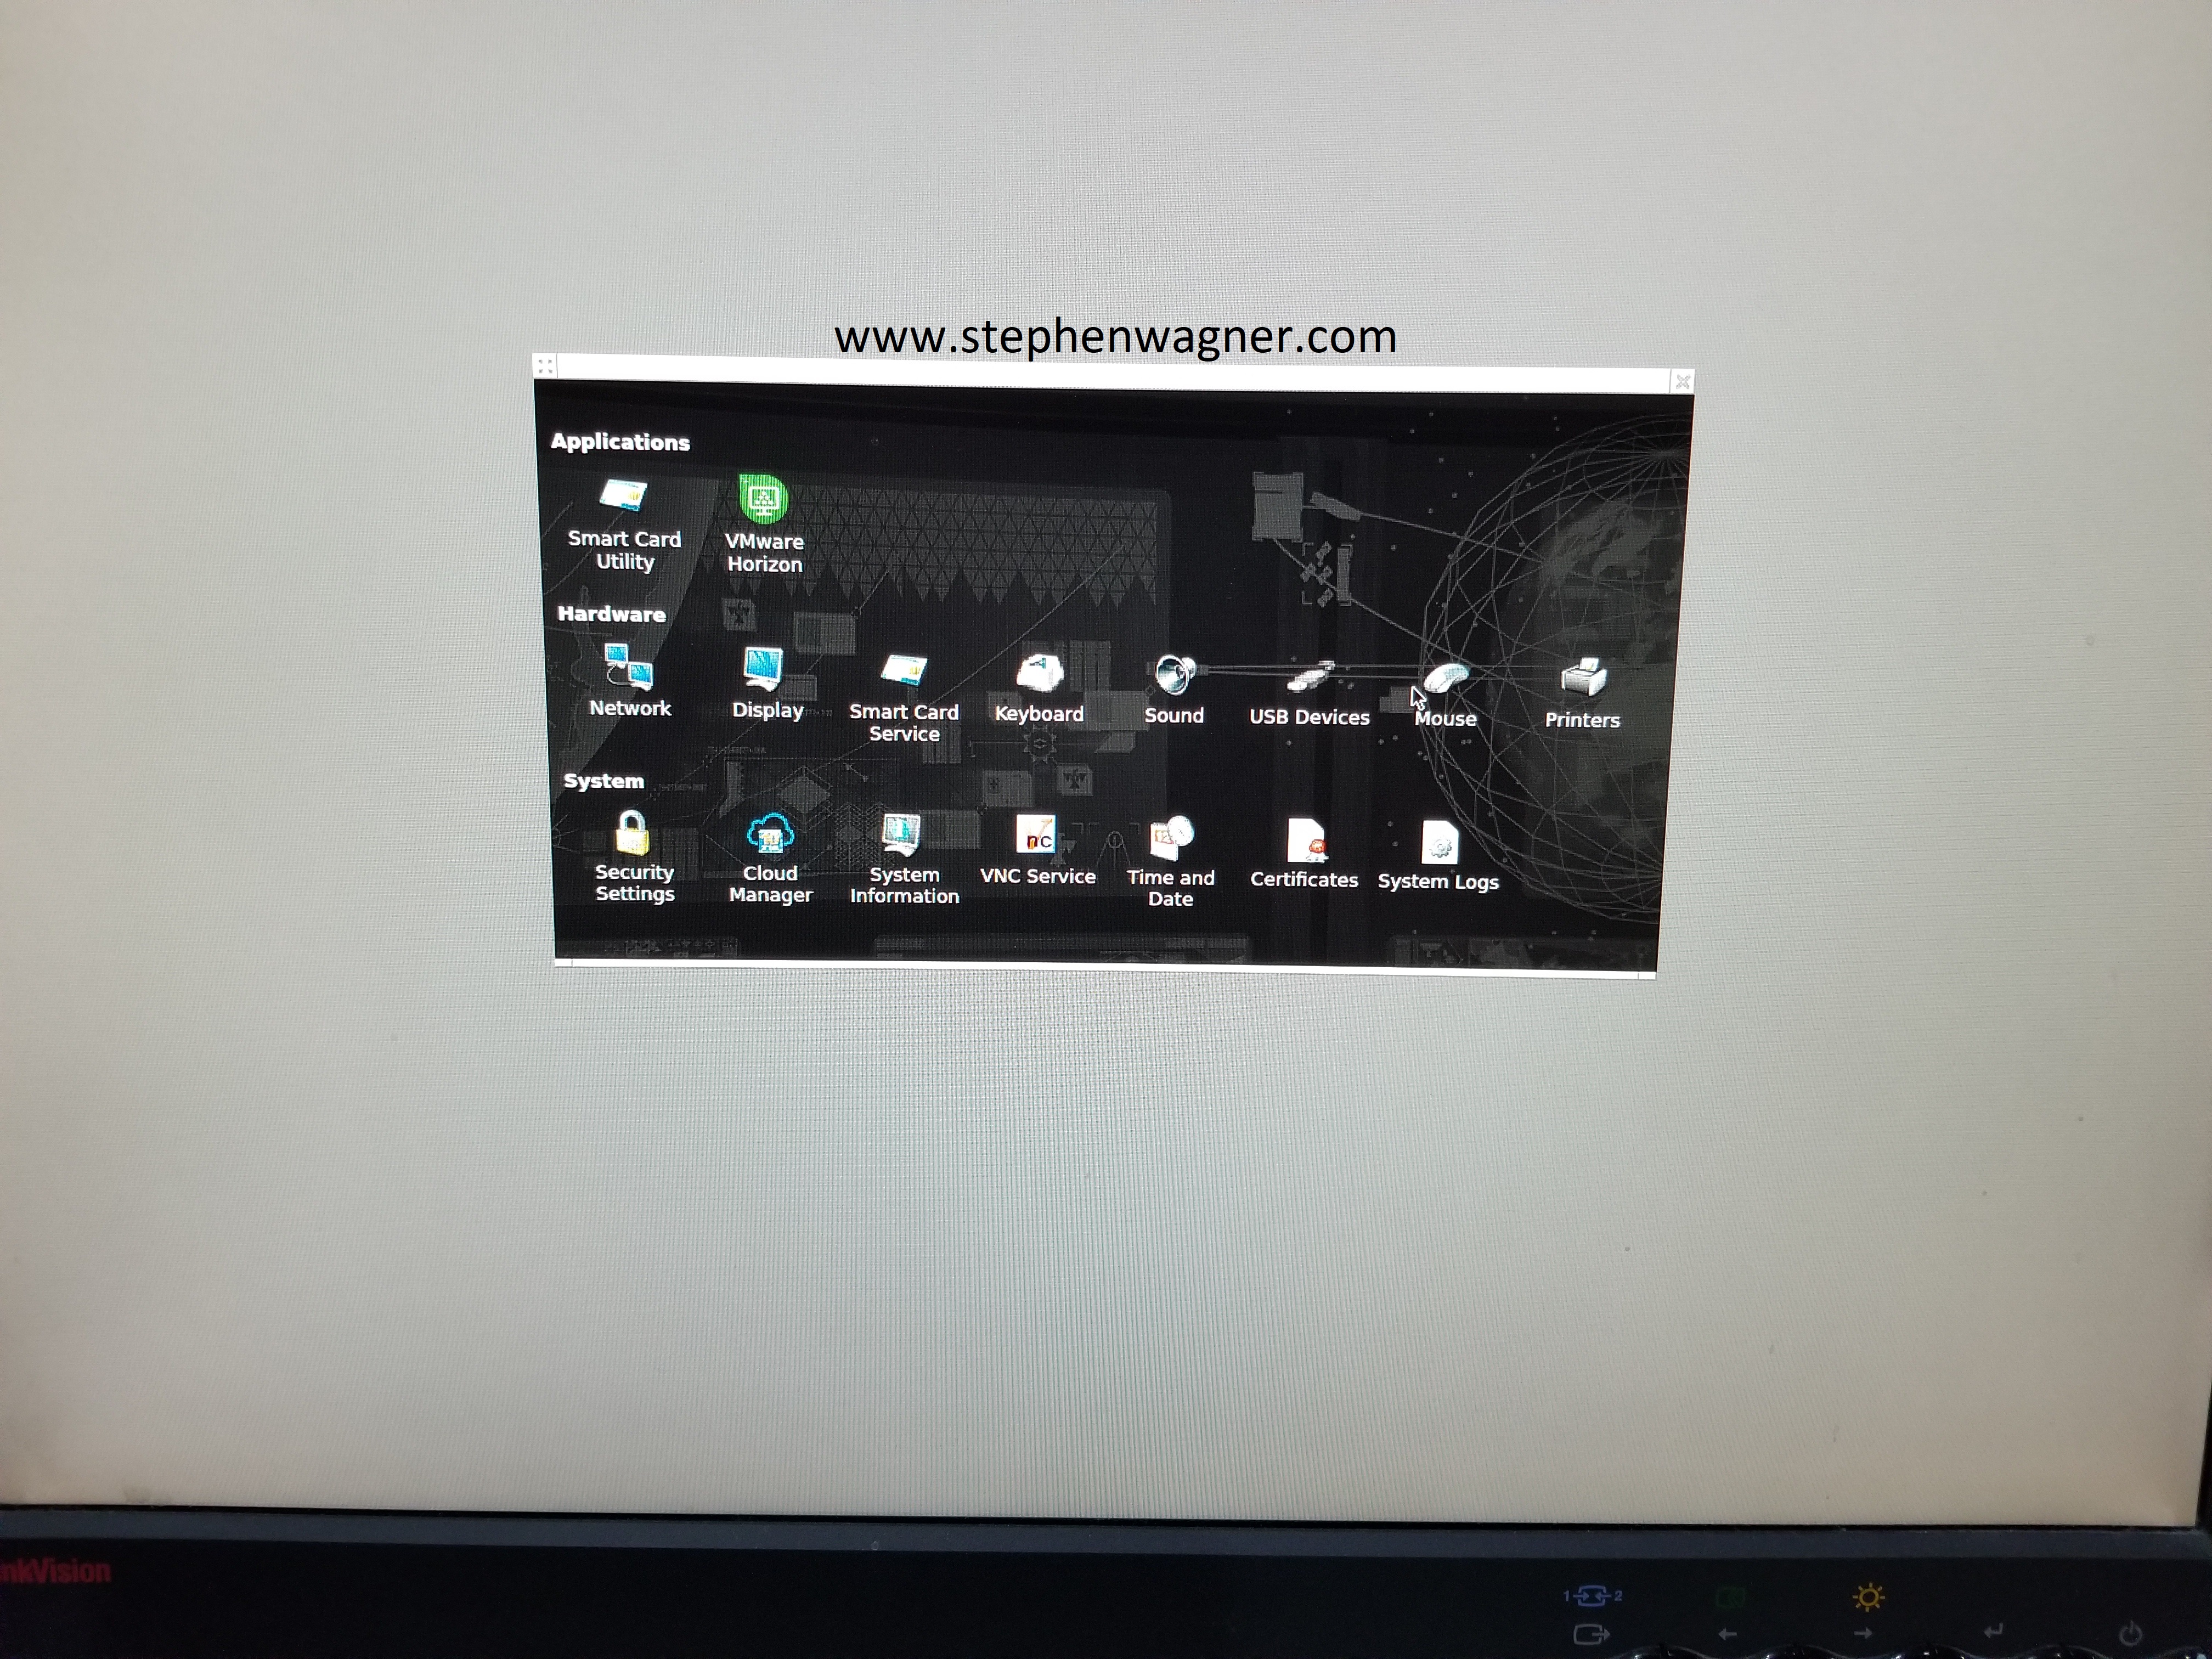
10ZiG 5948q Series Zero Client Configuration Menu
Videos
In this video, I demonstrate the capability of the 10ZiG 5948q zero client connected to a VMware Horizon View server (via a Unified Access Gateway) playing a video from YouTube. Please note that the ESXi server does not have a GPU and 3D rendering is disabled for the test (this is as low performance as it gets).
In this video, I demonstrate the capability of the 10ZiG 5948q zero client using USB redirection on a live VDI session.
And finally, here’s a video of a 10ZiG zero client cold boot for those that are interested.
And remember, my company Digitally Accurate Inc. is a VMware Solutions Provider and 10ZiG Partner. I’m also regularly posting content on these on the corporate blog as well!
It’s an exciting weekend as I got my hands on 2 new 10ZiG5900 Series Zero Clients (5948qv). My company purchased these for internal testing and demo purposes since we sell VMware VDI solutions and 10ZiG Thin and Zero Clients. I figured I’d do a brief post to offer my first impressions, offer a few pictures, as well as a brief write up.
If you’re interesting in 10ZiG products and looking to buy, don’t hesitate to reach out to me for information and/or a quote! We can configure and sell 10ZiG Zero Clients (and thin clients), help with solution design and deployment, and provide consulting services! We sell and ship to Canada and the USA!
Why a Zero Client
For a brief backstory, zero clients are used for environments and businesses that use desktop virtualization (VDI) instead of traditional computers. This means that an employee won’t actually have a computer, instead they will be using a zero client which relays video/keyboard/mouse (it’s actually more complicated than that, lol) to a desktop computer that’s virtualized on a server (either in the cloud, data center, or on-premise). This allows the company to save on hardware, provide better performance to end users, and really simplify a big portion of the IT landscape.
I’m a big fan of VDI, particularly the VMware Horizon View product. My company has a full demo/test VDI environment we have available to showcase this technology.
What’s really awesome is that you don’t necesarily even need to use a zero client. You could instead use an old netbook, laptop, computer, or even a cellphone to connect to these virtualized desktops using the VMware Horizon View client.
The next question you may be asking, is what about graphics quality? Well, you can implement special graphics cards to virtualize GPUs (such as the AMD FirePro MxGPU class of cards) and provide high end graphical capabilities to your users.
In my deployment we’ve been using software based VDI clients, but it was time to get our hands dirty with some zero clients. We decided to partner up with 10ZiG, and order a couple of these units for internal and demo purposes.
Now let’s get started!
10ZiG 5948qv Zero Client (5900q Series Zero Client)
Unboxing
10ZiG 5948q Zero Client
The 5948qv is part of 10ZiG’s power class of zero clients. This bad boy is the latest and greatest model and supports 3 displays (yup, that’s right) and 4K UHD resolutions. The hardware itself is based off an Intel Braswell (refreshed version) CPU. The device has 1 HDMI port, as well as 2 DisplayPort connections. It also has a microphone, audio line out, and a ton of USB ports (including both USB2 and USB3) for USB redirection. You can choose from 4GB or 8GB RAM configurations.
The 5948qv runs off 10ZiG’s NOS operation system. This is a compact and lightweight operating system that includes the VMware Horizon View client, as well as all the configuration utilities you’ll need to get up and running (as well as troubleshoot the device if needed).
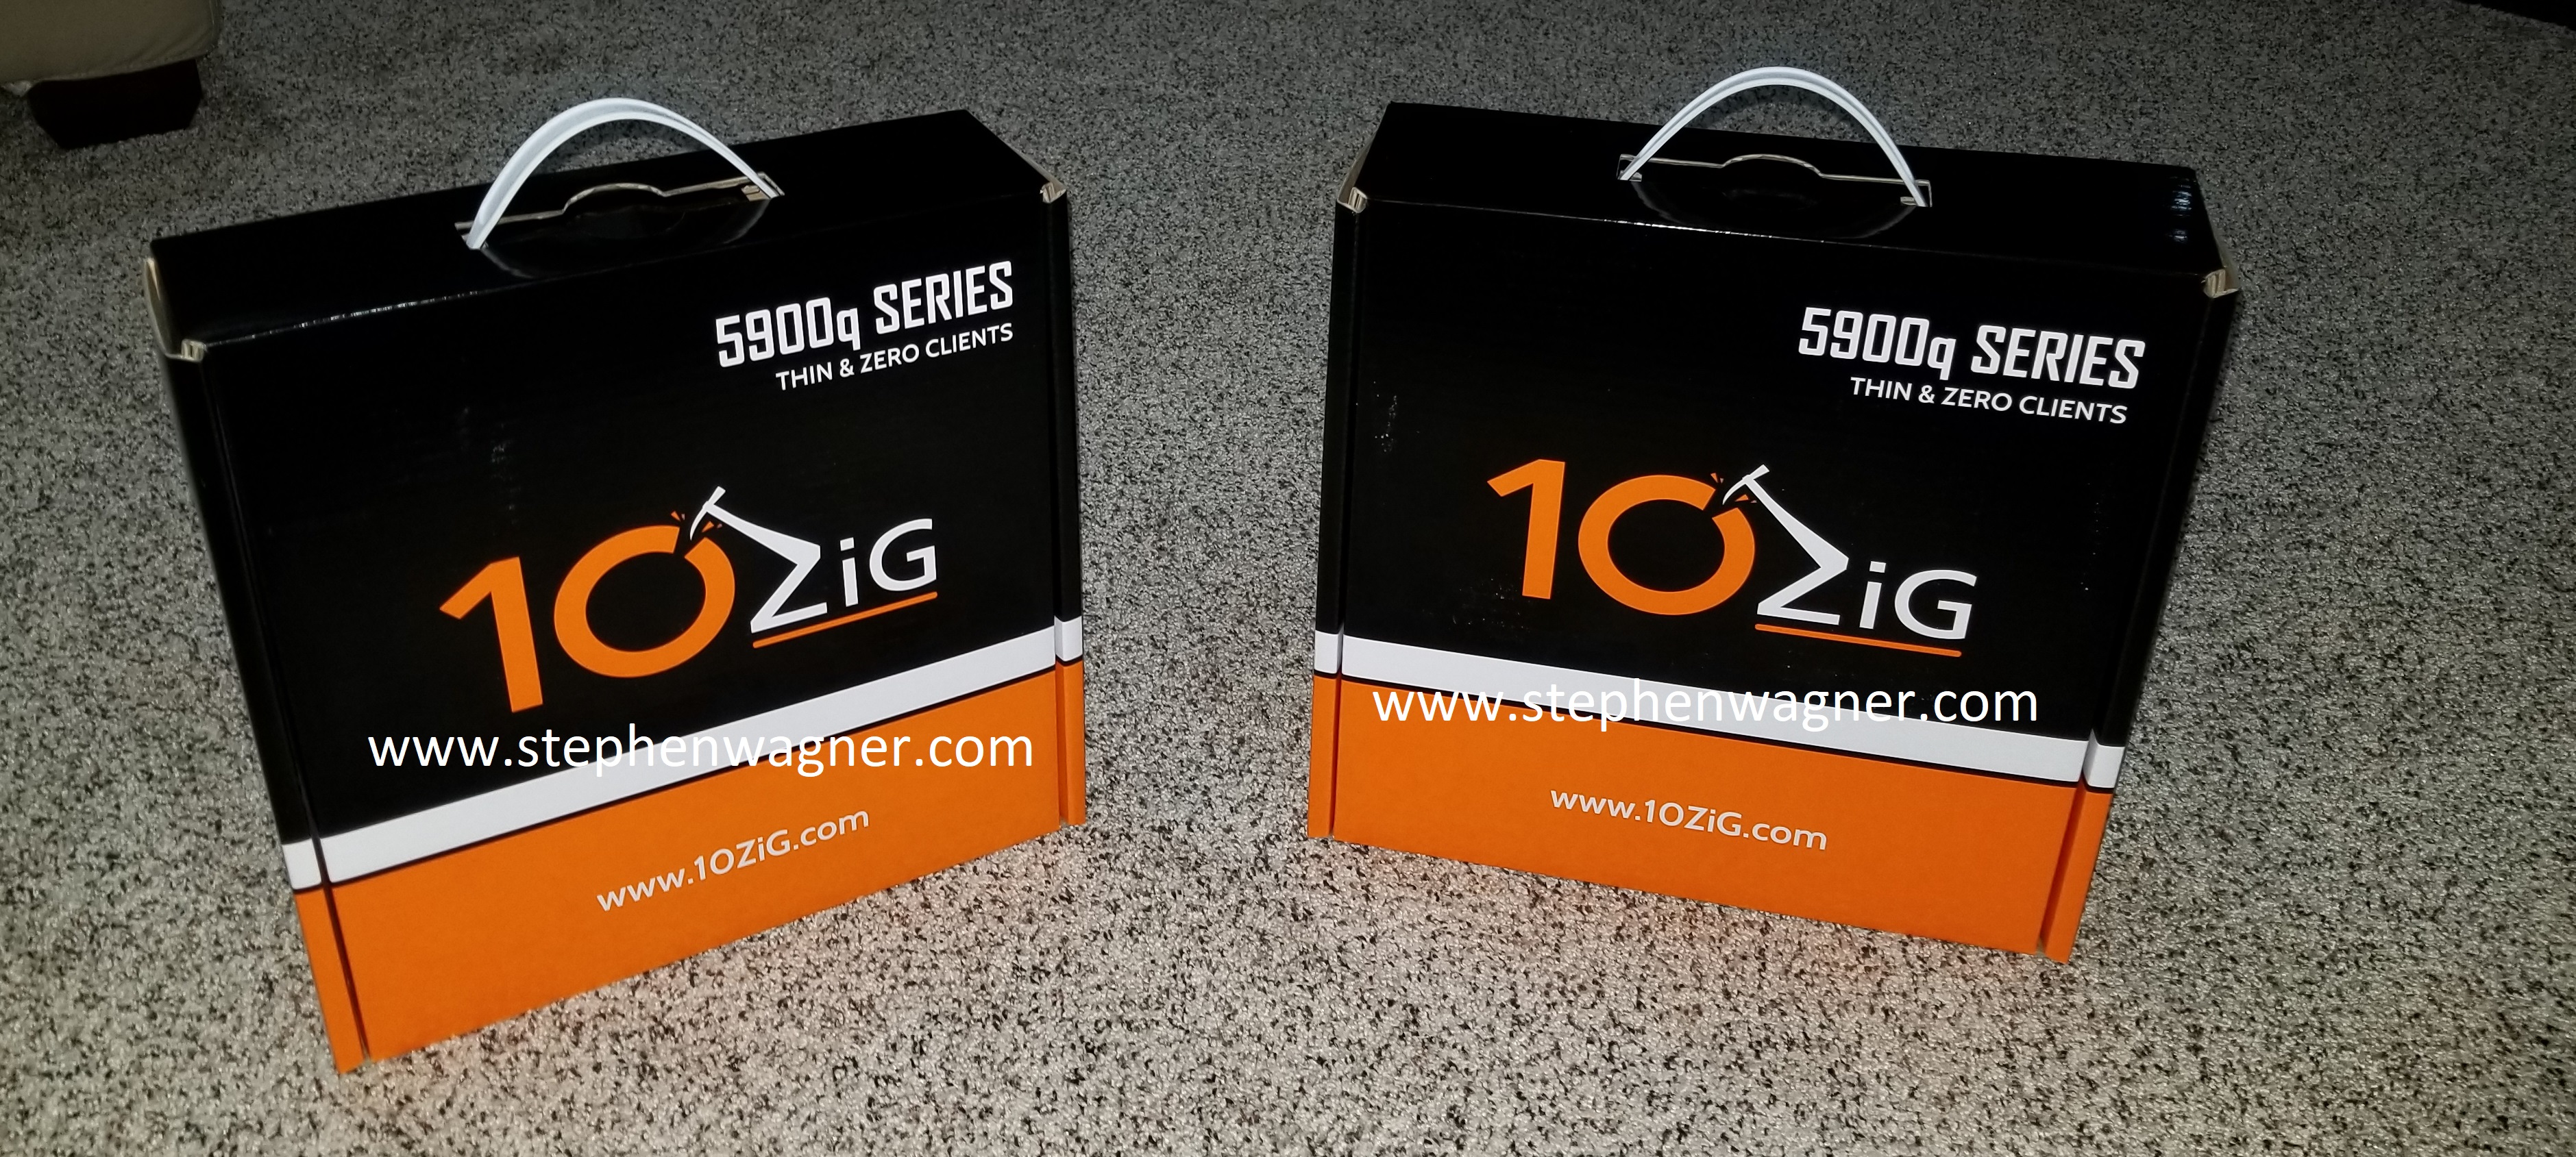
When I received the first two units, I noticed that the boxes were very heavy (I was actually really surprised).
10ZiG 5900q Series Zero Client Box Shot
10ZiG 5948q Series Zero Client Box Shot
The packaging was very nice, and the contents were safely secured with proper cardboard spacers to avoid items shifting during transport.
The Zero Client
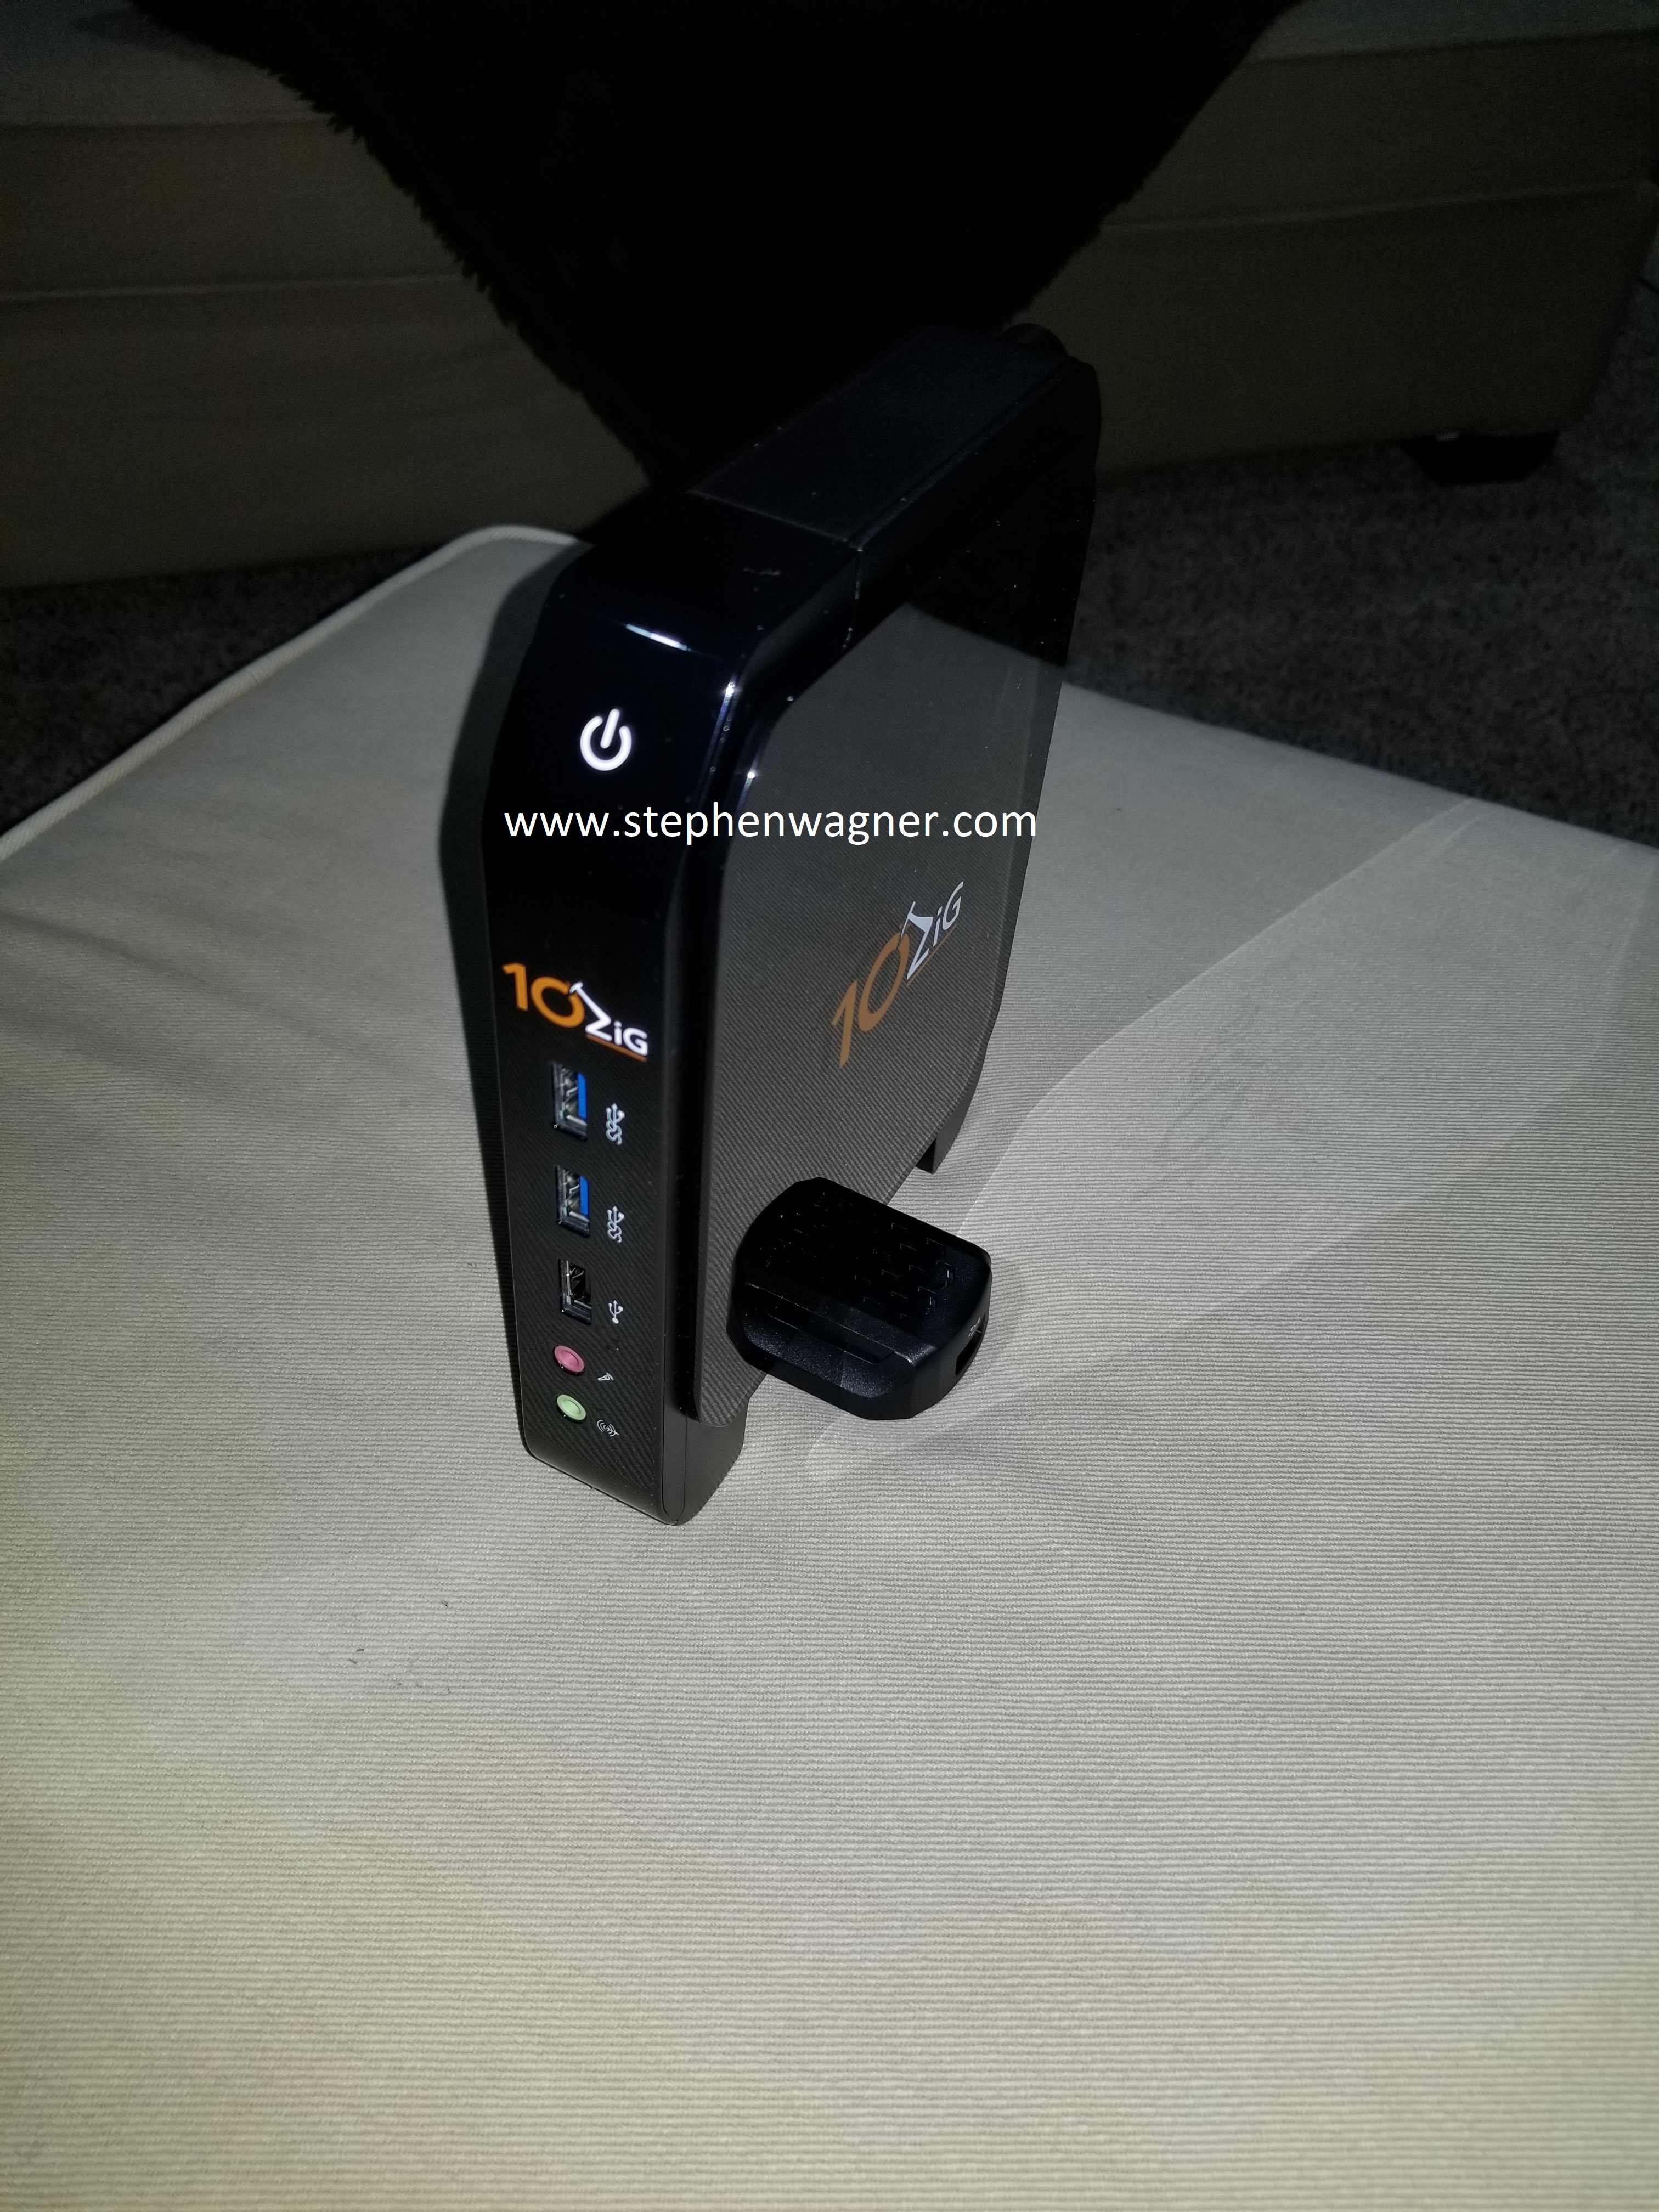
Finally it was time to take the zero client out! It is a very sleek, and very well put together device (I was actually surprised). As mentioned, it has some weight to it. It just looks great…
10ZiG 5948qv Zero Client
The bottom of the device swivels and turns to expose 2 hidden USB ports which can be used for any type of USB device. The device also has 2 x USB3.0 ports on the front, an additional 1 x USB2.0 on the front, and 2 x USB2.0 ports on the back.
10ZiG NOS – Linux Based OS
Plugging in the device and turning it on, it brings you to a big 10ZiG splash image and then on to first time configuration. In the first time configuration with the 10ZiG NOS Operating System you specify your locale and region settings, date and time, and others. One problem I came across, is that when choosing Canada, it defaulted the keyboard to French for some reason. I actually didn’t even realize this until later when trying to log in to my VDI session (it was registering the wrong characters when pressing keys) and rejecting my password. It actually took me over an hour to realize this when I finally started poking around in the console and noticed that the “/” key was triggering an entirely different character. Changing the keyboard to US English fixed this (although in my opinion it should have been the default).
Usage
After the first time setup is complete, the interface is very simple yet powerful. You can configure your VMware View Connection Server address (and properties for the connection), as well as all the hardware components of the zero client, this includes: Network, Display, Mouse, Keyboard, USB devices, printers, etc…
After specifying my View connection server and then leaving the control panel, I logged in to my VDI session and it worked great!
Initially I tested some videos on YouTube, which looked great, and then moved on to trying some other things that involved audio and all was perfect. This product was production ready! I also tested the USB redirection by connecting a USB thumb flash drive to a USB port. The Windows 10 VM detected the USB drive, and I was able to partition, format, and use the stick without any problems. Initial testing resulted in 4MB/sec USB redirection speeds.
I’m really hoping that when my budget permits, I can purchase an AMD MxGPU S7150 card so I can test the 10ZiG with some high performance graphic applications. In the meantime though, this works great!
Now before I leave you, there are two important things I want to mention:
The 10ZiG zero clients can be completely centrally managed and provisioned by the 10ZiG Manager, which is completely free if you own the products. You’d use this to deploy many zero clients (hundreds, thousands, etc…) in large scale deployments.
All in all, I’m very impressed with the device and have absolutely no complaints. I’ll be doing some more write ups and videos on the device soon! Stay posted!
I run a Sophos UTM firewall appliance in my VMware vSphere environment and noticed the other day that I was getting warnings on the space used on the ESXi host for the thin-provisioned vmdk file for the guest VM. I thought “Hey, this is weird”, so I enabled SSH and logged in to check my volumes. Everything looked fine and my disk usage was great! So what gives?
After spending some more time troubleshooting and not finding much, I thought to myself “What if it’s not unmapping unused blocks from the vmdk to the host ESXi machine?”. What is unampping you ask? When files get deleted in a guest VM, the free blocks aren’t automatically “unmapped” and released back to the host hypervisor in some cases.
Two things need to happen:
The guest VM has to release these blocks (notify the hypervisor that it’s not using them, making the vmdk smaller)
The host has to reclaim these and issue the unmap command to the storage (freeing up the space on the SAN/storage itself)
On a side note: In ESXi 6.5 and when using VMFS version 6 (VMFS6), the datastores can be configured for automatic unmapping. You can still kick it off manually, but many administrators would prefer it to happen automatically in the background with low priority (low I/O).
Most of my guest VMs automatically do the first step (releasing the blocks back to the host). On Windows this occurs with the defrag utility which issues trim commands and “trims” the volumes. On linux this occurs with the fstrim command. All my guest VMs do this automatically with the exception being the Sophos UTM appliance.
The fix
First, a warning: Enable SSH on the Sophos UTM at your own risk. You need to know what you are doing, this also may pose a security risk and should be disabled once your are finished. You’ll need to “su” to root once you log in with the “loginuser” account.
This fix not only applies to the Sophos UTM, but most other linux based guest virtual machines.
Now to fix the issue, I used the “df” command which provides a list of the filesystems, their mount points, and storage free for those fileystems. I’ve included an example below (this wasn’t the full list):
You’ll need to run the fstrim command on every mountpoint for file systems “/dev/sdaX” (X means you’ll be doing this for multiple mountpoints). In the example above, you’ll need to run it on “/”, “/boot”, “/var/storage”, “/var/log”, “/tmp”, and any other mountpoints that use “/dev/sdaX” filesytems.
Two examples:
fstrim / -v
fstrim /var/storage -v
Again, you’ll repeat this for all mount points for your /dev/sdaX storage (X is replaced with the volume number). The command above only works with mountpoints, and not the actual device mappings.
You’ll need to use esxcli to do this. I simply enabled SSH on my ESXi hosts temporarily.
Please note: Using the unmap command on ESXi hosts is very storage I/O intensive. Do this during maintenance window, or at a time of low I/O as this will perform MAJOR I/O on your hosts…
I issue the command (replace “DATASTORENAME” with the name of your datastore):
This could run for hours, possibly days depending on your “reclaim-unit” size (this is the block size of the unit you’re trying to reclaim from the VMFS file-system). In this example I choose 8, but most people do something larger like 100, or 200 to reduce the load and time for the command to complete (lower values look for smaller chunks of free space, so the command takes longer to execute).
I let this run for 2 hours on a 10TB datastore, however it may take way longer (possibly 6+ hours, to days).
Finally, not only are we are left with a smaller vmdk file, but we’ve released the space back to the SAN as well!
In the latest updates and versions of Microsoft Office 2016, I found a bug where when a user adds a new on-premise Microsoft Exchange 2016 account, it will repeatedly prompt for a username and password and ultimately fail if you hit cancel (no matter how many times you enter credentials). This was on the internal LAN on a domain joined workstation.
I did the usual checks:
Check Virtualdirectory configuration on Exchange
Check Virtualdirectory configuration on IIS (Internet Information Services)
Check Autodiscover DNS entries, InternalURL and ExternalURL configuration
Check for SCP inside of domain
All the of the above came back fine and were configured properly.
I have numerous other Outlook 2016 clients configured and working (installed as older versions, but have been updated), so I used those to troubleshoot (same scenario, domain joined on internal LAN and external WAN). After spending 10 hours ripping apart everything, confirming configuration, I noticed that when using the “Test Email Autoconfiguration…” (holding CTRL while right clicking on Outlook tray icon), that the e-mail clients had a skewed order for checking autodiscovery.
The e-mail clients were actually trying to authenticate with Office365 before my own on-premise Exchange Server (domain SCP or autodiscover records). This is absolutely bizarre! After spending 2 hours googling (I couldn’t find anything), I finally stumbled across this document and found an interesting piece of information:
“Outlook uses a set of heuristics to determine whether the user account provided comes from Office 365. If Outlook determines confidently that you are an O365 user, a try is made to retrieve the Autodiscover payload from the known O365 endpoints (typically https://autodiscover-s.outlook.com/autodiscover/autodiscover.xml or https://autodiscover-s.partner.outlook.cn/autodiscover/autodiscover.xml). If this step does not retrieve a payload, Outlook moves to step 5.”
WTF?!?!?
So while this doesn’t explain why this happened, it explains what’s happening. I believe this is what’s happening as my working clients are trying to Autodisocver with Office365 first…
I went ahead an created a registry value to control the policy for “ExcludeExplicitO365Endpoint“. After configuring the registry key, I noticed that Autodiscover was now functioning properly and checking SCP and autodiscover DNS records first. I have no idea why the “heuristics” determined I was an Office365 user, but I’m not (I do have access to Office365 as a partner, but don’t use it and don’t have it configured). This may effect other partners, or users that utilize some O365 services…
The Fix
To fix this issue, create a text file and copy/paste this text below.
Windows Registry Editor Version 5.00

[HKEY_CURRENT_USER\Software\Microsoft\Office\16.0\Outlook\AutoDiscover]
"ExcludeExplicitO365Endpoint"=dword:00000001
Then save it, and rename it as ExcludeExplicitO365Endpoint.reg and run it (this will import the applicable registry key). ONLY DO THIS if you are using an Exchange On-Premise account, and not a Office365 or hosted exchange account.
Keep in mind that autodiscover also queries the domain root (domain.com), before querying the autodiscover host (autodiscover.domain.com). If you want to stop both the Office365 autodiscover and the root domain autodiscover challenge, use the following below:
Windows Registry Editor Version 5.00

[HKEY_CURRENT_USER\Software\Microsoft\Office\16.0\Outlook\AutoDiscover]
"ExcludeExplicitO365Endpoint"=dword:00000001
"ExcludeHttpsRootDomain"=dword:00000001
You’ll notice that we also set “ExcludeHttpsRootDomain” to “1” which stops it from checking the root domain.
After this, the issue was completely fixed. If you know what you’re doing, you can also use Outlook GPO settings and deploy this to a vast number of systems using Group Policy.
Additional Note (added November 2nd, 2018)
While reading numerous documents covering autodiscovery, I also came across an article that went in to detail with particulars as to how Mapi over HTTP functions. Even with the above, when accessing Outlook externall from the domain, you may still notice a single password prompt for the first time you log in externally.
After reading through documentation, I found that this is most likely because the first user account login (the very first time the user logged in on the computer), the username format of “DOMAIN\Username” was used, and not the UPN. The documentation mentioned that this may fail the negotiation, which will require a single password prompt on autodiscovery. This issue can be avoided by using the users UPN ([email protected]) to log in for the first time on the system.
Please note that the UPN must match the user’s e-mail address.
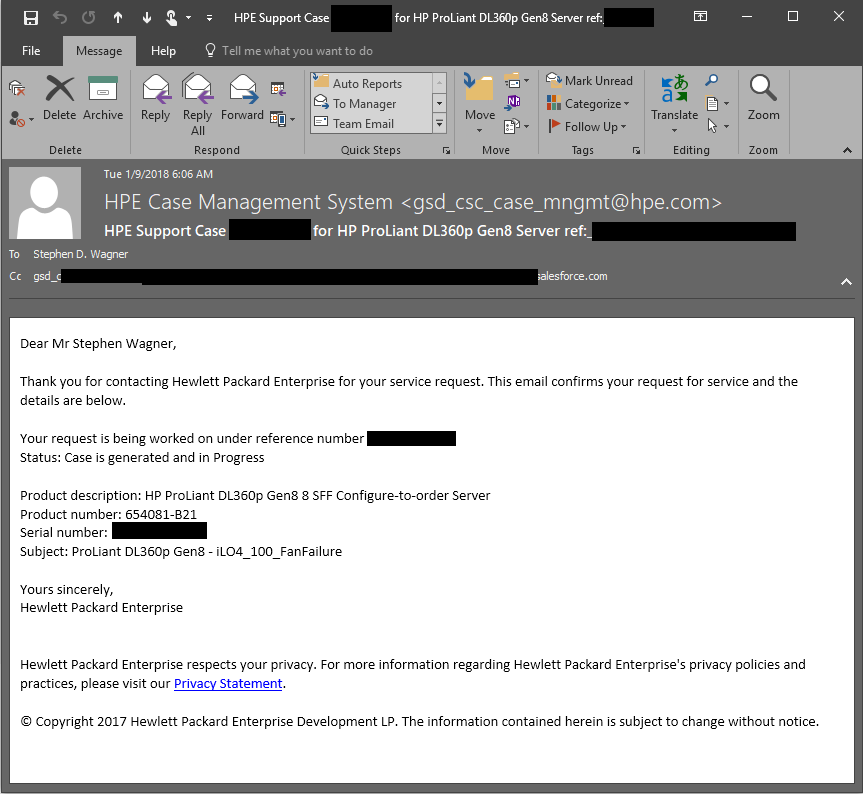
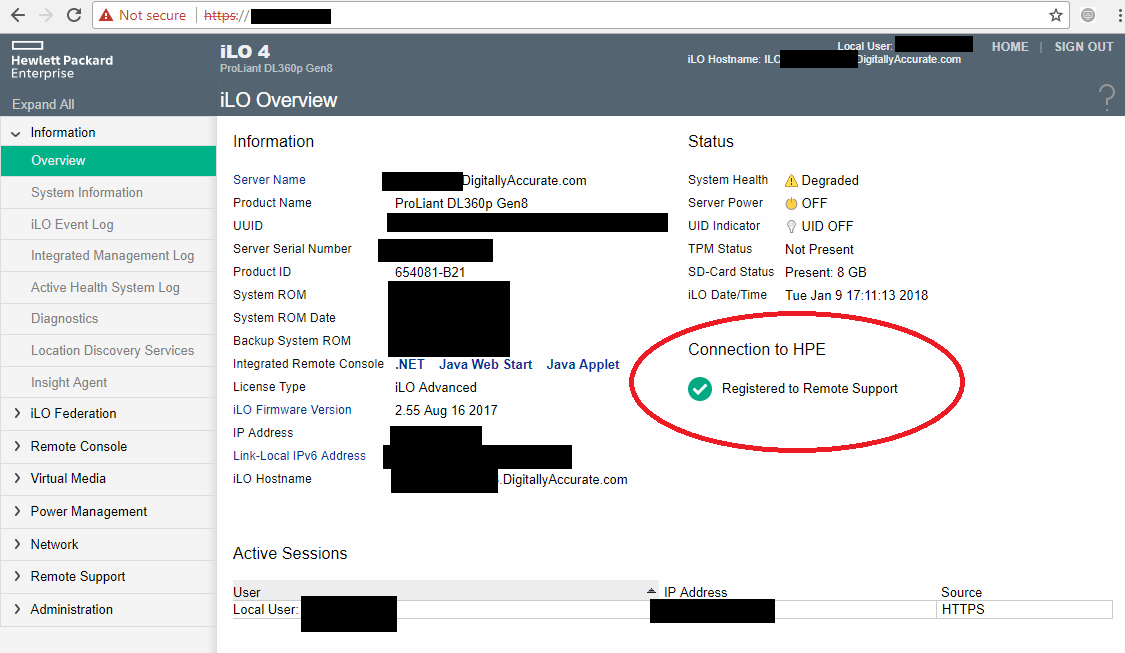
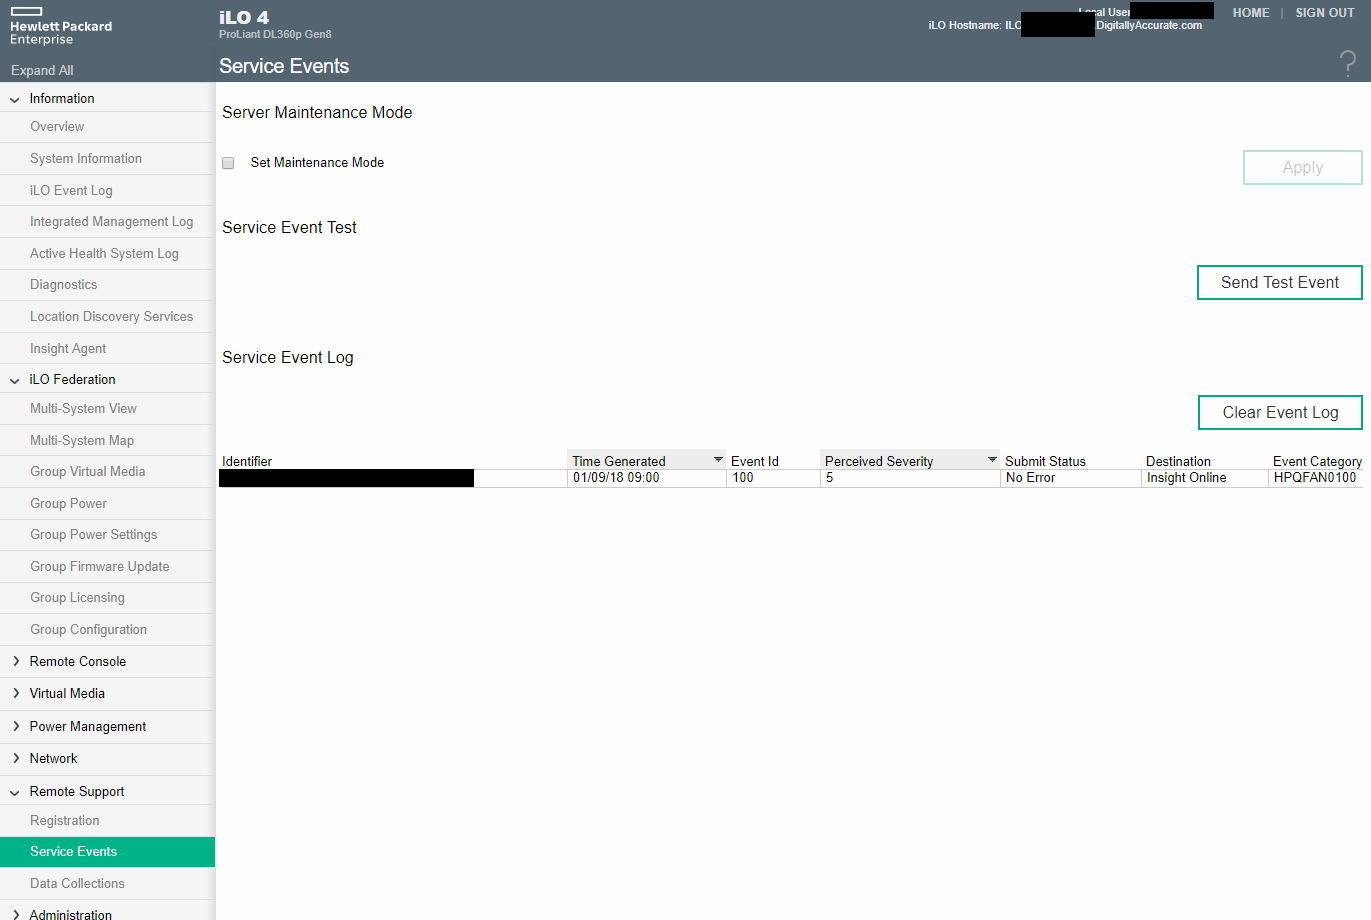
Many months ago, I configured the HPE Insight Online – Direct Connect on all my HPE Proliant DL360p Gen8 servers running VMware vSphere 6.5. This service is available with active support contracts (warranties), and allows your servers to “phone home” to HPE for free. This allows service and health information to be broadcast to your HPE passport and support account, to pro-actively manage, monitor, and maintain your servers. Information on the service can be found at https://www.hpe.com/ca/en/services/remote-it-support.html.
This is all pretty cool, but does it work? Read below!
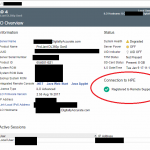
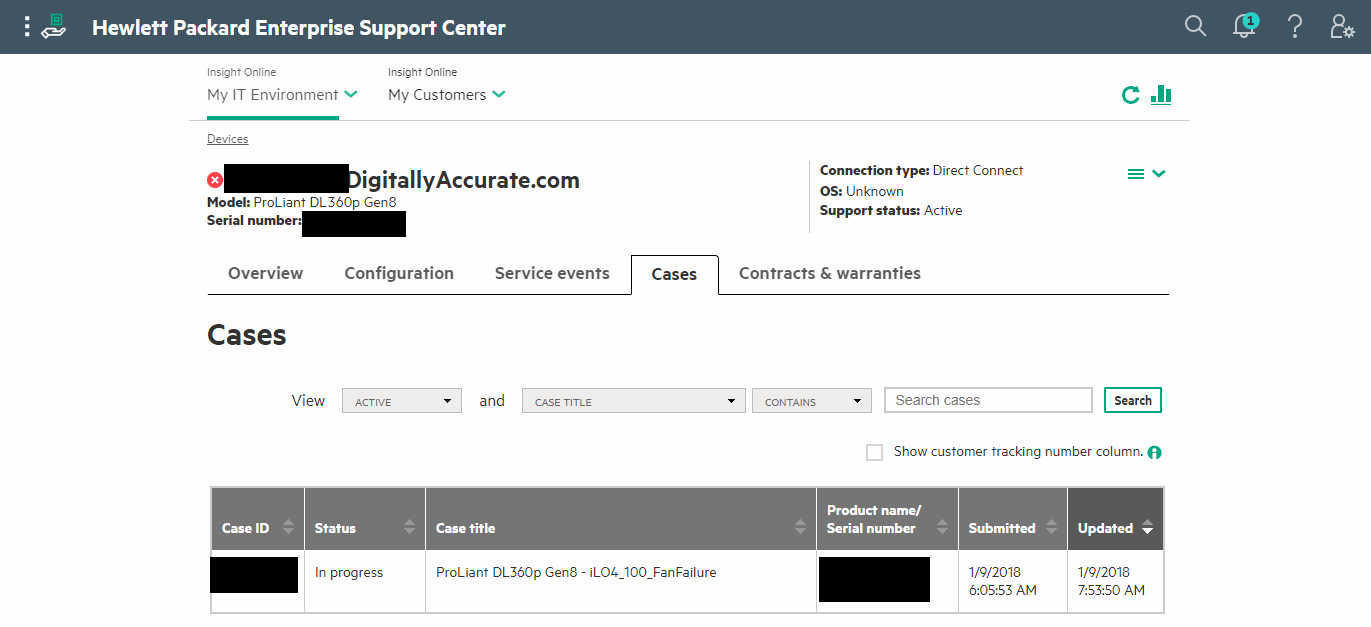
I woke up this morning to notifications from my own monitoring system that a fan failure had occurred on one of my HPE Proliant server ESXi hosts. All my servers have fan redundancy so the server continued to run without problems. Scrolling through my other overnight e-mails, I also see e-mails from HPE acknowledging a support case that I had created. I had long since forgot that I configured Insight Online direct connect, so it actually took a few minutes for me to put two and two together. The server by itself took care of everything!
After reviewing all these e-mails, logging in to the HPE support portal, I had realized that the server by itself had:
Identified a fan failure
Sent diagnostic data off to HPE support
Created an HPE support ticket and case
HPE support engineers looked up the serial and part number of the server, and assigned a replacement part for the fan to be dispatched to me
I called in to HPE support, mentioned this was the first time this had ever happened and asked if there was anything additional I needed to provide. All the engineer asked, was whether I wanted an engineer to replace the part, or if I was comfortable replacing the part myself (of course I want to replace it myself). That was it!
This is VERY interesting and cool technology. I can see this being extremely valuable for customers who have 4 hour response contracts with their HPE equipment.
I’ve provided some screenshots below to show the process.
This website uses cookies to improve your experience. We'll assume you're ok with this, but you can opt-out if you wish.
Do you accept the use of cookies and accept our privacy policy? AcceptRejectCookie and Privacy Policy
Privacy & Cookies Policy
Privacy Overview
This website uses cookies to improve your experience while you navigate through the website. Out of these cookies, the cookies that are categorized as necessary are stored on your browser as they are essential for the working of basic functionalities of the website. We also use third-party cookies that help us analyze and understand how you use this website. These cookies will be stored in your browser only with your consent. You also have the option to opt-out of these cookies. But opting out of some of these cookies may have an effect on your browsing experience.