Jun 092012
 

So there I was… Had a custom built vSphere cluster, 3 hosts, iSCSI target (setup with Lio-Target), everything running fine, smoothly, perfect… I’m done right? NOPE!

Most of us who care, are concerned about our Disaster Recovery or Backup solution. With virtualization things get a little bit interesting in the fact that either you have a CRAZY large setup, and can use the VMware backup stuff, or you have a smaller environment and want something simple, easy to use, and with a low footprint. Configuring a backup and/or disaster recovery solution for a virtualized environment may be difficult and complicated, however after it’s fully implemented; management, use, and administration is easy, and don’t forget about the abilities and features you get with virtualization.

Reasons why virtualization rocks when it comes to backup and disaster recovery:

-Unlike traditional backups you do not have to install a bare OS to run the backup software to restore over

-You can restore to hardware that is not like nor similar to the original hardware

-Backups are now simple files that can be easily moved, transported, copied, and saved on to normal or non-normal media (you could save an entire system on to a USB key if it was big enough). On a 2TB external USB drive, you could have a backup of over 16+ virtual machines!

-Ease of recovery: Copy the backed up VM files to host/datastore, and simply hit play. Restore complete and you’re up and running!


So with all that in mind, here we go! (Scroll to bottom of post for a quick conclusion).

For my solution, here are some of the requirements I had:

1) Utilize snapshots to take restorable backups while the VMs are running (no downtime).

2) Move the backups to a different location while running (this could be a drive, NFS export, SMB share, etc…).

3) Have the backups stored somewhere easy to access where I can move them to a removable external USB drive to take off-site. This way, I have fast disk-to-disk access to restore backups in the event my storage system goes down or RAID array is lost (downtime would be minimal), or in the event of something more serious like a fire, I would have the USB drive off-site to restore from. Disk-to-disk backups could happen on a daily basis, and disk-to-USB could be done weekly and taken off-site.

4) In the event of a failure, be able to bring USB drive onsite, transfer VMs back and be up and running in no time.


So with this all in mind, I started designing a solution. My existing environment (without backup) composed of:

2 X HP DL360 G5 Servers (running ESXi)

1 X HP ML350 G5 Server (running ESXi)

1 X Super Micro Intel Xeon Server (Running CentOS 6 & Lio-Target backports: providing iSCSI VMFS)

2 X HP MSA20 Storage Units


First, I need a way to create snapshots of my 16+ virtual machines. After, I would need to have the snapshots moved to another location (such as a backup server). There is a free script available called ghettoVCB. ghettoVCB is a “Free alternative for backup up VM’s for ESX(i) 3.5, 4.x+ & 5.x” and is available (along with tons of documentation) at: http://communities.vmware.com/docs/DOC-8760. This script is generally ran on the ESXi host, generates a snapshot and clones it to a seperate datastore configured on that host. It does this for all virtual machines named in the VM list you specify, or for all VMs on the host if a specific switch is passed to ghettovcb.sh.

So now that we have the software, we need to have a location setup to back up to. We could either create a new iSCSI target, or we could setup a new Linux server and have a RAID array configured and formatted with ext4 and exported via NFS. This would allow us to have the NFS setup as a datastore on ESXi (so we can backup to the NFS export), and afterwards be able to access the backups natively in Linux to copy/move to a external drive formatted with EXT4.

We configure a new server, running CentOS 6 with enough storage to backup all VMs. We create NFS exports and mount these to all the ESXi hosts. We copy the ghettovcb script to a location on the NFS export so it’s accessible to all hosts easily (without having to update the script on each host individually), and we create lists for each physical host containing the names of the virtual machine it virtualizes. We then edit the ghettovcb.sh file to specify the new destination datastore (the backup datastore) and how we want it to back up.

When executing:

./ghettovcb.sh -f esxserverlist01

It creates the snapshot for each VM in the list for that host, clones it to the destination datastore (which in my setup is the NFS export on the new backup server), then deletes the snapshot when the backup is complete, finally moving on to the next VM and repeating the process until done. The script needs to be ran on all hosts, and list files for VMs have to be created for each host.

We now have a backup server and have done a disk-to-disk backup of our virtual machines. We can now plug in a large external USB drive to the backup server, and simply copy over the backups to it.


I do everything manually because I like to confirm everything is done and backed up properly, however you can totally create scripts to automate the whole process. After this we have our new backup solution!


Quick recap:

1) Setup a new backup server with enough disk space to back up all VMs. Setup an NFS export and mount it to ESXi hosts.

2) Download and configure the ghettoVCB script. Run the script on each ESXi host to disk-to-disk backup your VMs to your new backup server.

3) Copy the backup files from the backup server to a external USB drive that has enough space. Take off-site.


I have had to restore a couple VMs in the past due to a damaged RAID array, and I did so using a backup from above. It worked great! I will create a post on the restore process sometime in the future (for now feel free to look at the ghettoVCB documentation)!
Jun 092012
 

Recently, I’ve started to have some issues with the HP MSA20 units attached to my SAN server at my office. These MSA20 units stored all my Virtual Machines inside of a VMFS filesystem which was presented to my vSphere cluster hosts over iSCSI using Lio-Target. In the last while, these logical drive has just been randomly disappearing, causing my 16+ virtual machines to just halt. This always requires me to shut off the physical hosts, shut off the SAN server, shut off the MSA20s, and bring everything all the way back up. This causes huge amounts of downtime, and it just a pain in the butt…

I decided it was time for me to re-do my storage system. Preferably, I would have purchased a couple HP MSA60s and P800 controllers to hook it up to my SAN server, but unfortunately right now it’s not in the budget.

A few years ago, I started using software RAID. In the past I was absolutely scared of it, thought it was complete crap, and would never have touched it, but my opinion drastically changed after playing with it, and regularly using it. While I still recommend businesses to use Hardware based RAID systems, especially for mission critical applications, I felt I could try out software RAID for the above situation since it’s more of a “hobby” setup.

I read that most storage enthusiasts use either the Super Micro AOC-SASLP-MV8, or the LSI SAS 9211-8i. Both are based off different chipsets (both of which are widely used in other well known cards), and both have their own pro’s and con’s.

During my research, I noticed a lot of people who run Windows Home Server were utilizing the AOC Super Micro Card. And while using WHS, most reported no issues whatsoever, however it was a different story when reading posts/blog articles from people using Linux. I don’t know how accurate this was, but apperently a lot of people had issues with this card under heavy load, and some just couldn’t get it running inside of linux.

Then there is the LSA 9211-8i (which is the same as the extremely popular IBM M1015). This bad boy supports basic RAID operations (1, 0, 10), but most people use it with JBOD and simply use Linux MD Software RAID. While there was numerous complaints about users having issues with their systems even detecting their card, other users also reported issues caused by the BIOS of this card (too much memory for the system to boot). When people did get this card working though, I read of mostly NO issues under Linux. Spent a few days confirming what I already had read and finally decided to make the purchase.

Both cards support SAS/SATA, however the LSI card supports 6Gb/sec SAS/SATA. Both also have 2 internal SFF8087 Mini-SAS connectors to hook up a total of 8 drives directly, or more using an SAS expander. The LSI card uses a PCIe (V.2) 8x slot, vs the AOC-SASLP which uses PCIe (V.1) 4x slot.

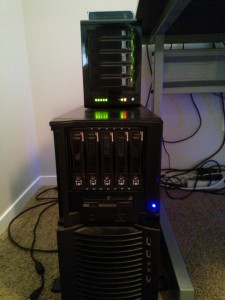
I went to NCIX.com and ordered the LSI 9211-8i along with 2 breakout cables (Card Part#: LSI00194, Cable Part#: CBL-SFF8087OCF-06M). This would allow me to hook up a total of 8 drives (even though I only plan to use 5). I already have an old computer I already use with an eSATA connector to a Sans Digital SATA Expander for NFS, etc… that I plan on installing the card in to. I also have an old Startech SATABAY5BK enclosure which will hold the drives and connect to the controller. Finished case:

Server with disk enclosures (StarTech SATABAY5BK)

(At this point I have the enclosure installed along with 5 X 1TB Seagate 7200.12 Barracuda drives)

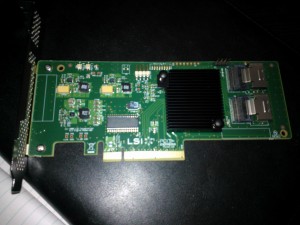
Finally the controller showed up from NCIX:

LSI SAS 9211-8i

I popped this card in the computer (which unfortunately only had PCIe V1), and connected the cables! This is when I ran in to a few issues…

-If no drives were connected, the system would boot and I could succesfully boot to CentOS 6.

-If at all I pressed CTRL+C to get in to the cards interface, the system would freeze during BIOS POST.

-If any drives were connected and detected by the cards BIOS, the system would freeze during BIOS POST.

I went ahead and booted in to CentOS 6. Downloaded the updated firmware and BIOS and flashed the card. The flashing manual was insane, but had to read it all to make sure I didn’t break anything. First I updated both the firmware and BIOS (which went ok), however I couldn’t convert the card from IR firmware to IT firmware due to errors. I google’d this and came up with a bunch of articles, but this one: http://brycv.com/blog/2012/flashing-it-firmware-to-lsi-sas9211-8i/ was the only one that helped and pointed me in the right direction. Essentially just stating you have to use the DOS flasher, erase the card (MAKING SURE NOT TO REBOOT OR YOU’D BRICK IT), and then flashing the IT Firmware. This worked for me, check out his post! Thanks Bryan!

Anyways, after updating the card and converting it to the IT firmware. I still had the BIOS issue. I tried the card in another system, and still had a bunch of issues. I finally removed 1 of 2 video cards and populated the card in a Video Card slot, and I finally could get in to the BIOS. First I enabled staggered spin-up (to make sure I don’t blow the PSU on the computer with a bunch of drives starting up at once), changed some other settings to optimize, and finally disabled the boot BIOS, and changed the option for the adapter to be disabled for boot, and only available to the OS. When removing the card, and putting it in the target computer, this worked. Also noticed that the staggered spin-up started during the Linux kernel startup when initializing the card. Here’s a copy of the kernel log:

mpt2sas version 08.101.00.00 loaded
mpt2sas 0000:06:00.0: PCI INT A -> Link[LNKB] -> GSI 18 (level, low) -> IRQ 18
mpt2sas 0000:06:00.0: setting latency timer to 64
mpt2sas0: 64 BIT PCI BUS DMA ADDRESSING SUPPORTED, total mem (3925416 kB)
mpt2sas 0000:06:00.0: irq 24 for MSI/MSI-X
mpt2sas0: PCI-MSI-X enabled: IRQ 24
mpt2sas0: iomem(0x00000000dfffc000), mapped(0xffffc900110f0000), size(16384)
mpt2sas0: ioport(0x000000000000e000), size(256)
mpt2sas0: sending message unit reset !!
mpt2sas0: message unit reset: SUCCESS
mpt2sas0: Allocated physical memory: size(7441 kB)
mpt2sas0: Current Controller Queue Depth(3305), Max Controller Queue Depth(3432)
mpt2sas0: Scatter Gather Elements per IO(128)
mpt2sas0: LSISAS2008: FWVersion(13.00.57.00), ChipRevision(0x03), BiosVersion(07.25.00.00)
mpt2sas0: Protocol=(Initiator,Target), Capabilities=(TLR,EEDP,Snapshot Buffer,Diag Trace Buffer,Task Set Full,NCQ)
mpt2sas0: sending port enable !!
mpt2sas0: host_add: handle(0x0001), sas_addr(0x5000000080000000), phys(8)
mpt2sas0: port enable: SUCCESS

SUCCESS! Lot’s of SUCCESS! Just the way I like it! Haha, card intialized, had access to drives, etc…

Configured the RAID 5 Array using a 256kb chunk size. I also changed the “stripe_cache_size” to 2048 (the system has 4GB of RAM) to increase the RAID 5 performance.

cd /sys/block/md0/md/

echo 2048 > stripe_cache_size

At this point I simply formatted the drive using EXT4. Configured some folders, NFS exports, and then used Storage vMotion to migrate the Virtual Machines from the iSCSI target, to the new RAID5 array (currently using NFS). The main priority right now was to get the VMs off the MSA20 so I could at least create a backup after they have been moved. Next step, I’ll be re-doing the RAID5 array, configuring the md0 device as a iSCSI target using Lio-Target, and formatting it with VMFS. The performance of this Software RAID5 array is already blowing the MSA20 out of the water!

So there you have it! Feel free to post a comment if you have any questions or need any specifics. This setup is rocking away now under high I/O with absolutely no problems whatsoever. I think I may go purchase another 1-2 of these cards!

Jan 262012
 

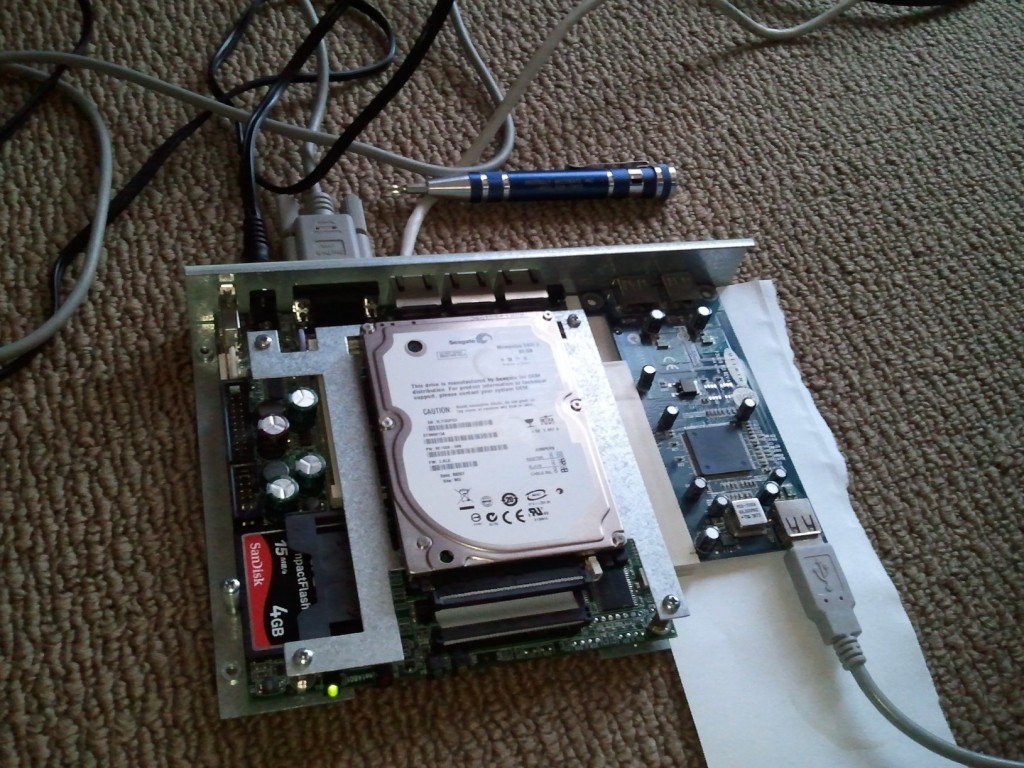
Well, did it. I finally got Ubuntu 10.04 LTS installed and running on my Net4801 (via PXE netboot install and serial console), and got Lio-Target running on it:

root@net4801:~# cat /proc/cpuinfo
processor       : 0
vendor_id       : Geode by NSC
cpu family      : 5
model           : 9
model name      : Unknown
stepping        : 1
cpu MHz         : 266.670
fdiv_bug        : no
hlt_bug         : no
f00f_bug        : no
coma_bug        : no
fpu             : yes
fpu_exception   : yes
cpuid level     : 2
wp              : yes
flags           : fpu tsc msr cx8 cmov mmx cxmmx up
bogomips        : 533.34
clflush size    : 32
cache_alignment : 32
address sizes   : 32 bits physical, 32 bits virtual
power management:

root@net4801:~# /etc/init.d/target status
[—————————] TCM/ConfigFS Status [—————————-]
\——> iblock_0
HBA Index: 1 plugin: iblock version: v3.5.3
\——-> lun0
Status: ACTIVATED  Execute/Left/Max Queue Depth: 0/32/32  SectorSize: 512  MaxSectors: 240
iBlock device: sdc
Major: 8 Minor: 32  CLAIMED: IBLOCK
udev_path: /dev/sdc

[—————————] LIO-Target Status [—————————-]
\——> iqn.2010.com.digitallyaccurate.net4801:lun0
\——-> tpgt_1  TargetAlias: LIO Target
TPG Status: ENABLED
TPG Network Portals:
\——-> xxx.xxx.xxx.xxx:3260
TPG Logical Units:
\——-> lun_0/iscsi00 -> target/core/iblock_0/lun0

Target Engine Core ConfigFS Infrastructure v3.5.3 on Linux/i586 on 2.6.32-38-386
Linux-iSCSI.org Target v3.5.3 on Linux/i586 on 2.6.32-38-386
root@net4801:~#

(IP removed from TPG)

Ubuntu is running off the Compact Flash card. There is a hard drive inside the Net4801 which was used as a block device for the iSCSI target, note the net4801 IDE channel only runs UDMA/33. After testing this, I popped in a USB 2.0 PCI card, and attached a 500GB USB drive. Please see a pic below:

Tests:

Writing around 1.6MB/sec (CPU utilization ~40%)

Reading around 2.5MB/sec (CPU utilization ~80%)

Please Note:

The test numbers are not exactly correct due to caching Windows performs.

Jan 262012
 

Well, for all you people out there considering extending your MSA20 RAID Array or transforming the RAID type, but are concerned about how long it will take…

I recently added a 250GB drive to a RAID5 array consisting of 9 X 250GB disks. Adding another 250GB disk to the RAID 5 array, took less then 8 hours (it actually could have been WAY less) to add the drive. Extending the logical partition took no time at all.

One thing I do have to caution though, I did a test transformation converting a RAID 5 array to a RAID 6. It started off going fast, once it hit 25% it sat there, only increasing 1% every 1-2 days. After 4 days I finally killed the transformation. PLEASE NOTE: There is a chance this may have had to do with a damaged drive, and I think that may have had something to do with the issue. This will need further testing. Also, just so you are aware, you CANNOT cancel a transformation. I stopped mine by simply turning off the unit, and ALL data was destroyed. If you start a transformation, you NEED to let it complete.

ALWAYS insure you have a COMPLETE backup before doing these types of things to a RAID array!

Oct 142011
 

In this tutorial, I will be showing you how to get Lio-Target (an iSCSI target that is compatible with persistent reservations required by both VMware and MS Clustering) running on CentOS 6.

While this tutorial is targetted for CentOS 6 users, I see no reason why this should work on any other newer distributions.

Please note that while Lio-Target 4.x (and required tcm_loop and iSCSI) is available on newer/non-stable development kernels, Lio 3.X is stable, and currently builds nicely on CentOS 6. I will be doing up a tutorial for Lio 4.X once I myself start using it.

One more note, In the past I have thrown up a few tutorials on how to get Lio-Target running on various Linux distributions. These tutorials have worked for some, and not for others. I myself have had a few difficulties replicating the success I did originally. I myself am a technical guy, I do not understand some developer terms, and am not an expert in understanding some development cycles. This is one of the reasons why I had so many difficulties earlier. Since the earlier tutorials, I have caught up to speed and am familiar with what is required to get Lio-Target running.

Now on to the tutorial:

It is a good idea to start with a fresh install of CentOS 6. Make sure you do not have any of the iSCSI target packages installed that ship with CentOS. In my case I had to remove a package called something like “iSCSI-Target-utils” (This shipped with the CentOS 6 install).

1. Let’s download the software. We need to download both the 3.5 version of Lio-Target, along with Lio-utils which was built for 3.x of Lio-Target. (I chose the RisingTide Systems GIT repo since lio related projects have been missing from kernel.org’s GIT repo due to the issues kernel.org has been having recently).

Issue the following commands:

git clone git://risingtidesystems.com/lio-core-backports.git lio-core-backports.git

git clone git://risingtidesystems.com/lio-utils.git lio-utils.git

cd lio-utils.git/

git checkout --track -b lio-3.5 origin/lio-3.5

cd ..

(You have now downloaded both Lio-Target 3.5 backport, and lio-utils for lio-target 3.x)

2. Build kernel modules for your existing running CentOS kernel. Make sure you change in to the lio-core-backports directory first.

Change in to the lio-core-backports directory then issue the following commands:

make

make install

(You have now built, and installed the kernel modules for Lio-Target)

3. Build lio-utils and install. This is one of the tasks I had difficulties with, for some reason the install scripts were calling out to the incorrect python directory, I found a fix to this myself.

Apply the fix first:

Go into the tcm-py and lio-py directories inside of the lio-utils directory. Open the install.sh in both the tcm-py and lio-py directories and change the “SITE_PACKAGES” string to reflect the following:

SITE_PACKAGES=/usr/lib/python2.6/site-packages

Remember to do this in both the install.sh files for lio-py and tcm-py. Now on to building and installing lio-utils.

Issue the following commands from the lio-utils directory:

make

make install

And you are now done!

Lio-Target and Lio-Utils have no succesfully been installed. As you can see, this was way easier than my previous tutorials, and doesn’t include and rebuilding of kernels, etc… One of the plus’s is that you actually build the kernel modules for the existing CentOS kernel.

One last thing. Start lio-target by issuing the command:

/etc/init.d/target start

And do a ‘dmesg’ to confirm that it started ok!

As always, feel free to post any comments or questions. I’ll do my best to help!

Apr 152011
 

I thought I’d pass this on to all you iSCSI enthusiasts out there!

This morning I received an e-mail forwarded on by someone.

Apparently the Microsoft iSCSI Target Software is now free and runs on Windows Server 2008 R2.

Article:

http://blogs.technet.com/b/canitpro/archive/2011/04/05/the-microsoft-iscsi-software-target-is-now-free.aspx

I plan on getting this installed, setup, and configured sometime in the next couple weeks to test with my VMware vSphere environment. I’ll post my results 🙂 Happy SANing!

Oct 202010
 

Well, my Ubuntu Server box running Lio-Target is still running great, and performing perfectly under the continous stress testing I’ve done.

While I’m waiting for a few more days of the stress test to finish, I’m setting up my old Soekris Net4801.

I’m install Ubuntu Server 10.04 TLS on to the Soekris Net4801 via remote PXE netboot. Afterwards I’m going to compile Lio-target 3.4 (kernel 2.6.34) on the device and test out performance of the iSCSI target. It won’t be anything special since the net4801 is so slow, but it’ll be interesting to see for sure.

I’ll also be sticking in a PCI – USB2.0 card inside of the net4801 to get USB2.0 speeds on a removal drive.

After this little experiment I might rip out the cross compiler and build Lio-Target on a Linksys WRT610N if I can to check out the performance on that. I know these little devices have quite a bit of power, gigabit networking, and a single USB 2.0 port built right in!

As promised I’ll be posting more detailed posts in the future once all the fun is done!

Oct 082010
 

Just got my test network setup:

  1. HP Proliant ML350 G5 – Running ESXi
  2. HP Proliant DL360 G5 – Running ESXi
  3. HP Proliant DL360 G5 – Running ESXi
  4. Custom Intel Server – Running vSphere (management server)
  5. Super Micro Server – Running CentOS 5.5 with lio-target (iSCSI Target)
  6. 2 X HP MSA20 – Running Multiple Arrays/Targets connected to Super Micro Server

The HP servers are booting ESXi via USB keys. The Super Micro Server has one single internal drive for OS, and connected to multiple MSA20 arrays acting as iSCSI targets. The custom intel server is running the vSphere vCenter Management software.

I’ve Storage vMotion’ed multiple test VMs to the iSCSI arrays. Currently testing! Speed is AMAZING! And judging from the logs on the Super Micro Server, the iSCSI SCSI persistent reservations ARE being handled properly J

More to come, stay posted!

Update: After testing this for a few days, I noticed that although SCSI reservations were being handled properly (which is great), for some reason the kernel on the storage server would stall. Causing the storage system to crash. I’ve only been able to get it to do this, when two ESXi boxes are concurrently accessing the same datastore. I’ve been trying to re-replicate this in different circumstances (one ESXi initiator, using Windows to test the target, etc… but have been unable). I might test the 4.0 release candidate soon.

Oct 052010
 

PLEASE VISIT http://www.stephenwagner.com/?p=300 FOR AN UPDATED TUTORIAL.


Disclaimer: Please note that whenever doing any of the steps mentioned in this post, if you do not know what you are doing, you can render your linux install usless. Please do NOT use this in a production environment, and only use for testing. I’m not liable if you toast your linux install.

First and foremost, you need to know that from what I understand, the typical kernels that ship with CentOS have numerous patches, modifications, and updates from the typical Linux kernel releases. This is one reason why the releases of the kernels are always behind compared to ones that are actively being developed. I could be wrong, but I think the Redhat kernel patches are applied to CentOS kernels.

This tutorial will walk you through on how to get you up and running in the dirtiest and quickest method. You may and probably will have to modify things, re-compile, etc… to resolve any issues you may run in to.

I wrote this article only to help more people get up and running with one of the only open-source Linux iSCSI targets that has been certified by VMware (Certified when running on certain appliances) to be used in a vSphere environment (supports Vmotion, SCSI reservations, etc…)

I’m going to assume you have CentOS 5.5 installed and is fully up to date.

Anyways, here’s a breakdown of what we will be doing to get Lio-Target to run on CentOS:

  • Download lio-target modified kernel
  • Download lio-utils
  • Compile a modified kernel using existing kernel .config file
  • Compile and install lio-utils
  • Sample commands to setup a dedicated drive on your system as a iSCSI target (to test)
  • Compose two quick and dirty config files so lio-target can run

Download the lio-target modified kernel

For this step, you will need to have git installed. From what I understand git is not an option during the CentOS install, and cannot be installed using the default typical yum repos. To get git installed, we will first add the “RPMFusion” and “EPEL” yum repos.

(Info on how to install these can be found at http://rpmfusion.org/ and https://fedoraproject.org/wiki/EPEL)

Once you have installed these, it’s time to install git. This can be easily done by typing:

yum install git

After git is installed, it’s now time to download the lio-target kernel.

Type in:

git clone git://git.kernel.org/pub/scm/linux/kernel/git/nab/lio-core-2.6.git lio-core-2.6.git

It is now downloading the source. After this is complete, change directory to the new directory that was created, and type in:

git checkout origin/lio-3.4

You now have the source.

Download lio-utils

This is a pretty simple step. If you just completed the step above, make sure you cd back in to a directory that you can use as a workspace, and make sure you do NOT do this, inside of the directory that was downloaded above. Type in:

git clone git://git.kernel.org/pub/scm/linux/storage/lio/lio-utils.git lio-utils.git

This should create a directory called “lio-utils.git”. This step is done.

At this point

You should have two directories inside of your workspace:

lio-core-2.6.git

lio-utils.git

Compile a modified kernel using existing kernel .config file

It is now time to build a kernel. First of all, issue a uname –a and note the kernel you are running. In my case it’s “2.6.18-194.17.1.el5”. I’m going to take a config file from the boot directory that matches the number, and copy it to the lio-core-2.6.git directory, only change the name to “.config”. This is what I would type in on my end:

cp /boot/config-2.6.18-194.17.1.el5 /root/lio-core-2.6.git/.config

This command above would copy the config for the CentOS kernel, and move it to the lio-core-2.6.git directory with the new name of “.config”. Now change into the lio-core-2.6.git directory:

cd lio-core-2.6.git

At this point we are going to run a command to help the config adjust to the newer kernel version. Type in:

make oldconfig

This will spawn numerous messages. You can just go ahead and keep hitting enter. It will seem like an endless loop, however eventually it will complete. Now the next step, this is important. By default, new kernels use a different sysfs structure. We need to turn on the depreciated item that CentOS uses. Type in:

make menuconfig

Navigate to:

“General Setup”, then check (put a star in the box) for “enable deprecated sysfs features to support old userspace tools”.

Now hit tab to select exit. Once again tab to exit at the main menu. We are now ready to compile! To do a quick compile, type in:

make && make modules && make modules_install && make install

Feel free to disapeer for a while. This will take some time depending on the performance of your system. Once done, you now have a kernel with lio-target built in that is compiled and installed.

Keep in mind that this is NOT the default kernel, and you will have to select this to boot when starting your system. To change this, modify /etc/grub.conf and change the default value to whichever item it is (remember that the first item is 0, and not 1).

Let’s boot the new kernel. Safely shut down your linux box, reboot, and when grub shows up, boot using the new kernel you compiled.

Please note: This guide is a quick and dirty way to get this up and running. Since we skipped customizing the kernel, the kernel you compiled will no doubt come up with errors on boot. I simply ignore this. You can too, just to get this up and running. You can come back at a later time and refine your custom kernel to be used.

Compile and install lio-utils

This is simple. Change directory to the directory where you downloaded lio-utils.

cd /root/lio-utils.git

And to compile and install:

make

make install

And BAM, you’re done, that was easy!

Sample commands to setup a dedicated drive on your system as a iSCSI target (to test)

It’s show time. I’m still fairly new to the configuration and usage of lio-target, so I’m just posting the commands to get it working on a dedicated disk. There are no manual (man page) entries installed by lio-utils, so you will need to use lio_node –help and tcm_node –help for more information on proper usage.

Keep in mind, DO NOT use your linux disk as a iSCSI target! Let’s pertend we have a second disk in the system /dev/sdb that we want to turn in to a target. This is what we would type:

tcm_node –block iblock_0/array /dev/sdb

/etc/init.d/target start

lio_node –addlun iqn.2010.com.stephenwagner.iscsi:array 1 0 iscsi00 iblock_0/array

lio_node –listendpoints

lio_node –addnp iqn.2010.com.stephenwagner.iscsi:array 1 192.168.0.10:3260

lio_node –listendpoints

lio_node –disableauth iqn.2010.com.stephenwagner.iscsi:array 1

lio_node –addlunacl iqn.2010.com.stephenwagner.iscsi:array 1 iqn.CLIENTINITIATORHERE.com 0 0

lio_node –enabletpg iqn.2010.com.stephenwagner.iscsi:array 1

The above will create a target, and discovery portal for /dev/sdb on 192.168.0.10. This will also disable CHAP authentication, and will allow the initator I specified above to connect.

Please change /dev/sdb to the drive you want to use

Please change iqn.2010.com.stephenwagner.iscsi:array to the iSCSI target you want to call yours.

Please change 192.168.0.10 to the IP of the iSCSI target your configuring. Leave port as 3260.

Please change iqn.CLIENTINITIATORHERE.com to the iqn for your initiator (client). This will be set on the client you are using to connect to the iSCSI target.

BAM, your target is up and running! Keep in mind, this configuration is lost upon reboot.

Compose two quick and dirty config files so lio-target can run

Here’s what you need to put in the config files to make the above config work on boot:

/etc/target/tcm_start.sh should contain:

tcm_node –block iblock_0/array /dev/sdb

/etc/target/lio_start.sh should contain:

lio_node –addlun iqn.2010.com.stephenwagner.iscsi:array 1 0 iscsi00 iblock_0/array

lio_node –addnp iqn.2010.com.stephenwagner.iscsi:array 1 192.168.0.10:3260

lio_node –disableauth iqn.2010.com.stephenwagner.iscsi:array 1

lio_node –addlunacl iqn.2010.com.stephenwagner.iscsi:array 1 iqn.1991-05.com.CLIENTINITATOR.com 0 0

lio_node –enabletpg iqn.2010.com.stephenwagner.iscsi:array 1

After you make these config files. You should be able to start lio-target in a running state, by issuing:

/etc/init.d/target start

And remember, that you can always view a live feed of what’s going on by issuing:

tail –f /var/log/messages

Hope this helps!