Jun 192022
 
VMware vSphere 7 Logo

We all know that vMotion is awesome, but what is even more awesome? Optimizing VMware vMotion to make it redundant and faster!

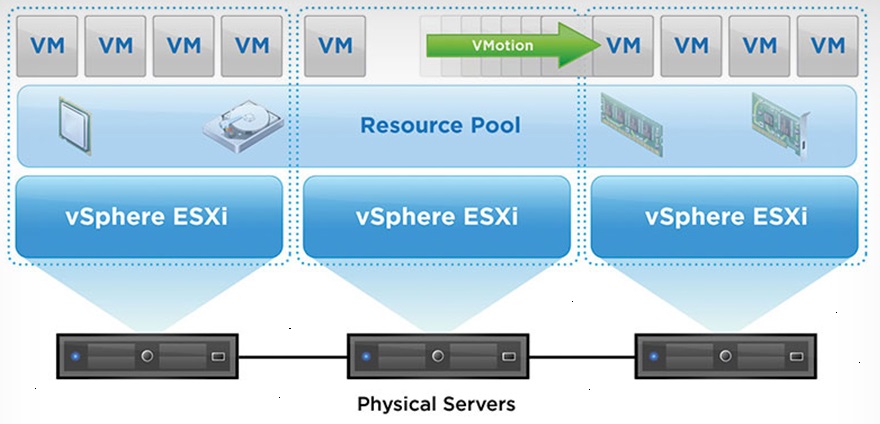
vMotion allows us to migrate live Virtual Machines from one ESXi host to another without any downtime. This allows us to perform physical maintenance on the ESXi hosts, update and restart the hosts, and also load balance VMs across the hosts. We can even take this a step further use DRS (Distributed Resource Scheduler) automation to intelligently load the hosts on VM boot and to dynamically load balance the VMs as they run.

Picture of VMware vMotion diagram
VMware vMotion

In this post, I’m hoping to provide information on how to fully optimize and use vMotion to it’s full potential.

VMware vMotion

Most of you are probably running vMotion in your environment, whether it’s a homelab, dev environment, or production environment.

I typically see vMotion deployed on the existing data network in smaller environments, I see it deployed on it’s own network in larger environments, and in very highly configured environments I see it being used with the vMotion TCP stack.

While you can preform a vMotion with 1Gb networking, you certainly almost always want at least 10Gb networking for the vMotion network, to avoid any long running VMs. Typically most IT admins are happy with live migration vMotion’s in the seconds, and not the minutes.

VMware vMotion Optimization

So you might ask, if vMotion is working and you’re satisfied, what is there to optimize? There’s actually a few things, but first let’s talk about what we can improve on.

We’re aiming for improvements with:

  • Throughput/Speed
    • Faster vMotion
      • Faster Speed
      • Less Time
    • Migrate more VMs
      • Evacuate hosts faster
      • Enable more aggressive DRS
      • Migrate many VMs at once very quickly
  • Redundancy
    • Redundant vMotion Interfaces (NICs and Uplinks)
  • More Complex vMotion Configurations
    • vMotion over different subnets and VLANs
      • vMotion routed over Layer 3 networks

To achieve the above, we can focus on the following optimizations:

  1. Enable Jumbo Frames
  2. Saturation of NIC/Uplink for vMotion
  3. Multi-NIC/Uplink vMotion
  4. Use of the vMotion TCP Stack

Let’s get to it!

Enable Jumbo Frames

I can’t stress enough how important it is to use Jumbo Frames for specialized network traffic on high speed network links. I highly recommend you enable Jumbo Frames on your vMotion network.

Note, that you’ll need to have a physical switch and NICs that supports Jumbo frames.

In my own high throughput testing on a 10Gb link, without using Jumbo frames I was only able to achieve transfer speeds of ~6.7Gbps, whereas enabling Jumbo Frames allowed me to achieve speeds of ~9.8Gbps.

When enabling this inside of vSphere and/or ESXi, you’ll need to make sure you change and update the applicable vmk adapter, vSwitch/vDS switches, and port groups. Additionally as mentioned above you’ll need to enable it on your physical switches.

You may assume that once you configure a vMotion enabled NIC, that when performing migrations you will be able to fully saturate it. This is not necessarily the case!

When performing a vMotion, the vmk adapter is bound to a single thread (or CPU core). Depending on the power of your processor and the speed of the NIC, you may not actually be able to fully saturate a single 10Gb uplink.

In my own testing in my homelab, I needed to have a total of 2 VMK adapters to saturate a single 10Gb link.

If you’re running 40Gb or even 100Gb, you definitely want to look at adding multiple VMK adapters to your vMotion network to be able to fully saturate a single NIC or Uplink.

You can do this by simply configuring multiple VMK adapters per host with different IP addresses on the same subnet.

One important thing to mention is that if you have multiple physical NICs and Uplinks connected to your vMotion switch, this change will not help you utilize multiple physical interfaces (NICs/Uplinks). See “Multi-NIC/Uplink vMotion”.

Please note: As of VMware vSphere 7 Update 2, the above is not required as vMotion has been optimized to use multiple streams to fully saturate the interface. See VMware’s blog post “Faster vMotion Makes Balancing Workloads Invisible” for more information.

Multi-NIC/Uplink vMotion

Another situation is where we may want to utilize multiple NICs and Uplinks for vMotion. When implemented correctly, this can provide load balancing (additional throughput) as well as redundancy on the vMotion network.

If you were to simply add additional NIC interfaces as Uplinks to your vMotion network, this would add redundancy in the event of a failover but it wouldn’t actually result in increased speed or throughput as special configuration is required.

To take advantage of the additional bandwidth made available by additional Uplinks, we need to specially configure multiple portgroups on the switch (vSwitch or vDS Distributed Switch), and configure each portgroup to only use one of the Uplinks as the “Active Uplink” with the rest of the uplinks under “Standby Uplink”.

Example Configuration

  • vSwitch or vDS Switch
    • Portgroup 1
      • Active Uplink: Uplink 1
      • Standby Uplinks: Uplink 2, Uplink 3, Uplink 4
    • Portgroup 2
      • Active Uplink: Uplink 2
      • Standby Uplinks: Uplink 1, Uplink 3, Uplink 4
    • Portgroup 3
      • Active Uplink: Uplink 3
      • Standby Uplinks: Uplink 1, Uplink 2, Uplink 4
    • Portgroup 4
      • Active Uplink: Uplink 4
      • Standby Uplinks: Uplink 1, Uplink 2, Uplink 3

You would then place a single or multiple vmk adapters on each of the portgroups per host, which would result in essentially mapping the vmk(s) to the specific uplink. This will allow you to utilize multiple NICs for vMotion.

And remember, you may not be able to fully saturate a NIC interface (as stated above) with a single vmk adapter, so I highly recommend creating multiple vmk adapters on each of the Port groups above to make sure that you’re not only using multiple NICs, but that you can also fully saturate each of the NICs.

For more information, see VMware’s KB “Multiple-NIC vMotion in vSphere (2007467)“.

Use of the vMotion TCP Stack

VMware released the vMotion TCP Stack to provided added security to vMotion capabilities, as well as introduce vMotion over multiple subnets (routed vMotion over layer 3).

Using the vMotion TCP Stack, you can isolate and have the vMotion network using it’s own gateway separate from the other vmk adapters using the traditional TCP stack on the ESXi host.

This stack is optimized for vMotion.

Please note, that troubleshooting processes may be different when Troubleshooting vMotion using the vMotion TCP/IP Stack (click the link for my blog post on troubleshooting).

For more information, see VMware’s Documentation on “vMotion TCP/IP Stack“.

Additional resources:

VMware – How to Tune vMotion for Lower Migration Times?

Jun 182022
 
Nvidia GRID Logo

When performing a VMware vMotion on a Virtual Machine with an NVIDIA vGPU attached to it, the VM may freeze during migration. Additionally, when performing a vMotion on a VM without a vGPU, the VM does not freeze during migration.

So why is it that adding a vGPU to a VM causes it to become frozen during vMotion? This is referred to as the VM Stun Time.

I’m going to explain why this happens, and what you can do to reduce these STUN times.

VMware vMotion

First, let’s start with traditional vMotion without a vGPU attached.

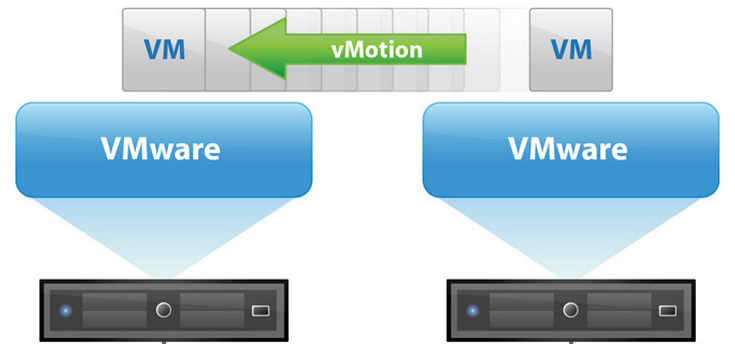
VMware vMotion with vSphere and ESXi
VMware vMotion with vSphere

vMotion allows us to live migrate a Virtual Machine instance from one ESXi host, to another, with (visibly) no downtime. You’ll notice that I put “visibly” in brackets…

When performing a vMotion, vSphere will migrate the VM’s memory from the source to destination host and create checkpoints. It will then continue to copy memory deltas including changes blocks after the initial copy.

Essentially vMotion copies the memory of the instance, then initiates more copies to copy over the changes after the original transfer was completed, until the point where it’s all copied and the instance is now running on the destination host.

VMware vMotion with vGPU

For some time, we have had the ability to perform a vMotion with a VM that as a GPU attached to it.

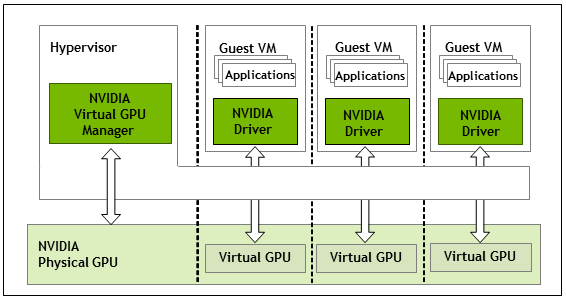
VMware vSphere with NVIDIA vGPU
VMware VMs with vGPU

However, in this situation things work slightly different. When performing a vMotion, it’s not only the system RAM memory that needs to be transferred, but the GPU’s memory (VRAM) as well.

Unfortunately the checkpoint/delta transfer technology that’s used with then system RAM isn’t available to transfer the GPU, which means that the VM has to be stunned (frozen) to stop it so that the video RAM can be transferred and then the instance can be initialized on the destination host.

STUN Time

The STUN time is essentially the time it takes to transfer the video RAM (framebuffer) from one host to another.

When researching this, you may find examples of the time it takes to transfer various sizes of VRAM. An example would be from VMware’s documentation “Using vMotion to Migrate vGPU Virtual Machines“:

NVIDIA vGPU Estimated STUN Times
Expected STUN Times for vMotion with vGPU on 10Gig vMotion NIC

However, it will always vary depending on a number of factors. These factors include:

  • vMotion Network Speed
  • vMotion Network Optimization
    • Multi-NIC vMotion to utilize multiple NICs
    • Multi-vmk vMotion to optimize and saturate single NICs
  • Server Load
  • Network Throughput
  • The number of VM’s that are currently being migrated with vMotion

As you can see, there’s a number of things that play in to this. If you have a single 10Gig link for vMotion and you’re migrating many VMs with a vGPU, it’s obviously going to take longer than if you were just migrating a single VM with a vGPU.

Optimizing and Minimizing vGPU STUN Time

There’s a number of things we can look at to minimize the vGPU STUN times. This includes:

  • Upgrading networking throughput with faster NICs
  • Optimizing vMotion (Configure multiple vMotion VMK adapters to saturate a NIC)
  • Configure Multi-NIC vMotion (Utilize multiple physical NICs to increase vMotion throughput)
  • Reduce DRS aggressiveness
  • Migrate fewer VMs at the same time

All of the above can be implemented together, which I would actually recommend.

In short, the faster we migrate the VM, the less the STUN Time will be. Check out my blog post on Optimizing VMware vMotion which includes how to perform the above recommendations.

Hope this helps!

Jan 162022
 

Welcome to Episode 04 of The Tech Journal Vlog at www.StephenWagner.com

The Tech Journal Vlog Episode 04

In this episode

Updates

  • VMware Horizon
    • Apache Log4j Mitigation with VMware Products
  • Homelab Update
    • HPE MSA 2040 vs Synology DS1621+
    • Migrating from MSA 2040 to a Synology DS1621+
    • Synology Benchmarking NVME Cache
  • DST Root CA X3 Expiration
    • End of Life Operating Systems

New Blog/Video Posts

Life Update/Fun Stuff

  • Work
  • Travel
  • Move

Current Projects

  • Synology DS1621+

Don’t forget to like and subscribe!
Leave a comment, feedback, or suggestions!

Oct 102021
 
VMware vSphere 7 Logo

In this post, I wanted to go over some Backup and Restore tips and tricks when it comes to VMware vCSA Updates and Upgrades.

We’ve almost all been there, performing an update or upgrade of the VMware vCenter Server Appliance when it fails, and we must restore from a backup. There’s also times where the update or upgrade has been successful, however numerous issues occur afterwards prompting for the requirement of a restore from backup.

In this post, I wanted to briefly go over the methods of backups (and restores) for the vCSA, as well as some Tips and Tricks which might help you out for avoiding failed updates or upgrades in the future!

We all want to avoid a failed update or upgrade! 🙂

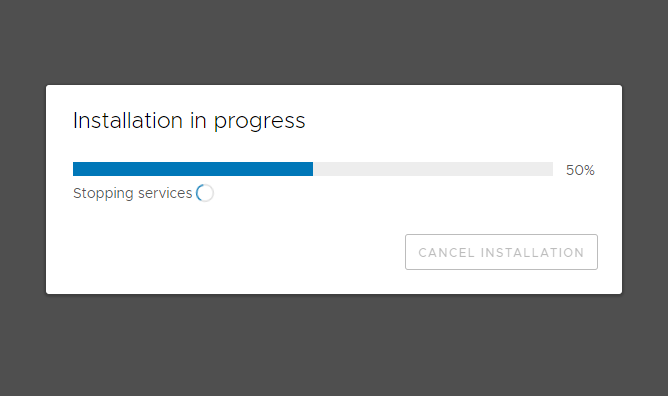
vCSA Update Installation

VMware vCSA Update Tips and Tricks for Backup and Restore

Please enjoy this video version of the blog post:

vCSA Update and Upgrade – Tips and Tricks for Backup and Restore

vCSA Backup methods

There are essentially two backup methods for backing up the vCenter Server Appliance:

  1. vCSA Management Interface Backup
  2. vSphere/ESXi Virtual Machine Snapshot

vCSA Management Interface Backup

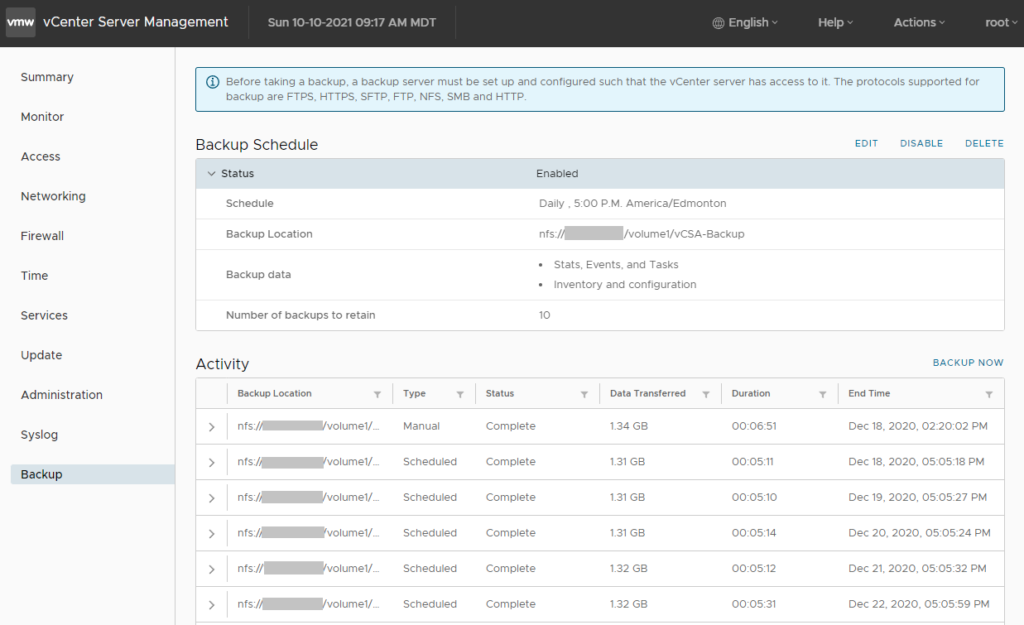
If you log in to the vCSA Management Interface, you can configure a scheduled backup that will perform a full backup of your vCSA (and vCenter Server) instance.

This backup can be automatically ran and saved to an HTTP, HTTPS, FTP, FTPS, SFTP, NFS, or SMB destination. It’s a no-brainer if you have a Windows File Server or an NFS datastore.

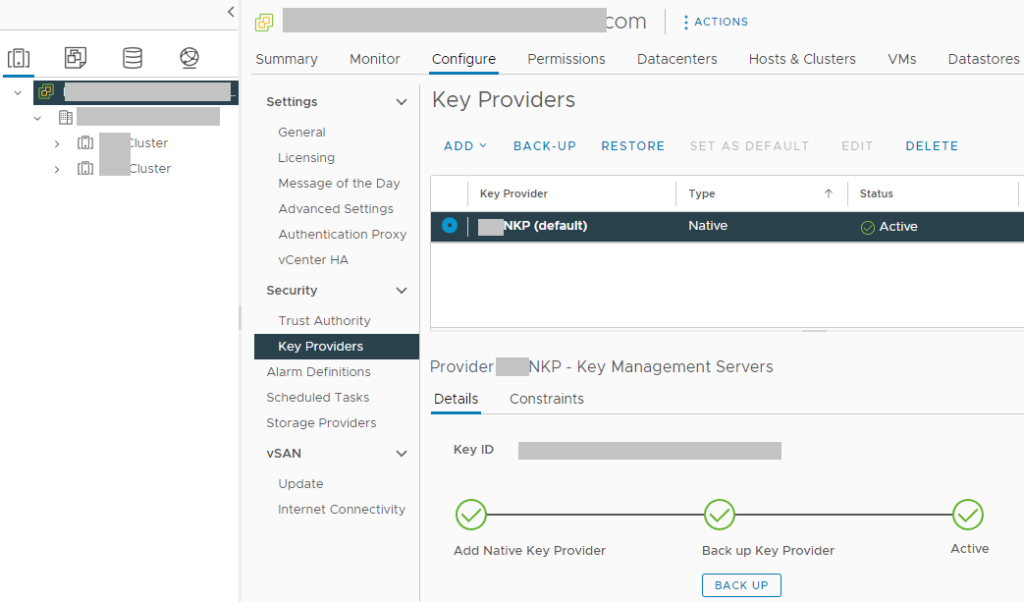
vCSA Backup Screenshot
vCSA Backup

In the event of a failed update/upgrade or a disaster, this backup can be restored to a new vCSA instance to recover from the failure.

For more information on backups from the vCSA Management Interface, please see https://docs.vmware.com/en/VMware-vSphere/7.0/com.vmware.vcenter.install.doc/GUID-8C9D5260-291C-44EB-A79C-BFFF506F2216.html.

For information on restoring a vCSA file based backup, please see https://docs.vmware.com/en/VMware-vSphere/7.0/com.vmware.vcenter.install.doc/GUID-F02AF073-7CFD-45B2-ACC8-DE3B6ED28022.html.

vSphere/ESXi Virtual Machine Snapshot

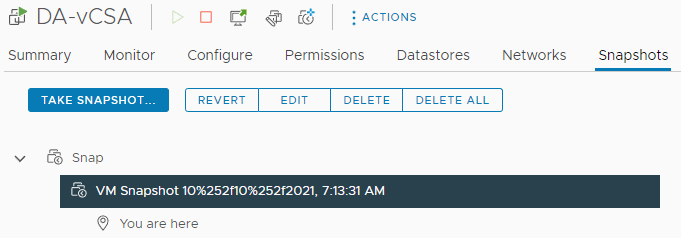
In addition to the scheduled automatic backups configured above, you should snapshot your vCSA appliance VM prior to initiating an update or upgrade. In the event of a failure, you can easily restore the vCSA VM snapshot to get back to a running state.

vCSA Snapshot Screenshot
vCSA Snapshot

Only after you test and confirm the upgrade or update was successful should you delete the snapshot.

You should also have your Backup application or suite performing regularly snapshot based backups of your vCSA.

Additional Tips and Tricks

I have a few very important tips and tricks to share which may help you either avoid a failed update or upgrade, or increase the chances of a successful restore from backup.

  1. Gracefully Shutdown and Restart the vCSA Appliance before Upgrading
  2. Application Consistent Snapshot – Snapshot after graceful shutdown

Let’s dive in to these below.

Gracefully Shutdown and Restart the vCSA Appliance before Upgrading

I noticed that I significantly reduced the amount of failed upgrades by simply gracefully shutting down and restarting the vCenter Server Appliance prior to an upgrade.

This allows you to clear out the memory, virtual memory, and restart all vCenter services prior to starting the upgrade.

Please Note: Make sure that you give the vCSA appliance enough time to boot, start services, and let some of the maintenance tasks run before initiating an upgrade.

Application Consistent Snapshot – Snapshot after graceful shutdown

Most VMware System Administrators I have talked to, usually snapshot the running vCSA appliance and do not snapshot the memory. This creates a crash consistent snapshot.

If you follow my advice above and gracefully shutdown and restart the vCSA appliance, you can use this time to perform a VM snapshot after a graceful shutdown. This will provide you with an application consistent snapshot instead of a crash consistent snapshot.

If you perform an application consistent snapshot by gracefully shutting down the VM prior to creating the snapshot, the virtual machine and database inside of it will be in a cleaner state.

Conclusion

Some of the Tips and Tricks in this post definitely aren’t necessary, however they can help you increase the chance of a successful upgrade, and a successful restore in the event of a failed upgrade.

For more information on upgrading the vCenter Server Appliance, please visit https://docs.vmware.com/en/VMware-vSphere/7.0/com.vmware.vcenter.upgrade.doc/GUID-30485437-B107-42EC-A0A8-A03334CFC825.html.

Sep 202021
 

Welcome to Episode 03.1 of The Tech Journal Vlog (Special Episode on VMware Horizon 8 Version 2106)

In this episode – VMware Horizon 8 Version 2106

This is a special episode dedicated to the release of VMware Horizon View 8, version 2106.

What’s new

In the video, I cover what’s new in the 2106 release.

My Favorite Changes & Enhancements:

  • Audio recording support for 48Khz Audio via RTAV, defaults to 16Khz
    • Persistence on Audio quality recording settings across sessions
    • Sample Rate can be configured via GPO
  • VMware Horizon Linux Client supports Microsoft Teams Optimization
    • Linux Based Zero Clients should add functionality shortly (10ZiG already has!)
  • Raspberry Pi 4 Support!!!!
    • Also supports RTAV

Other interesting changes and enhancements:

  • UI Change on VMware Horizon Client
  • Instant Clones now support SysPrep: Instant Clones with Parent
    • No duplicate SIDs when using SysPrep
  • Ability to use 6 x 4K Displays
  • No Longer have to re-install VMware Horizon Agent after VMware Tools Upgrade
  • Forgot to mention: Support added for USB Redirection with Xbox Gaming Controllers

Additional Items:

  • VMware OSOT Optimization tool Versioning now matches Horizon
    • Removal of Custom Templates
  • VMware VDI Base Image Creation Guide has been updated
    • New guide on automating the VMware VDI Base Image Creation added

Links Mentioned in this post:

Don’t forget to like and subscribe!

Leave a comment, feedback, or suggestions!