May 142019
 

There may be a point in time where you may wish to clear and rebuild the search index catalog on your Microsoft Exchange 2016 Server. This will cause the server to rebuild the search index from scratch.

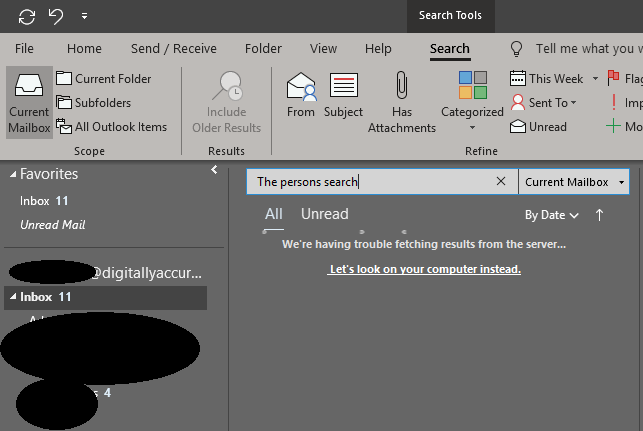
In my case, for the past month or so Outlook 2019 (Office 365) clients connecting to an on-premise Microsoft Exchange 2016 Server, have been seeing the message “We’re having trouble fetching results from the server…”. The user can click on “Let’s look on your computer instead.” and the search will complete.

When troubleshooting this issue, I tried all of the following:

  • Clearing and rebuilding the Search index on the client computers
  • Deleted the OST files to re-create the local cached copy on the client computers
  • Restarting the Exchange Server
  • Restarting the Client Computers
  • Analyzing the Event Log for any errors (none)

None of the above helped in troubleshooting.

We're having trouble fetching results from the server...
Outlook: “We’re having trouble fetching results from the server…”

Because of this, I decided to clear and rebuild the Search Index catalog for the mailbox database on the Exchange Server.

To check the status and to see if your index is corrupt, run the following command:

Get-MailboxDatabaseCopyStatus |  ft ContentIndexState

“ContentIndexState” will report as “Corrupt” if it is corrupt, or “Healthy” if it is healthy.

[PS] C:\Windows\system32>Get-MailboxDatabaseCopyStatus |  ft ContentIndexState

ContentIndexState
-----------------
          Healthy

My server reported as healthy, but I still chose to run the instructions below to rebuild the index.

Instructions

To do delete and re-create your Exchange Server Mailbox Database Search Index Catalog, please perform the following instructions.

Please Note: This is only for Exchange servers that are not part of a DAG. Do not perform these steps if your server is part of an Exchange cluster. Always make sure you have a complete backup of your server.

  1. Log on to your Exchange server.
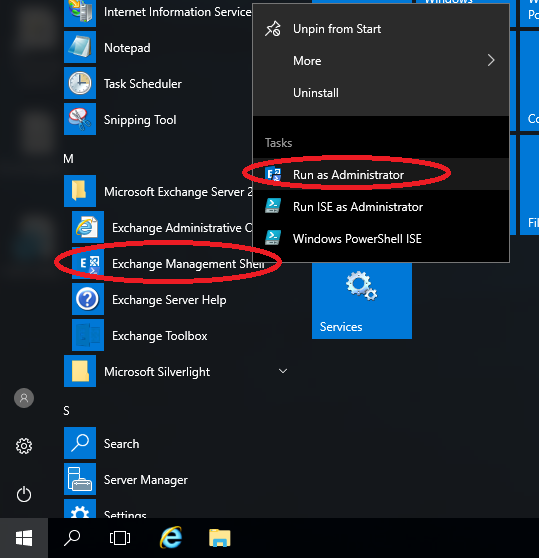
  2. From the Start Menu, expand “Microsoft Exchange Server 2016”, and right-click on “Exchange Management Shell”, and select “Run as Administrator”.
    Administrative Exchange Management Shell
  3. Type the following commands to stop required search services.
    Stop-Service MSExchangeFastSearch
    Stop-Service HostControllerService
  4. Open a file browser (you may need Administrative privilege) and navigate to your Exchange mailbox directory.
    C:\Program Files\Microsoft\Exchange Server\V15\Mailbox\Mailbox Database NumberNumberNumber
  5. You’ll see a folder inside of the mailbox folder with a GUID type name with Single at the end. Delete or move this (preferred is move to alternate location). I’ve put an example below.
    12854239C-1823-8c32-ODJQ-SSDFK123CSDFG.1.Single

    This is the folder you want to move/delete.
  6. Go back to the “Exchange Management Shell”, and run the following commands to start the services.
    Start-Service MSExchangeFastSearch
    Start-Service HostControllerService
  7. As mentioned above, you can check the status of the rebuild by running the “Get-MailboxDatabaseCopyStatus” command, and looking at the “ContentIndexState” status.

That’s it! After running the command, you may notice your server will experience heavy CPU usage due to Exchange rebuilding the search index.

After rebuilding the search index, I noticed that my Outlook clients were able to successfully search on the server without having to select “Let’s look on your computer instead.”.

May 142019
 

On a fresh or existing WSUS install, you may notice that the WSUS Administrator MMC applet stops functioning and present the error “Error: Connection Error – An error occurred trying to connect to the WSUS Server.”

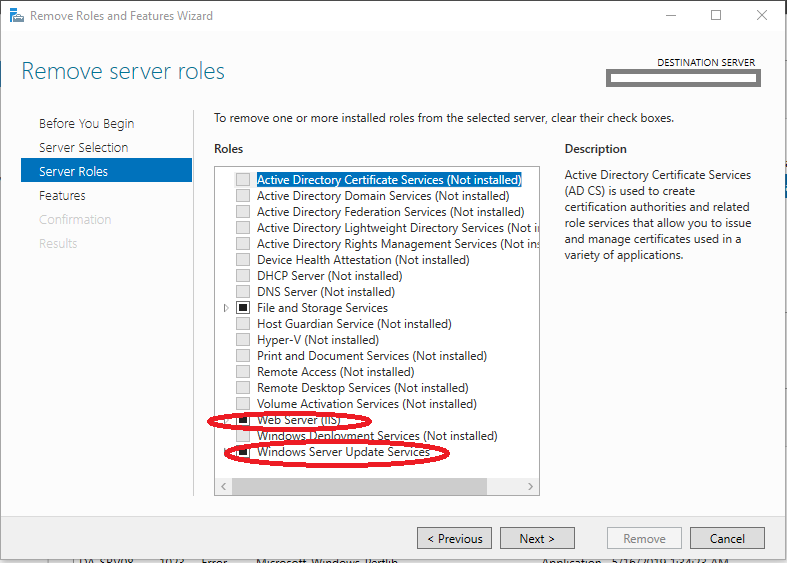
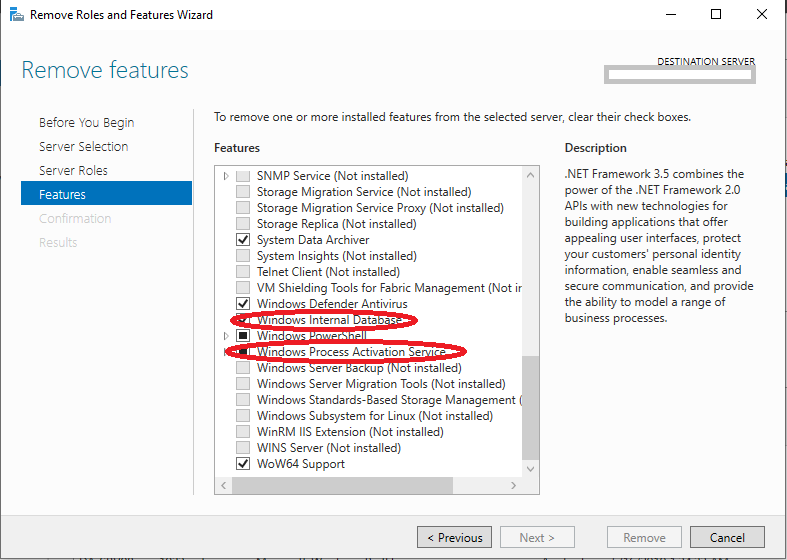
I originally experienced this on Windows Server Update Services running on Windows Server 2012 R2 and applied the fix. Recently, I deployed Windows Server Update Services on a new Windows Server 2019 – Server Core install, and experienced this issue during the first synchronization. Before realizing what the issue was, I attempted to re-install WSUS and IIS from scratch numerous times until I came across old notes. One would have thought they would have resolved this issue on a new server operating system.

When the issue occurs, all processes will appear to be running on the server. Looking at the server event log, you’ll notice multiple application errors:

  • Event ID: 13042 - Windows Server Update Services
    Description: Self-update is not working.
  • Event ID: 12002 - Windows Server Update Services
    Description: The Reporting Web Service is not working.
  • Event ID: 12012 - Windows Server Update Services
    Description: The API Remoting Web Service is not working.
  • Event ID: 12032 - Windows Server Update Services
    Description: The Server Synchronization Web Service is not working.
  • Event ID: 12022 - Windows Server Update Services
    Description: The Client Web Service is not working.
  • Event ID: 12042 - Windows Server Update Services
    Description: The SimpleAuth Web Service is not working.
  • Event ID: 12052 - Windows Server Update Services
    Description: The DSS Authentication Web Service is not working.
  • Event ID: 12072 - Windows Server Update Services
    Description: The WSUS content directory is not accessible.
    System.Net.WebException: The remote server returned an error: (503) Server Unavailable.
       at System.Net.HttpWebRequest.GetResponse()
       at Microsoft.UpdateServices.Internal.HealthMonitoring.HmtWebServices.CheckContentDirWebAccess(EventLoggingType type, HealthEventLogger logger)

You will also see the below error message when attempting to use the WSUS MMC.

WSUS Connection Error presented when memory issue occurs
WSUS 503 Error: Connection Error

The Problem

This issue occurs because the WSUS application pool in IIS “WsusPool” has reached it’s maximum private memory limit and attempts to recycle the memory usage.

Ultimately I believe this causes the IIS worker process to crash since it has run out of memory, and the pending command (whether it’s a synchronization or something else) fails to complete.

Previously, I noticed database corruption on a WSUS SQL Express database when this issue occurred, so I recommend applying the fix on a fresh install of WSUS.

The Fix

To resolve this issue, we need to adjust the max

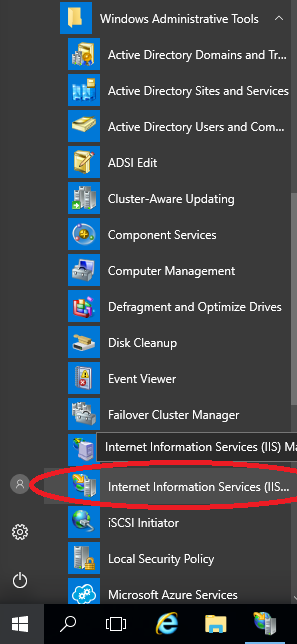
  1. On the server running WSUS and IIS, open the “Internet Information Services (IIS) Manager” inside of the “Windows Administrative Tools” (found in the start menu, or Control Panel).
    Internet Information (IIS) Services in Start Menu
  2. On the left hand side under “Connections”, expand the server, and select “Application Pools”.
    IIS Application Pools Selected
  3. On the right hand side under “Application Pools” heading, right-click on “WsusPool” and select “Advanced Settings”.
    WsusPool Application Pool Selected with Right-Click
  4. In the “Advanced Settings” window, scroll down until you see “Private Memory Limit (KB)”. Either change this to “0” (as shown below) to set no memory limit, or increase the limit to the value you prefer.
    Private Memory Limit set to "0" in WsusPool IIS Application Pool
  5. Select “Ok” to close the window.
  6. Restart IIS by running “iisreset” from an administrative command prompt, restarting the server, or selecting “Restart” under “Manage Server” when looking at the default pane in IIS when the server is selected.

The issue should now be resolved and your WSUS server should no longer be crashing.

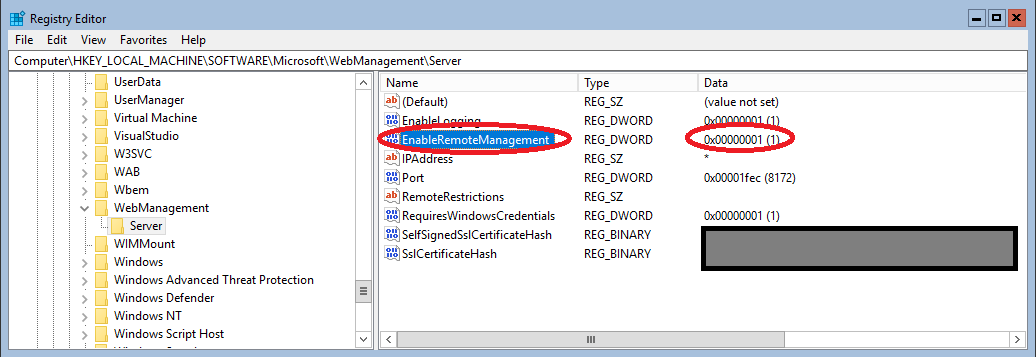
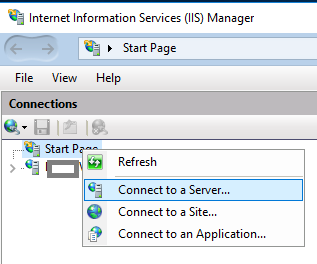
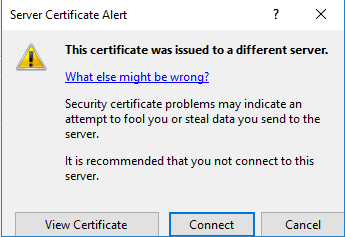
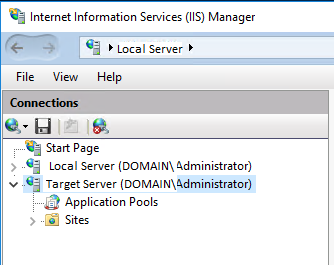
If you are applying this fix on a Server Core install, you’ll need to connect remotely to the IIS instance to apply the fix.

May 082019
 
vSphere Logo Image

We’ve all been in the situation where we need to install a driver, vib file, or check “esxtop”. Many advanced administration tasks on ESXi need to be performed via shell access, and to do this you either need a console on the physical ESXi host, an SSH session, or use the Remote vCLI.

In this blog post, I’m going to be providing a quick “How to” enable SSH on an ESXi host in your VMware Infrastructure using the vCenter flash-based web administration interface. This will allow you to perform the tasks above, as well as use the “esxcli” command which is frequently needed.

This method should work on all vCenter versions up to 6.7, and ESXi versions up to 6.7.

How to Enable SSH on an ESXi Host Server

  1. Log on to your vCenter server.
    vCenter Server Login Window
  2. On the left hand “Navigator” pane, select the ESXi host.
    ESXi Navigator Pane on vCenter Web Interface
  3. On the right hand pane, select the “Configure” tab, then “Security Profile” under “System.
    ESXi Host Configuration under Configure Tab in Web Interface
  4. Scroll down and look for “Services” further to the right and select “Edit”.
    ESXi Host Services in Host Configuration
  5. In the “Edit Security Profile” window, select and highlight “SSH” and then click “Start”.
    ESXi Services List on vCenter web interface
  6. Click “Ok”.

This method can also be used to stop, restart, and change the startup policy to enable or disable SSH starting on boot.

Congratulations, you can now SSH in to your ESXi host!

May 072019
 
VMware Horizon View Icon

So you’ve started to use or test Duo Security’s MFA/2FA technology on your network. You’ve been happy so far and you now want to begin testing or rolling out DUO MFA on your VMware Horizon View server.

VMware Horizon is great at providing an end user computing solution for your business, a byproduct of which is an amazing remote access system. With any type of access, especially remote, comes numerous security challenges. DUO Security’s MFA solution is great at provided multi-factor authentication for your environment, and fully supports VMware Horizon View.

In this guide, I’ll be providing a quick how to guide on how to get setup and configured with DUO MFA on your Horizon Server to authenticate View clients.

If you are looking to only implement DUO 2FA on the VMware Unified Access Gateway (and not the connection server), head over to my colleague’s post here: https://securedpackets.com/?p=424

Here’s a video of DUO on VMware Horizon View in action! Scroll down for instructions on how to set it up!

Video Demonstration of DUO MFA 2FA on VMware Horizon View

Enabling DUO MFA on VMWare View will require further authentication from your users via one of the following means:

  • DUO Push (Push auth request to mobile app)
  • Phone call (On user’s pre-configured phone number)
  • SMS Passcode (Texted to users pre-configured phone number)
  • PIN code from a Hardware Token

For more information on the DUO technology and authentication methods, please visit
https://www.digitallyaccurate.com/blog/2018/06/12/secure-business-enterprise-it-systems-multi-factor-authentication-duo-mfa/

Prerequisites

  • VMware Horizon View Connection Server (Configured and working)
  • VMware View Client (for testing)
  • DUO Authentication Proxy installed, configured, and running (integrated with Active Directory)
  • Completed DUO Auth Proxy config along with “[ad_client]” as primary authentication.

Please Note: For this guide, we’re going to assume that you already have a Duo Authentication Proxy installed and fully configured on your network. The authentication proxy server acts as a RADIUS server that your VMware Horizon View Connection Server will use to authenticate users against.

Instructions

The instructions will be performed in multiple steps. This includes adding the application to your DUO account, configuring the DUO Authentication Proxy, and finally configuring the VMware View Connection Server.

Add the application to your DUO account

  1. Log on to your DUO account, on the left pane, select “Applications”.
  2. Click on the Blue button “Protect an Application”.
  3. Using the search, look for “VMware View”, and then select “Protect this Application”.
  4. Record the 3 fields labelled “Integration key”, “Security key”, and “API hostname”. You’ll need these later on your authentication proxy.
  5. Feel free to modify the Global Policy to the settings you require. You can always change and modify these later.
  6. Under Settings, we’ll give it a friendly name, choose “Simple” for “Username normalization”, and optionally configure the “Permitted Groups”. Select “Save”.

Configure the DUO Authentication Proxy

  1. Log on to the server that is running your DUO Authentication Proxy.
  2. Open the file explorer and navigate to the following directory.
    C:\Program Files (x86)\Duo Security Authentication Proxy\conf
  3. Before any changes I always make a backup of the existing config file. Copy and paste the “authproxy.cfg” file and rename the copy to “authproxy.cfg.bak”.
  4. Open the “authproxy.cfg” file with notepad.
  5. Add the following to the very end of the file:
    ;vmware-view
    [radius_server_challenge]
    ikey=YOUR_INTEGRATION_KEY
    skey=YOUR_SECRET_KEY
    api_host=YOUR-API-ADDRESS.duosecurity.com
    failmode=safe
    client=ad_client
    radius_ip_1=IP-ADDY-OF-VIEW-SERVER
    radius_secret_1=SECRETPASSFORDUOVIEW
    port=1813
    Using the values from the “Protect an Application”, replace the “ikey” with your “integration key”, “skey” with your “secret key”, and “api_host” with the API hostname that was provided. Additionally “radius_ip_1” should be set to your View Connection Server IP, and “radius_secret_1” is a secret passphrase shared only by DUO and the View connection server.
  6. Save the file.
  7. Restart the DUO Authentication Proxy either using Services (services.msc), or run the following from a command prompt:
    net stop DuoAuthProxy & net start DuoAuthProxy

Configure the VMware View Connection Server

  1. Log on to your server that runs your VMware View Connection Server.
  2. Open the VMware Horizon 7 Administrator web interface and log on.
    Horizon 7 Administrator Launch Icon Screenshot
  3. On the left hand side, under “Inventory”, expand “View Configuration” and select “Servers”.
    View Configuration and Servers highlighted on Left Pane
  4. On the right hand side in the “Servers” pane, click on the “Connection Servers” tab, then select your server, and click “Edit”.
    Select Connection Server in Server Pane Window
  5. On the “Edit Connection Server Settings” window, click on the “Authentication” tab.
    Authentication under Edit Connection Settings Window
  6. Scroll down to the “Advanced Authentication” section, and change the “2-factor authentication” drop down, to “RADIUS”. Check both check boxes for “Enforce 2-factor and Windows user name matching”, and “Use the same user name and password for RADIUS and Windows Authentication”.
    Advanced Auth Settings for DUO in Authentication Tab Dialog Window
  7. Below the check boxes you will see “Authenticator”. Open the drop down, and select “Create New Authenticator”.
  8. In the “Add RADIUS Authenticator” window, give it a friendly name, friendly description, and populate the fields as specified in the screenshot below. You’ll be using the shared RADIUS/DUO secret we created above in the config file for the proxy auth.
    Edit RADIUS Authenticator VMware View Window
    Please Note that I changed the default RADIUS port in my config to 1813.
  9. Click “Ok”, then make sure the newly created authenticator is select in the drop down. Proceed to click “Ok” on the remaining windows, and close out of the web interface.

That’s it!

You have now completely implemented DUO MFA on your Horizon deployment. Now when users attempt to log on to your VMware View Connection server, after entering their credentials they will be prompted for a second factor of authentication as pictured below.

DUO Security Login VMware View Client Dialog Box
DUO Security Login VMware View Client
DUO Security MFA authenticate VMware View Client dialog box
DUO Security MFA authenticate VMware View Client

VMware Horizon View is now fully using MFA/2FA.

Leave a comment!

May 072019
 
Sophos UTM with SFP Modules Picture

In the many years I’ve been providing IT Services, I’ve noticed that whenever taking over a customer from a competitor, or providing consulting services for a company that has IT staff, that I don’t see DHCP reservations being used all that frequently.

I wanted to write a post and create a video to discuss the comparison, when each should be used and the various case scenarios. I’m hoping my readers may provide their own input in the comments.

See below for the video, or read on for the blog post!

As an example: When a customer was purchasing a VoIP PBX, the PBX vendor get angry when I requested that it be configured for DHCP so that a DHCP reservation could be used, I advised I’d prefer this method so I could change the IP when needed for maintenance or network restructuring. They tried to convince me the IP will change on a DHCP Server and the port forwarding will stop working, because they simply had no idea of what a DHCP reservation was. Ultimately when the day came where I had to change the IP and firewall rules for the PBX, I had to log a support call with the vendor since I couldn’t change the IP myself (which resulted in delays, and costs). If we were using DHCP reservations, I could have simply modified the firewall rules, modified the IP address on the reservation, and restarted the device using the buttons on the front panel (I didn’t have any other access to the device).

Just to state the obvious:

  • A static IP address is an IP address that’s manually set on a NIC (Network Interface Card).
  • A DHCP Reservation is a pre-set IP that’s provided by a DHCP Server, and given to a NIC when a NIC calls out to a DHCP server for an IP address.

Static IP Addresses

It’s in my opinion that for server, network, core, and all top level infrastructure, all of these devices and services should be configured with Static IP addresses.

These devices which are almost always running, and have other services that rely on them, require a set static IP that should and will not change. Typically, these IP addresses will never change, even when major changes are being made to the core infrastructure.

These addresses should always be logged, documented, and added to network topology maps.

An example of devices commonly seen with Static IPS:

  • Servers
  • Storage (SAN, NAS)
  • Network Switches, Routers, Gateways, Load Balancers
  • Printers
  • Wireless Access Points
  • Computers/Workstations using special services (or requiring firewall exceptions)

DHCP Reservations

DHCP stands for Dynamic Host Configuration Protocol, and was created to dynamically configure hosts networking configuration on the fly for easy deployment.

In it’s most simplest explanation, when a computer (or device) that is configured to use DHCP reaches out to the network, the DHCP server will assign and provide an IP address for the computer to use.

In home networks, pretty much every computer and device will get it’s IP address from the DHCP server running on the router.

In business networks, pretty much every computer and device that isn’t hosting services will get it’s IP address from the DHCP server running on one of their servers or routers.

DHCP Servers support something called a “DHCP Reservation”, which essentially allows you to provide a pre-set IP address to a specific client based on it’s physical MAC address. This means that the device will always get the same IP address and it will never change (whereas they typically do on occasion).

I’m surprised I don’t see these used more often, as they can become quite the powerful tool on the IT tool belt when used properly. I’ve listed some pros and cons below.

The Pros:

  • Manage IP addresses (IP reservations) from a single console
  • Ability to change IP addresses on the fly easily from a single console without having to log in to the device.
  • Manage network topology for ROBO (Remote Office, Branch Office) remotely, easily, and efficiently.
  • Manage IP addresses for 3rd party devices that you don’t normally have access to modify (tell the vendor to set to DHCP), reducing support calls for external services.
  • Ability to create different PXE boot environments as each reservation can have it’s own PXE boot options assigned.

The Cons:

  • Device must support DHCP Configuration.
  • The device MUST RELY on a DHCP Server once set to use DHCP. If the DHCP Server is down, so is the device.
  • If rogue DHCP servers appear on your network, it may disrupt communication (this can also happen with static IPs and conflicts).

So with the list above, DHCP reservations look pretty powerful. The next question, is where do we use DHCP reservations. Let’s finish off with the devices we’d use them on, and what use case scenarios apply.

Devices:

  • Wireless Access Points
  • Printers
  • 2nd Level (non core) Routers and Gateways
  • IoT Devices
  • IP Phones
  • IP PBX Systems (VoIP, Traditional with IP Management, etc).
  • Thin Clients and Zero Clients

Use Cases:

  • Remote Offices (remote sites with limited access)
  • Remote Support environments
  • Branch Offices
  • IP Phone Networks
  • Wireless LAN Access Point VLANs

DHCP Reservation Use Cases

I use DHCP reservations frequently with customers that have remote or branch offices in remote geographical areas. When supporting these users and troubleshooting issues, it’s awesome to be able to just log in to the DHCP server to change IP addresses of printers, phones, and wireless access points.

Also, when configuring, shipping, and deploying new devices to these offices, I can simply log and write down the MAC address, configure the DHCP reservation, and the device will get the IP address I’ve chosen once it’s connected to the network and powered on.

Using DHCP reservations, you can easily make big changes to these remote networks without having to be present. If you were to use Static IPs and something was misconfigured, this might cause a physical visit to the site to resolve.

If by change a vendor directly dropships equipment to the remote site, I can simply call someone at that office to get the MAC address. Most devices with a NIC (printers, MFPs, wireless access points), all usually have their MAC addresses printed on the outside of the box. With this information provided, I can login to the remote server, create a DHCP reservation, configure drivers, and push the device config out to the network.

DHCP reservations add to the whole concept of a centrally managed environment, which further helps ease of maintaining, and supporting it.

Leave a comment and let me know your thoughts!