Around the end of September, I posted a blog article talking about Outlook 2016 prompting for password credentials due to a Office 2016 click to run update bug when using Microsoft Exchange. While they did just recently fix this by deploying a new update, I have since come across a new bug in the latest update.
I noticed multiple computers with Outlook 2016 Version 1710 (Build 8625.2121 Click-to-Run) started getting stuck with the Outlook icon on the system tray showing that it was sending and receiving. When opening Outlook, and hitting Send and Receive, nothing is shown.
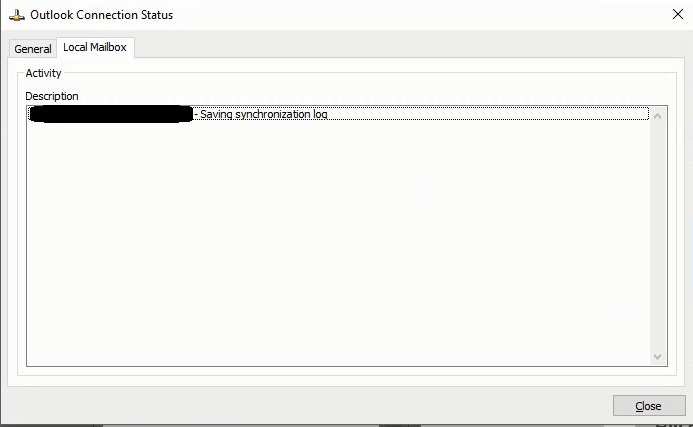
When you hold down CTRL and right click on the Outlook icon, choose “Connection Status…”, then select the “Local Mailbox” tab, you’ll notice it gets stuck on “[email protected] – Saving synchronization log” (as seen below).
I went ahead and tried all the usual troubleshooting steps like deleting and recreating the OST and Outlook Mail Profiles, but it still had no effect. I went ahead and completely uninstalled Microsoft Office, and reinstalled an older version. The issue DID NOT occur on the older version. Once updating to the latest, the bug re-occurred.
I’ve been scouring the internet for 2 days now trying to find information on this however I haven’t received any. This is most likely a new bug produced in the update that resolved the last bug. I will be posting updates when I hear more.
UPDATE November 7th, 2017 (Thanks Tony):
Microsoft has acknowledged that an MVP has reported this issue to the team. They are investigating.