After installing the VMware Horizon Agent on a Physical PC, you may have noticed some issues with USB redirection, audio, and hardware redirection. These issues include not working, or not working in it’s entirety.
On a few occasions I’ve had readers reach out to inform me that they are experiencing these issues. Most recently a reader by the name of “Sascha” reached out and reported issues with audio, particularly the microphone not functioning or being redirected from the VMware Horizon View Client to the Physical PC.
The Fix
In Sascha’s case (along with the other readers), we troubleshot the issue and realized that in each and every case the problem was due to the use of a Windows 10 Profesional license being used. As per the VMware Horizon release notes, a Windows 10 Enterprise license must be used when installing the Horizon Agent on a Physical PC.
Once Sascha and the other users upgrades or installed a Windows 10 Enterprise license, the issues stopped immediately.
This is another reminder that you need an Windows 10 Enterprise license when installing the Horizon Agent on a Physical PC.
I’ve noticed in a few situations where an ESXi host is marked as “unresponsive” or “disconnected” inside of vCenter due to issues occurring on that host (or connected hardware). This recently happened again with a customer and is why I’m writing this article at this very moment.
In these situations, usually all normal means of managing, connecting, or troubleshooting the host are unavailable. Usually in cases like this ESXi administrators would simply reset the host.
However, I’ve found hosts can often be rescued without requiring an ungraceful restart or reset.
Observations
In these situations, it can be observed that:
The ESXi host is in a unresponsive to disconnected state to vCenter Server.
Connecting to the ESXi host directly does not work as it either doesn’t acknowledge HTTPS requests, or comes up with an error.
Accessing the console of the ESXi host isn’t possible as it appears frozen.
While the ESXi host is unresponsive, the virtual machines are still online and available on the network.
Troubleshooting
In the few situations I’ve noticed this occurring, troubleshooting is possible but requires patience. Consider the following:
When trying to access the ESXi console, give it time after hitting enter or selecting a value. If there’s issues on the host such as commands pending, tasks pending, or memory issues, the console may actually respond if you give it 30 seconds to 5 minutes after selecting an item.
With the above in mind, attempt to enable console access (preferably console and not SSH). The logins may take some time (30 seconds to 5 minutes after typing in the password), but you might be able to gain troubleshooting access.
Check the SAN, NAS, and any shared storage… In one instance, there were issues with a SAN and datastore that froze 2 VMs. The Queued commands to the SAN caused the ESXi host to become unresponsive.
There may be memory issues with the ESXi instance. The VMs are fine, however an agent, driver, or piece of software may be causing the hypervisor layer to become unresponsive.
If there are storage issues, do what you can. In one of the cases above, we had to access the ESXi console, issue a “kill -9” to the VM, and then restart the SAN. We later found out there was issues with the SAN and corrupted virtual machines. The moment the SAN was restarted, the ESXi host became responsive, connected to the vCenter server and could be managed.
In another instance, on an older version of ESXi there was an HPE agentless management driver/service that was consuming the ESXi hosts memory continuously causing the memory to overflow, the host to fill the swap and become unresponsive. Eventually after gracefully shutting down the VMs, I was able to access the console, kill the service, and the host become responsive.
It’s official, VMware vSphere 7 is here. VMware has put together tons of content for the launch of the new version.
First and foremost, check out their blog at https://blogs.vmware.com/vsphere/vsphere-7. This page will have tons of information on the launch and will host some important materials in one place for you to access.
Lately, I’ve been playing with video editing and encoding as a new hobby. It requires a powerful system for the production process for both editing, and encoding. While CPU power isn’t necessarily important, the CPU instruction sets and your GPU play a key part with editing and encoding.
For the last few weeks, I’ve been attempting to use my desktop rig with a couple of Nvidia GeForce cards and I’ve been struggling to be able to edit in real time, as well as encode completed video productions in a reasonable amount of time.
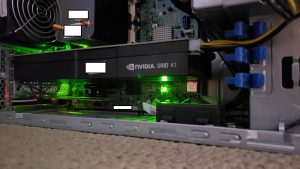
As part of my demo and homelab, I have an HPE ML310e Gen8 v2, with an Nvidia Grid K1 card. This setup is backed with an HPE MSA 2040 SAN for main storage and a Synology DS1813+ for backup and video storage.
It’s a beautiful desktop replacement as it’s silent, provides a desktop backed with a Intel Xeon Processor, and a high performance GPU.
VDI Video Editing and Encoding
For software, I’ve been using Cyberlink’s PowerDirector software. I’ve used this in the past for screen recording, as well as editing videos I use for demos.
On my physical desktop rig, even with two GPUs it struggles to allow me to preview in realtime the edits I’ve done on a project. The preview window is jolty with loss frames, and it’s hard to know what you’re doing. Also, when producing and encoding a finalized video project, it would take forever to complete even a small 5 minute video at 1080p.
When I first loaded this up on my VDI environment, the software instantly detected the Nvidia GRID card, and asked me if it could use it. From that point on the preview window was fluid, transitions and add-ins were rendered on the fly during previewing, and the final production encoding was literally over 20 times faster using 1080p. Keep in mind this VM only has one Nvidia K180q profile attached to it, so I’m only using less than 25% of the cards full capability.
Other benefits to video editing and encoding on VDI
There’s some other benefits that can be realized when doing video editing and encoding inside of a VDI environment:
Ability to connect remotely and work anywhere
Ability to work anywhere with a high performance system
High speed video storage on demand (since it’s all remote)
It can become part of your normal backup solution
This is just another great use case scenario for VDI. Whether it’s for the video professional, or a large organization.
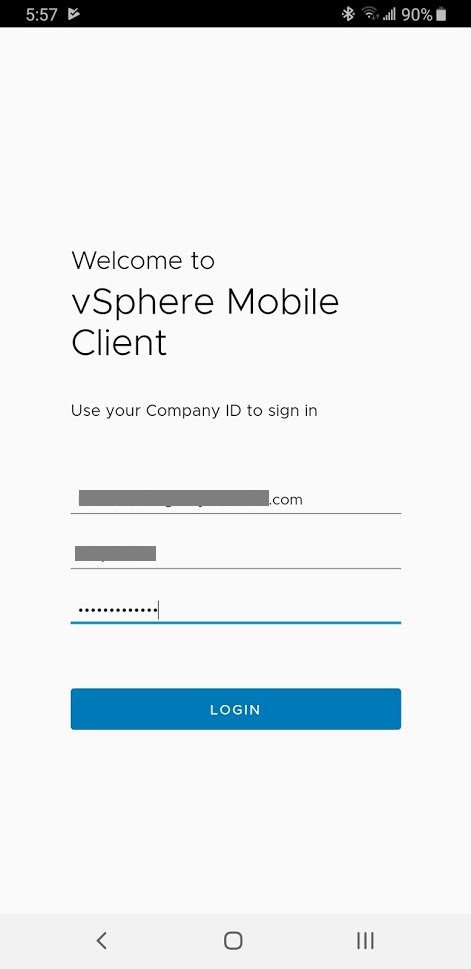
It’s finally here! VMware has released the alpha (test) of the vSphere Mobile Client for Android Devices. This will allow you to manage your vSphere instance via your Android mobile device.
Some of you may remember the vSphere Mobile Watchlist app for android. It was great because it allowed you to manage your vSphere environment (and I still use it), but one day it was abruptly removed from the Google Play store and no longer available. However, those that had it installed could keep using it.
This new version of the vSphere Mobile Client is only available for Android as of the time of this post.
While there is a tarball download, you’ll actually want to forget that and follow the instructions for a proper install. The tarball is only needed if you want to deploy the notification service.
Then simply follow the instruction after the opt-in and download it for your device.
Using the vSphere Mobile Client for Android
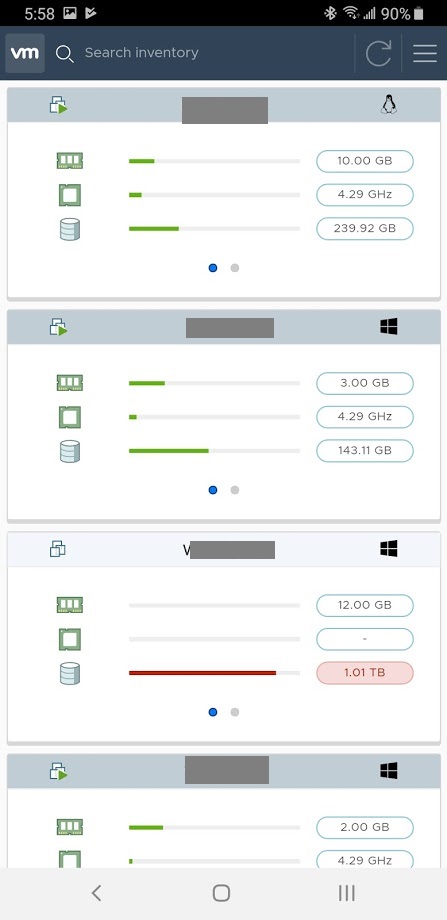
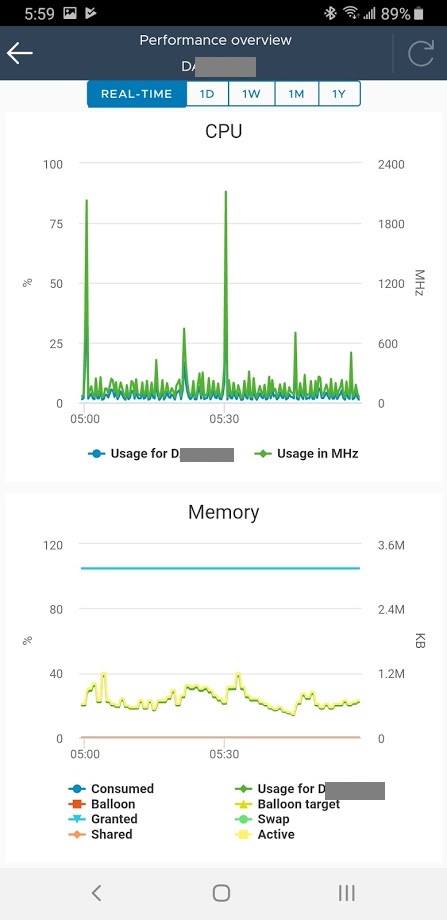
The app is a slick but simple one. Since it’s alpha, functionality is limited, but gives you the ability shutdown, restart, view performance and do a couple other things.
Bugs and Annoyances
Shortly after using the app, I noticed that I couldn’t log in subsequent tries due to an “incorrect user name or password”. I know I was typing it right, so I’m assuming this is a bug. To resolve this, you have to delete the app cache, then you will be able to log in properly.
Unfortunately the app also doesn’t allow you to save your password, like the previous watchlist app.
Screenshots
See below for some screenshots:
Conclusion
All in all, it’s pretty exciting that VMware is finally working on an official mobile app. I still use watchlist almost daily, so I see tremendous value in this!
Leave a comment below and let me know what you think of the new app!
This website uses cookies to improve your experience. We'll assume you're ok with this, but you can opt-out if you wish.
Do you accept the use of cookies and accept our privacy policy? AcceptRejectCookie and Privacy Policy
Privacy & Cookies Policy
Privacy Overview
This website uses cookies to improve your experience while you navigate through the website. Out of these cookies, the cookies that are categorized as necessary are stored on your browser as they are essential for the working of basic functionalities of the website. We also use third-party cookies that help us analyze and understand how you use this website. These cookies will be stored in your browser only with your consent. You also have the option to opt-out of these cookies. But opting out of some of these cookies may have an effect on your browsing experience.