Well, it’s official, according to the release notes for VMware Horizon 2106, VMware now supports Media Optimization for Microsoft Teams on the VMware Horizon Linux Client.
This is great news for zero clients, as most VDI Zero Clients are based of embedded Linux. As soon as major vendors update their firmware to the latest VMware Horizon Client, we should start seeing Microsoft Teams Optimization on VDI Zero Clients.
The AMD S7150 x2 PCIe MxGPU is a Graphics card designed for multi-user (MxGPU) virtualized environments (VDI). Installing an AMD S7150 x2 MxGPU allows you to provision virtual GPUs to Virtual workstations to enable 3D acceleration for applications like engineering, gaming, or pretty much anything that requires accelerated graphics.
Being a big fan of VDI and having my own VDI homelab, I just had to get my hands on one of these cards to experiment with, and learn. It’s an older card that was released in February of 2016, but it’s perfect for the homelab enthusiast.
I secured one and here’s a story about how I got it working on an unsupported 1U HPE DL360p Gen8 Server.
AMD S7150 x2 Specifications
The S7150x2 features 2 physical GPUs, each with 8GB of Video RAM, while the little brother “S7150”, has one GPU and 8GB of Video RAM.
For cooling, the S7150x2 requires the server to cool the card (it has no active cooling or fans), whereas the S7150 is available as both active (with fan) cooling, and passive cooling.
This card supports older versions of VMware ESXi 6.5 and also some versions of Citrix XenServer.
AMD MxGPU Overview
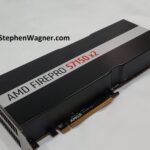
AMD S7150 x2 PCIe mxGPU Card
The AMD MxGPU technology, uses a technology called SR-IOV to create Virtual Functions (VFs) that can be attached to virtual machines.
The S7150 x2, with it’s 2GPUs can actually be carved up in to 32 (16 per GPU) VFs, providing 32 users with 3D accelerated graphics.
Additionally, you can simply passthrough the individual GPUs to VMs themselves without using SR-IOV and VFs, providing 2 users with vDGA PCIe Passthrough 3D Accelerated graphics. vDGA stands for “Virtual Dedicated Graphics Acceleration”.
Please Note: In order to use MxGPU capabilities, you must have a server that supports SR-IOV and be using a version of VMware that is compatible with the MxGPU drivers and configuration utility.
The AMD FirePro S7150 x2 does not have any video-out connectors or ports, this card is strictly designed to be used in virtual environments.
The AMD S7150 x2 connected to a HPE DL360p Gen8 Server
As most of you know, I maintain a homelab for training, learning, testing, and demo purposes. I’ve had the S7150 x2 for about 7 months or so, but haven’t been able to use it because I don’t have the proper server.
Securing the proper server is out of the question due to the expense as I fund the majority of my homelab myself, and no vendor has offered to provide me with a server yet (hint hint, nudge nudge).
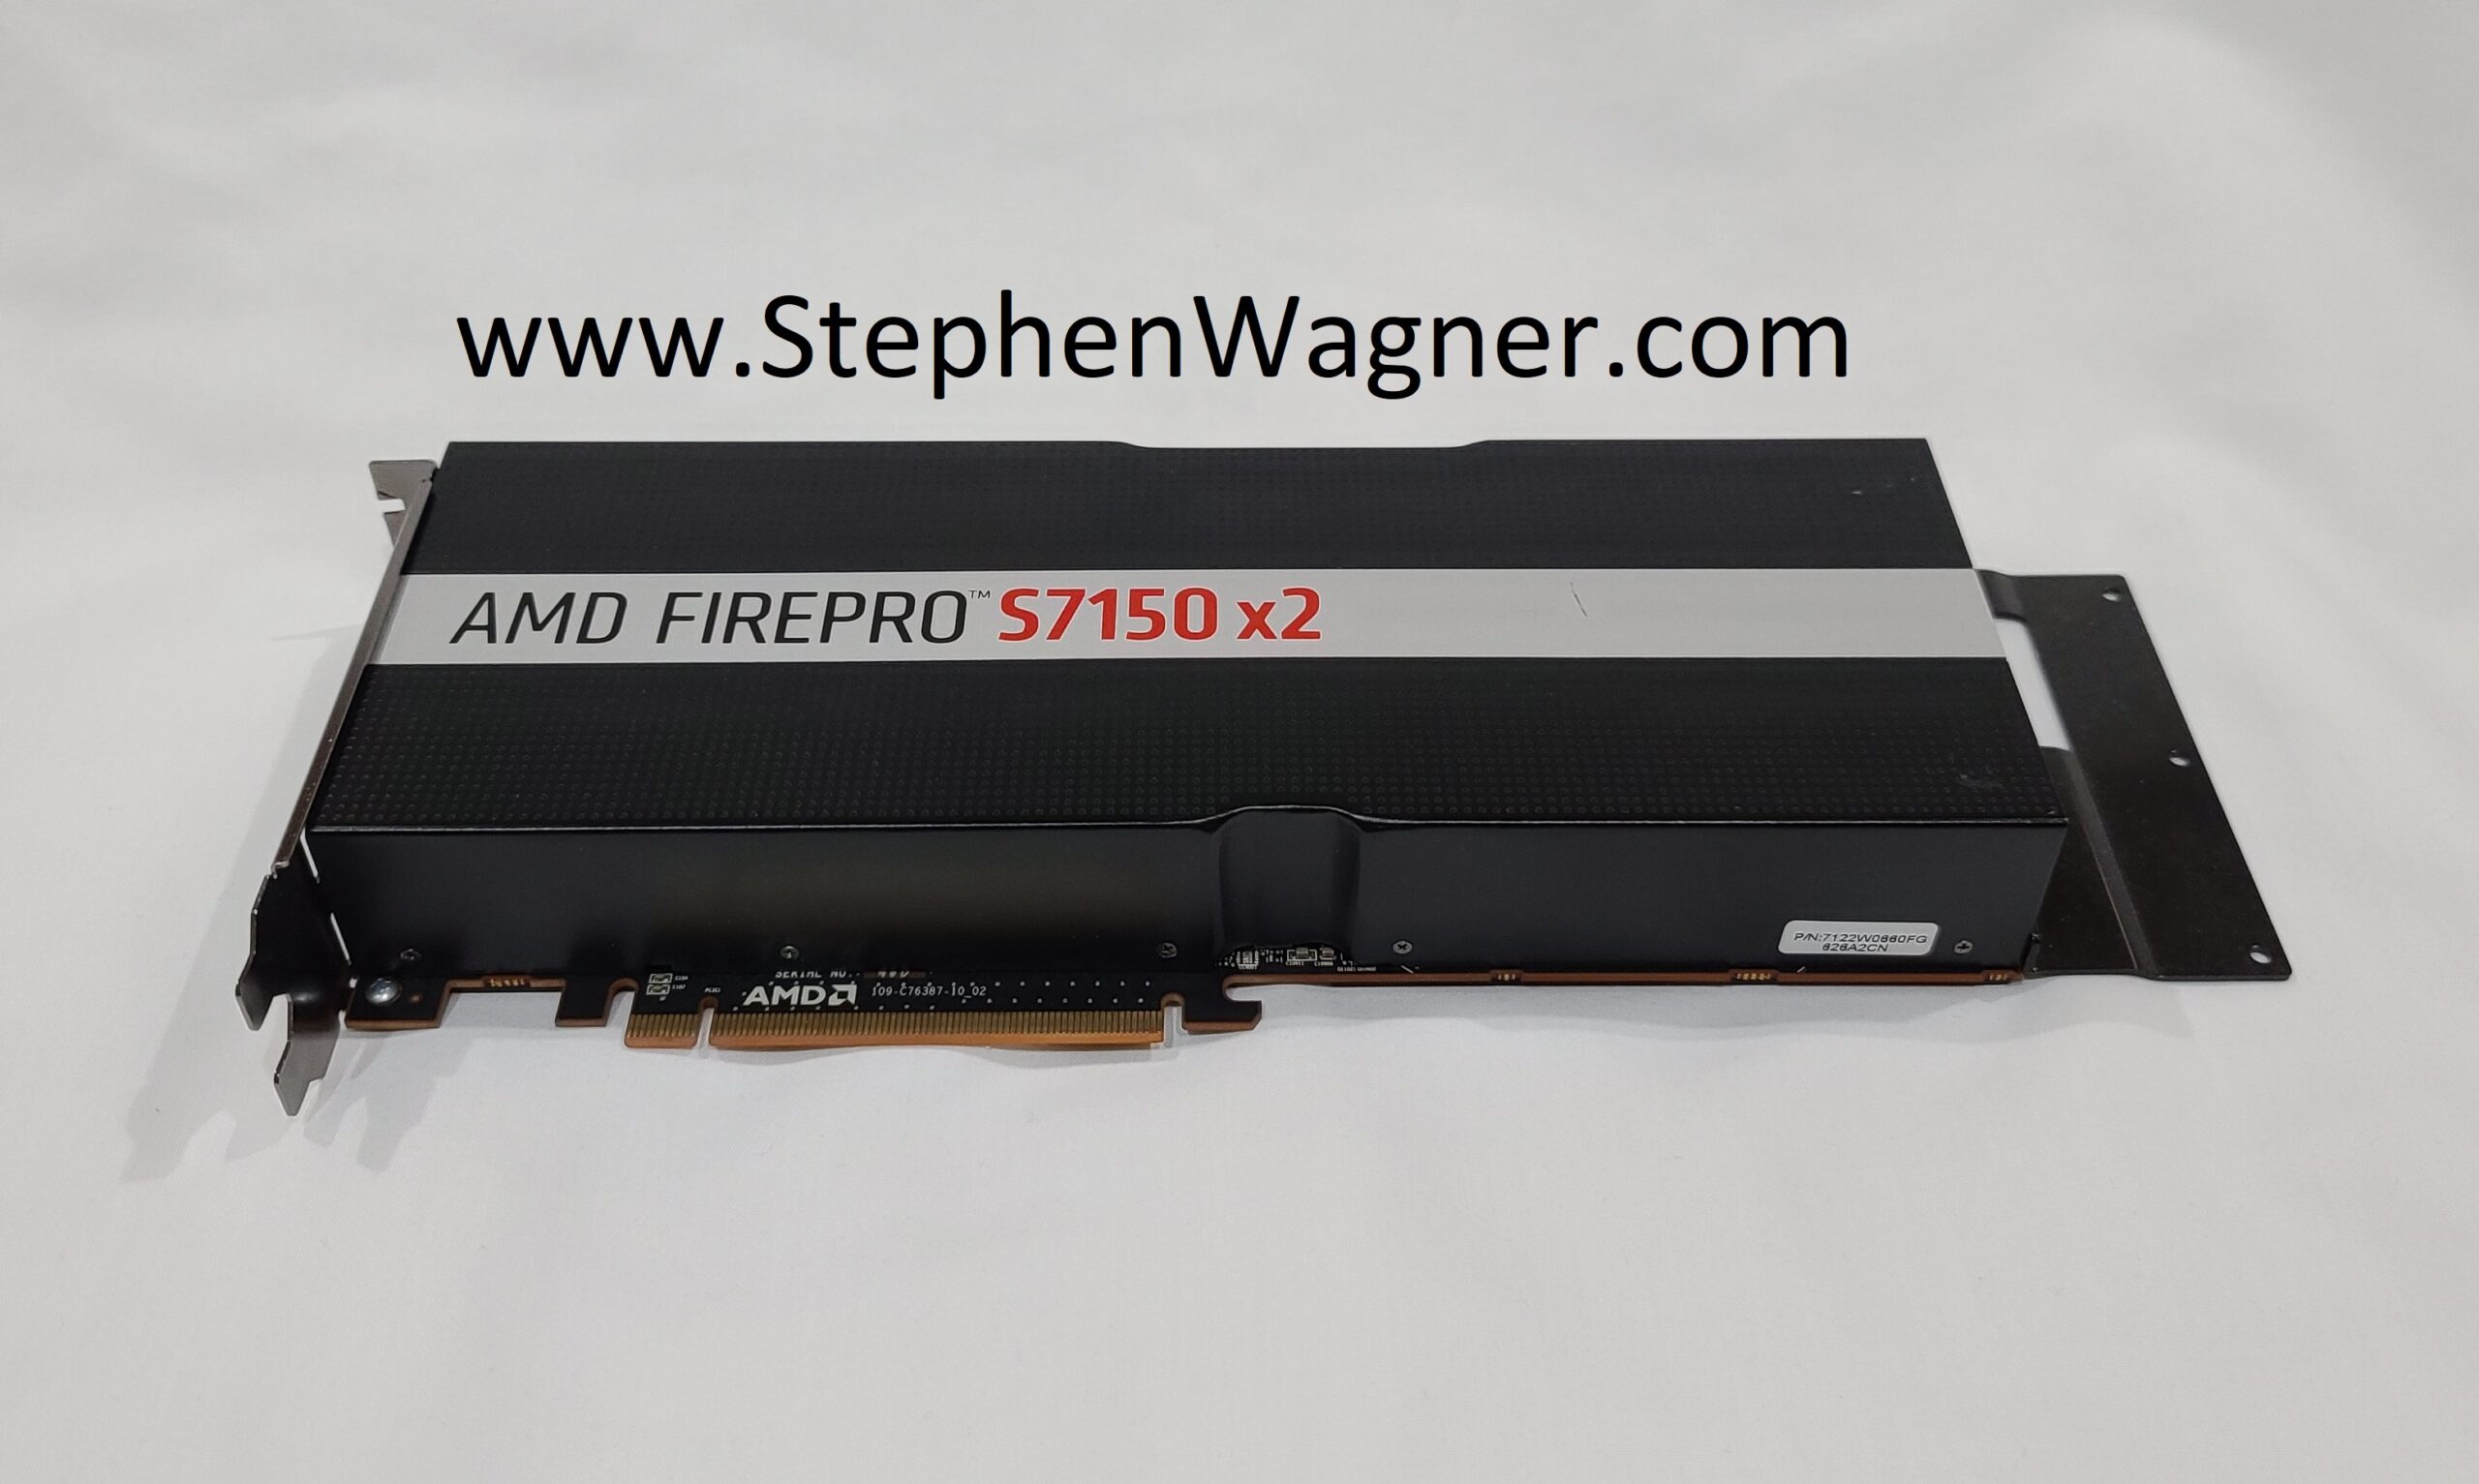
I do have a HPE ML310e Gen8 v2 server that had an NVidia Grid K1 card which can physically fit and cool the S7150 x2, however it’s an entry-level server and there’s bugs and issues with PCIe passthrough. This means both vDGA and MxGPU are both out of the question.
AMD S7150 X2 side by side with an Nvidia GRID K1 GPU Graphics Card
All I have left are 2 x HPE DL360P Gen 8 Servers. They don’t fit double width PCIe cards, they aren’t on the supported list, and they can’t power the card, but HEY, I’m going to make this work!
Connecting the Card
To connect to the Server, I purchased a “LINKUP – 75cm PCIe 3.0 x16 Shielded PCI Express Extension Cable”. This is essentially just a really, very long PCIe extension ribbon cable.
I connected this to the inside of the server, gently folded the cable and fed it out the back of the server.
Server with PCIe Extension Ribbon Cable to an external GPU
I realized that when the cable came in contact with the metal frame, it actually peeled the rubber off the ribbon cable (very sharp), so be careful if you attempt this. Thankfully the cable is shielded and I didn’t cause any damage.
Cooling the Card
Cooling the card was one of the most difficult tasks. I couldn’t actually even test this card when I first purchased it, because after powering up a computer, the card would instantly get up to extremely hot temperatures. This forced me to power down the system before the OS even booted.
I purchased a couple 3D printed cooling kits off eBay, but unfortunately none worked as they were for Nvidia cards. Finally one day I randomly checked, and I finally found a 3D printed cooling solution specifically for the AMD S7150 x2.
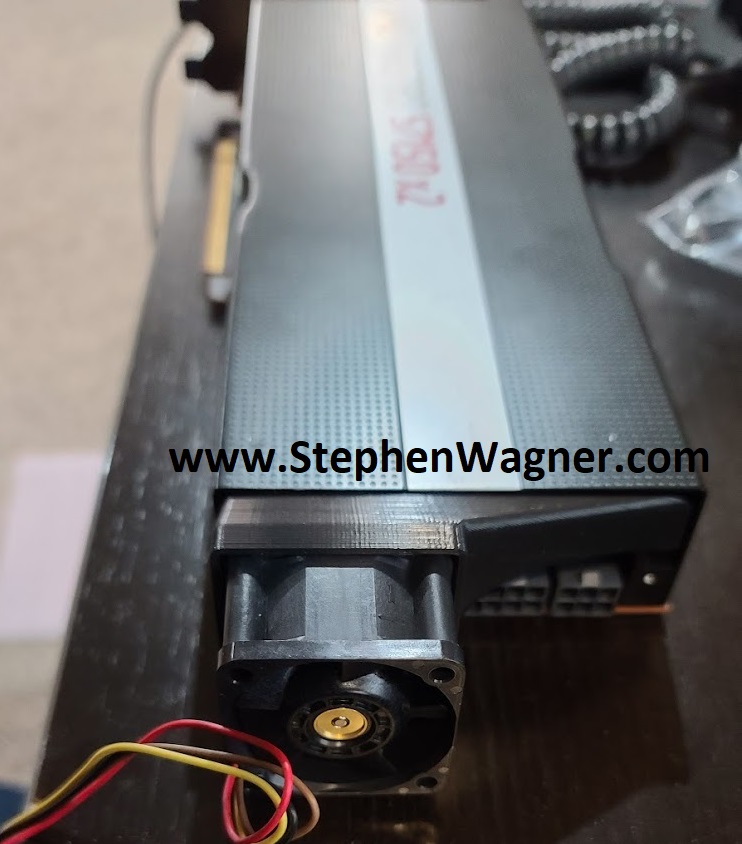
AMD S7150 X2 Cooling Shroud and Fan
As you can see, the kit included a 3D printed air baffle and a fan. I had to remove the metal holding bracket to install the air baffle.
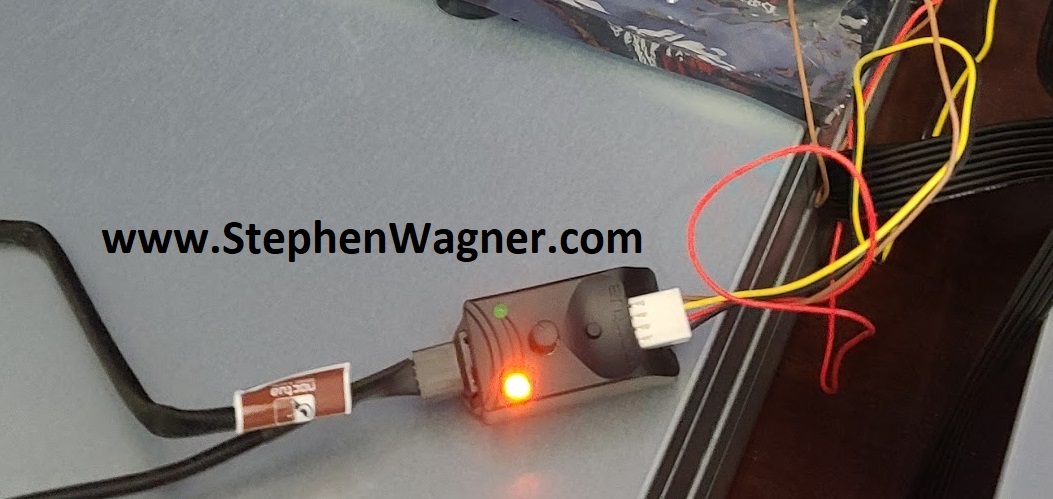
I also had to purchase a PWM fan control module, as the fan included with the kit runs at 18,000 RPM. The exact item I purchased was a “Noctua NA-FC1, 4-Pin PWM Fan Controller”.
CFM Fan Control Module
Once I installed the controller, I was able to run some tests adjusting the RPM while monitoring the temperatures of the card, and got the fan to a speed where it wasn’t audible, yet was able to cool and keep the GPUs between 40-51 degrees Celsius.
Powering the Card
The next problem I had to overcome was to power the card with it being external.
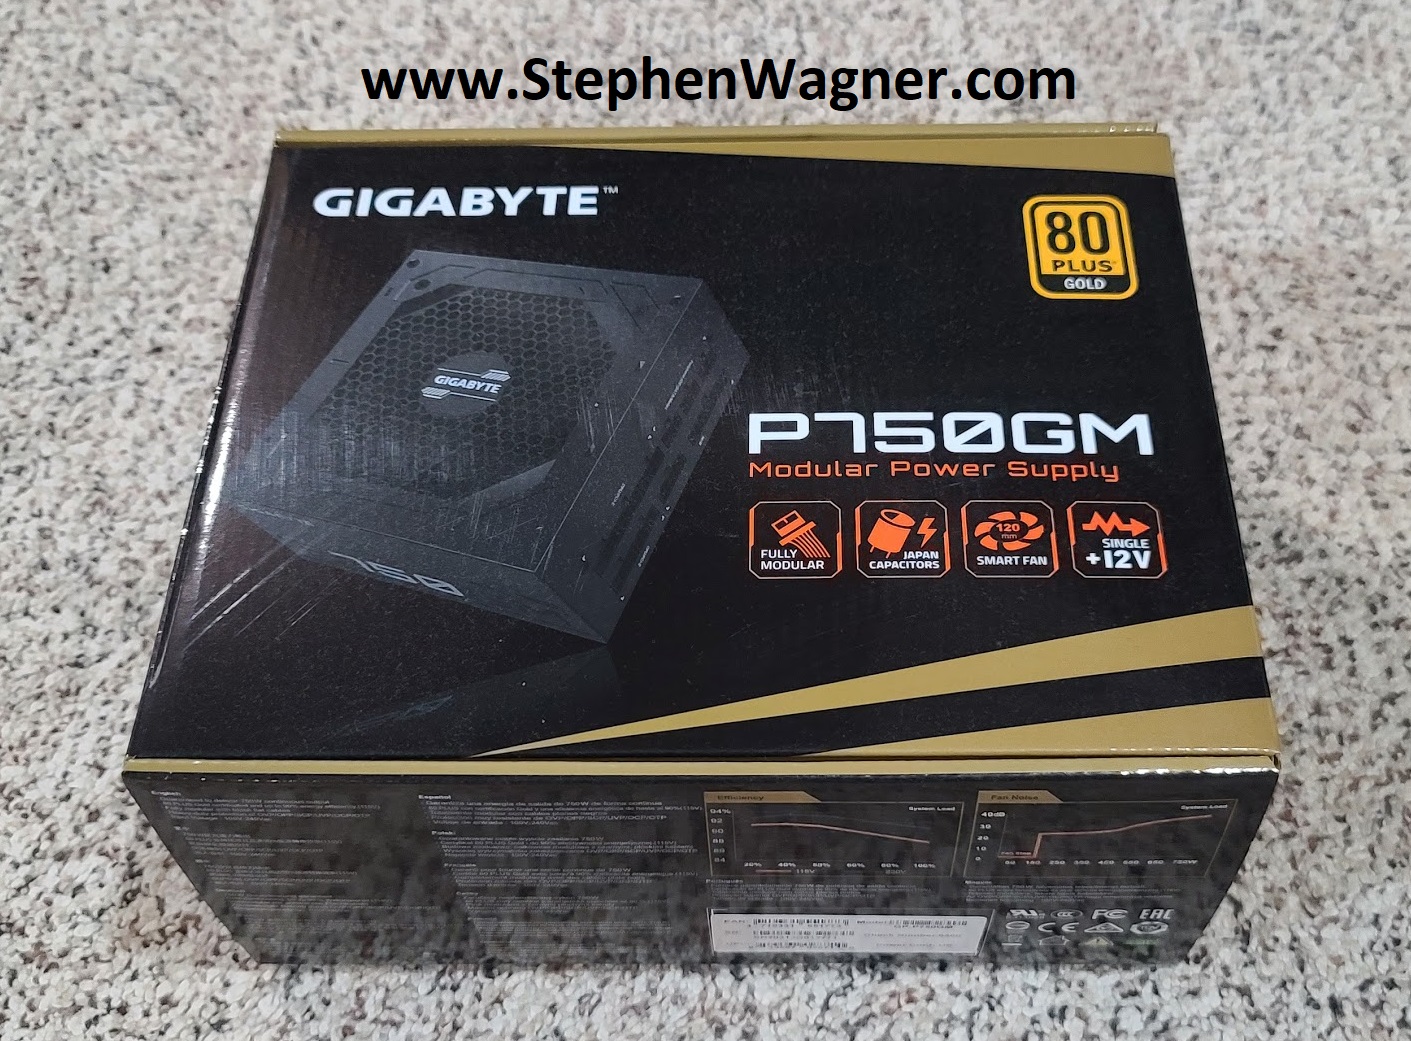
To do this, I purchased a Gigabyte P750GM Modular Power Supply. I chose this specific PSU because it’s modular and I only had to install the cables I required (being the 6-pin power cable, 8-pin power cable, ATX Power Cable (for PSU on switch), and a CFM fan power connector).
Gigabyte P750GM Modular Power Supply (PSU)
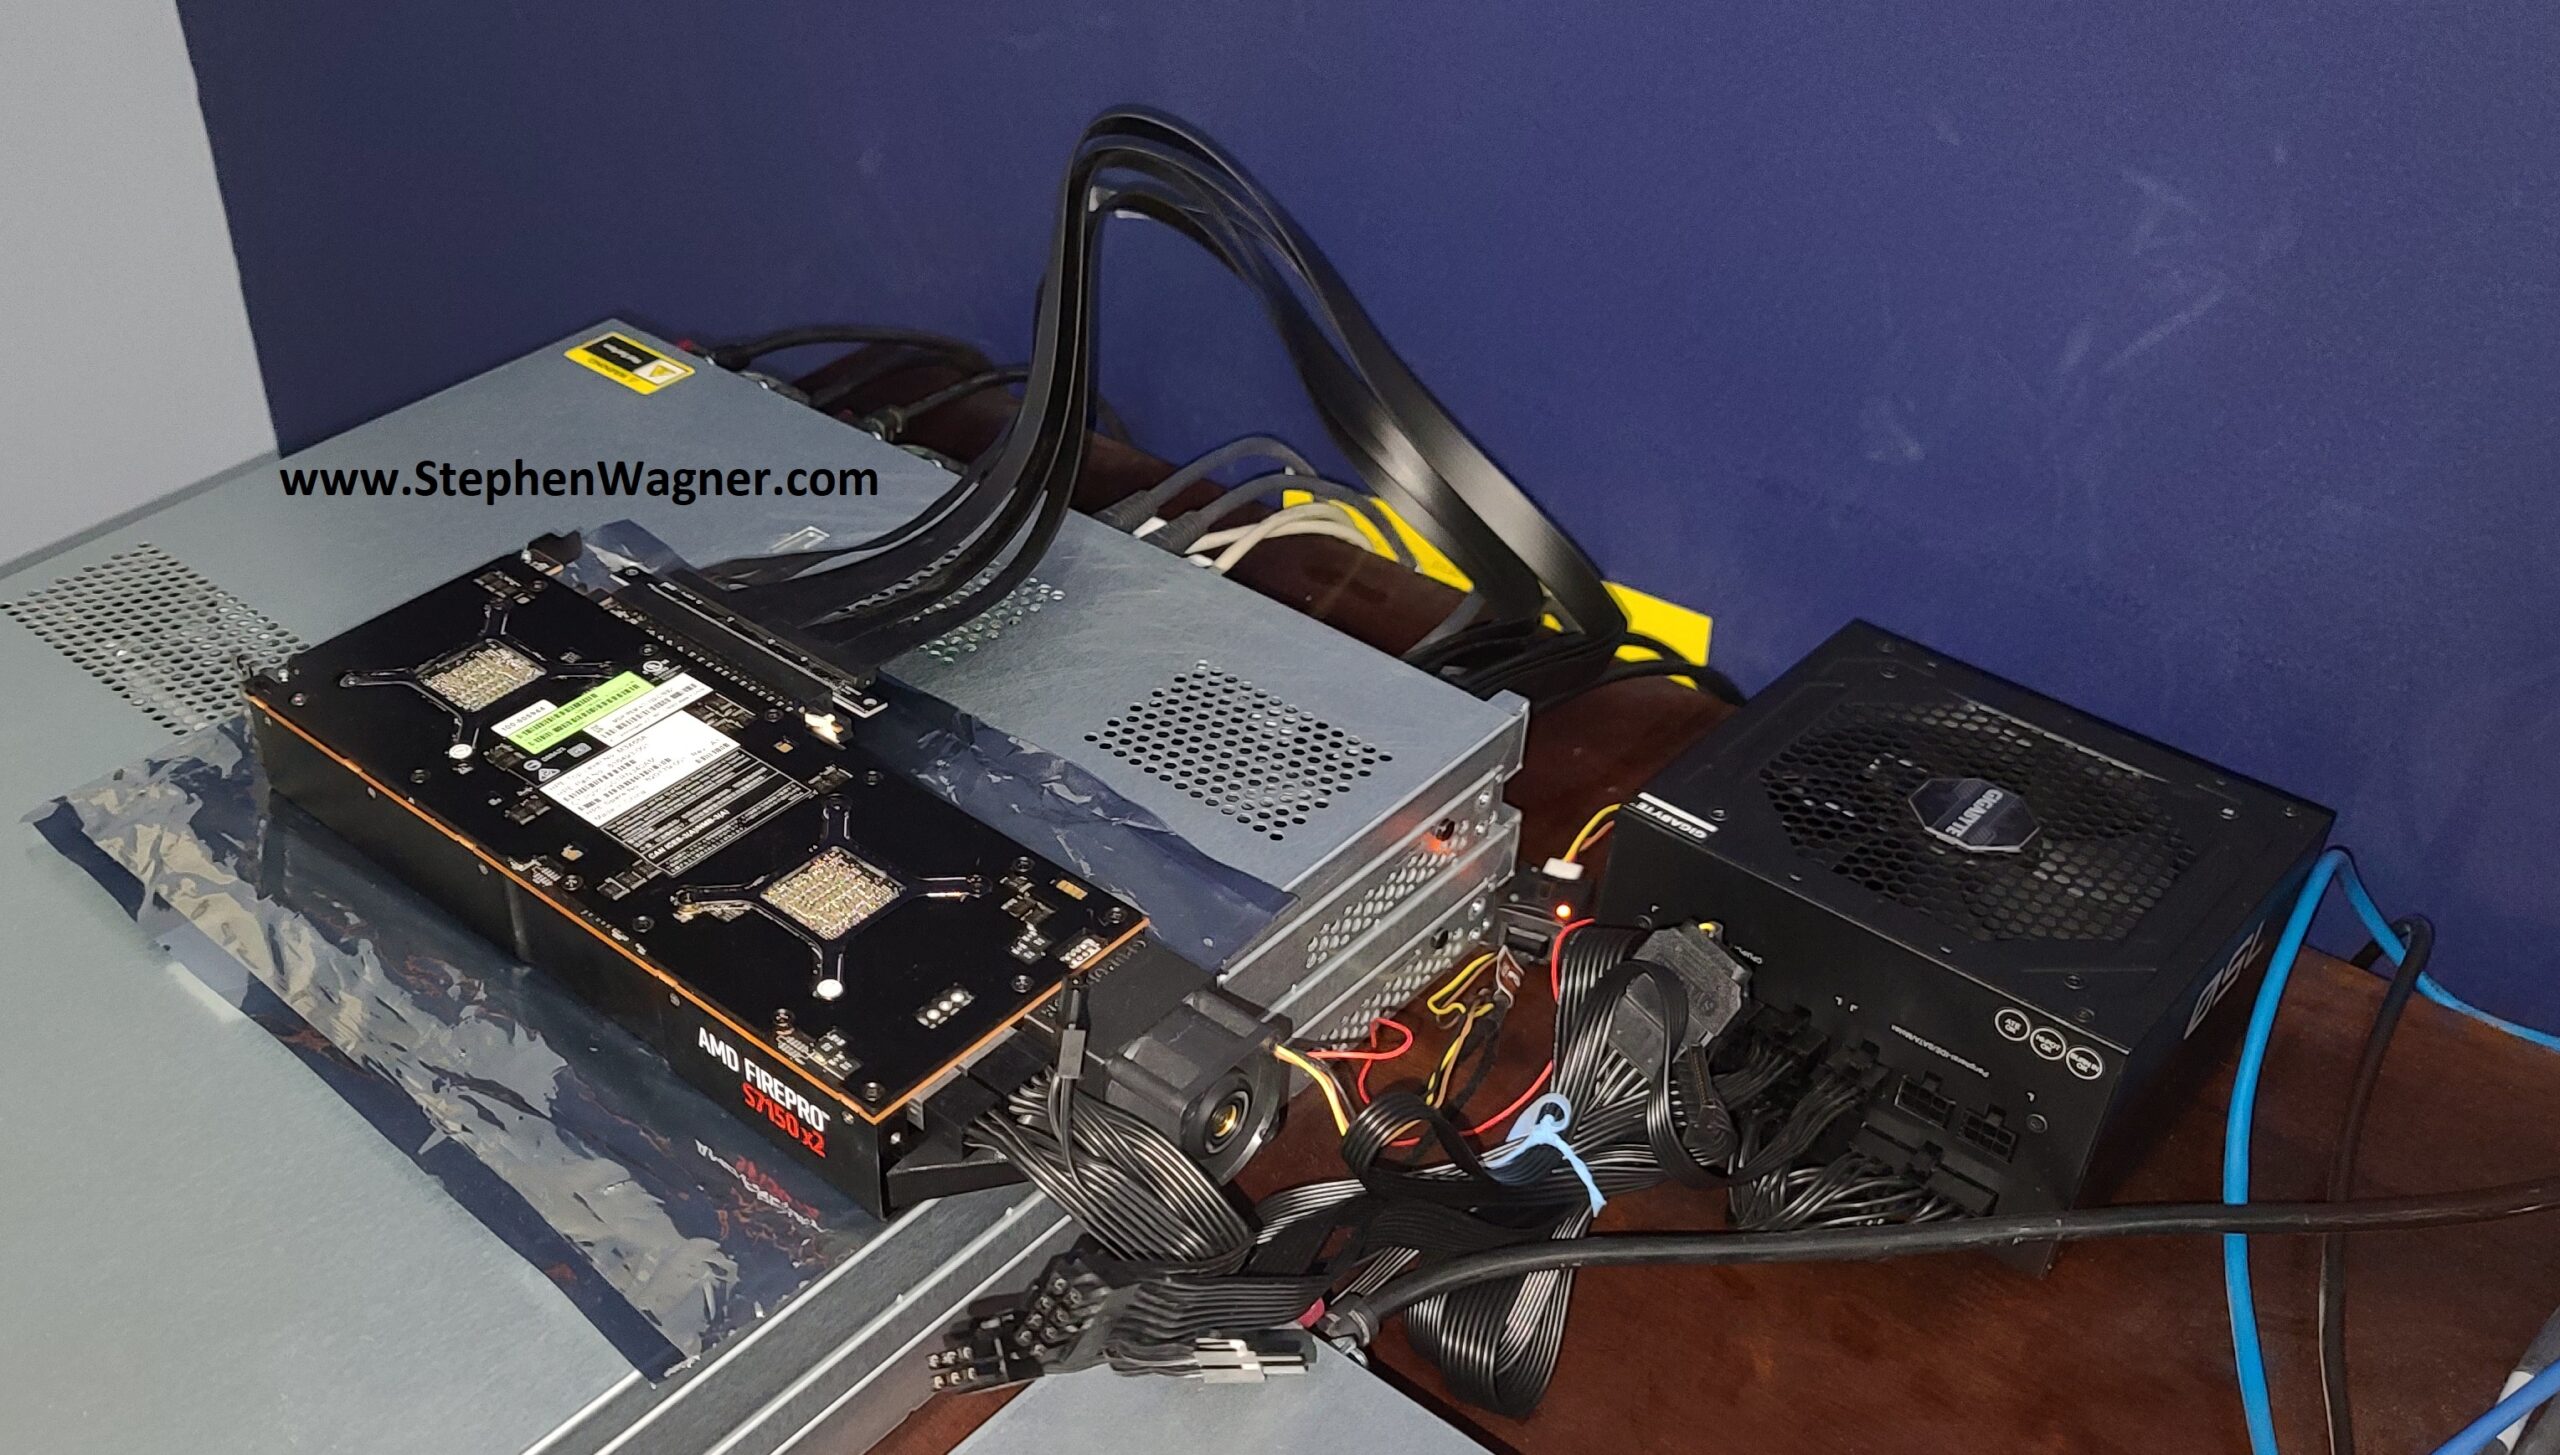
As you can see in the picture below, I did not install all the cabling in the PSU.
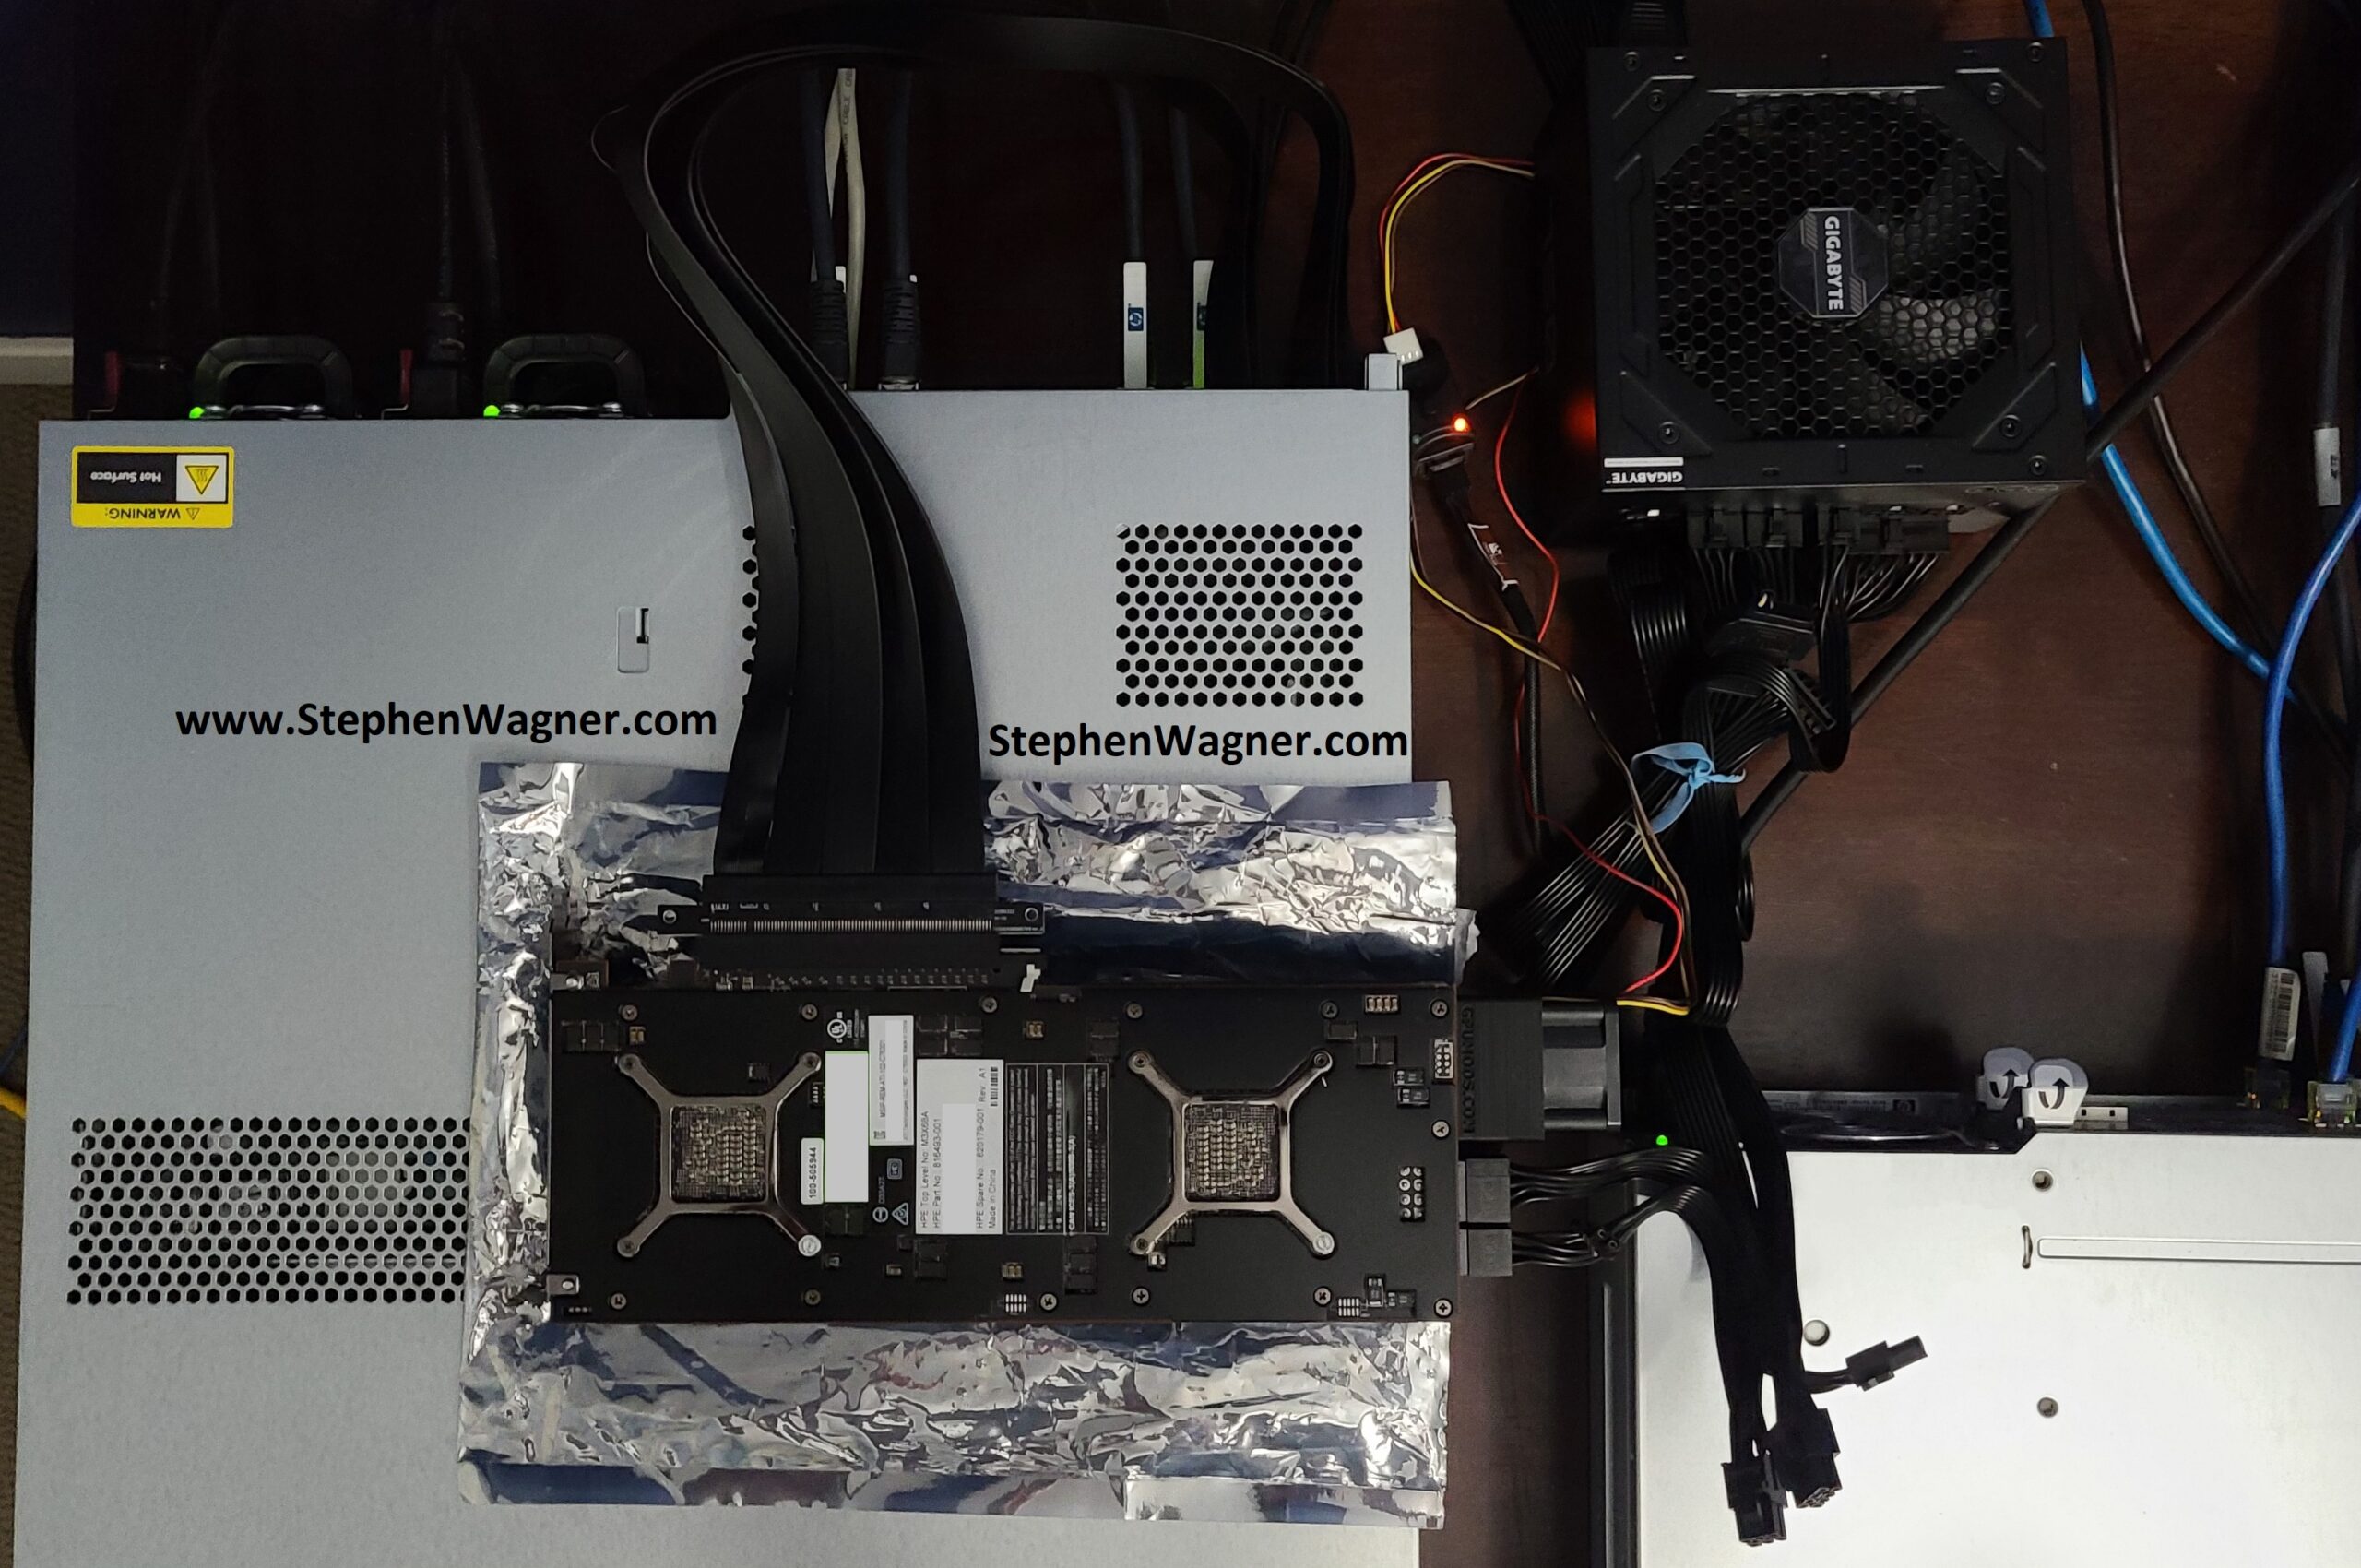
Modular PSU Connected to AMD S7150 x2
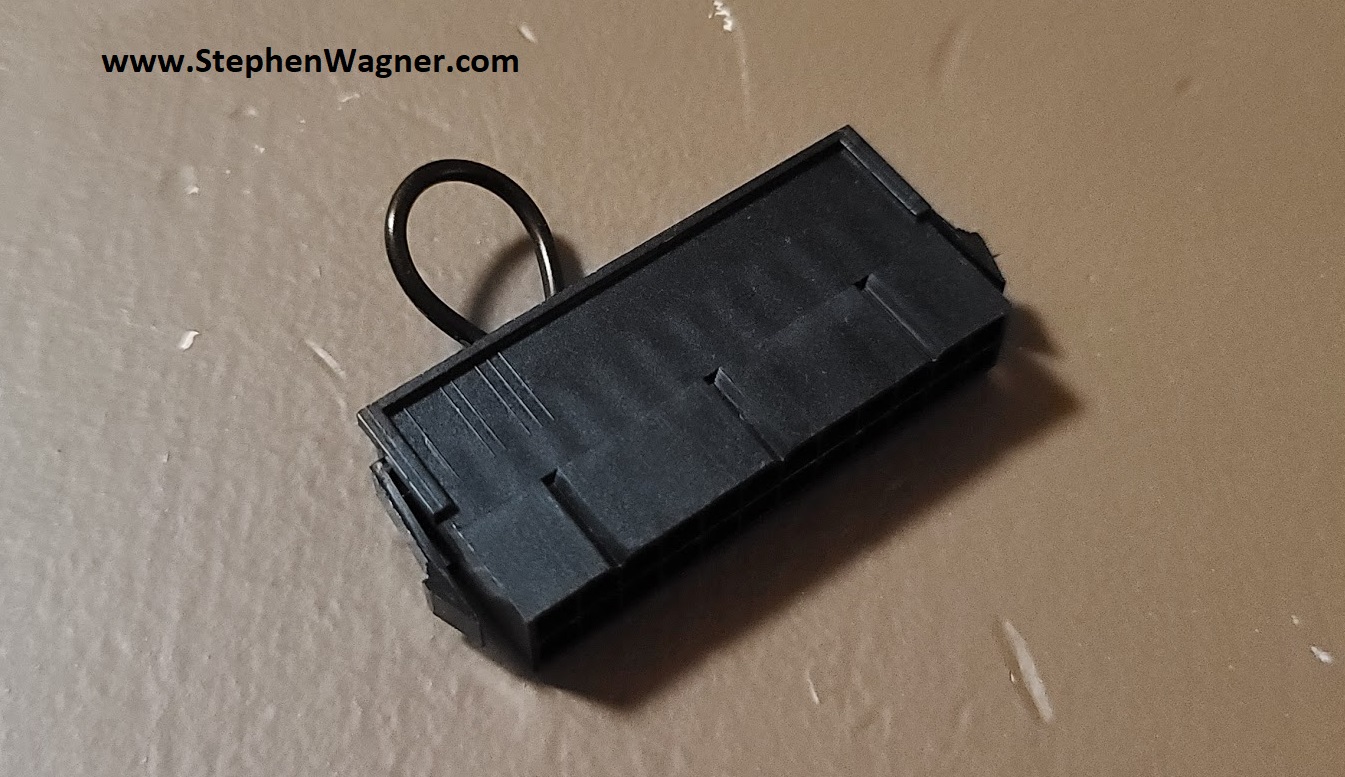
As you can see, if came together quite nicely. I also had to purchase an ATX power on adapter, to short certain pins to power on the PSU.
ATX PSU Jump Adapter
I fed this cable under the PSU and it is hanging underneath the desk out of the way. Some day I might make my own adapter, so I can remove the ATX power connector but unfortunately the PIN-outs on the PSU don’t match the end of the ATX connector cable.
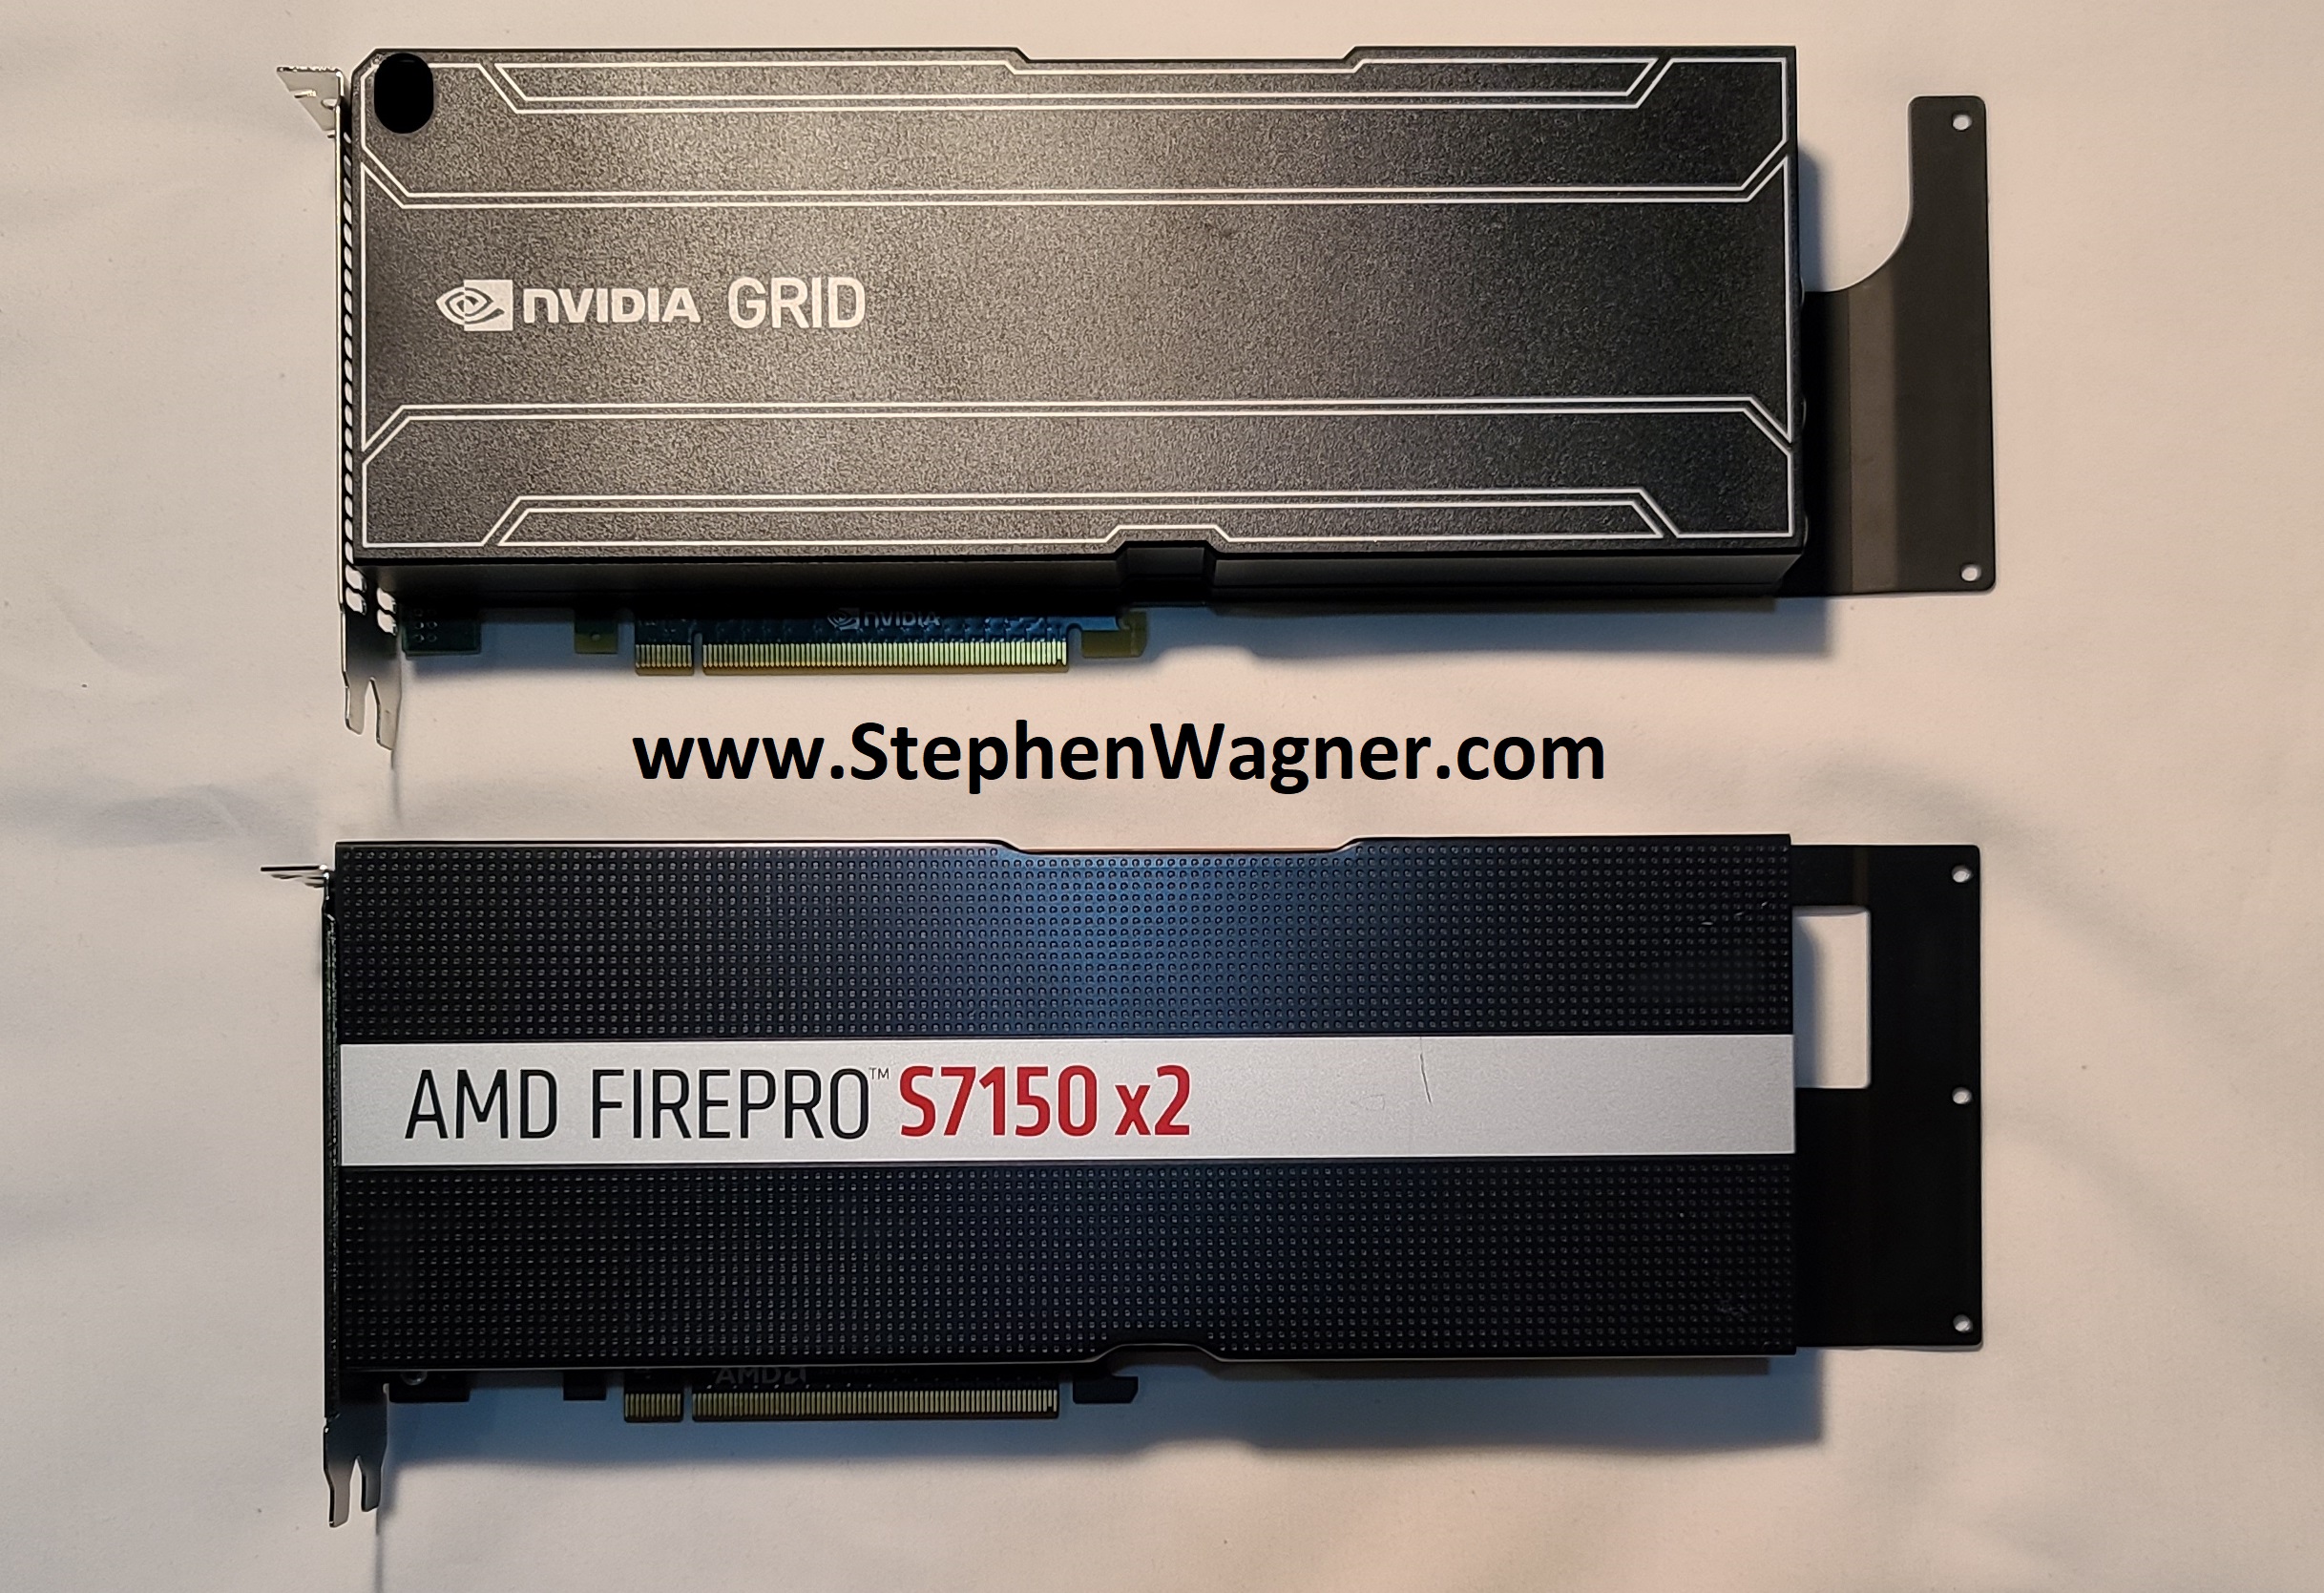
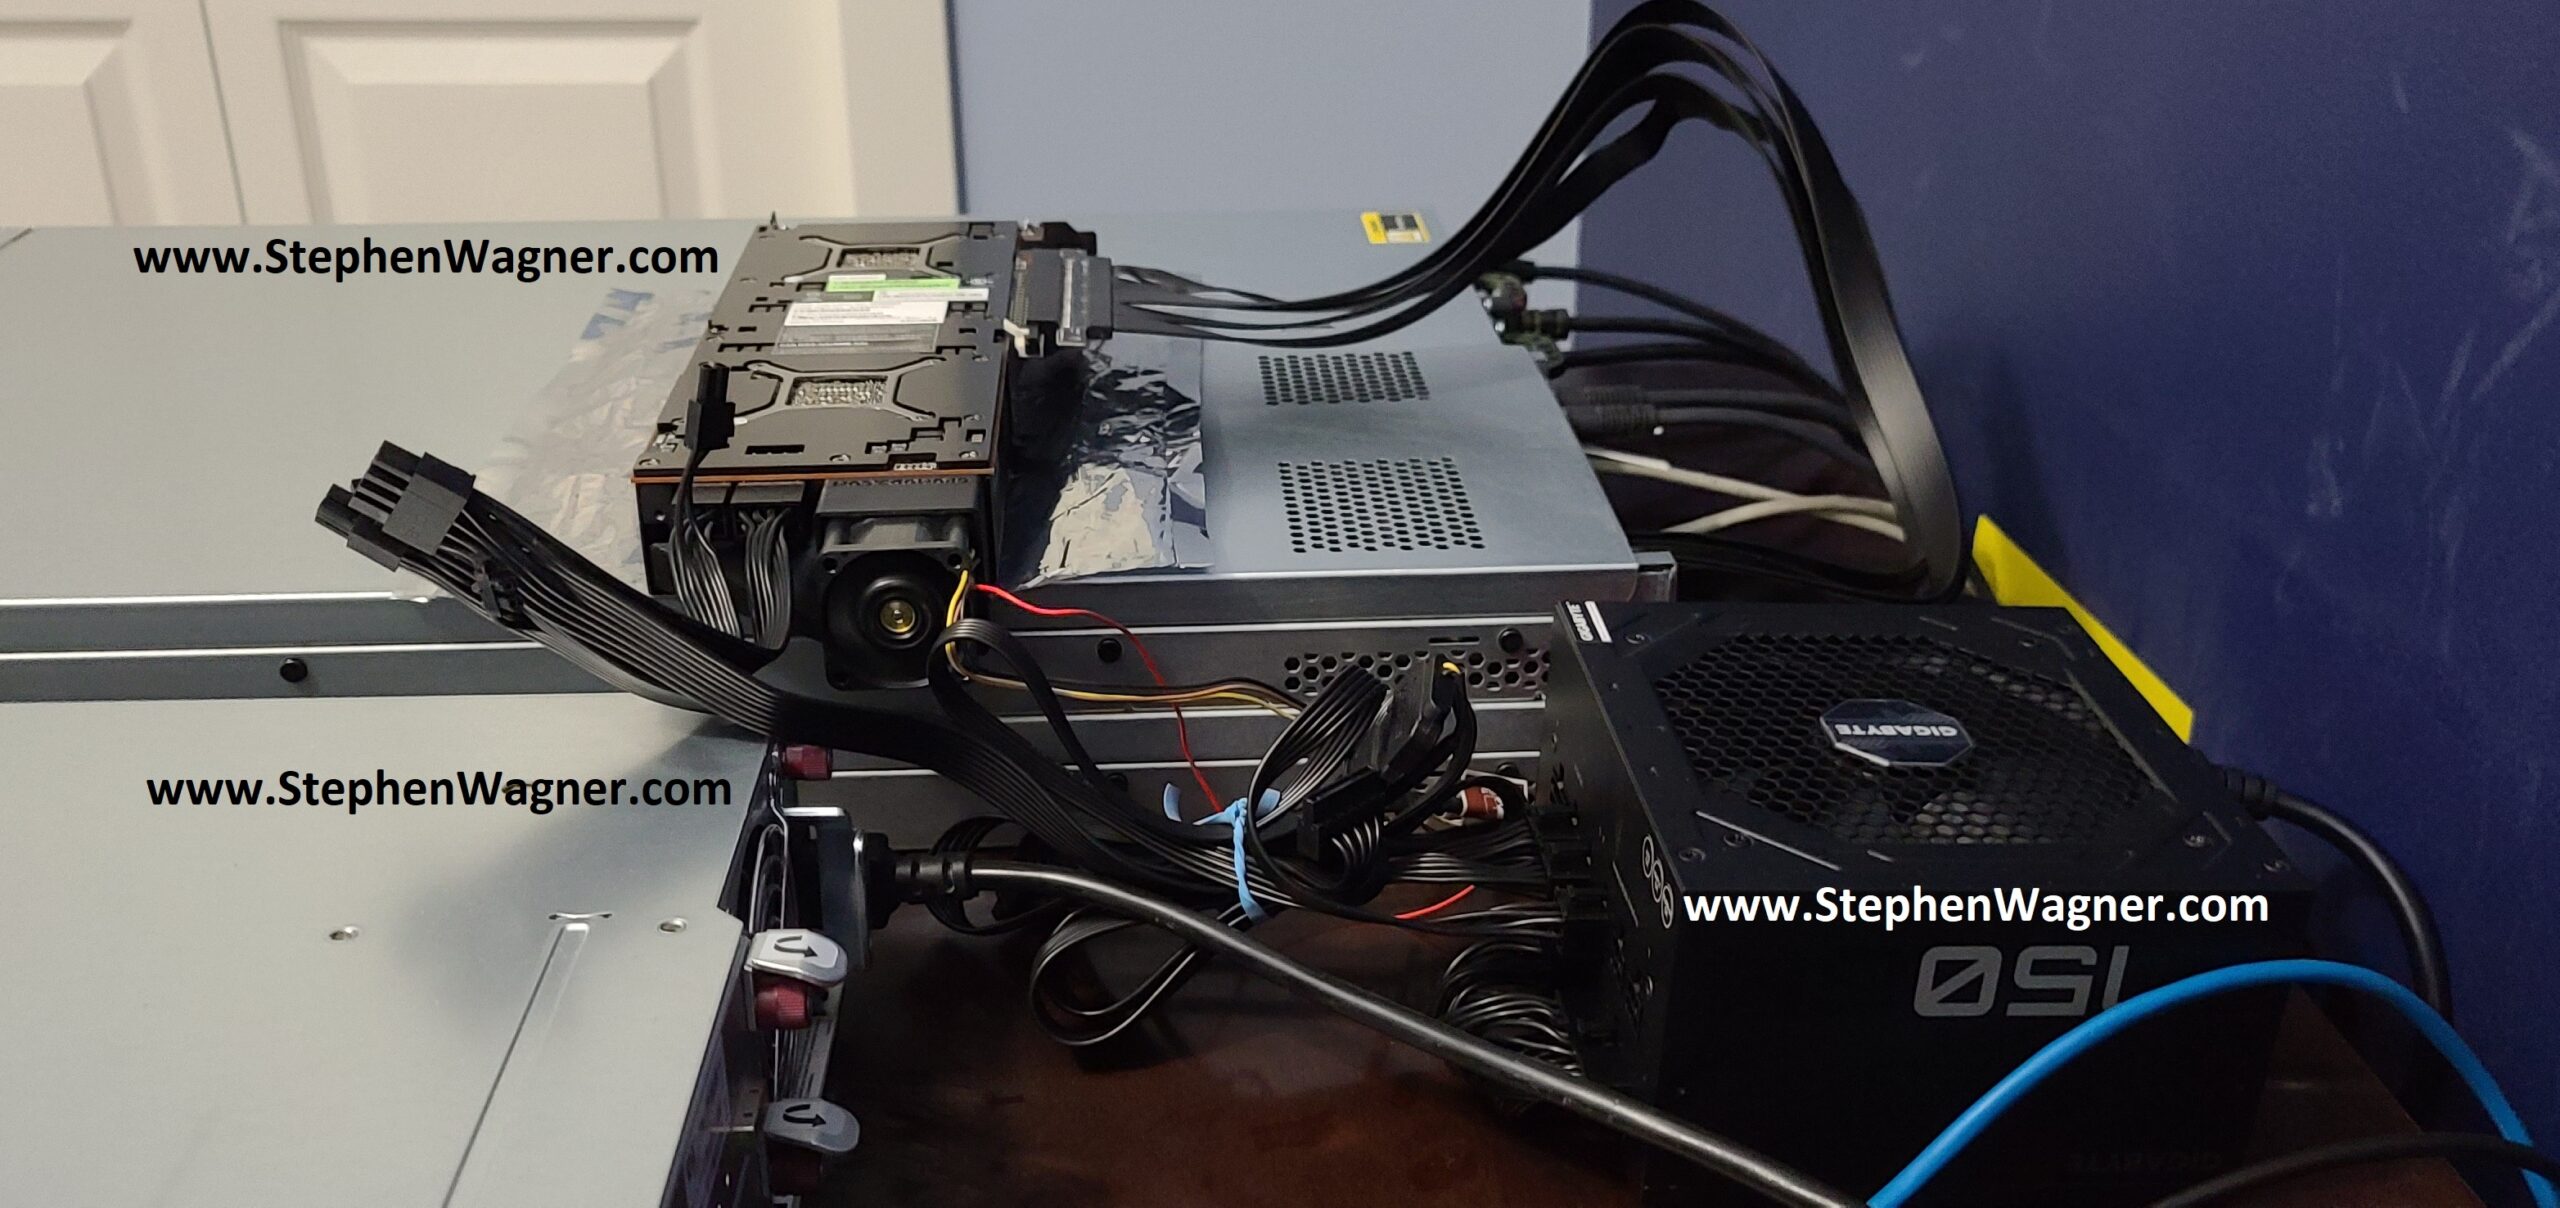
Side view of external S7150 x2 GPU on Server
It’s about as neat and tidy as it can be, being a hacked up solution.
Using the card
Overall, by the time I was done connecting it to the server, I was pretty happy with the cleaned up final result.
AMD S7150 x2 connected to HPE Proliant DL360p Gen8 Server
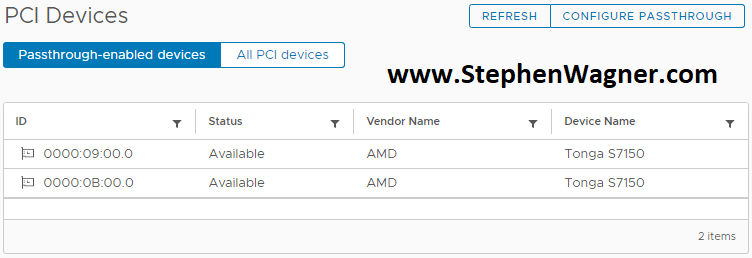
After booting the system, I noticed that VMware ESXi 6.5 detected the card and both GPUs.
AMD S7150 X2 PCIe Passthru ESXi 6.5
You’ll notice that on the server, the GPUs show up as an “AMD Tonga S7150”.
Before I started to play around with the MxGPU software, I wanted to simply pass through an entire GPU to a VM for testing. I enabled ESXi Passthru on both GPUs, and restarted the server.
So far so good!
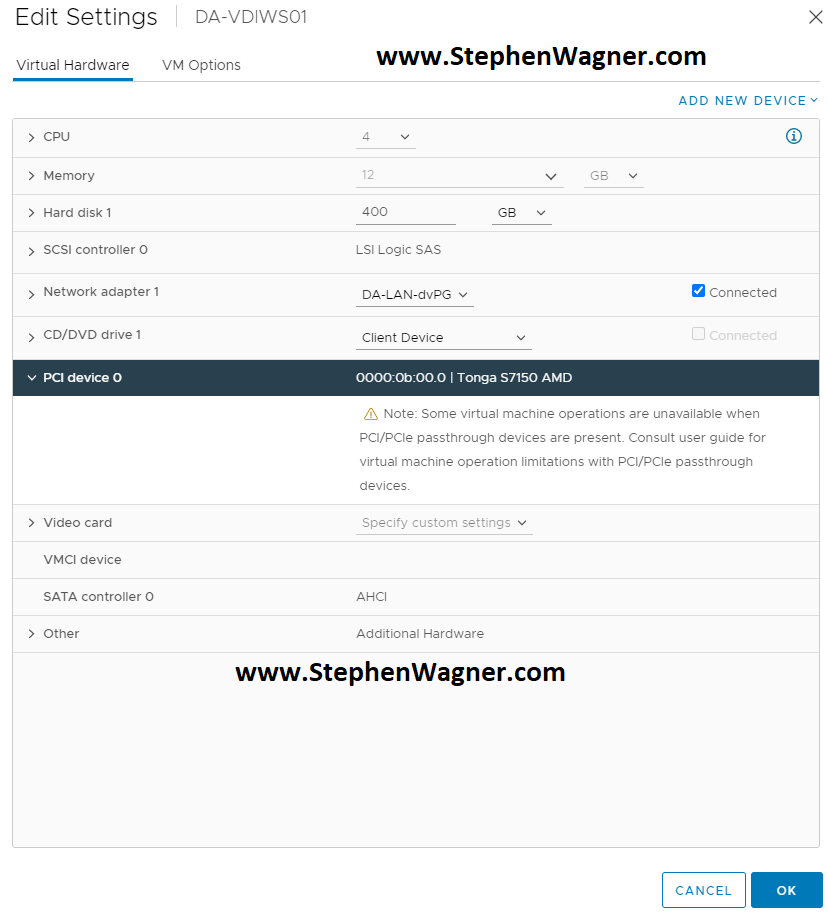
I already had a persistent VDI VM configured and ready to go, so I edited the VM properties, and attached one of the AMD S7150 x2 GPUs to the VM.
Attached S7150 x2 Tonga GPU to vSphere VDI VM PCIe Passthru
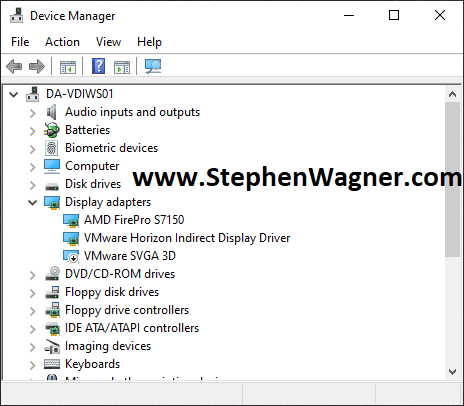
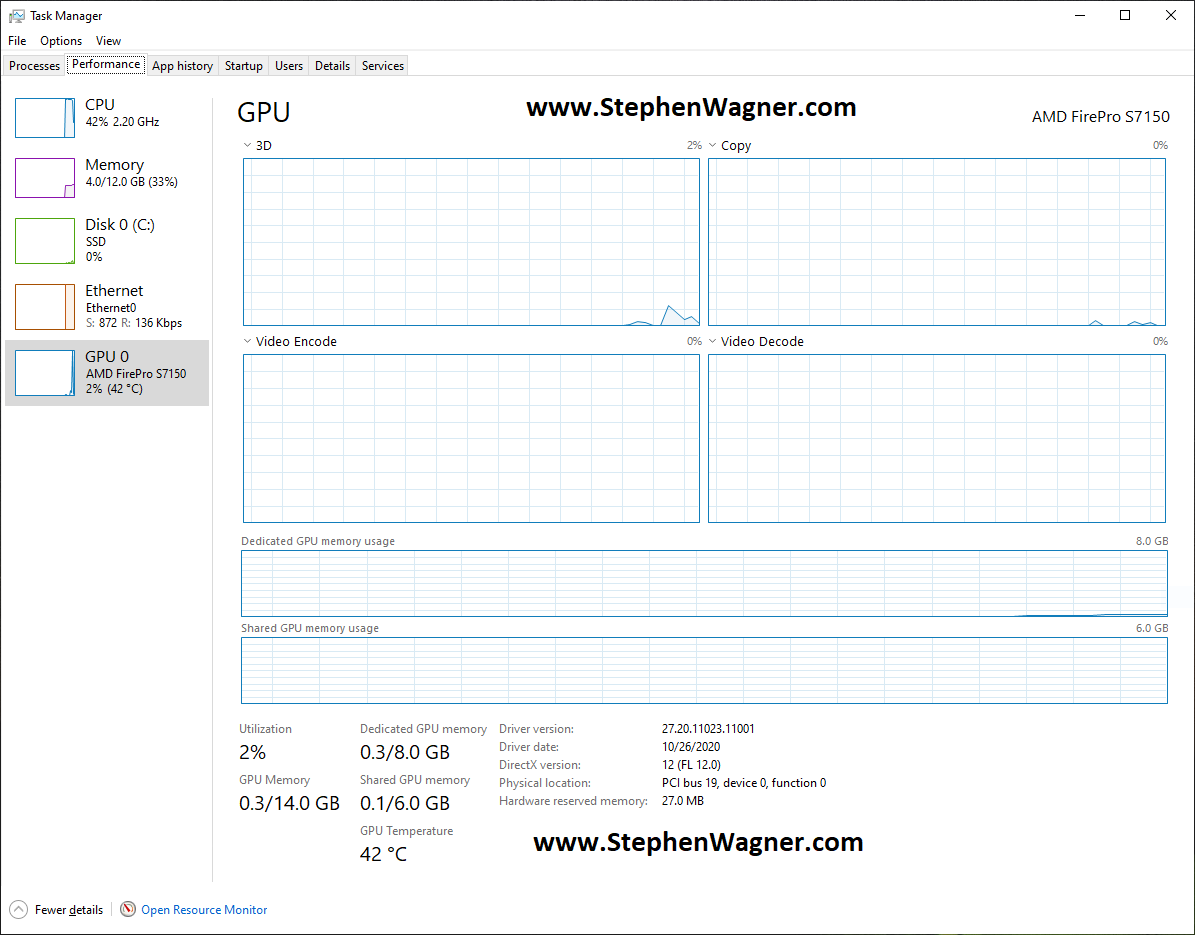
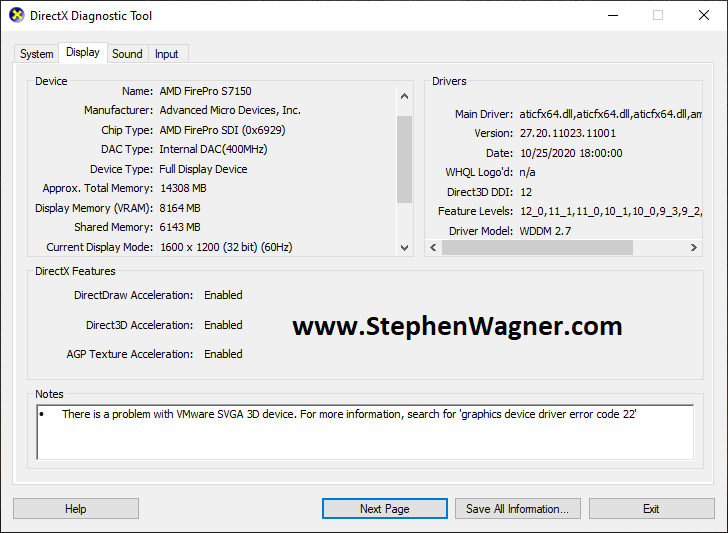
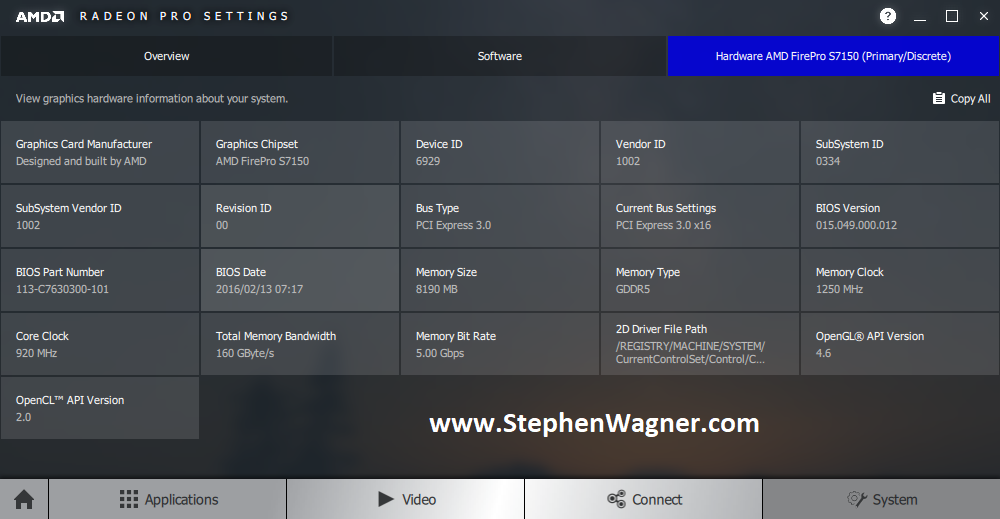
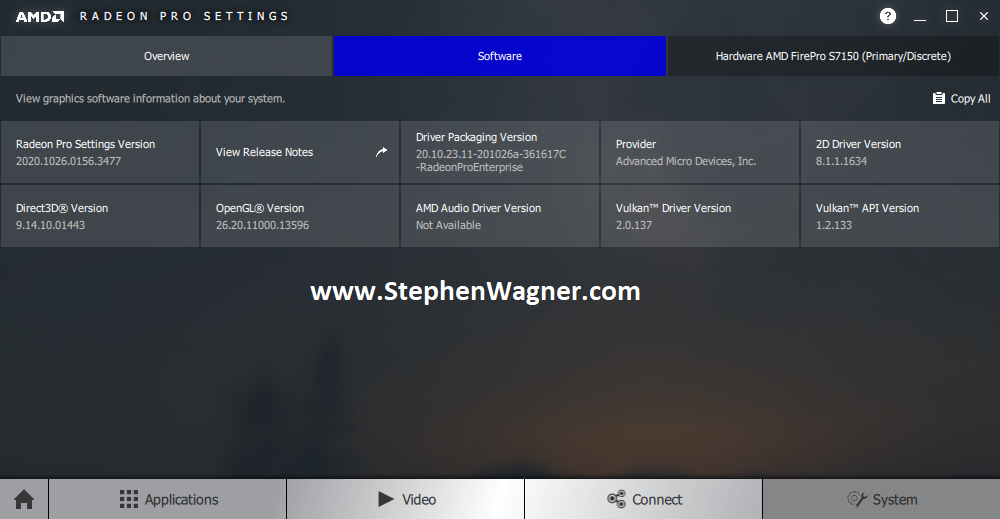
Booting the VM I was able to see the card and I installed the AMD Radeon FirePro drivers. Everything just worked! “dxdiag” was showing full 3D acceleration, and I confirmed that hardware h.264 offload with the VMware Horizon Agent was functioning (confirmed via BLAST session logs).
Device Manager with AMD S7150 X2 Passthru on ESXi with VDI VMWindows Task Manager (taskmgr) showing GPU Performance of AMD S7150 X2 Passthru VDI VM on ESXiAMD S7150 X2 ESXi Passthru Running dxdiagVMware Horizon Performance Monitor with AMD S7150 X2 GPU PassthruHardware Tab of AMD Radeon Pro Settings with AMD S7150 X2 Passthru on ESXi VDI VMOverview Tab of AMD Radeon Pro Settings with AMD S7150 X2 Passthru on ESXi VDI VMSoftware Tab of AMD Radeon Pro Settings with AMD S7150 X2 Passthru on ESXi VDI VM
That was easy! 🙂
Issues
Now on to the issues. After spending numerous days, I was unable to get the MxGPU features working with the AMD Radeon FirePro drivers for VMware ESXi. However, thanks for a reader named TonyJr, I was able to solve this, but more on that later (keep reading).
Even though I had the drivers and the scripts installed, it was unable to create the VFs (Virtual Functions) with SR-IOV. From research on the internet with the limited amount of information there is, I came to believe that this is due to an SR-IOV bug on the Gen8 platform that I’m running (remember, this is completely and utterly NOT SUPPORTED).
If anyone is interested, the commands worked and the drivers loaded, but it just never created the functions on reboot. I also tried using the newer drivers for the V340 card, with no luck as the module wouldn’t even load.
Here is an example of the configuration script:
[root@DA-ESX03:/vmfs/volumes/5d40aefe-030ee1d6-df44-ecb1d7f30334/files/mxgpu] sh mxgpu-install.sh -c
Detected 2 SR-IOV GPU
0000:06:00.0 Display controller VGA compatible controller: AMD Tonga S7150 [vmgfx0]
0000:08:00.0 Display controller VGA compatible controller: AMD Tonga S7150 [vmgfx1]
Start configuration....
Do you plan to use the Radeon Pro Settings vSphere plugin to configure MxGPU? ([Y]es/[N]o, default:N)n
Default Mode
Enter the configuration mode([A]uto/[H]ybrid,default:A)a
Auto Mode Selected
Please enter number of VFs:(default:4): 2
Configuring the GPU 1 ...
0000:06:00.0 VGA compatible controller: AMD Tonga S7150 [vmgfx0]
GPU1=2,B6
Configuring the GPU 2 ...
0000:08:00.0 VGA compatible controller: AMD Tonga S7150 [vmgfx1]
GPU2=2,B8
Setting up SR-IOV settings...
Done
pciHole.start = 2048
pciHole.end = 4543
Eligible VMs:
DA-VDIWS01
DA-VDIWS02
DA-VDIUbuntu01
DA-MxGPU
PCI Hole settings will be added to these VMs. Is this OK?[Y/N]n
User Exit
The configuration needs a reboot to take effect

To automatically assign VFs, please run "sh mxgpu-install.sh -a" after system reboot
[root@DA-ESX03:/vmfs/volumes/5d40aefe-030ee1d6-df44-ecb1d7f30334/files/mxgpu]
And as mentioned, on reboot I would only be left with the actual 2 physical GPUs available for passthru.
I also tried using “esxcfg-module” utility to configure the driver, but that didn’t work either.
Both combinations failed to have any effect on creating the VFs. It was unfortunate, but I still had 2 separate GPUs that I could able to passthrough to 2 VDI VMs which is more than enough for me.
Issues (Update June 19 2022)
Thanks to “TonyJr” leaving a comment, I was able to get the MxGPU drivers functioning on the ESXi host.
To get SR-IOV and the drivers to function, I had to perform the following:
Log on to the BIOS
Press Ctrl+A which unlocked a secret Menu called “SERVICE OPTIONS”
Open “SERVICE OPTIONS”
Select “PCI Express 64-Bit BAR Support”, choose “Enable” and then reboot the server.
Upon reboot, the ESXi instance had actually already sliced up the S7150 MxGPU using the options I tried configuring above. It’s all working now!
Ultimately I tweaked the settings to only slice one of the two GPUs in to 2 VFs, leaving me with a full GPU for passthrough, as well as 2 VFs from the other GPU. Thanks TonyJr!
Horizon View with the S7150 x2
Right off the bat, I have to say this works AMAZING! I’ve been using this for about 4 weeks now without any issues (and no fires, lol).
As mentioned above, because of my issues with SR-IOV on the server I couldn’t utilize MxGPU, but I do have 2 full GPUs each with 8GB of VRAM each that I can passthrough to VDI Virtual Machines using vDGA. Let’s get in to the experience…
Similar to the experience with the Nvidia GRID K1 card, the S7150 x2 provides powerful 3D acceleration and GPU functionality to Windows VDI VMs. Animations, rendering, gaming, it all works and it’s all 3D accelerated!
I’ve even tested the S7150 x2 with my video editing software to edit and encode videos. No complaints and it works just like a desktop system with a high performance GPU would. Imagine video editing on the road with nothing but a cheap laptop and the VMware Horizon client software!
The card also offloads encoding of the VMware BLAST h.264 stream from the CPU to the GPU. This is what actually compresses the video display feed that goes from the VM to your VMware View client. This provides a smoother experience with no delay or lag, and frees up a ton of CPU cycles. Traditionally without a GPU to offload the encoding, the h.264 BLAST stream uses up a lot of CPU resources and bogs down the VDI VM (and the server it’s running on).
Unfortunately, I don’t have any engineering, mapping, or business applications to test with, that this card was actually designed for, but you have to remember this card was designed to provide VDI users with a powerful workstation experience.
It would be amazing if AMD (and other vendors) released more cards that could provide these capabilities, both for the enterprise as well as enthusiasts and their homelab.
This website uses cookies to improve your experience. We'll assume you're ok with this, but you can opt-out if you wish.
Do you accept the use of cookies and accept our privacy policy? AcceptRejectCookie and Privacy Policy
Privacy & Cookies Policy
Privacy Overview
This website uses cookies to improve your experience while you navigate through the website. Out of these cookies, the cookies that are categorized as necessary are stored on your browser as they are essential for the working of basic functionalities of the website. We also use third-party cookies that help us analyze and understand how you use this website. These cookies will be stored in your browser only with your consent. You also have the option to opt-out of these cookies. But opting out of some of these cookies may have an effect on your browsing experience.