Jul 072020
 
Picture of a business office with cubicles

In the ever-evolving world of IT and End User Computing (EUC), new technologies and solutions are constantly being developed to decrease costs, improve functionality, and help the business’ bottom line. In this pursuit, as far as end user computing goes, two technologies have emerged: Hosted Desktop Infrastructure (HDI), and Virtual Desktop Infrastructure (VDI). In this post I hope to explain the differences and compare the technologies.

We’re at a point where due to the low cost of backend server computing, performance, and storage, it doesn’t make sense to waste end user hardware and resources. By deploying thin clients, zero clients, or software clients, we can reduce the cost per user for workstations or desktop computers, and consolidate these on the backend side of things. By moving moving EUC to the data center (or server room), we can reduce power requirements, reduce hardware and licensing costs, and take advantage of some cool technologies thanks to the use of virtualization and/or Storage (SANs), snapshots, fancy provisioning, backup and disaster recovery, and others.

See below for the video, or read on for the blog post!

And it doesn’t stop there, utilizing these technologies minimizes the resources required and spent on managing, monitoring, and supporting end user computing. For businesses this is a significant reduction in costs, as well as downtime.

What is Hosted Desktop Infrastructure (HDI) and Virtual Desktop Infrastructure (VDI)

Many IT professionals still don’t fully understand the difference between HDI and VDI, but it’s as sample as this: Hosted Desktop Infrastructure runs natively on the bare metal (whether it’s a server, or SoC) and is controlled and provided by a provisioning server or connection broker, whereas Virtual Desktop Infrastructure virtualizes (like you’re accustomed to with servers) the desktops in a virtual environment and is controlled and provided via hypervisors running on the physical hardware.

Hosted Desktop Infrastructure (HDI)

As mentioned above, Hosted Desktop Infrastructure hosts the End User Computing sessions on bare metal hardware in your datacenter (on servers). A connection broker handles the connections from the thin clients, zero clients, or software clients to the bare metal allowing the end user to see the video display, and interact with the workstation instance via keyboard and mouse.

Pros:

  • Remote Access capabilities
  • Reduction in EUC hardware and cost-savings
  • Simplifies IT Management and Support
  • Reduces downtime
  • Added redundancy
  • Runs on bare metal hardware
  • Resources are dedicated and not shared, the user has full access to the hardware the instance runs on (CPU, Memory, GPU, etc)
  • Easily provide accelerated graphics to EUC instances without additional costs
  • Reduction in licensing as virtualization products don’t need to be used

Cons:

  • Limited instance count to possible instances on hardware
  • Scaling out requires immediate purchase of hardware
  • Some virtualization features are not available since this solution doesn’t use virtualization
  • Additional backup strategy may need to be implemented separate from your virtualized infrastructure

Example:

If you require dedicated resources for end users and want to be as cost-effective as possible, HDI is a great candidate.

An example HDI deployment would utilize HPE Moonshot which is one of the main uses for HPE Moonshot 1500 chassis. HPE Moonshot allows you to provision up to 180 OS instances for each HPE Moonshot 1500 chassis.

More information on the HPE Moonshot (and HPE Edgeline EL4000 Converged Edge System) can be found here: https://www.stephenwagner.com/2018/08/22/hpe-moonshot-the-absolute-definition-of-high-density-software-defined-infrastructure/

Virtual Desktop Infrastructure (VDI)

Virtual Desktop Infrastructure virtualizes the end user operating system instances exactly how you virtualize your server infrastructure. In VMware environments, VMware Horizon View can provision, manage, and maintain the end user computing environments (virtual machines) to dynamically assign, distribute, manage, and broker sessions for users. The software product handles the connections and interaction between the virtualized workstation instances and the thin client, zero client, or software client.

Pros:

  • Remote Access capabilities
  • Reduction in EUC hardware and cost-savings
  • Simplifies IT Management and Support
  • Reduces downtime
  • Added redundancy
  • Runs as a virtual machine
  • Shared resources (you don’t waste hardware or resources as end users share the resources)
  • Easy to scale out (add more backend infrastructure as required, don’t need to “halt” scaling while waiting for equipment)
  • Can over-commit (over-provision)
  • Backup strategy is consistent with your virtualized infrastructure
  • Capabilities such as VMware DRS, VMware HA

Cons:

  • Resources are not dedicated and are shared, users share the server resources (CPU, Memory, GPU, etc)
  • Extra licensing may be required
  • Extra licensing required for virtual accelerated graphics (GPU)

Example:

If you want to share a pool of resources, require high availability, and/or have dynamic requirements then virtualization would be the way to go. You can over commit resources while expanding and growing your environment without any discontinuation of services. With virtualization you also have access to technologies such as DRS, HA, and special Backup and DR capabilities.

An example use case of VMware Horizon View and VDI can be found at: https://www.digitallyaccurate.com/blog/2018/01/23/vdi-use-case-scenario-machine-shops/

 Conclusion

Both technologies are great and have their own use cases depending on your business requirements. Make sure you research and weigh each of the options if you’re considering either technologies. Both are amazing technologies which will compliment and enhance your IT strategy.
Jun 202020
 

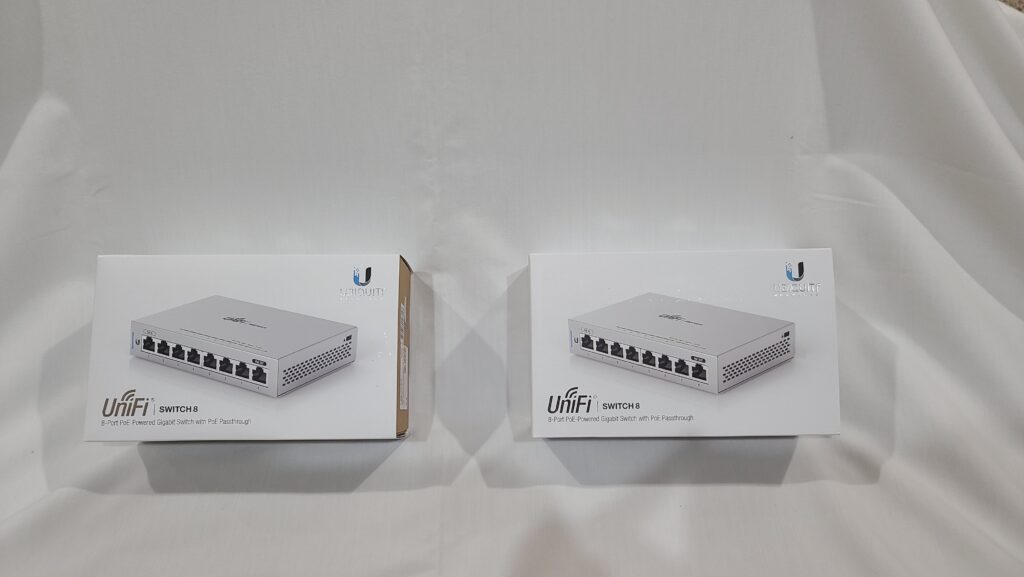
Well, it was about time… I just purchased two Ubiquiti UniFi US-8 Gigabit Switches to replace a couple of aged Linksys Routers and Switches.

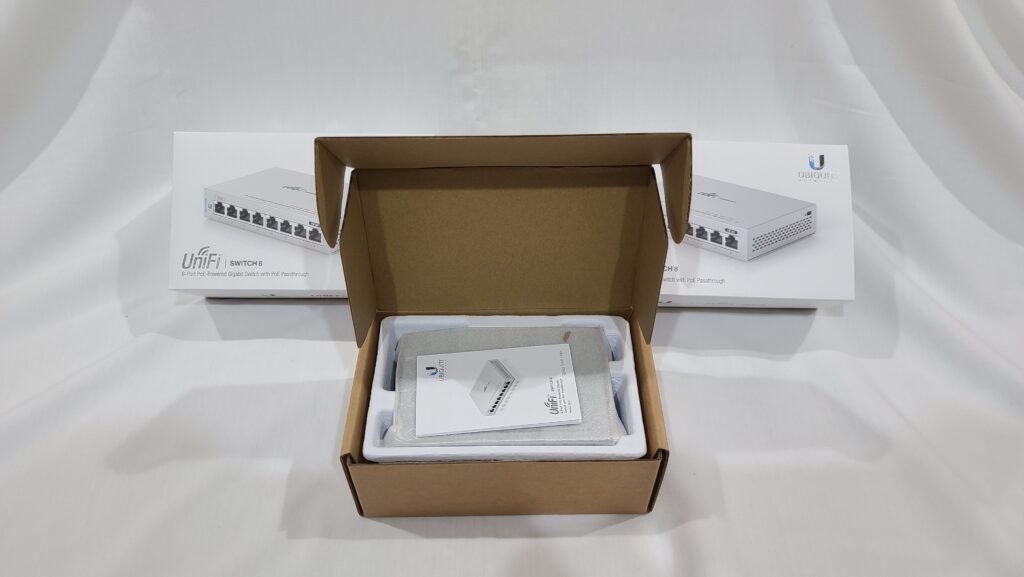
Picture of 2 Ubiquiti UniFi US-8 Switches
Ubiquiti UniFi US-8 Switch

I’ll be outlining why I purchased these, how they are setup, my impressions, and review.

Make sure you check out the video review below, and read the entire written review below as well!

Ubiquiti UniFi US-8 Gigabit Switch Review Video

Now on to the written review…

The back story

Yes, you read the first paragraph correctly, I’m replacing wireless routers with the UniFi US 8 Port switch.

While my core infrastructure in my server room is all Ubiquiti UniFi, I still have a few routers/switches deployed around the house to act as “VLAN breakout boxes“. These are Linksys wireless routers that I have hacked and installed OpenWRT on to act as switches for VLAN trunks and also provide native access to VLANs.

Originally these were working fine (minus the ability to manage them from the UniFi controller), but as time went on the hardware started to fail. I also wanted to fully migrate to an end-to-end UniFi Switching solution.

The goal

In the end, I want to replace all these 3rd party switches and deploy UniFi switches to provide switching with the VLAN trunks and provide native access to VLANs. I also want to be able to manage these all from the UniFi Controller I’m running on a Linux virtual machine.

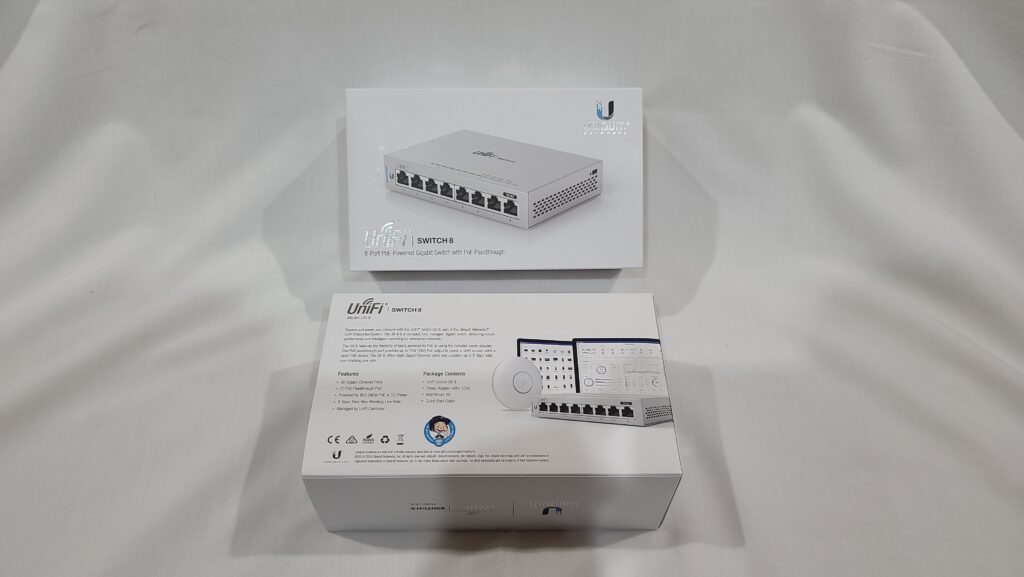
Picture of Ubiquiti UniFi US-8 Switch Front and Back Box Shot
Ubiquiti UniFi US-8 Switch Front and Back Box Shot

To meet this goal, I purchased 2 of the Ubiquiti UniFi US-8, 8 port Gigabit manageable switches.

Ubiquiti UniFi US-8 Switch

So I placed an order through distribution for 2 of these switches.

As with all UniFi product, I was very impressed with the packaging.

Unboxing a Ubiquiti UniFi US-8 Switch
Ubiquiti UniFi US-8 Switch Unboxing

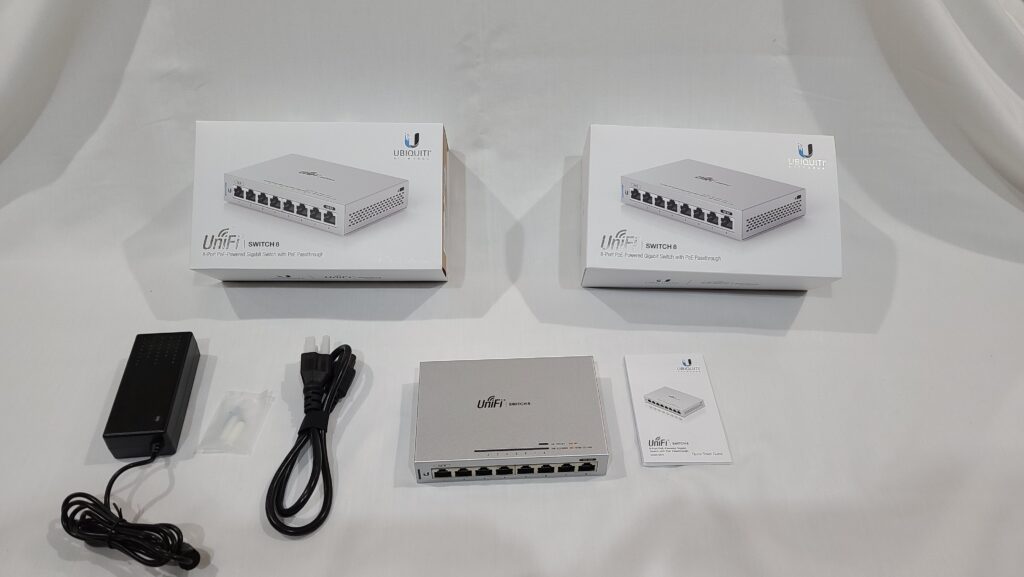
And here is the entire package unboxed.

A Ubiquiti UniFi US-8 Switch unboxed
Ubiquiti UniFi US-8 Switch Unboxed

Another good looking UniFi Switch!

Specs

The UniFi Switch 8 is available in two variants, the non-PoE and PoE version.

Part#: US-8Part#: US-8-60W
8Gbps of Non-Blocking Throughput8Gbps of Non-Blocking Throughput
16Gbps Switching Capacity16Gbps Switching Capacity
12W Power Consumption12W Power Consumption
Powered by PoE (Port 1) or AC/DC Power AdapterPowered by AC/DC Power Adapter
48V PoE Passthrough on Port 8
(Powered by PoE passthrough from Port 1, or DC Power Adapter)
4 Auto-Sensing 802.3af PoE Ports (Ports 5-8)

UniFi Controller Adoption

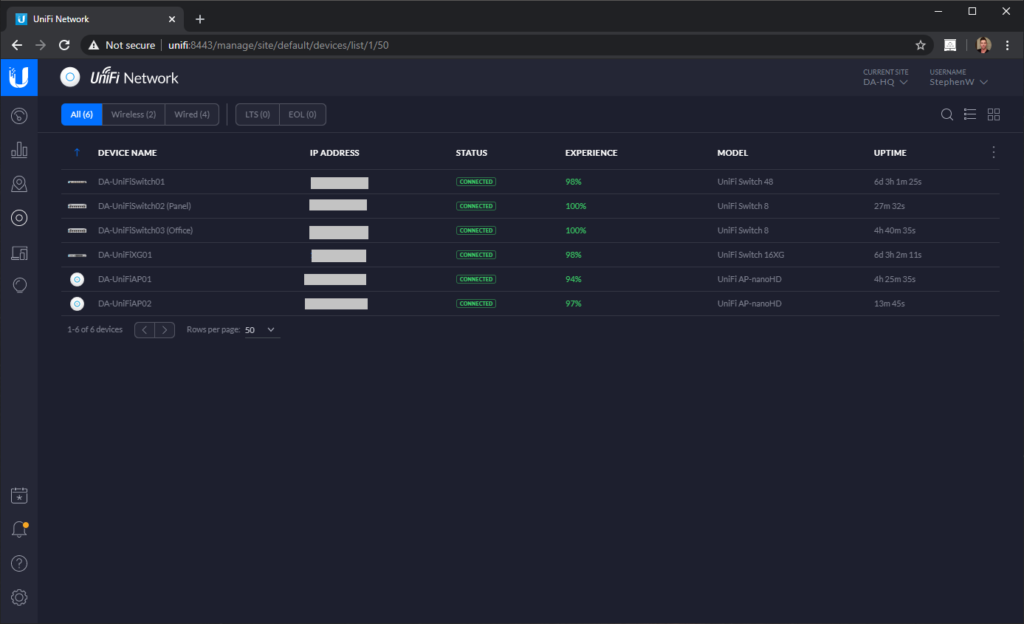
After plugging in the two switches, they instantly appeared in the UniFi controller and required a firmware update to adopt.

Adoption was easy, and I was ready to configure the devices! Click on the images to view the screenshots.

Screenshot of Ubiquiti UniFi US-8 Adopted on UniFi Controller
Ubiquiti UniFi US-8 Adopted on UniFi Controller

Configuration and Setup

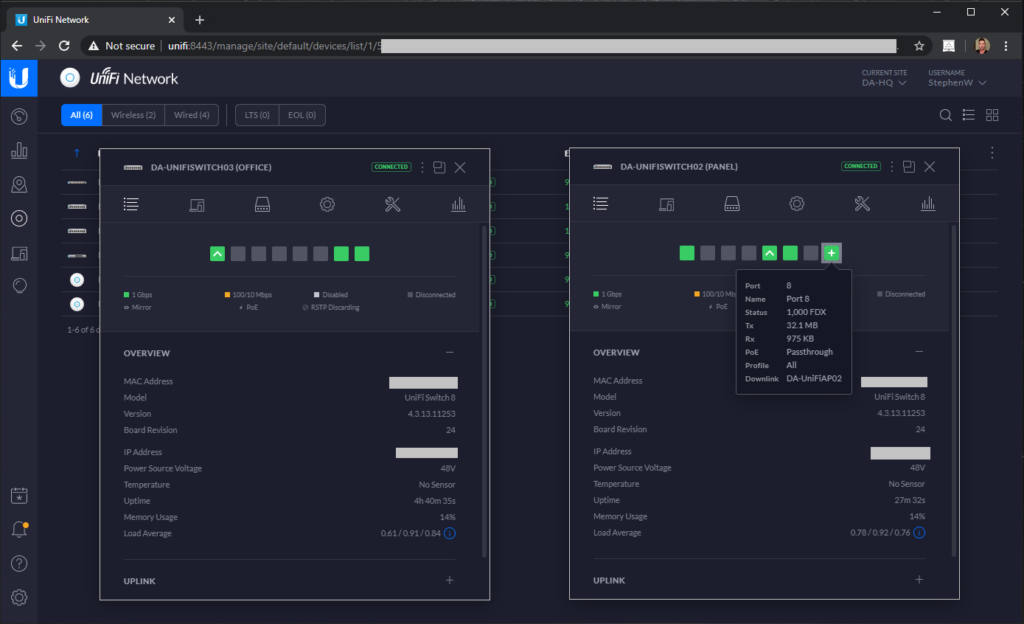
I went ahead and configured the management VLANs, along with the required VLAN and switch port profiles on the applicable ports.

One of these switches were going in my furnace room which has a direct link (VLAN trunk) from my server room. The other switch is going on my office desk, which will connect back to the furnace room (VLAN trunk). The switch on my desk will provide native access to one of my main VLANs.

I also planed on powering a UniFi nanoHD on my main floor with the PoE passthrough port, so I also enabled that on the switch residing in my furnace room.

Configuration was easy and took minutes. I then installed the switches physically in their designated place.

Screenshot of Ubiquiti UniFi US-8 Adopted and Configured on UniFi Controller
Ubiquiti UniFi US-8 Adopted and Configured on UniFi Controller

One things I want to note that I found really handy was the ability to restart and reset PoE devices via the UniFi Controller web interface. I’ve never had to reset any of my nanoHDs, but it’s handy to know I have the ability.

Everything worked perfectly once the switches were configured, setup, and implemented.

Overall Review

These are great little switches, however the price point can be a bit much when compared to the new UniFi USW-Flex-Mini switches. I’d still highly recommend this switch, especially if you have an end-to-end UniFi setup.

Use Cases:

  • Small Network Switch
  • Patch Panel Switch
  • Desktop Switch to connect to core switches
  • Network switch to power Wireless Access Points

What I liked the most:

  • Easy to setup
  • Visually attractive hardware
  • Uniform management with other UniFi devices
  • No fan, silent running
  • PoE Passthrough even on the Non-PoE version

What could be improved:

  • Price

Additional Resources and Blog Posts:

Manufacturer Product Links

Jun 172020
 

One thing I love doing is mixing technology with sport.

In my free time I’m often hiking, cycling, running, or working out. I regularly use technology to supplement and track my activities. It helps to record, remember, track, and compete with myself.

I use a combo of hardware and software to do so, including watches, phones, software, etc but today I wanted to put emphasis on the Snapchat Spectacles.

The Snapchat Spectacles

Picture of Snapchat Spectacles and Charging Case
Snapchat Spectacles

I’ve had a pair of the 1st generation Snapchat Spectacles since they were released (I had to use my US shipping address to bring them over to Canada). Over the years I’ve used them to collect videos and haven’t really done much with them, with the exception of sending snaps to friends.

Thankfully I save everything I record and as of the past year, incorporating my new hobby with video, I’ve been able to use some of the old footage to generate some AMAZING videos!

See below for a video I put together of 3 beautiful mountain summits I hiked in one month, first person from the Snapchat Spectacles.

https://youtu.be/KSH0GFDUyQs
Snapchat Spectacles: 3 Mountain Summits in 31 Days

If you keep reading through to the end of the post there’s another video.

First person view

As you can see, even the first version of the Snapchat Spectacles generates some beautiful HD video, providing a first person view of the wearers field of vision.

You might say it’s similar to wearing a GoPro, but what I like about the Spectacles is that the camera is mounted beside your eyes, which makes the video capture that much more personal.

My wishlist

What I’d really like is the ability to continuously record HD video non-stop and even possibly record to my mobile device. Even if this couldn’t be accomplished wirelessly and required a wire to my mobile device, I would still be using it all the time.

Another thing that would be nice would be more size options, as the first generation are way too small for my head, LOL! 🙂

Conlusion

Tech is awesome, and I love using tech like this to share personal experiences!

Snapchat Spectacles: Hiking Grotto Mountain September 2017

Snapchat, if you’re listening, I’d love to help with the design of future versions of the Snapchat Spectacles…

Jun 152020
 

We all love speed, whether it’s our internet connection or our home network. And as our internet speeds approach gigabits per second, it’s about time our networks hit 10Gb per second…

High speed networking, particularly 10Gig network is becoming more cost-effective day by day, and with vendors releasing affordable switches, there hasn’t been a better time to upgrade.

Today we’re going 10Gig with the Ubiquiti UniFi US-16-XG switch.

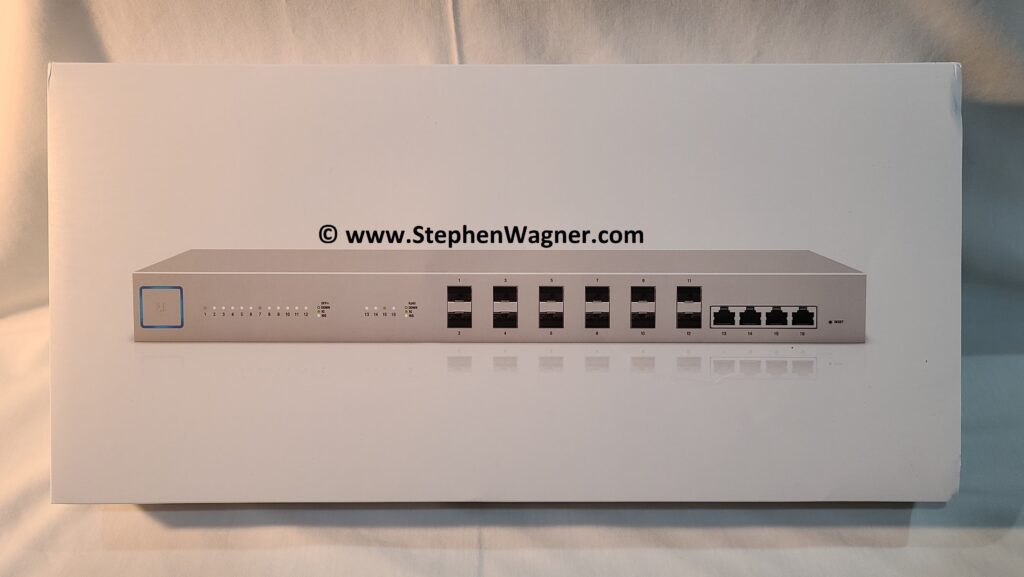
Picture of a Ubiquiti UniFi US-16-XG Switch retail box
Ubiquiti UniFi US-16-XG Switch Box shot

I’ll be discussing my configuration and setup, why you should use this switch for your homelab and/or business, as well as providing a review on the equipment.

Make sure you check out the video below and read the entire post!

Going 10Gig with the Ubiquiti UniFi US-16-XG Network Switch

Let’s get to it!

The back story

Just like the backstory with my original Ubiquiti UniFi Review, I wanted to optimize my network, increase speeds, and remove bottlenecks.

Most of my servers have 10Gig network adapters (through 10GbaseT or SFP+ ports), and I wanted to upgrade my other servers. I always wanted the ability to add more uplinks to allow a single host/server to have redundant connections to my network.

Up until now, I had 2 hosts connected via my Ubiquiti UniFi US-48 switch via the SFP+ ports with a SFP+ to 10GbaseT module. Using both of the 10Gig ports disallows anymore 10Gig devices being connected. Also, the converter module adds latency.

The goal

Ultimately I wanted to implement a solution that included a new 10Gb network switch acting as a backbone for the network, with connections to my servers, storage, 10Gig devices, and secondary 1Gb switches.

While not needed, it would be nice to have access to both SFP+ connections, as well as 10GbaseT as I have devices that use both.

At the same time, I wanted something that would be easy to manage, affordable, and compatible with equipment from other vendors.

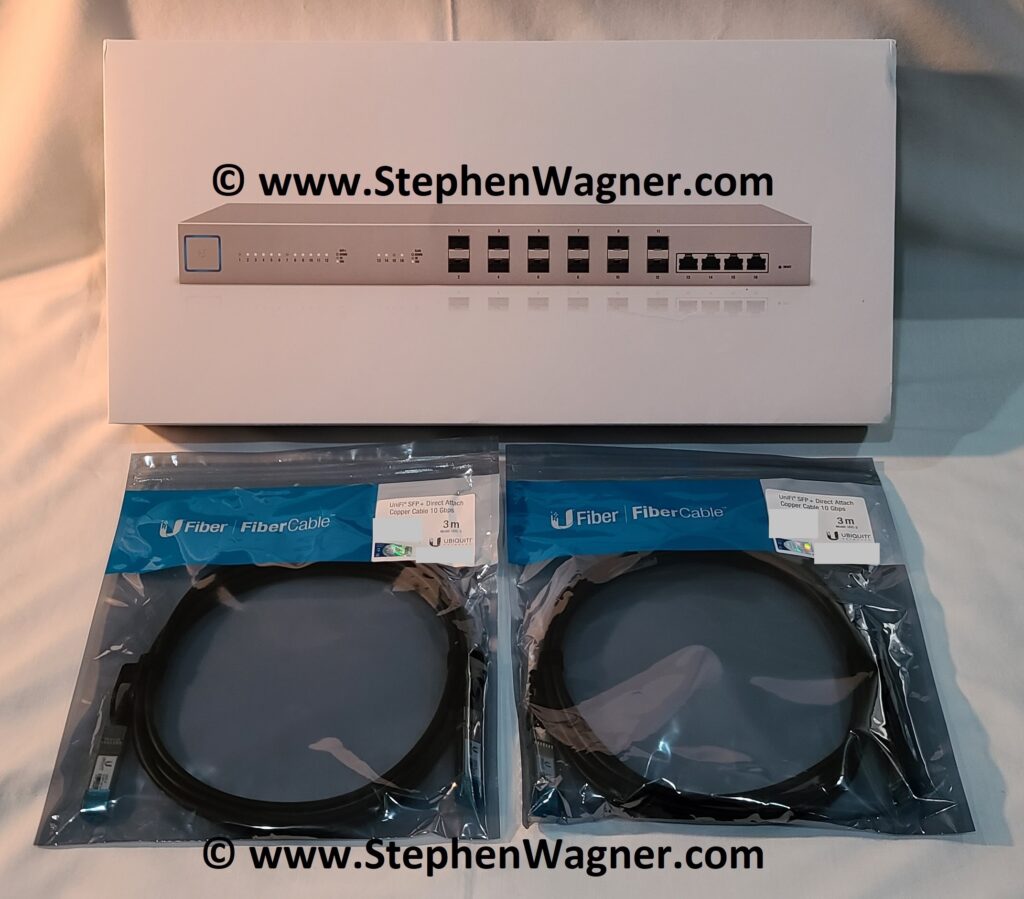
Picture of Ubiquiti UniFi 16 XG Switch with UDC-1 DAC SFP+ Cables
Ubiquiti UniFi 16 XG Switch with UDC-1 DAC SFP+ Cables

I chose the Ubiquiti UniFi US-16-XG Switch for the task, along with an assortment of cables.

Ubiquiti UniFi US-16-XG Switch

After already being extremely please with the Ubiquiti UniFi product line, I was happy to purchase a unit for internal use, as my company sells Ubiquiti products.

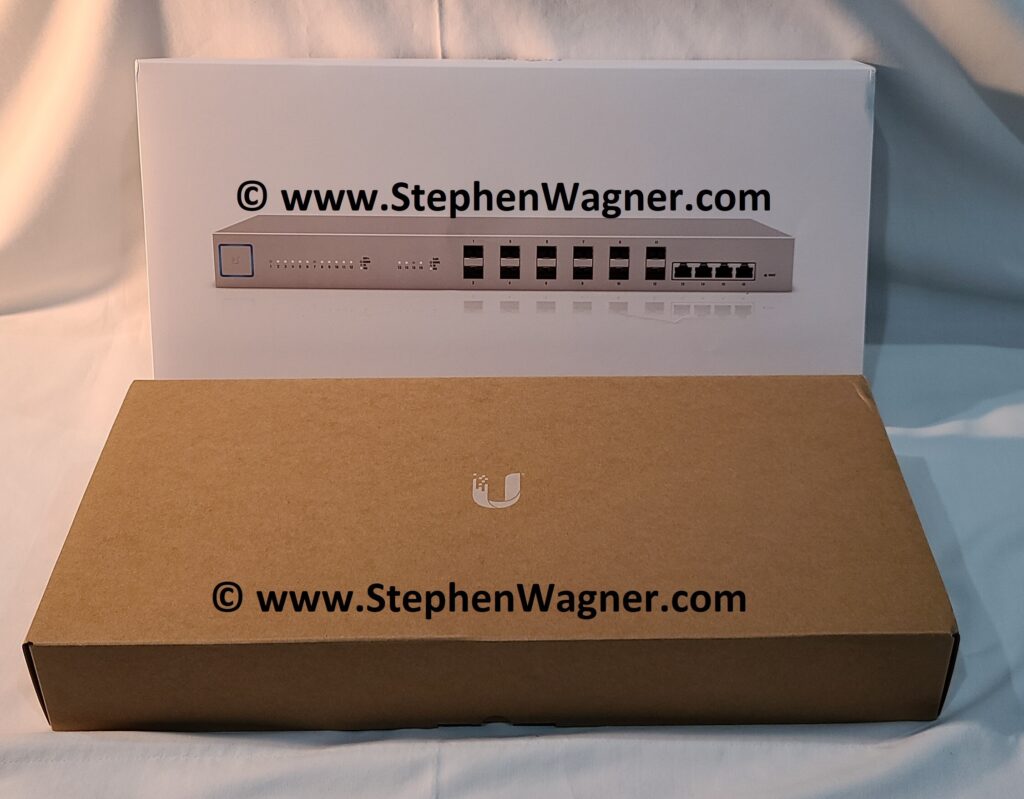
Receiving the product, I was very impressed with the packaging and shipping.

Ubiquiti UniFi US-16-XG Switch Unboxing
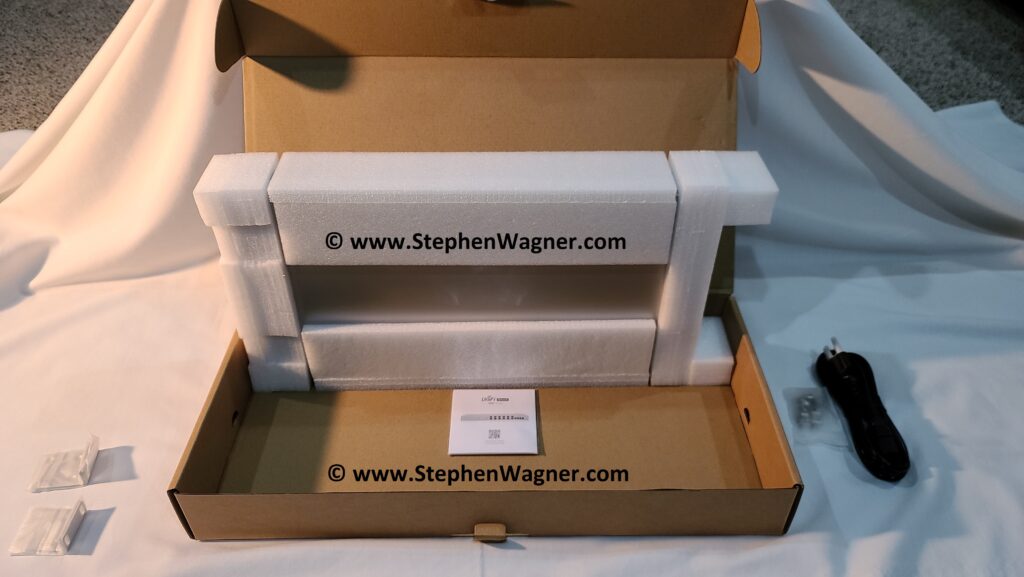
Picture of Ubiquiti UniFi US-16-XG Switch Unboxing and Package contents
Ubiquiti UniFi US-16-XG Switch Unboxing and Package contents

And here I present the Ubiquiti UniFi 16 XG Switch…

Picture of Ubiquiti UniFi US-16-XG Switch
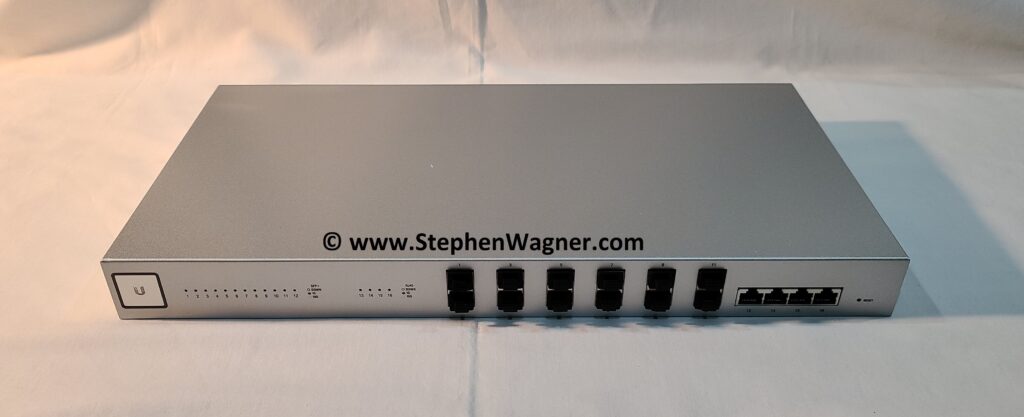
Ubiquiti UniFi US-16-XG Switch

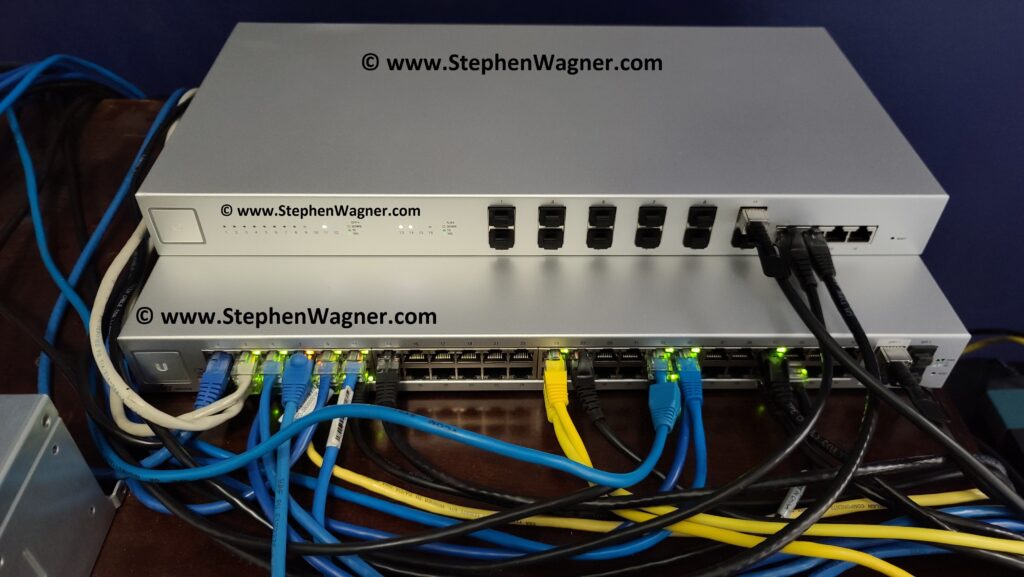
You’ll notice the trademark UniFi product design. On the front, the UniFi 16 XG switch has 12 x 10Gb SFP+ ports, along with 4 x 10GbaseT ports. All ports can be used at the same time as none are shared.

Picture of the backside of a Ubiquiti UniFi US-16-XG Switch
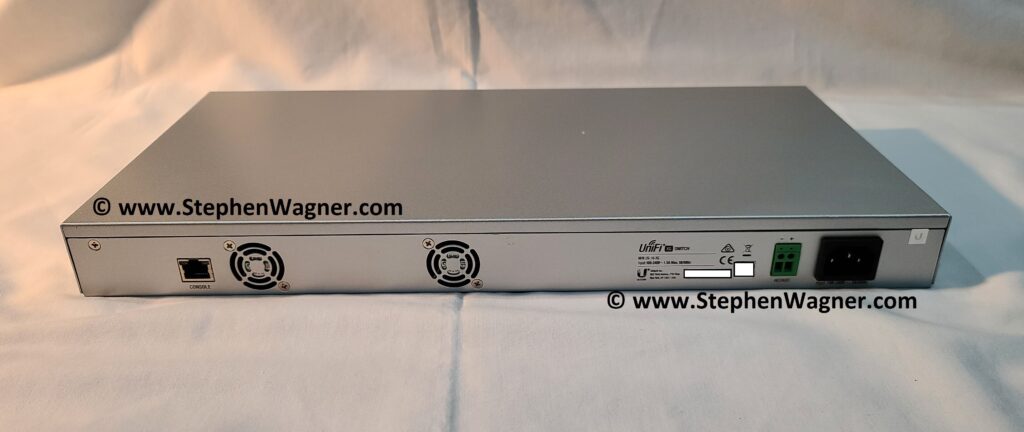
Ubiquiti UniFi US-16-XG Switch Backside

The backside of the switch has a console port, along with 2 fans, DC power input, and the AC power.

Overall, it’s a good looking unit. It has even better looking specs…

Specs

The UniFi 16 XG switch specifications:

  • 12 x 10Gb SFP+ Ports
  • 4 x 10GbaseT Ports
  • 160 Gbps Total Non-Blocking Line Rate
  • 1U Form Factor
  • Layer 2 Switching
  • Fully Managed via UniFi Controller

The SFP+ ports allow you to use a DAC (Direct Attach Cable) for connectivity, or fiber modules. You can also populate them with converters, such as the Ubiquiti 10GBASE-T SFP+ CopperModule.

Picture of the Ubiquiti UniFi 16 XG Switch Ports
Ubiquiti UniFi 16 XG Switch Ports

You can also attach 4 devices to the 10GbaseT ports.

UDC-3 “FiberCable” DAC

I also purchased 2 x Ubiquiti UDC-3 SFP+ DAC cables. These cables provide connectivity between 2 devices with DAC ports. These can be purchased in lengths of 1 meter, 2 meter, and 3 meters with the part numbers of UDC-1, UDC-2, and UDC-3 respectively.

10Gtek Cable DAC

To test compatibility and have cables from other vendors (in case of any future issues), I also purchased an assortment of 10Gtek SFP+ DAC cables. I specifically chose these as I wanted to have a couple of half meter cables to connect the switches with an aggregated LAG.

UniFi Controller Adoption

To get quickly up and running, I setup the US-16-XG on my workbench, plugged in a network cable in to one of the 10GbaseT ports, and powered it on.

Picture of Ubiquiti US-16-XG Initial Provisioning on workbench
Ubiquiti US-16-XG Initial Provisioning

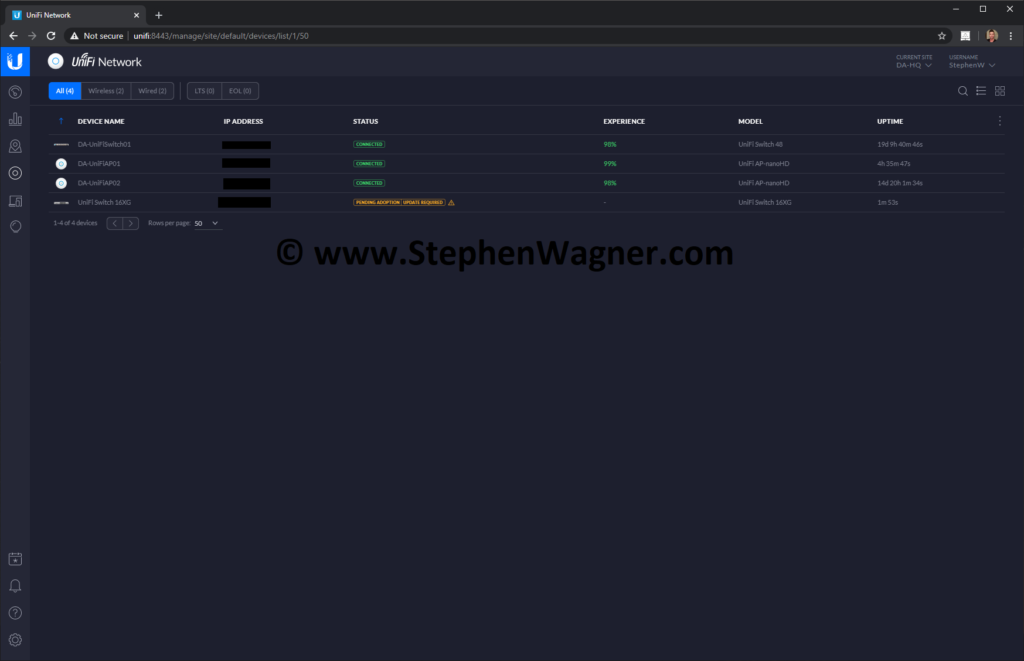
Boot-up was quick and it appeared in the UniFi Controller immediately. It required a firmware update before being able to adopt it to the controller.

Screenshot of UniFi US-16-XG UniFi Controller Pre-adoption
UniFi US-16-XG UniFi Controller Pre-adoption

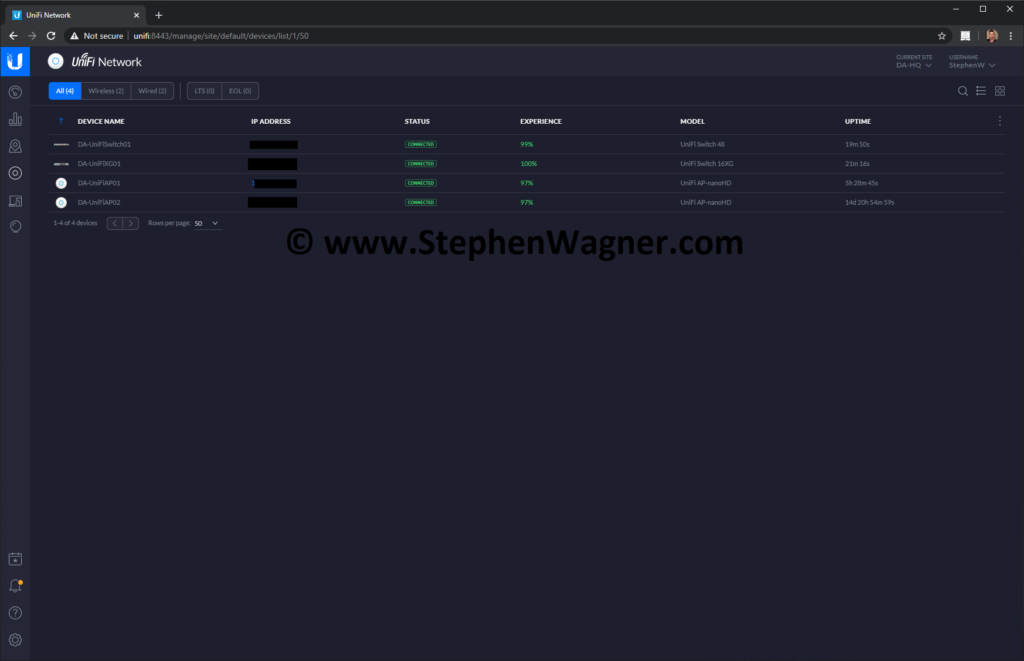
After a quick firmware update, I was able to adopt and configure the switch.

Screenshot of UniFi US-16-XG UniFi Configured
UniFi US-16-XG UniFi Configured

The device had a “Test date” of March 2020 on the box, and the UniFi controller reported it as a hardware revision 13.

Configuration and Setup

Implementing, configuration, and setup will be an ongoing process over the next few weeks as I add more storage, servers, and devices to the switch.

The main priority was to test cable compatibility, connect the US-16-XG to my US-48, test throughput, and put my servers directly on the new switch.

I decided to just go ahead and start hooking it up. I decided to do this live without shutting anything down. I went ahead and perfomed the following:

  1. Put the US-16-XG on top of the US-48
  2. Disconnect servers from SFP+ CopperModules on US-48 switch
  3. Plug servers in to 10GbaseT ports on US-16-XG
  4. Remove SFP+ to 10GbaseT CopperModule from US-48 SFP+ ports
  5. Connect both switches with a SFP+ DAC cable
Picture of US-16-XG and US-48 Connected and Configured
US-16-XG and US-48 Connected and Configured

Performing these steps only took a few seconds and everything was up and running. One particular thing I’d like to note is that the port auto-negotiation time on the US-16-XG was extremely quick.

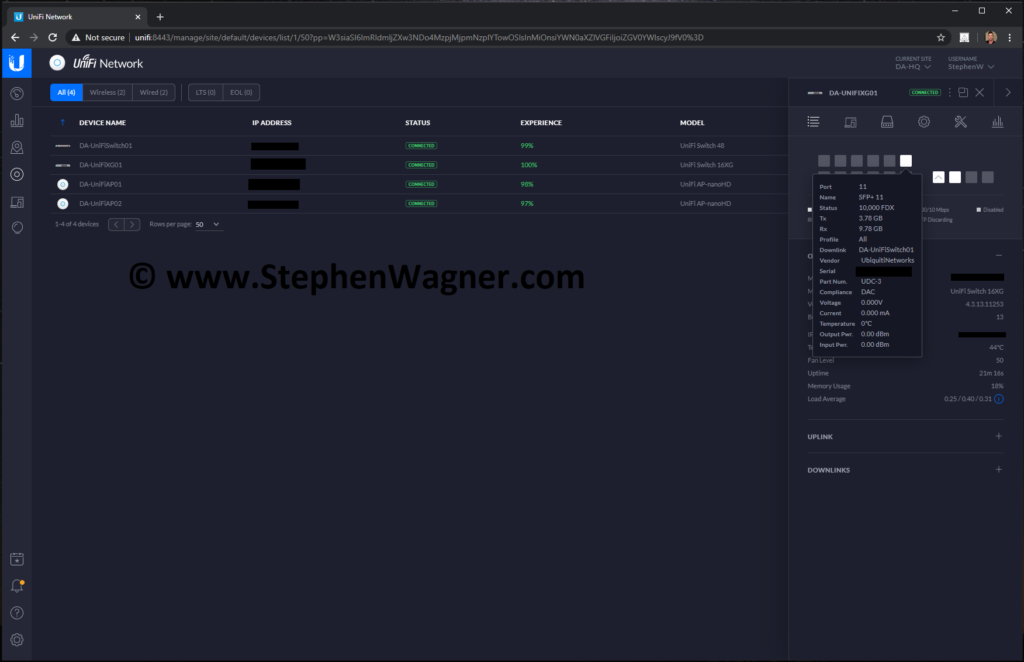
Taking a look at the UniFi Controller view of the US-16-XG, we see the following.

Screenshot of US-16-XG Configured and Online with UniFi Controller
US-16-XG Configured and Online with UniFi Controller

Everything is looking good! Ports auto-detected the correct speed, traffic was being passed, and all is good.

After running like this for a few days, I went ahead and tested the 10Gtek cables which worked perfectly.

To increase redundancy and throughput, I used 2 x 0.5-Meter 10Gtek SFP+ DAC cables and configured an aggregated LAG between the two switches which has also been working perfectly!

In the coming weeks I will be connecting more servers as well as my SAN, so keep checking back for updated posts.

Overall Review

This is a great switch at an amazing price-point to take your business network or homelab network to 10Gig speeds. I highly recommend it!

Use Cases:

  • Small network 10Gig switch
  • 10Gig backbone for numerous other switches
  • SAN switch for small SAN network

What I liked the most:

  • 10Gig speeds
  • Easy setup as always with all the UniFi equipment
  • Beautiful management interface via the UniFi Controller
  • Near silent running
  • Ability to use both SFP+ and 10GbaseT
  • Compatibility with SFP+ DAC Cables

What could be improved:

  • Redundant power supplies
  • Option for more ports
  • Bug with mobile app showing 10Mbps manual speed for 10Gig ports

Additional Resources and Blog Posts:

Manufacturer Product Links

Jun 072020
 

This month on June 23rd, HPE is hosting their annual HPE Discover event. This year is a little bit different as COVID-19 has resulted in a change of the usual in-person event, and this year’s event is now being hosted as a virtual experience.

I expect it’ll be the same great content as they have every year, only difference is you’ll be able to virtually experience it from the comfort of your own home.

I’m especially excited to say that I’ve been invited to be special VIP Influencer for the event, so I’ll be posting some content on Twitter, LinkedIn, and of course generating some posts on my blog.

HPE Discover Register Now Graphic
Register for HPE Discover Now

Stay tuned, and don’t forget to register at: https://www.hpe.com/us/en/discover.html

The content catalog is now live!