In a VMware Horizon environment with DUO MFA configured via RADIUS on the VMware Horizon Connection Server, you may notice authentication issues when logging in through a UAG (Unified Access Gateway) after upgrading to VMware Horizon 8 Version 2111.
During this condition, you can still login and use the connection server directly with MFA working, however all UAG connections will get stuck on authenticating.
Horzion 8 Version 2111 UAG Stuck on Authenticating using DUO MFA (RADIUS)
Disabling MFA and/or RADIUS on the connection server will allow the UAG to function, however MFA will be disabled. This occurs on upgrades to version 2111 of the UAG both when configuring fresh, and importing the JSON configuration backup.
Temporary Fix
Update January 26 2022: VMware has now released version 2111.2 of the Unified Access Gateway which resolves this issue. You can download it here, or view the release notes here.
Temporary workaround/fix: To fix this issue, log on to the UAG and under “Horizon Edge Settings”, configure “Client Encryption Mode” to “Disabled”.
“Client Encryption Mode” is a new setting on UAG 2111 (and UAG 2111.1) that enables new functionality. Disabling this reverts the UAG to the previous behavior of older Unified Access Gateway versions.
Another workaround is to deploy an older version of the UAG, version 2106. After downgrading, the UAG functions with DUO and RADIUS even though the Connection Server is at version 2111.
If you use an older version of the UAG, please make sure that you mitigate against the Apache log4j vulnerabilities on the UAG using information from the following post: https://kb.vmware.com/s/article/87092.
Today we’re going to discuss and deploy Active Directory Certificate Services on a Windows Server 2022 Server. Additionally, we’ll also be generating a domain certificate request inside of IIS and then assign the resultant certificate to a WSUS Server.
This video will demonstrate and explain the process of deploying a Windows Server 2022 Certification Authority with AD CS.
Check it out and feel free to leave a comment! Scroll down below for more information and details on the guide.
Windows Server 2022: Active Directory Certificate Services Discussion and Installation Guide
Who’s this guide for
This guide is perfect for a seasoned IT professional or a beginner who is looking at getting experience with Windows Server 2022.
What’s included in the video
In this guide I will walk you through the following:
In this post, I wanted to go over some Backup and Restore tips and tricks when it comes to VMware vCSA Updates and Upgrades.
We’ve almost all been there, performing an update or upgrade of the VMware vCenter Server Appliance when it fails, and we must restore from a backup. There’s also times where the update or upgrade has been successful, however numerous issues occur afterwards prompting for the requirement of a restore from backup.
In this post, I wanted to briefly go over the methods of backups (and restores) for the vCSA, as well as some Tips and Tricks which might help you out for avoiding failed updates or upgrades in the future!
We all want to avoid a failed update or upgrade! 🙂
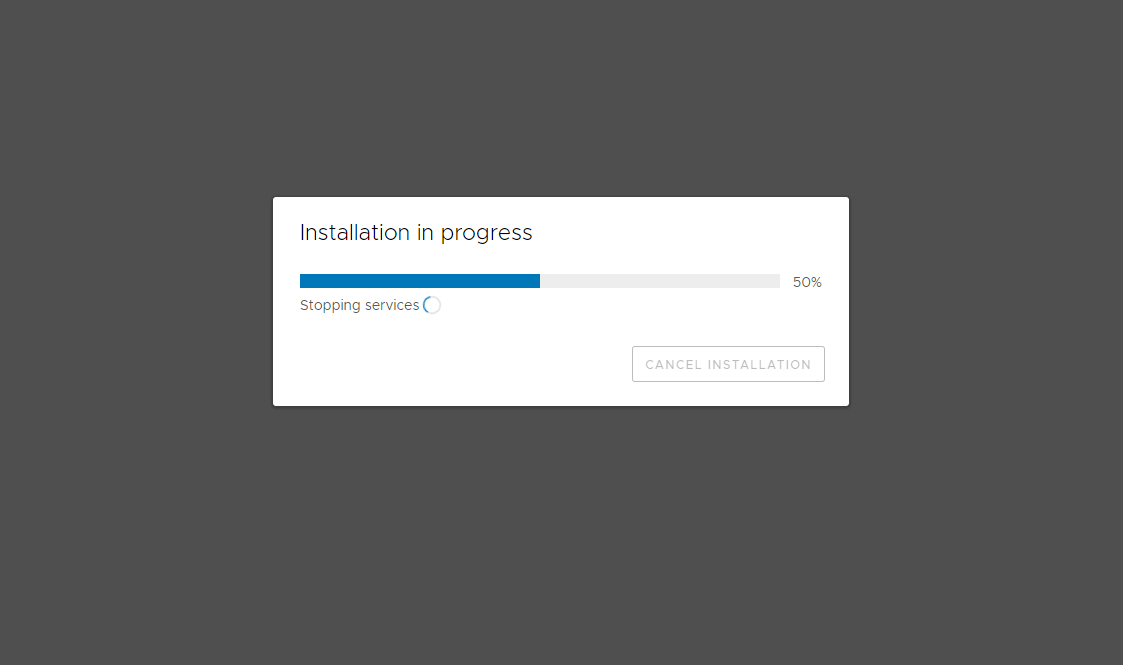
vCSA Update Installation
VMware vCSA Update Tips and Tricks for Backup and Restore
Please enjoy this video version of the blog post:
vCSA Update and Upgrade – Tips and Tricks for Backup and Restore
vCSA Backup methods
There are essentially two backup methods for backing up the vCenter Server Appliance:
vCSA Management Interface Backup
vSphere/ESXi Virtual Machine Snapshot
vCSA Management Interface Backup
If you log in to the vCSA Management Interface, you can configure a scheduled backup that will perform a full backup of your vCSA (and vCenter Server) instance.
This backup can be automatically ran and saved to an HTTP, HTTPS, FTP, FTPS, SFTP, NFS, or SMB destination. It’s a no-brainer if you have a Windows File Server or an NFS datastore.
vCSA Backup
In the event of a failed update/upgrade or a disaster, this backup can be restored to a new vCSA instance to recover from the failure.
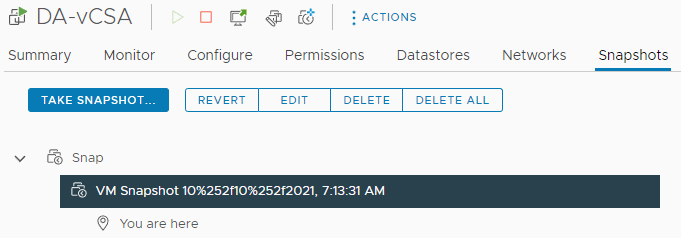
In addition to the scheduled automatic backups configured above, you should snapshot your vCSA appliance VM prior to initiating an update or upgrade. In the event of a failure, you can easily restore the vCSA VM snapshot to get back to a running state.
vCSA Snapshot
Only after you test and confirm the upgrade or update was successful should you delete the snapshot.
You should also have your Backup application or suite performing regularly snapshot based backups of your vCSA.
Additional Tips and Tricks
I have a few very important tips and tricks to share which may help you either avoid a failed update or upgrade, or increase the chances of a successful restore from backup.
Gracefully Shutdown and Restart the vCSA Appliance before Upgrading
Application Consistent Snapshot – Snapshot after graceful shutdown
Let’s dive in to these below.
Gracefully Shutdown and Restart the vCSA Appliance before Upgrading
I noticed that I significantly reduced the amount of failed upgrades by simply gracefully shutting down and restarting the vCenter Server Appliance prior to an upgrade.
This allows you to clear out the memory, virtual memory, and restart all vCenter services prior to starting the upgrade.
Please Note: Make sure that you give the vCSA appliance enough time to boot, start services, and let some of the maintenance tasks run before initiating an upgrade.
Application Consistent Snapshot – Snapshot after graceful shutdown
Most VMware System Administrators I have talked to, usually snapshot the running vCSA appliance and do not snapshot the memory. This creates a crash consistent snapshot.
If you follow my advice above and gracefully shutdown and restart the vCSA appliance, you can use this time to perform a VM snapshot after a graceful shutdown. This will provide you with an application consistent snapshot instead of a crash consistent snapshot.
If you perform an application consistent snapshot by gracefully shutting down the VM prior to creating the snapshot, the virtual machine and database inside of it will be in a cleaner state.
Conclusion
Some of the Tips and Tricks in this post definitely aren’t necessary, however they can help you increase the chance of a successful upgrade, and a successful restore in the event of a failed upgrade.
One of the new real cool features of the Synology C2 Cloud and Synology DSM 7.0 is the ability to back your Synology DiskStation NAS up to the cloud.
Using the Synology’s “C2 Storage” service, you can use Synology Hyper Backup on DSM 7.0 to backup your your File Shares, NAS, applications, and data to the cloud.
Below, I will show the process of creating a Hyper Backup Backup task to backup a few Synology File Shares to the Synology C2 Storage Service.
NAS Backup (and Restore) with Synology C2 Cloud Video
For a full video guide and demonstration, please enjoy this video! Please continue scrolling for a text guide (with images).
Synology DiskStation NAS Backup (and Restore) with Synology C2 Storage Cloud!
Backup NAS to Synology C2 Storage
It’s very easy to back your NAS up to the cloud. Here’s a quick guide showing how it’s done.
We’re going to assume you already have some File Shares configured on your NAS. These can be Windows File Shares, NFS Exports, and even Active Backup for Business storage repositories. In my case, I want to back up 2 Windows File Shares to the Synology C2 Storage service.
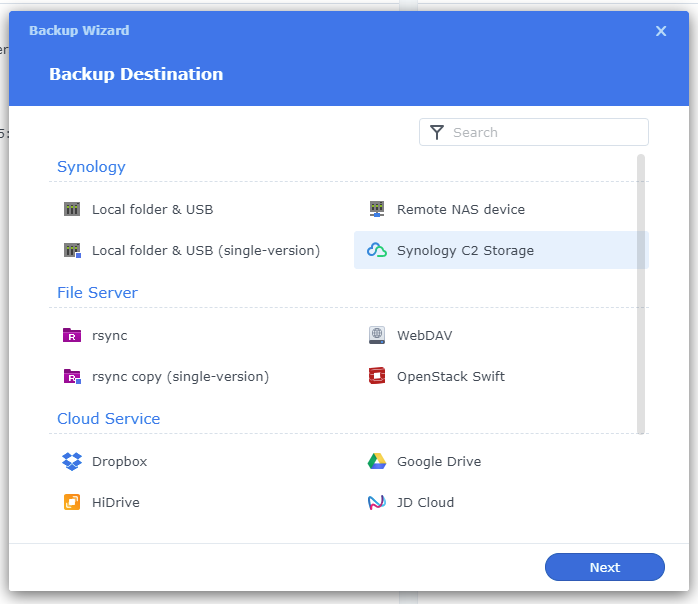
Open Hyper Backup
If you have no existing backup jobs, the “Backup Wizard” should automatically open to configure a new job. If you have existing jobs, select the “+” on the top left of the window.
Under “Backup Destination”, choose “Synology C2 Storage”.
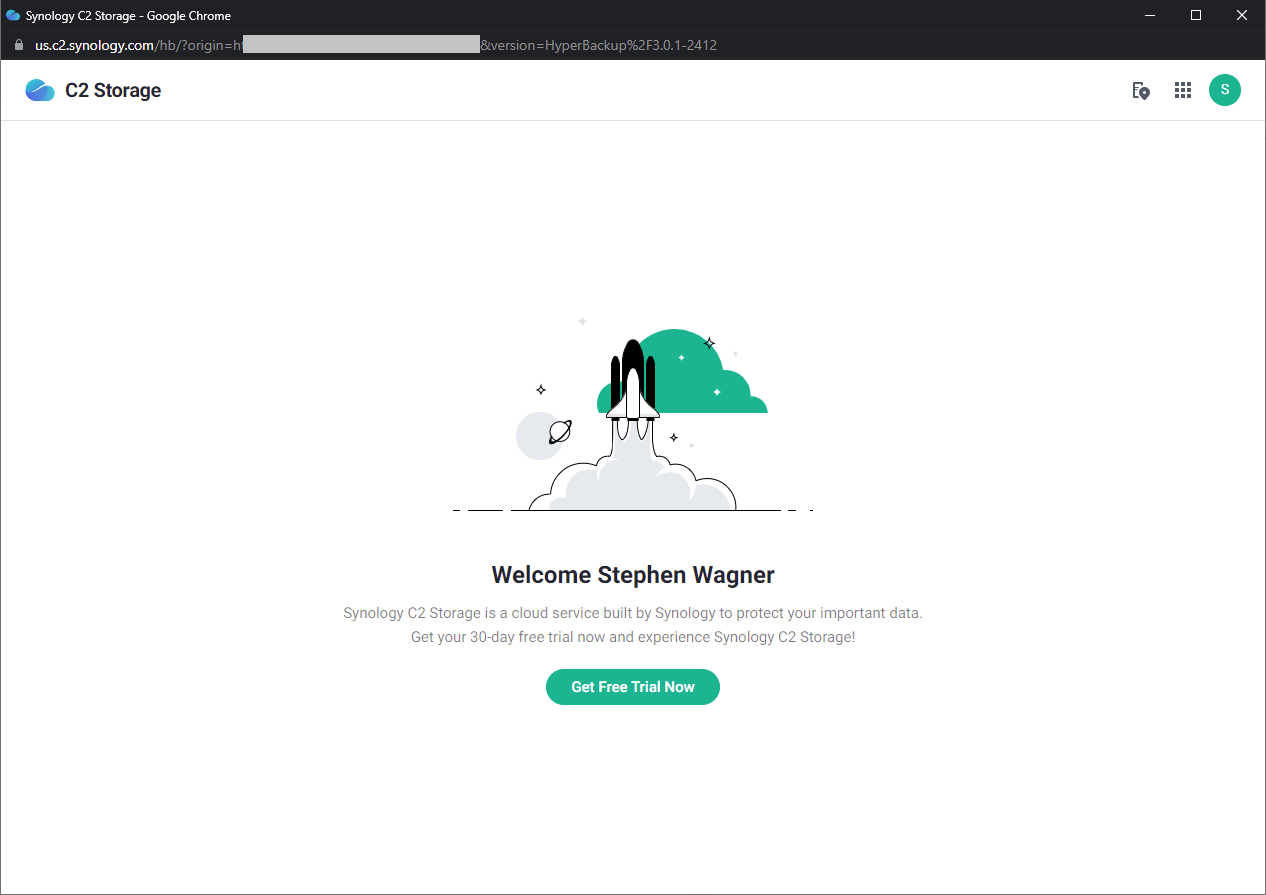
This will open a new window asking you to log on to the Synology C2 Storage Service. You may have to create a new account, or log in with your existing Synology credentials. From here you can start a free trial.
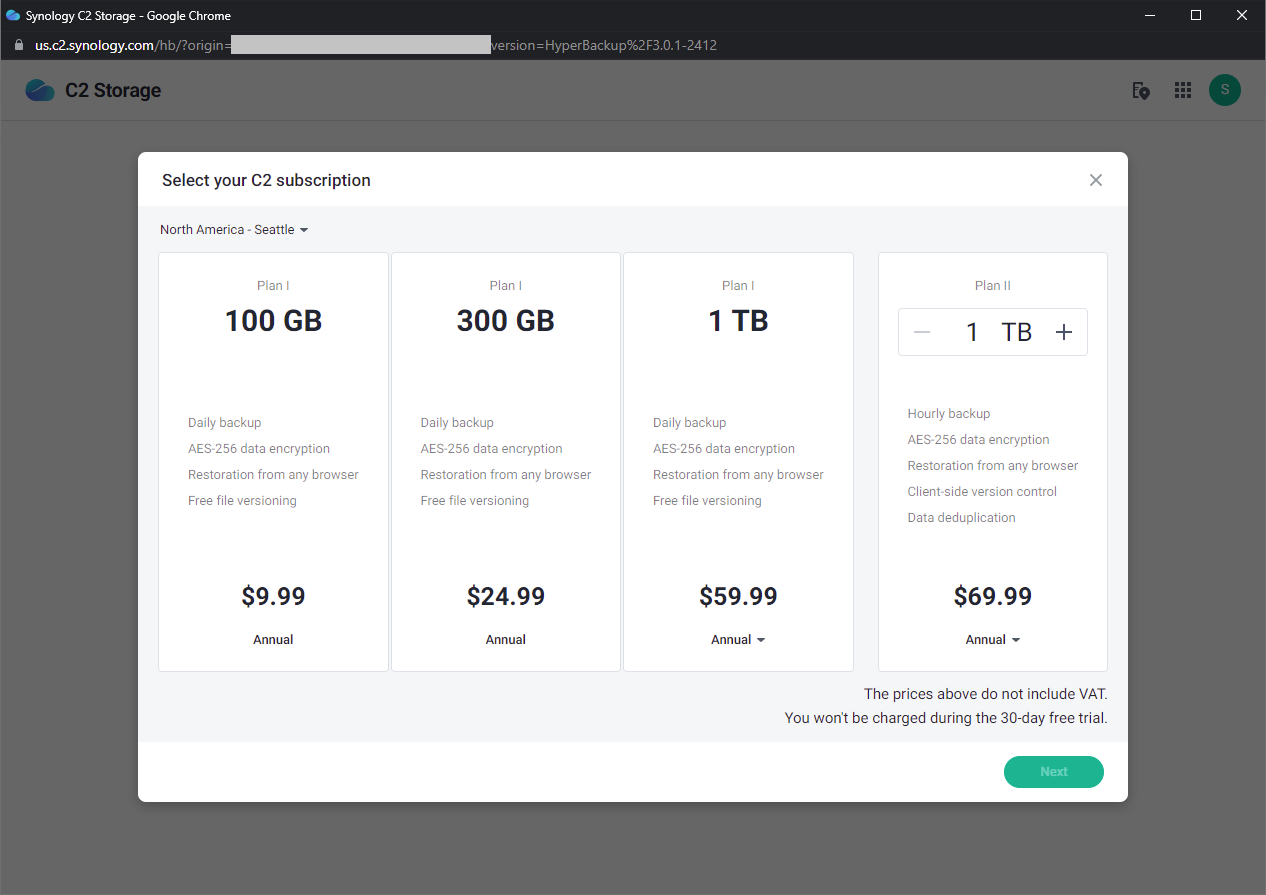
Choose a subscription and plan. You should get a 30-day free trial.
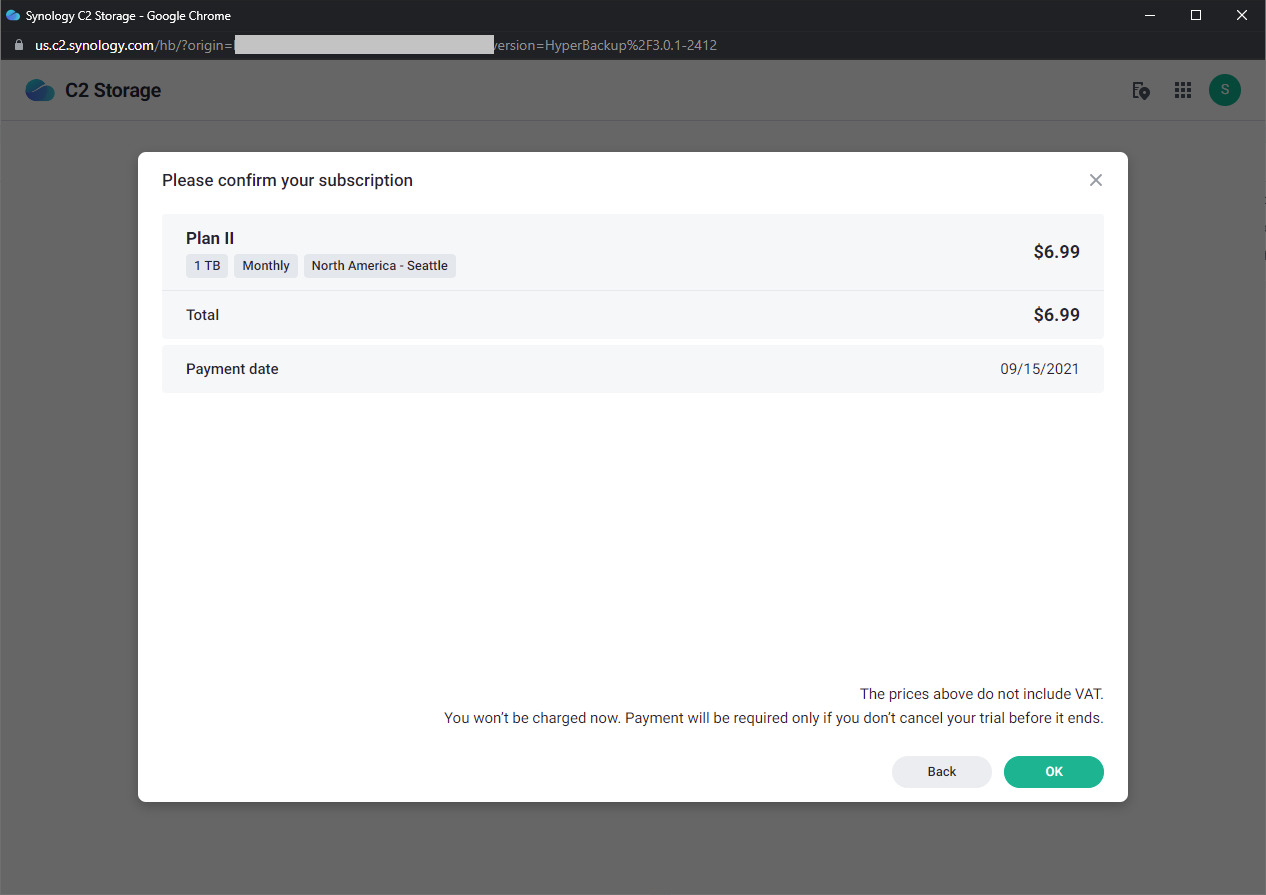
Confirm your subscription
Accept the TOS (Terms of Service)
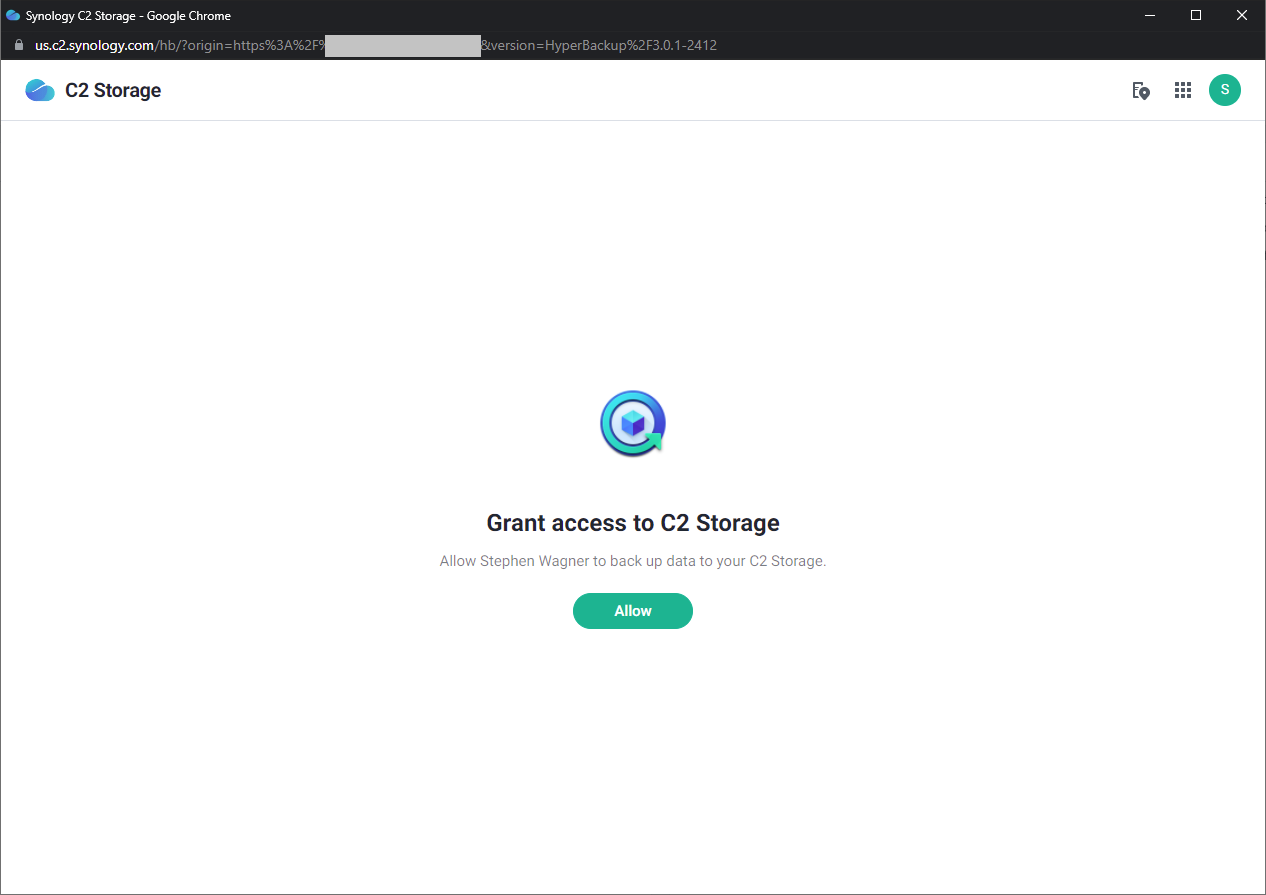
You must now “Grant access to C2 Storage”. This will allow your user account to access the C2 Storage service.
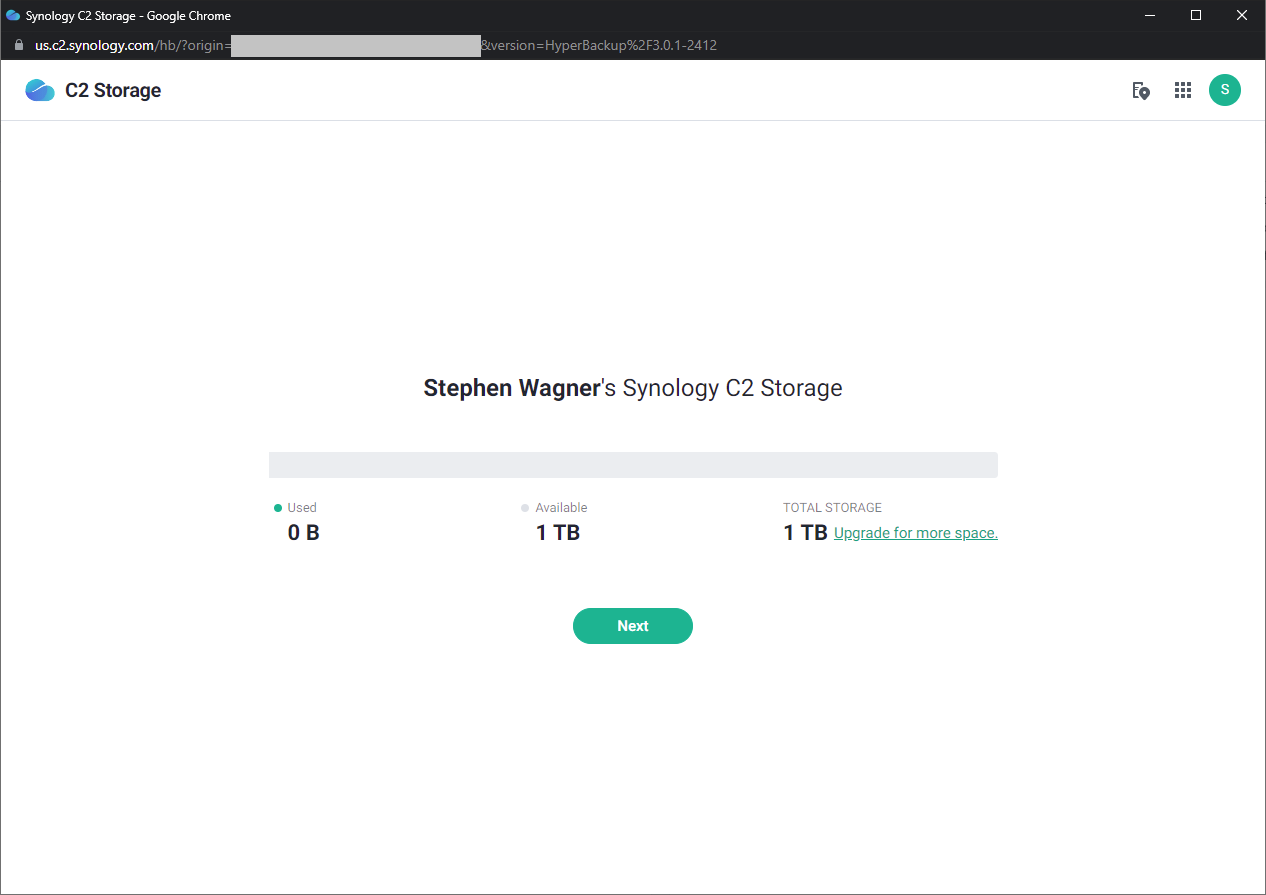
You will now be presented with information on your Synology C2 Storage Account
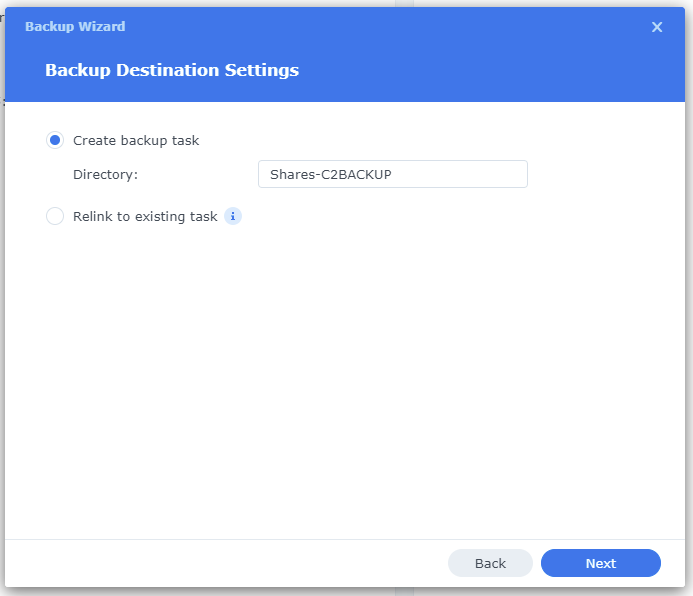
You will now be redirected back to Hyper Backup. You’ll need to create a name for the new backup task destination directory.
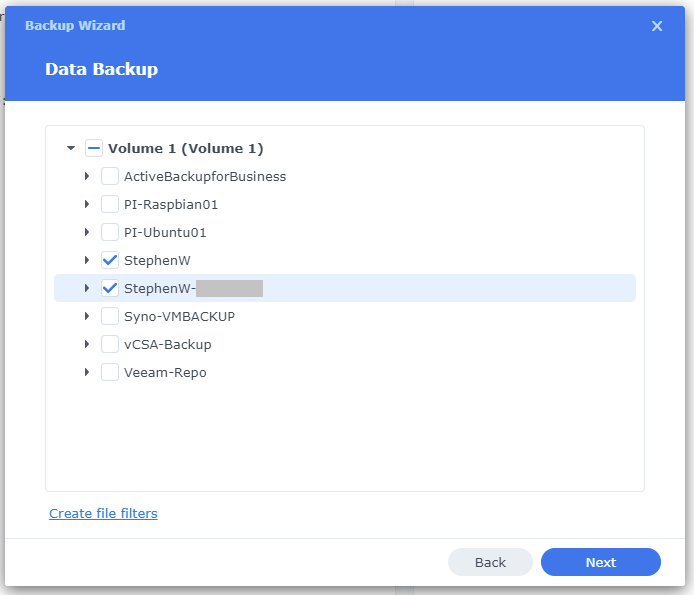
Here’s where you will configure which File Shares (or volumes) to backup to Synology C2.
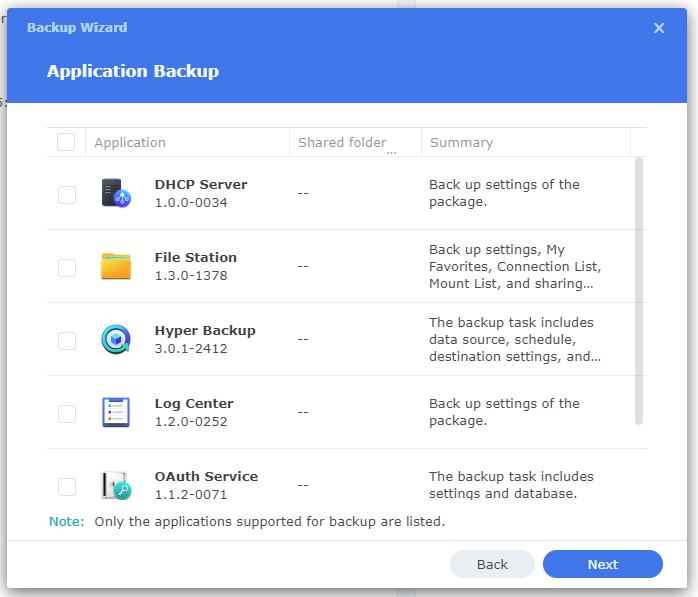
You also have the ability to backup Synology Applications. This is helpful should you wish to backup your entire Synology NAS to Synology’s C2 cloud. I’m only doing shares, so I hit next without selecting anything.
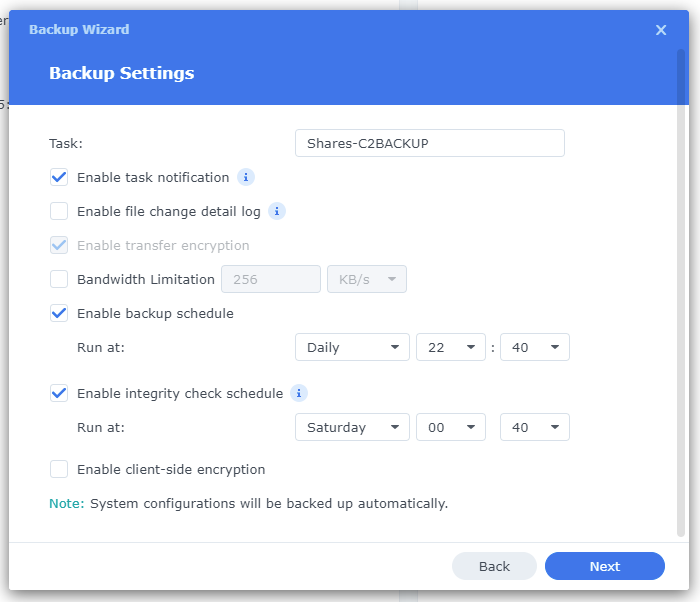
Now we will configure the Backup Task settings. This includes the task name, notifications, file change logs, bandwidth limits, backup schedule, and integrity check schedule. We can also “Enable client-side encryption” which we will use to encrypt the data on the cloud.
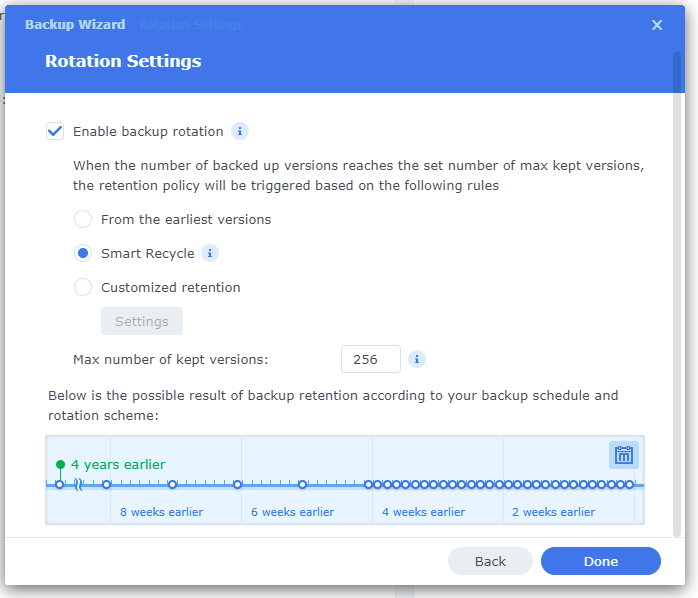
After proceeding, we will now configure backup rotation settings. I enabled backup rotation with “Smart Recycle”.
If you enabled encryption, you will be prompted to download your encryption key. Save this file in a safe location as you will need it in the event your NAS fails and you need to access your cloud storage.
And that’s it! You have now configured your NAS to backup to Synology C2 Cloud!
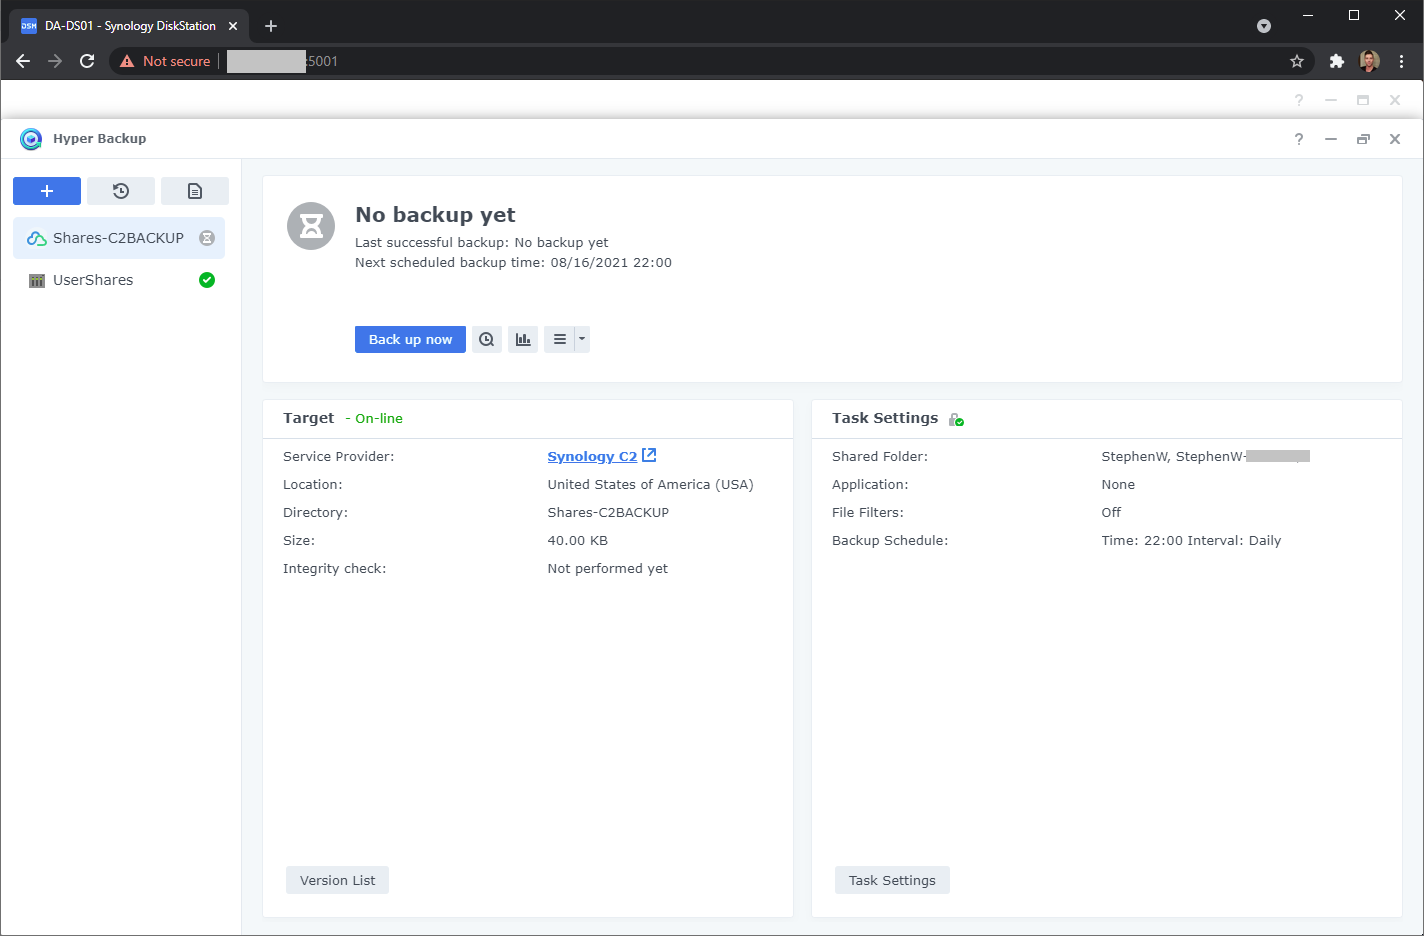
Hyper Backup NAS Backup to Synology C2 Cloud
We have now configured the backup job. Let’s go ahead and kick off a backup by clicking on “Back up now”.
And that’s it! After some time, your backup should complete and you data should be safe on the Synology C2 Cloud.
What happens when your run of out space
This is a question many of you will be asking, and I was curious myself. I went ahead and uploaded a bunch of garbage data to max out my plan.
Synology Hyper Backup C2 Storage – Not enough quota available on the target
To my surprise Synology allowed me to exceed my plan by a decent amount of storage until the backup job went in to a “Suspended” state reporting “Not enough quota available on the target”. I actually exceeded the storage by 128GB!!! This is extremely generous!
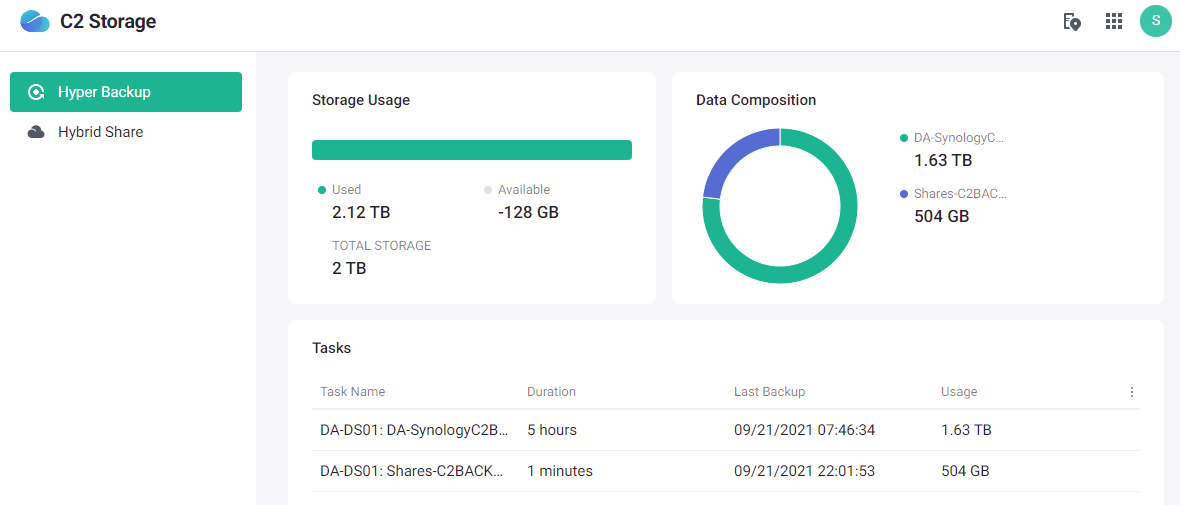
Synology C2 Storage – Storage overage
To find out how well the NAS would recover from this situation, I logged on to the Synology C2 Storage service and increased my purchased storage. I was able to simply click on “Action” and “Resume” the backup without any issues… It actually resumed where it left off.
Conclusion
The Synology C2 Storage Cloud service is a great option for backing up your DiskStation NAS and all your important files to the cloud. In my case I use my NAS as a backup, and then further backup my NAS both to a removable hard drive, and the Synology C2 Cloud, keeping me compliant with the 3-2-1 backup rule.
The pricing is amazing and there’s extra cost to backup and restore, which means no upload or download costs. They even provide de-duplication so you’re not paying to store duplicated data.
As part of the backup process, Hyper Backup only copies over blocks of data and files that have changed, which significantly helps bandwidth usage as only what’s changed is copied.
I highly recommend using Synology C2 Storage with your Synology DiskStation NAS!
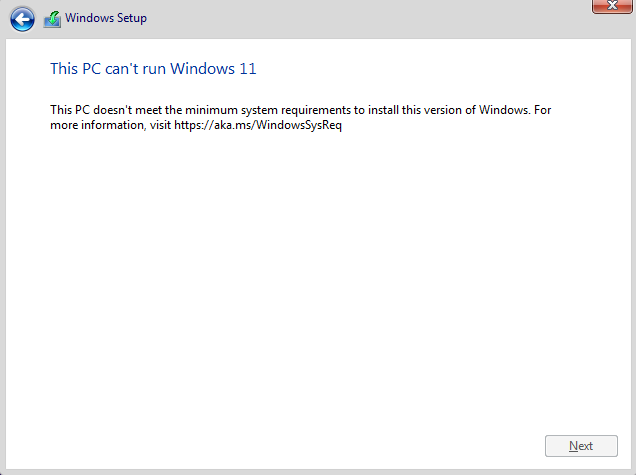
When attempting to do a fresh install of Windows 11 using the ISO, you may receive the message “This PC can’t run Windows 11”. Additionally, “This PC doesn’t meet the minimum system requirements to install this version of Windows.”
Windows 11 has a new set of minimum system requirements and these include certain CPUs as well as a TPM 2.0 (Trusted Platform Module Version 2.0) chip, Secure Boot, and 8GB of RAM.
Below you’ll find an explanation of the problem, and two different methods to workaround it.
The Problem
You’ll see this message while performing a fresh install if your system does not meet the minimum requirements.
Windows 11 Fresh Install – This PC can’t run Windows 11
Just like my previous post on upgrading to Windows 11, you’ll encounter this when attempting a fresh install because some pre-requisite checks are failing:
CPU is not supported
Windows 11 Installer cannot find a TPM 2.0 chip
Secure Boot is not enabled
EFI or UEFI is Required
One thing to note is that you may see these messages even if your system has a TPM 2.0 chip.
Most computers purchased in the last 6 years probably have a TPM 2 chip that just needs to be enabled via the system UEFI/EFI. If you boot to your UEFI, you can attempt to enable the TPM 2.0 chip.
It may already be enabled, however it may be configured to run at version 1.2. If this is the case, change it to version 2.0. You’ll also need to make sure you have “Secure boot” enabled.
If this doesn’t work, please see below for multiple workarounds.
The Fix
At this point in time, there are two different methods to workaround the minimum system requirements:
Method 1 – Use Rufus to create a modified Windows 11 Installer from ISO and disable the TPM 2.0, Secure Boot, and 8GB of RAM requirement.
Method 2 – Use native Windows 11 installer and ISO to modify registry during Windows Setup.
You can either either method, depending on which one you may find easier or more convenient.
Method 1 – Use Rufus to create a modified Windows 11 Installer from ISO and disable the TPM 2.0, Secure Boot, and 8GB of RAM requirement.
You can use a utility called “Rufus” (Reliable USB Formatting Utility, with Source) to convert the Windows 11 ISO in to a bottable USB key to install Windows.
Using the latest version of Rufus, you can modify the Windows 11 Setup installer to bypass the requirements for TPM 2.0, Secure Boot, and 8GB of RAM.
To use this method, you’ll need the following files:
Please enjoy this video demonstrating the process:
Windows 11 Fresh Install – TPM and Secure Boot Bypass for “This PC can’t run Windows 11”
To use this method as a workaround:
Download Rufus and place in a folder
Download Windows 11 ISO and place in a folder
Insert USB key that is larger than the size of the Windows 11 ISO (larger than 5.5GB)
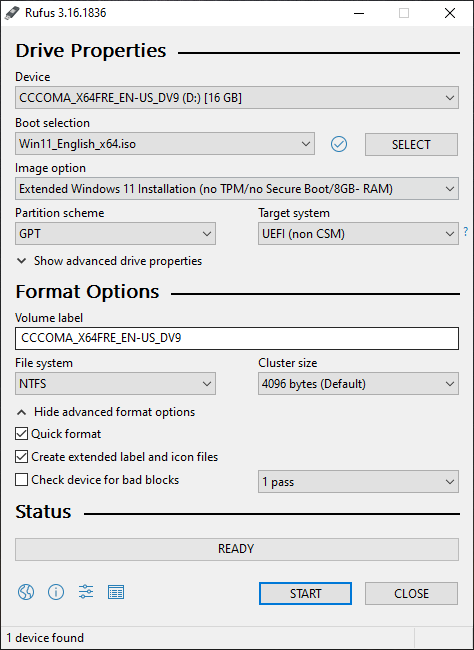
Open Rufus
Select your USB key under “Device”
Under “Boot Selection”, click on “SELECT”
Navigate to and select the Windows 11 ISO file
Under “Image option”, choose “Extended Windows 11 Installation (no TPM/no Secure Boot/8GB- RAM”
Click “Start”. PLEASE NOTE: This will erase and repartition your USB drive. All existing data on the USB drive will be deleted.
Rufus – Windows 11 Fresh Install TPM, Secure Boot, and RAM bypass
Now simply wait for the USB key to be created. It can take 30-90 minutes depending on the speed of your USB drive.
Once you have created the USB key, make sure your computer is configured to use UEFI and make sure you disable Secure Boot in the UEFI.
Simply boot from the USB Key your created above, and install Windows 11.
Method 2 – Use native Windows 11 installer and ISO to modify registry during Windows Setup.
Bypass the check for TPM 2.0
If you don’t have TPM 2.0 or it’s not working, you can disable the TPM 2.0 check on the Windows 11 installer. Please note, you still require TPM 1.2 for this bypass to function. This workaround only disables the requiremnt for TPM 2.0. You still need to have Secure Boot enabled, and you must have a TPM 1.2 chip.
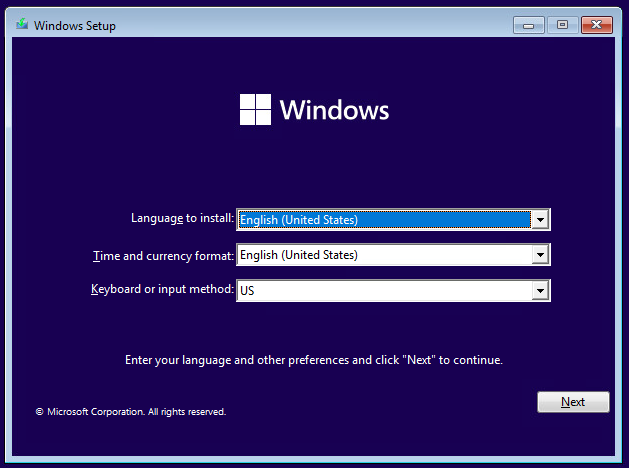
To do this, boot from the Windows 10 ISO:
Windows 11 – Installer
When you see the above screen, press “SHIFT + F10” and a Windows Command Prompt should open.
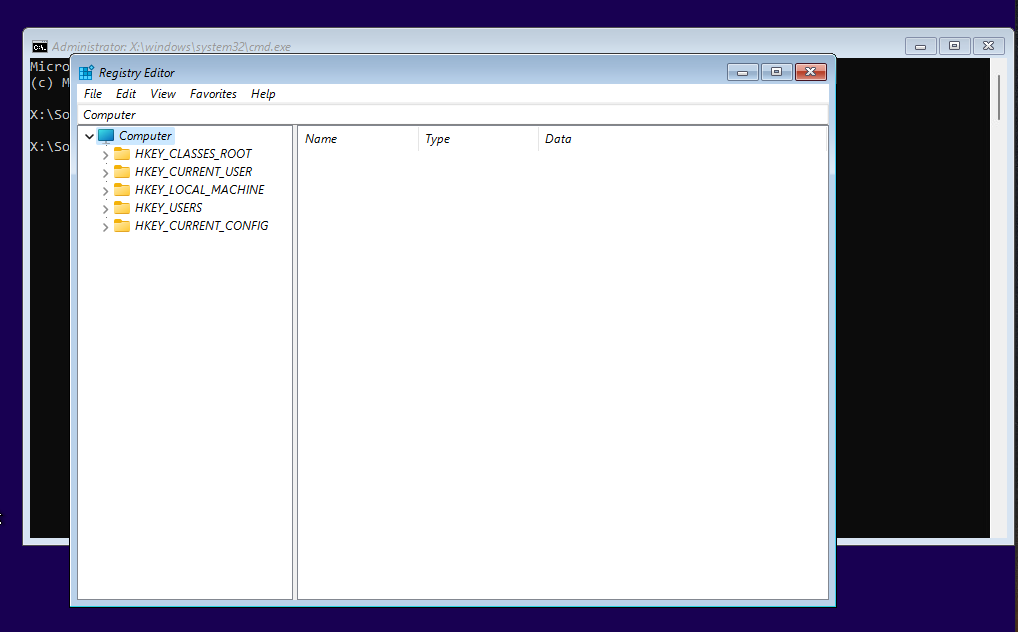
From the command prompt, type “regedit” and press enter.
Windows 11 Installer – Registry Editor “regedit”
Now we must create a registry key called “MoSetup” and a DWORD Value to disable the TPM and CPU check.
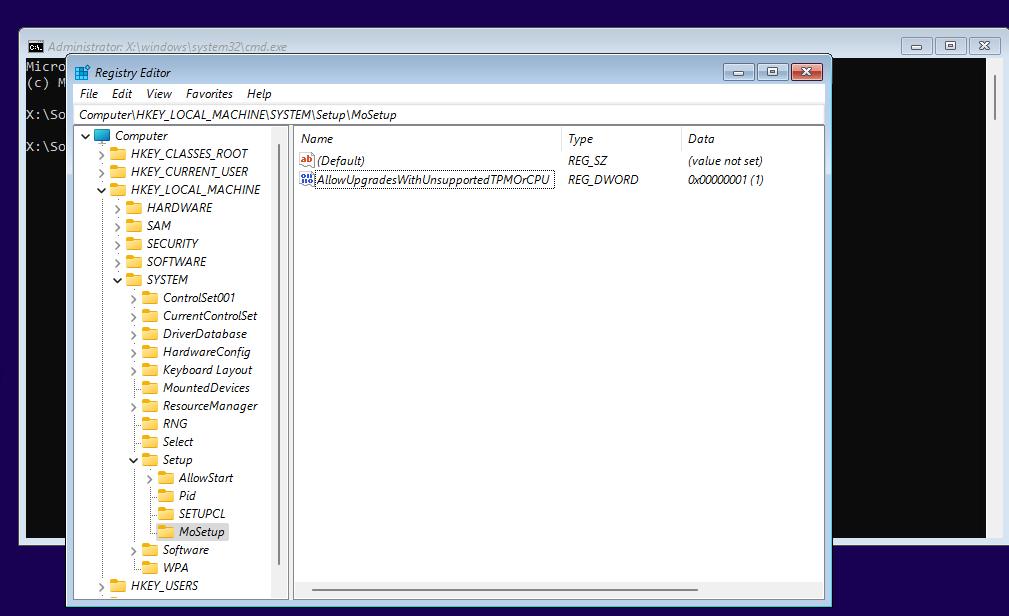
Navigate to “HKEY_LOCAL_MACHINE\SYSTEM\Setup”
Right click on “Setup”, select “New”, and choose “Key”, name it “MoSetup”
Navigate to “MoSetup”
On the right pane, right-click an empty space, select “New”, and select “DWORD (32-bit) Value”
Name it: “AllowUpgradesWithUnsupportedTPMOrCPU” (without quotations)
Set it to “1” (without quotations)
After performing the above, it should look like this.
Windows 11 Installer – MoSetup and AllowUpgradesWithUnsupportedTPMOrCPU
Now simply close the Registry Editor, type “exit” to close out of the command prompt and continue with the Windows 11 Installer.
After performing the above, you should now be able to successfully perform a fresh install of Windows 11 with the TPM and CPU check disabled.
This website uses cookies to improve your experience. We'll assume you're ok with this, but you can opt-out if you wish.
Do you accept the use of cookies and accept our privacy policy? AcceptRejectCookie and Privacy Policy
Privacy & Cookies Policy
Privacy Overview
This website uses cookies to improve your experience while you navigate through the website. Out of these cookies, the cookies that are categorized as necessary are stored on your browser as they are essential for the working of basic functionalities of the website. We also use third-party cookies that help us analyze and understand how you use this website. These cookies will be stored in your browser only with your consent. You also have the option to opt-out of these cookies. But opting out of some of these cookies may have an effect on your browsing experience.