Apr 042020
 
VMware Horizon View Logo

In all my years assisting and providing support with VMware Horizon, one of the most common problems that customers report with their VDI implementations, is the VMware Horizon Blank Screen.

When a user is presented with a blank or black screen when using the VMware Horizon Client, the problem can be caused by a number of different things. In this post, I will address and provide solutions for some of the common issues that cause the VMware Horizon blank screen.

VMware Horizon Blank screen issue

This troubleshooting guide applies to VMware Horizon 8, VMware Horizon 7, as well as earlier versions of VMware Horizon.

VMware Horizon Blank Screen Causes

There’s a number of different causes of a blank or black screen when connecting and establishing a VDI session to Horizon View. Click on the item below to jump to that section of the post:

Now that we have a list, let’s dive in to each of these individually. Some of these will require you to do your own research and will only guide you, while other sections will include the full fix for the issue.

VMware Tools and Horizon Agent Installation Order

When deploying the VMware Horizon View agent, you are required to install the agent, along with VMware tools in a specific order. Failing to do so can cause problems, including a blank screen screen.

The installation order:

  1. Install GPU/vGPU drivers (if needed)
  2. Install VMware Tools Agent
  3. Install the VMware Horizon Agent
  4. Install the VMware User Environment Manager Agent (if needed)
  5. Install the VMware App Volumes Agent (if needed)

It is important to also consider this when upgrading the agents as well. When upgrading VMware Tools, it is recommended to re-install the Horizon agent in versions up to and including Horizon 8 2103. As of Horizon 2106 and later, you no longer need to re-install the Horizon Agent when performing a VMware Tools upgrade.

For more information on the agent installation order for VMware Horizon, please visit: https://kb.vmware.com/s/article/2118048.

Network ports are blocked (Computer Firewall, Network Firewall)

For the VMware Horizon agent to function properly, ports must be accessible through your firewall, whether it’s the firewall on the VM guest, client computer, or network firewall.

The following ports are required for the VMware Horizon Agent when connecting directly to a View Connection Server.

DestinationNetwork ProtocolDestination PortDetails
Horizon Connection ServerTCP443Login, authentication, and connection to the VMware Connection Server.
Horizon AgentTCP22443Blast Extreme
UDP22443Blast Extreme
TCP4172PCoIP
UDP4172PCoIP
TCP3389RDP (Remote Desktop Protocol)
TCP9427Client Shared Drive redirection (CDR) and Multi-media redirection (MMR).
TCP32111USB Redirection (Optional), can be incorporated in to the Blast Extreme connection.
Network Ports Required for VMware Horizon View to View Connection Server

The following ports are required for the VMware Horizon Agent when connecting through a VMware Unified Access Gateway (UAG).

DestinationNetwork ProtocolDestination PortDetails
Unified Access GatewayTCP443Login, authentication, and connection to the Unified Access Gateway. This port/connection can also carry tunneled RDP, client drive redirection, and USB redirection traffic.
TCP4172PCoIP via PCoIP Secure Gateway
UDP4172PCoIP via PCoIP Secure Gateway
UDP443Optional for Login traffic. Blast Extreme will attempt a UDP login if there are issues establishing a TCP connection.
TCP8443Blast Extreme via Blast Secure Gateway (High Performance connection)
UDP8443Blast Extreme via Blast Secure Gateway (Adaptive performance connection)
TCP443Blast Extreme via UAG port sharing.
Network Ports Required for VMware Horizon View to VMware Unified Access Gateway (UAG)

You’ll notice the ports that are required for Blast Extreme and PCoIP. If these are not open you can experience a blank screen when connecting to the VMware Horizon VDI Guest VM.

For more information on VMware Horizon network ports, visit VMware’s Network Ports in VMware Horizon | VMware.

Certain types of IPS (Intrusion Prevention Service) can also intercept and block traffic. IPS may cause intermittent issues.

DNS Issues

While VMware Horizon View usually uses IP address for connectivity between the View Connection Server, guest VM, and client, I have seen times where DNS issues have stopped certain components from functioning properly.

It’s always a good idea to verify that DNS is functioning both internally and externally. DNS (forward and reverse) is required for VMware Horizon Linux guests VMs.

XDR, EDR, and AV Platform causing momentary blank screen at logon

When using an XDR (Extended Detection and Response), EDR (Endpoint Detection and Response), or special AV solution with non-persistent desktops, one may experience a momentary blank screen on user session logon. I have observed this with Sophos XDR as well as Cortex XDR, with blank screens varying from 10-30 seconds on user login.

Removal of the platform can reduce the momentary blank screen down to 1-5 seconds.

I highly recommend configuring and tweaking policies as much as possible to enhance and optimize your environment. There will always be a trade off of performance for security, and the decisions should be made by those in the organization who make cyber security related decisions.

Incorrectly configured Unified Access Gateway

A big offender when it comes to blank screens is an incorrectly configured VMWare Unified Access Gateway for VMware Horizon.

Sometimes, first-time UAG users will incorrectly configure the View Connection server and UAG.

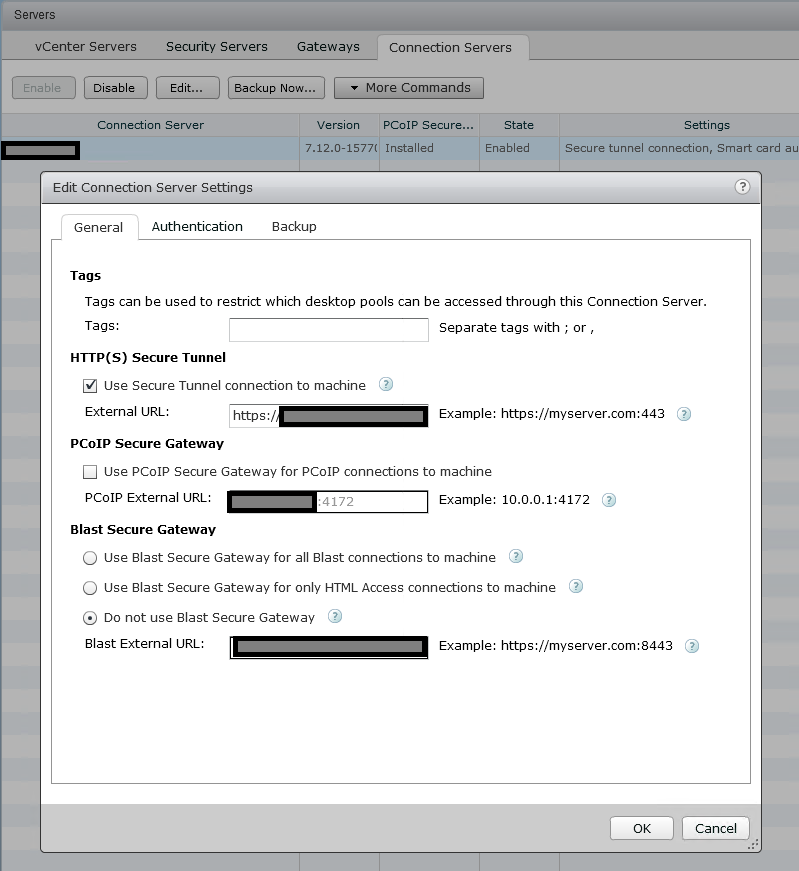
When configuring a UAG, you must disable both “Blast Secure Gateway”, and “PCoIP Secure Gateway” on the View Connection Server, as the UAG will be handling this. See below.

Picture of the Secure Gateway settings on VMware Horizon View Connection Server when used with VMware UAG.
Secure Gateway Settings on View Connection Server when used with UAG

Another regular issue is when admins misconfigure the UAG itself. There are a number of key things that must be configured properly. These are the values that should be populated on the UAG under Horizon Settings.

Connection Server URLhttps://ConnectionServerIP:443
Connection Server URL Thumbprintsha1=SSLTHUMPRINT
(Thumbprint of the SSL certificate your View Connection Server is using)
PCOIP External URLUAG-EXTERNALIP:4172
Blast External URLUAG-InternetFQDN:443
Tunnel External URLUAG-InternetFQDN:443

You must also have a valid SSL certificate installed under “TLS Server Certificate Settings”. I’d recommend applying it to both the admin and internal interface. This is a certificate that must match the FQDN (internal and external) of your UAG appliance.

Once you’re good, you’re green!
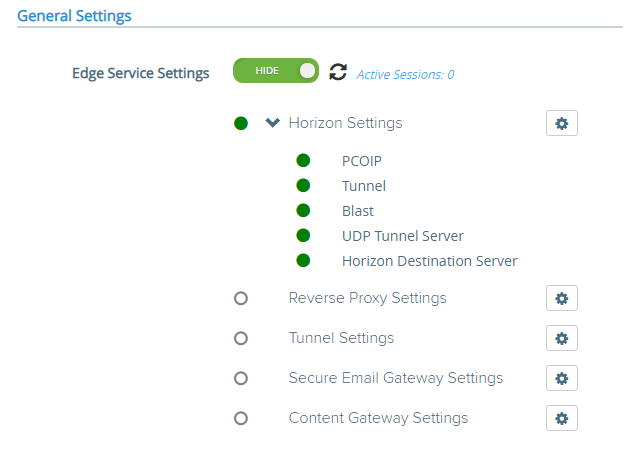
Picture of the VMware UAG interface showing all green (functioning).
VMware Unified Access Gateway showing valid

You should always see green lights, all protocols should work, and the connections should run smooth. If not, troubleshoot.

GPU Driver Issue

When using a GPU with your VM for 3D graphics, make sure you adhere to the requirements of the GPU vendor, along with the VMware requirements.

Some vendors have display count, resolution, and other limits that when reached, cause Blast Extreme to fail.

An incorrectly installed driver can also cause issues. Make sure that there are no issues with the drivers in the “Device Manager”.

VMware documents regarding 3D rendering:

Blast Extreme log files can be found on the guest VM in the following directory.

C:\ProgramData\VMware\VMware Blast\

Looking at these log files, you can find information that may pertain to the H.264 or display driver issues that will assist in troubleshooting.

When using GPUs such as Nvidia GRID and AMD MxGPU, it is recommended to disable the VMware SVGA 3D Driver and adapter inside of Device Manager after you install the applicable GPU drivers.

NVIDIA vGPU Issues

You may be experiencing issues related to the NVIDIA vGPU platform, either inside of the VM guest, or on the VMware ESXi host.

Please check out my NVIDIA vGPU Troubleshooting Guide – How to troubleshoot vGPU on VMware for more information on how to troubleshoot, as well as a list of common issues experienced with VMware Horizon and NVIDIA vGPU.

VMware Tools

A corrupt VMware tools install, whether software or drivers can cause display issues. Make sure that the drivers (including the display driver) are installed and functioning properly.

It may be a good idea to completely uninstall VMware Tools and re-install.

If you’re experiencing display driver issues (such as a blank screen), before re-installing VMware Tools try forcibly removing the display driver.

  1. Open “Device Manager”
  2. Right click on the VMware Display adapter and open “Properties”
  3. On the “Driver” tab, select “Uninstall”
  4. Check the box for “Delete the driver software for this device”.

This will fully remove the VMware driver. Now re-install VMware Tools.

Horizon Agent

Often, re-installing the Horizon Agent can resolve issues. Always make sure that VMware Tools are installed first before installing the Horizon Agent.

Make sure that if you are running 64-bit Windows in the VM then you install and use the 64-bit Horizon Agent.

You may experience issues with the “VMware Horizon Indirect Display Driver”. Some users have reported an error on this driver and issues loading it, resulting in a blank screen. To do this, I’d recommend forcibly uninstalling the driver and re-installing the Horizon Agent.

To forcibly remove the “VMware Horizon Indirect Display Driver”:

  1. Open “Device Manager”
  2. Right click on the “VMware Horizon Indirect Display Driver” and open “Properties”
  3. On the “Driver” tab, select “Uninstall”
  4. Check the box for “Delete the driver software for this device”.

Now proceed to uninstall and reinstall the Horizon View Agent.

When running the Horizon Agent on Horizon for Linux, make sure that forward and reverse DNS entries exist, and that DNS is functioning on the network where the Linux VM resides.

Also, as a reminder, it is recommended that you re-install the Horizon agent in versions up to and including Horizon 8 2103 after upgrading VMware Tools. As of Horizon 8 2106, you no longer need to re-install the Horizon Agent when performing a VMware Tools upgrade.

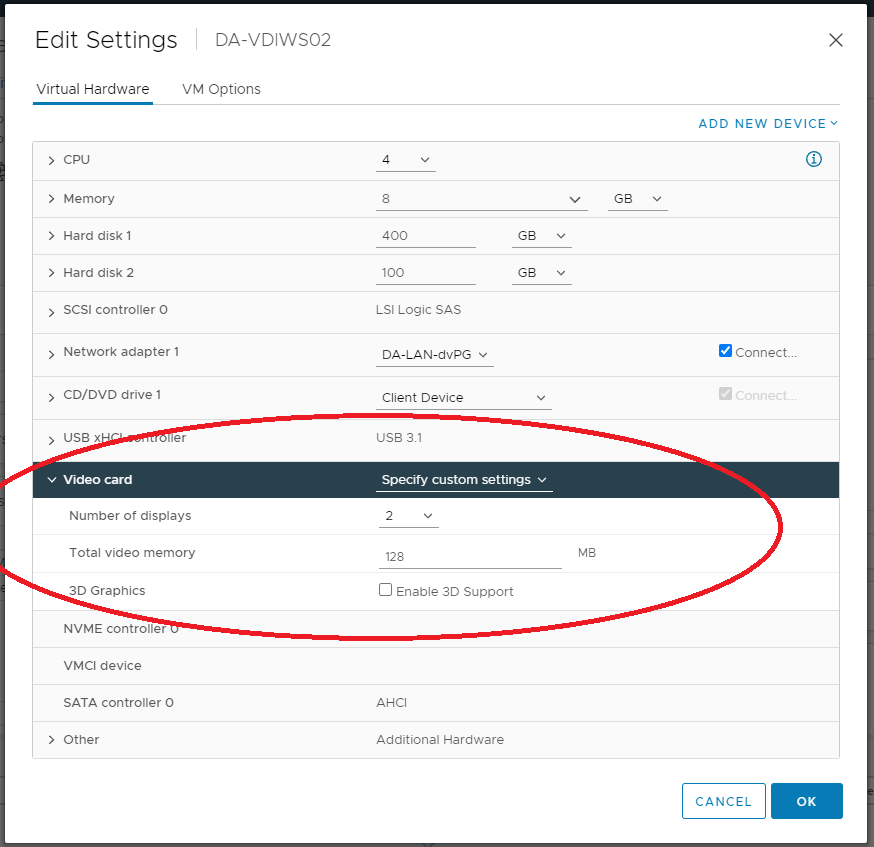
Video Settings (Video Memory (VRAM), Resolution, Number of Displays)

When experiencing video display issues or blank screens on VMware Horizon View, these could be associated with the guest VM’s memory, video memory (VRAM), display resolution, and number of displays.

vSphere Video RAM (VRAM) configuration for VMware Horizon
vSphere Video RAM Configuration for VMware Horizon

If you do not have enough Video RAM (VRAM) allocated to the virtual machine and/or you have too many displays (multi-monitor), then you can experience the blank screen with Horizon.

Make sure you are adhering to the specifications put forth by VMware. Please see the following links for more information.

Master Image Resolution

While this isn’t likely to cause a blank screen issue (it can though), it’s always a good idea to set your image to a lower resolution before snapping or converting to a template for deployment.

It’s a lot easier for the VMs to start using lower resolution and VRAM (Video Memory) and then increase to what’s needed, instead of starting at a crazy high resolution and then getting adjusted down.

I consider it a good practice to reduce the graphics resolution before creating and deploying the image to the desktop pools.

Protocol

When troubleshooting blank screens with VMware Horizon, you need to try to identify whether it’s specific to the guest VM, or if it’s associated with the connection protocol you’re using (and the route it takes whether through a Connection Server, or UAG).

Always try different protocols to see if the issue is associated with all, or one. Then try establishing connections and find if it’s isolated direct to the Connection Server, or through the UAG.

If the issue is with a specific protocol, you can view the protocol log files. If the issue is with the UAG, you can troubleshoot the UAG.

Log files can be found in the following directory:

C:\ProgramData\VMware\

HTTPS Proxy and redirection issues

If you are connecting through a network that does passive and/or transparent HTTPS scanning or uses a proxy server, you may experience issues with inability to connect, or blank screens.

You’ll need to modify your firewall or proxy to allow the VMware connection and open the required ports for VMware Horizon and create an exception not to touch or manipulate the VMware Horizon related traffic.

Login banner or disclaimer (PCoIP)

I haven’t seen or heard of this one in some time, but when using VMware Horizon with PCoIP, sessions can fail or show a blank screen when the legal disclaimer login banner is used on the Windows instance (Windows 7, Windows 10, or Windows 11).

For more information on this issue, and how to resolve or workaround, visit https://kb.vmware.com/s/article/1016961.

Old version of VMware Horizon

It never stops surprising me how old some of the VMware Horizon View environments are that some businesses are running. VMware regularly updates, and releases new versions of VMware Horizon that resolve known issues and bugs in the software.

While it may be difficult, simply upgrading your VMware Horizon environment (VMware vSphere, View Connection Server, VMware Tools, VMware Horizon Agent) can often resolve many issues.

Blank Screen connecting to Physical PC running Horizon Agent

When you install the VMware Horizon Agent on a Physical PC, you may encounter issues with a blank screen.

This is usually caused by:

After troubleshooting these issues, you should be able to resolve the issue.

Conclusion

As you can see there are a number of different things that can cause Horizon View to show a blank screen on login. It’s always best to try to understand how the technology works, and establish where the failure points are.

Let me know if this helped you out, or if you find other reasons and feel I should add them to the list!
Mar 192020
 
VMware Horizon View Icon

After installing the VMware Horizon Agent on a Physical PC, you may have noticed some issues with USB redirection, audio, and hardware redirection. These issues include not working, or not working in it’s entirety.

On a few occasions I’ve had readers reach out to inform me that they are experiencing these issues. Most recently a reader by the name of “Sascha” reached out and reported issues with audio, particularly the microphone not functioning or being redirected from the VMware Horizon View Client to the Physical PC.

The Fix

In Sascha’s case (along with the other readers), we troubleshot the issue and realized that in each and every case the problem was due to the use of a Windows 10 Profesional license being used. As per the VMware Horizon release notes, a Windows 10 Enterprise license must be used when installing the Horizon Agent on a Physical PC.

Once Sascha and the other users upgrades or installed a Windows 10 Enterprise license, the issues stopped immediately.

This is another reminder that you need an Windows 10 Enterprise license when installing the Horizon Agent on a Physical PC.

Mar 122020
 
10ZiG RepurpOS (RPOS) Running on PC

Looking to repurpose old PCs or laptops in to VDI Thin Clients (or Zero Clients)? Looking at implementing VDI but don’t have the budget for fancy Thin Clients or Zero Clients? Look no further! 10ZiG RepurpOS (also known as RPOS) allows you to repurpose PCs and laptops as VDI client endpoints.
You get all the power of a thin client, but built in to a piece of software that you can install on traditional x86 PC hardware. This means you don’t have to throw away semi-new hardware when rolling out your VDI deployment, it also means you can repurpose old hardware that was destined for recycling.

Read the post, or scroll down to watch the video! Please note that the screenshots may be a bit blurry since they were captured from the video recording.

The Software

10ZiG RepurpOS (RPOS) is built on Linux, similar to their NOS OS for Zero Clients. It install’s like an operating system on traditional x86 computer systems, and turns them in to a fully functioning Thin Client which can be used for VDI.

Pros of the Software

  • Easy installation
  • Installs on x86 hardware (PCs, Laptops)
  • Supports most VDI Technologies (VMware, Citrix, RDP/VDA)
  • Centrally Managed via 10ZiG Manager

Minimum Requirements

  • x86 Hardware
  • 128MB of Memory (RAM)
  • VGA Graphics Adapter
  • 500Mhz or Higher Processor
  • 1GB of Storage
  • Ethernet or Wireless Network Interface

You can find more information on 10ZiG RepurpOS (RPOS) on 10ZiG’s website at https://www.10zig.com/more-products/pc-repurposing.

You can also contact me (or 10ZiG) for a free 10ZiG Repurposing Trial.

Demonstration

Below you’ll see a demonstration video of the 10ZiG RepurpOS (RPOS) in action, followed further below by a text review of the software.

10ZiG RepurpOS (RPOS) Software Video Demonstration

The continuation of this blog post features the different segments of the video.

Setup and Configuration

Getting started is easy… You’ll be provided with a compressed archive that contains an ISO file (which you can burn to CD), or you can use an executable provided that will write the ISO to a USB stick, so you can boot the computer from that.

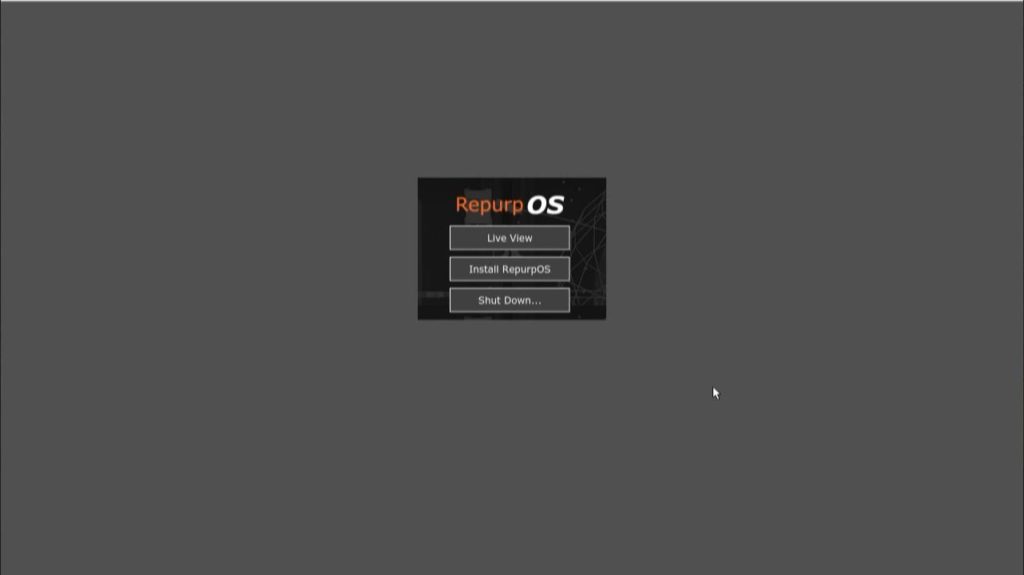
After booting the installer, you’ll see a very simple interface to get started.

Screenshot of the 10ZiG RepurpOS (RPOS) Installer
10ZiG RepurpOS (RPOS) Installer

You’ll note that you have the capability of both running a Live Instance as a Live CD, or you can choose to install the 10ZiG repurposing software to the hard drive disk.

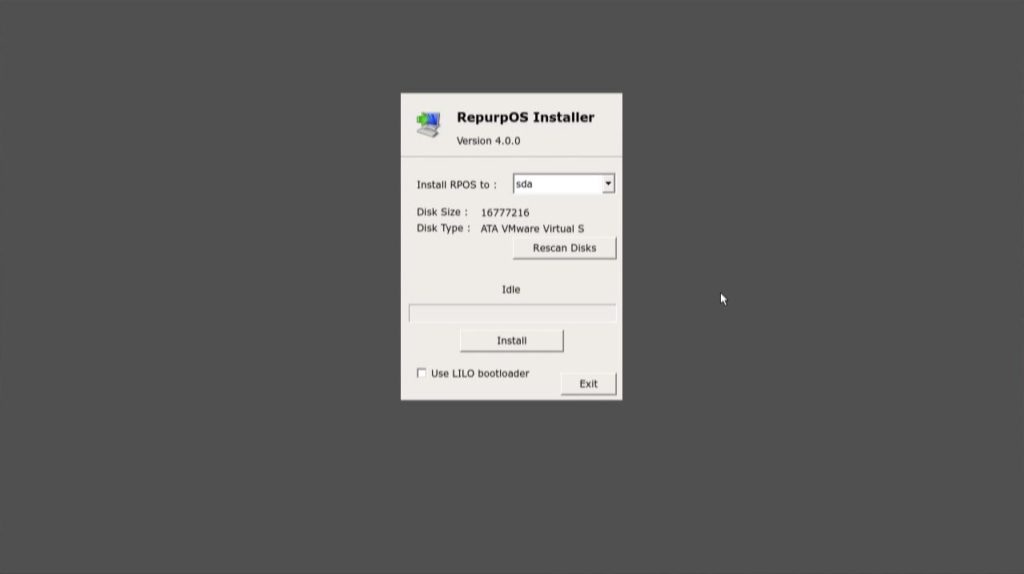
After choosing to “Install RepurpOS”, you select the disk and hit “Install”.

Screenshot of Installing the 10ZiG RepurpOS (RPOS) software to disk
Install the 10ZiG RepurpOS (RPOS) to disk

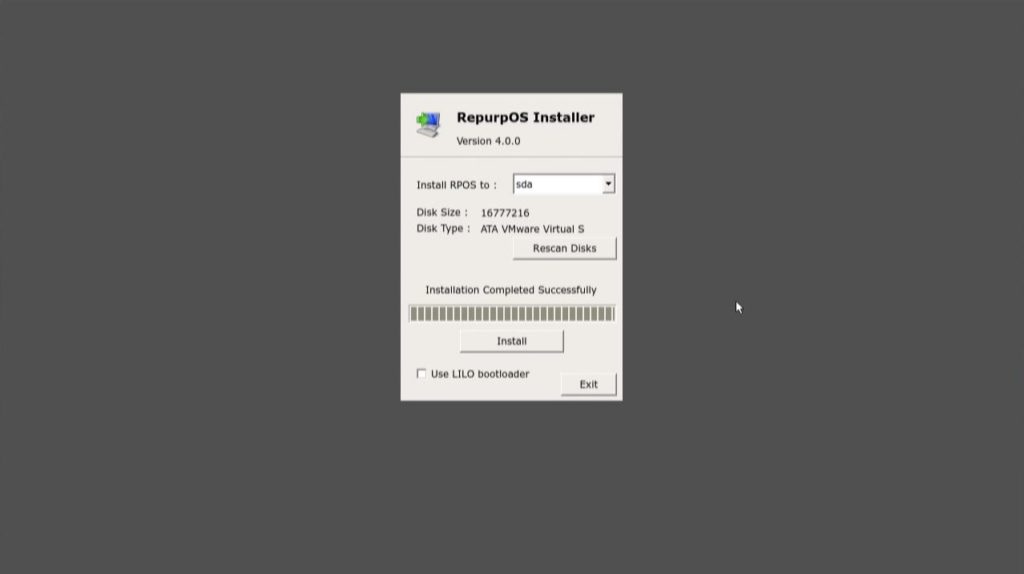
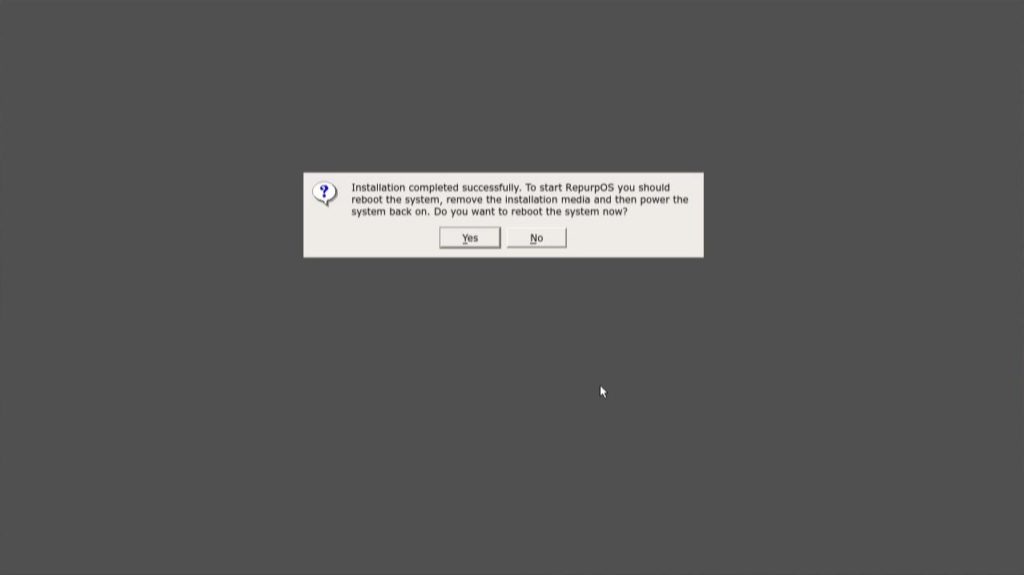
After a few moments, the install will complete. You’ll hit “Exit” and then restart the PC.

Screenshot of successful 10ZiG RepurpOS (RPOS) Install
10ZiG RepurpOS Installed
Screenshot of the 10ZiG RepurpOS (RPOS) Installer rebooting the PC post-installation
10ZiG RepurpOS Reboot after Installation

Interface and Usage

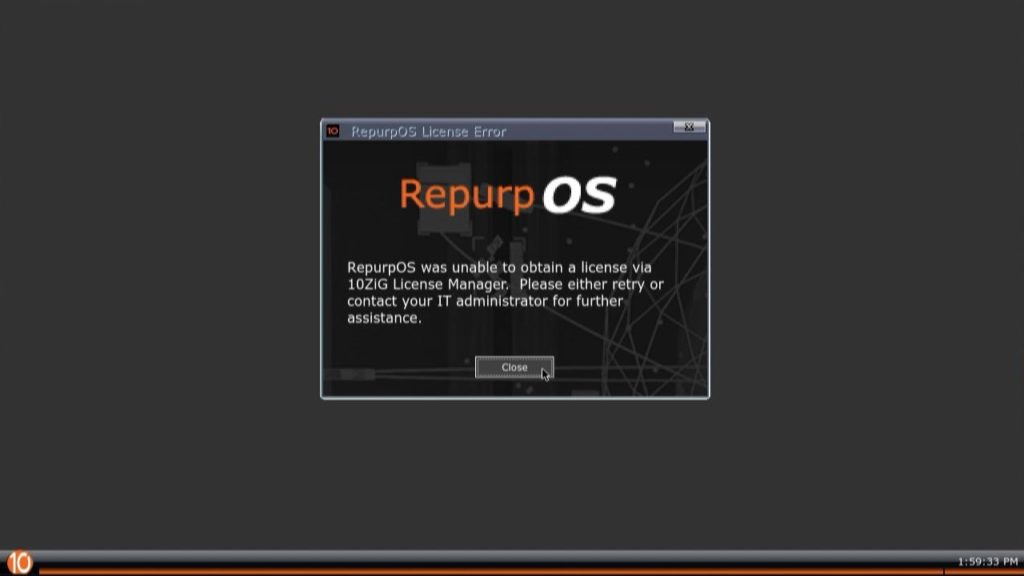
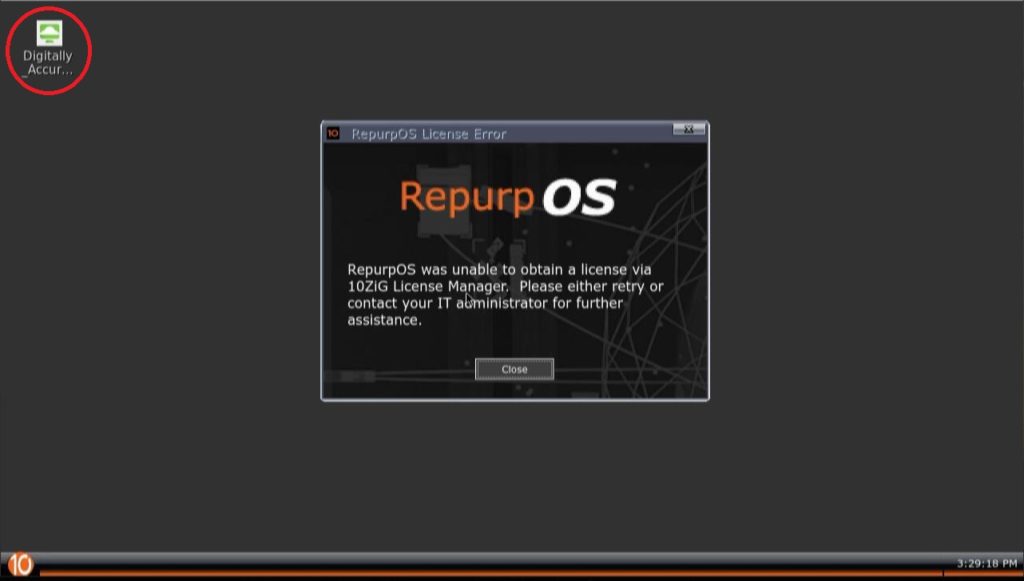
On first boot, you’ll notice the PC repurposing software has a very simple look and interface. We started off with a licensing message since we are using a demo.

10ZiG RepurpOS (RPOS) reporting it was unable to obtain a license via 10ZiG License Manager. Please retry or contact your IT administrator for further assistance.
10ZiG RepurpOS (RPOS) unable to obtain a license

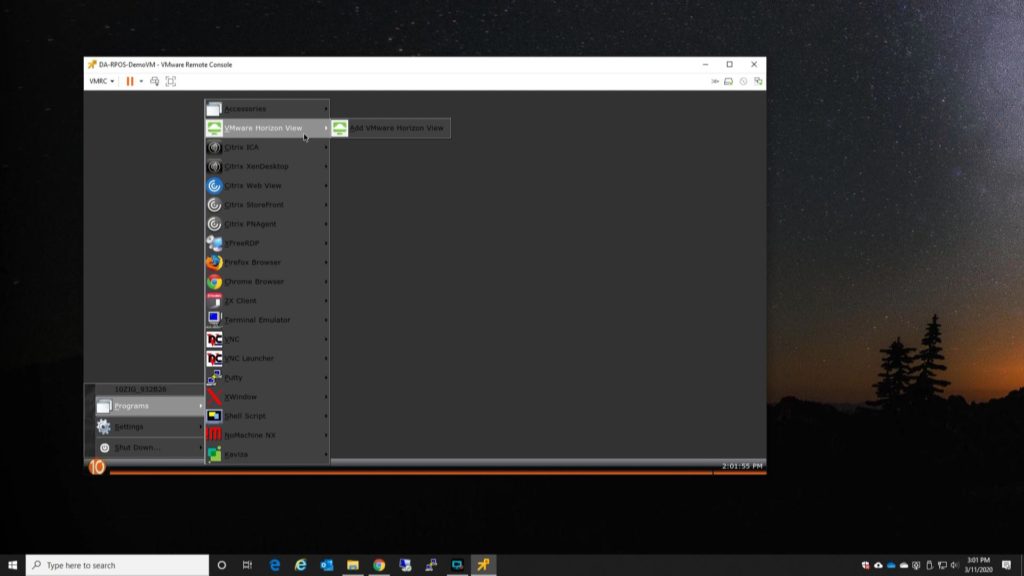
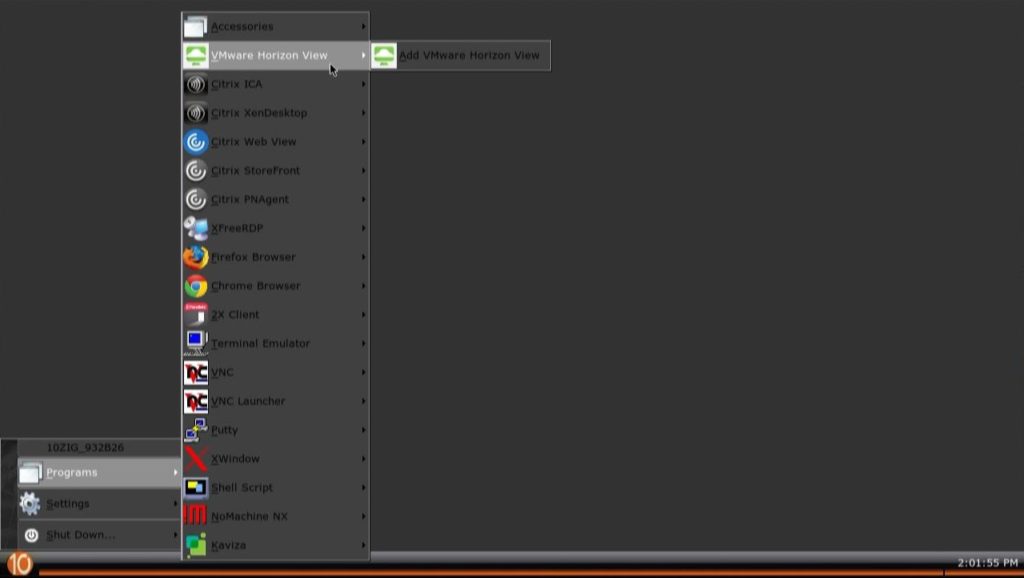
To get started, theres a simple “Start menu”-like interface that allows you to configure and use the client. You can configure the thin client settings, or configure and add connections.

10ZiG RepurpOS (RPOS) Programs menu which allows you to add connections.
10ZiG RepurpOS (RPOS) Programs

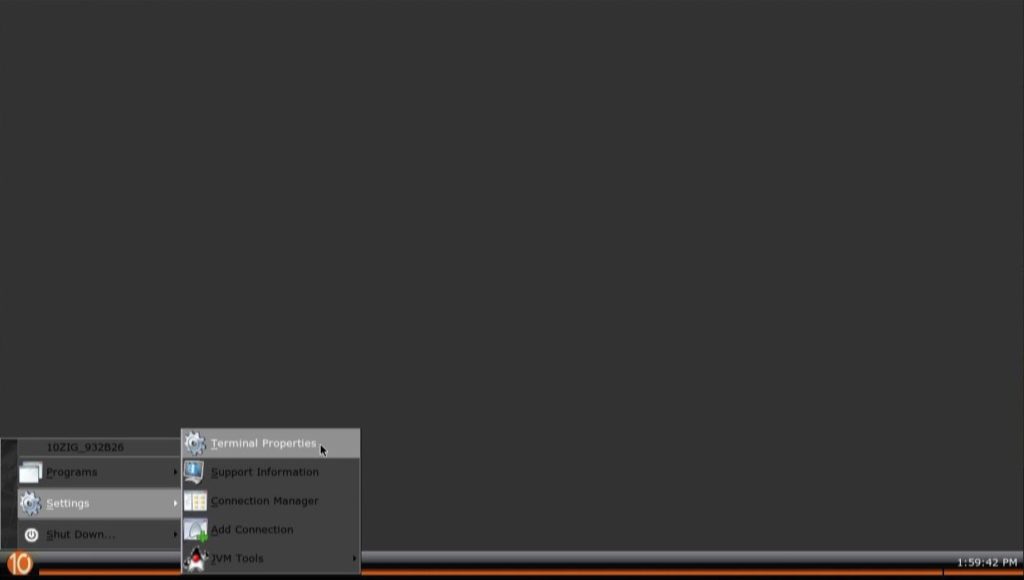
And we have the settings menu.

10ZiG RepurpOS (RPOS) Settings menu to configure the thin client repurposing software.
10ZiG RepurpOS (RPOS) Settings Menu

I want you to keep in mind that while you can configure and use the 10ZiG RPOS software from this interface, in a large corporate environment you’d probably want to use the 10ZiG Manager software, and lock out the interface.

10ZiG RepurpOS Configuration and 10ZiG Manager Compatibility

All components of this software can be managed and configured via the 10ZiG Manager, just like the 10ZiG 5948qv and other 10ZiG Zero Clients. This makes the software extremely powerful since you can easily manage and maintain it, even if you have thousands of repurposed PCs running RPOS.

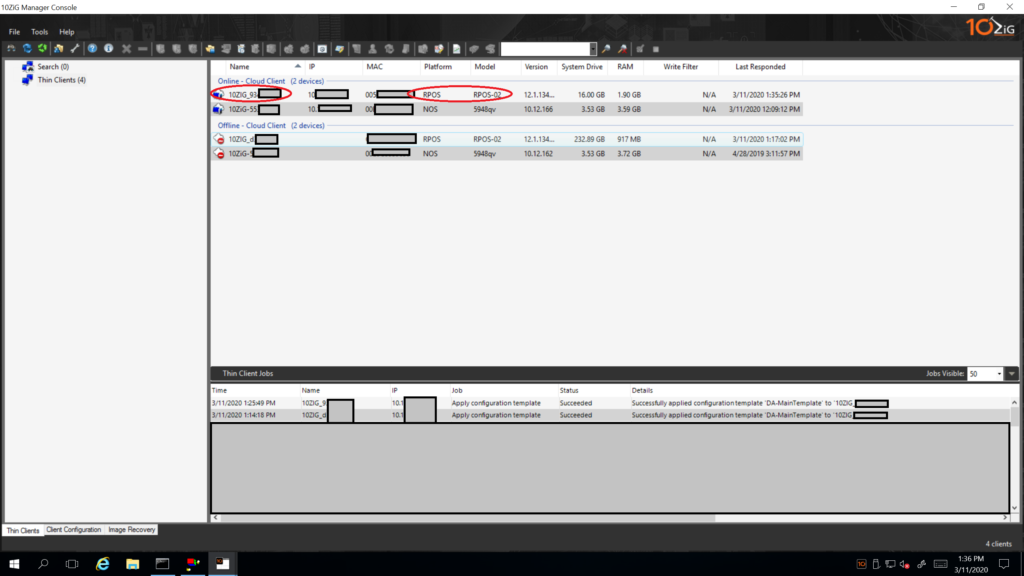
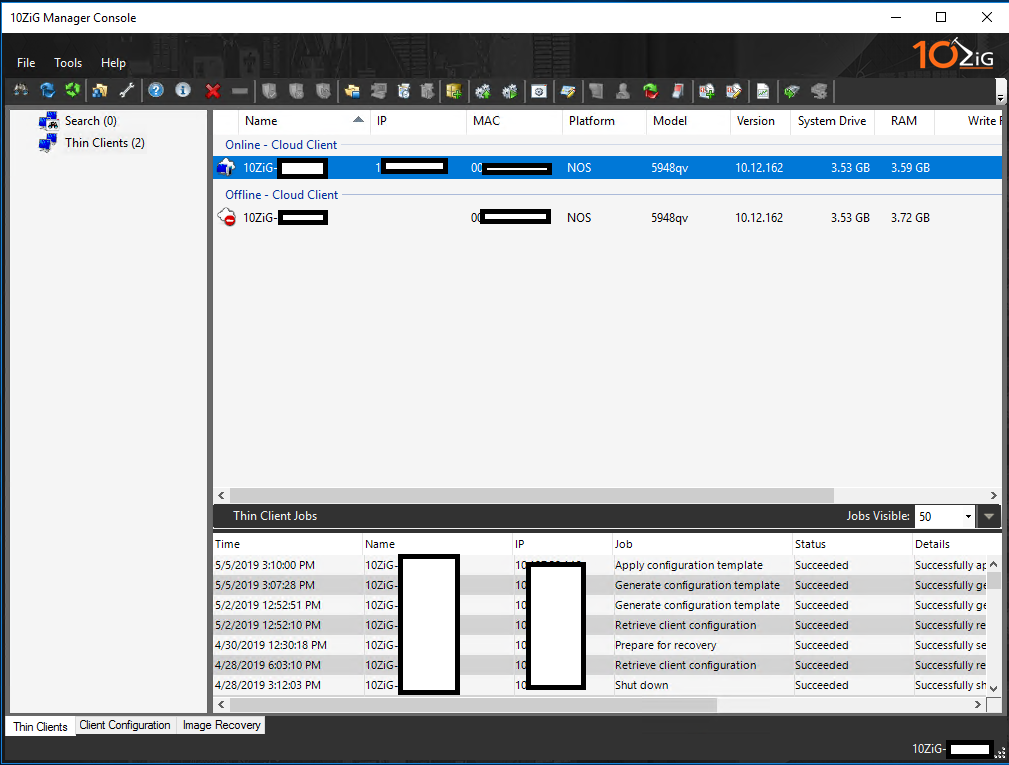
Inside of the 10ZiG Manager, the RPOS devices show up similar to how the other 10ZiG Thin clients and Zero clients would appear.

10ZiG RepurpOS (RPOS) with 2 online clients, and 2 offline clients. Mix of RepurpOS and 5948qv.
10ZiG RepurpOS (RPOS) with RPOS and NOS Clients

You can see above that I pushed my main configuration template to the RPOS demo devices. For more posts on 10ZiG Manager, please see the following posts:

As part of my main template, I have included SSL certificates for my VMware Horizon View connection server, so we’ll be able to test a VDI connection using BLAST.

Using the guides for the 10ZiG Manager above, you could fully configure the RPOS the way you want (for mass deployment), and then create a template and deploy it to a large batch of RPOS PCs. Or you could do all the initial configuration directly from the 10ZiG Manager.

The software supports a number of different protocols and technologies.

Programs menu on the 10ZiG RepurpOS (RPOS)
10ZiG RepurpOS (RPOS) Programs List

The list of applications and programs on 10ZiG RepurpOS (RPOS)

  • VMware Horizon View (VMware Horizon Linux Client)
  • Citrix XenApp (ICA Client)
  • Terminal
  • RDP (Using 2XClient, XFreeRDP)
  • VNC
  • Putty (SSH, Serial, RLogin)
  • XWindows (X Window System)
  • NoMachine NX (NX Technology desktop virtualization)
  • Kaviza (“VDI in a box”)
  • Web Browsing (via Chrome and Firefox)

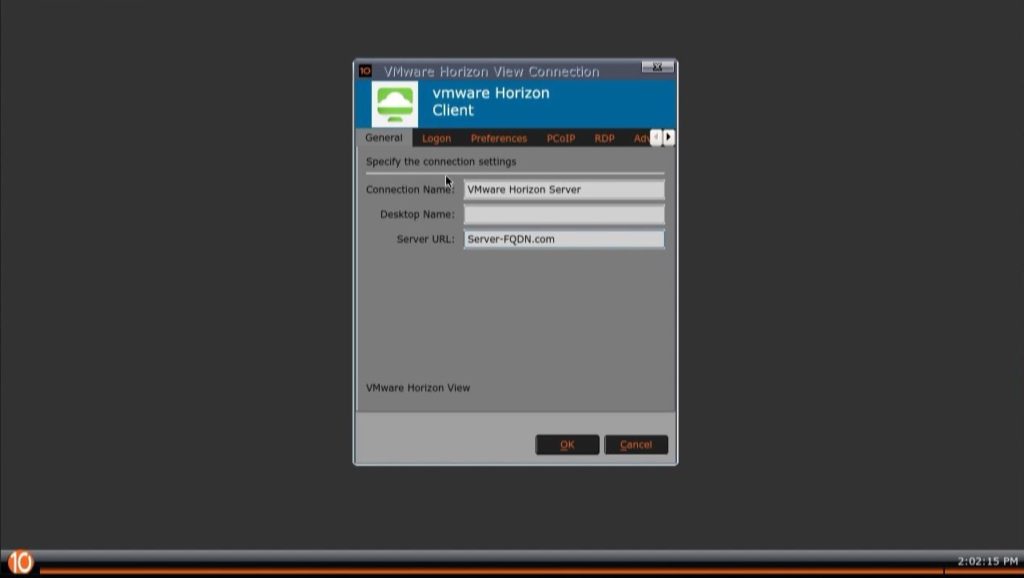
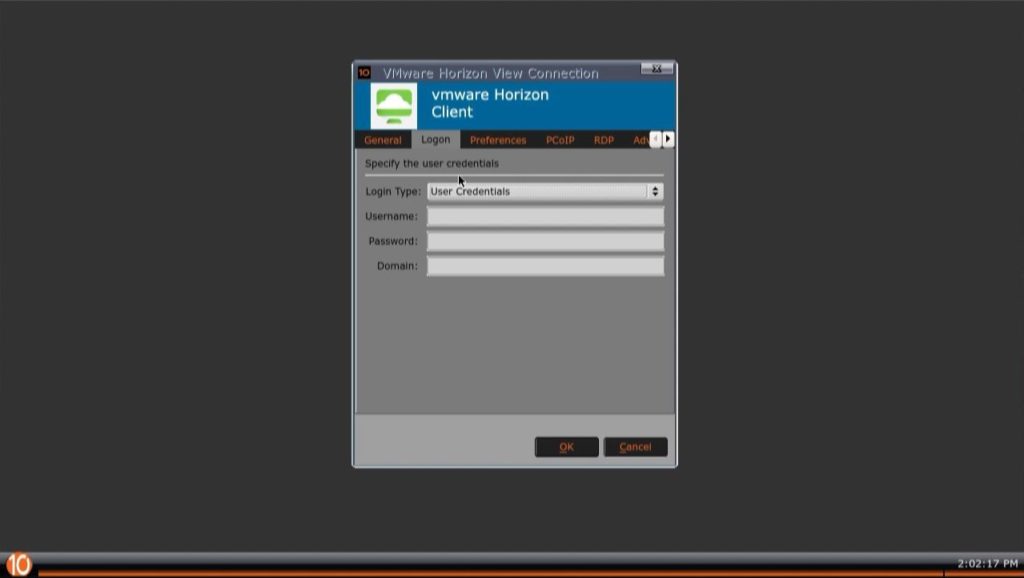
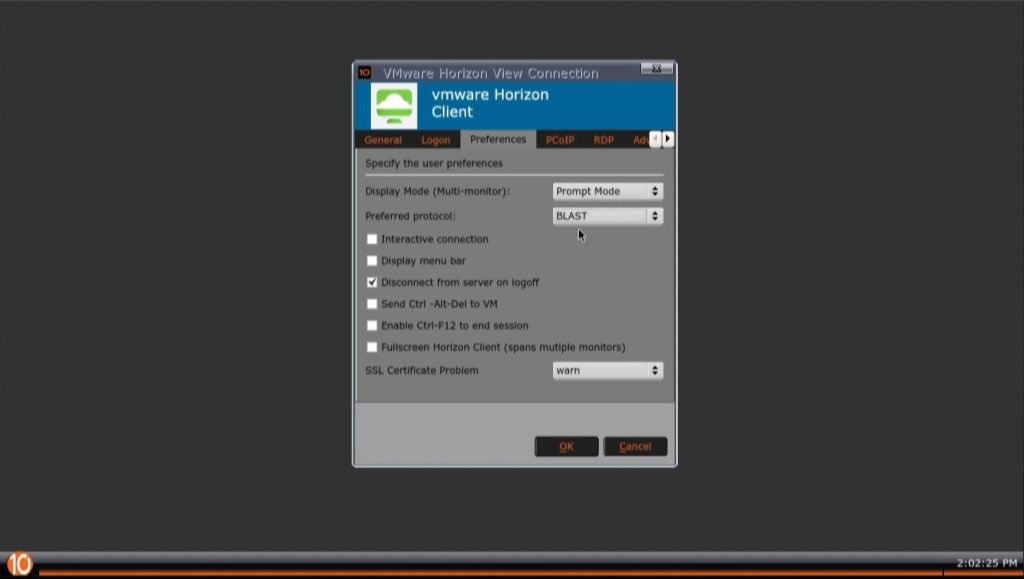
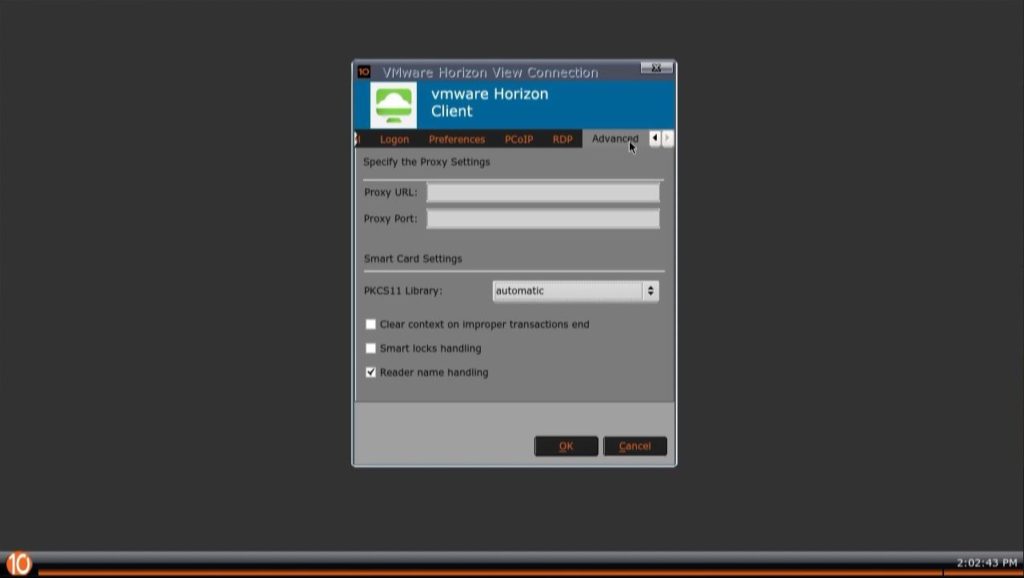
If we choose to create a VMware Horizon View connection, we can configure the following options.

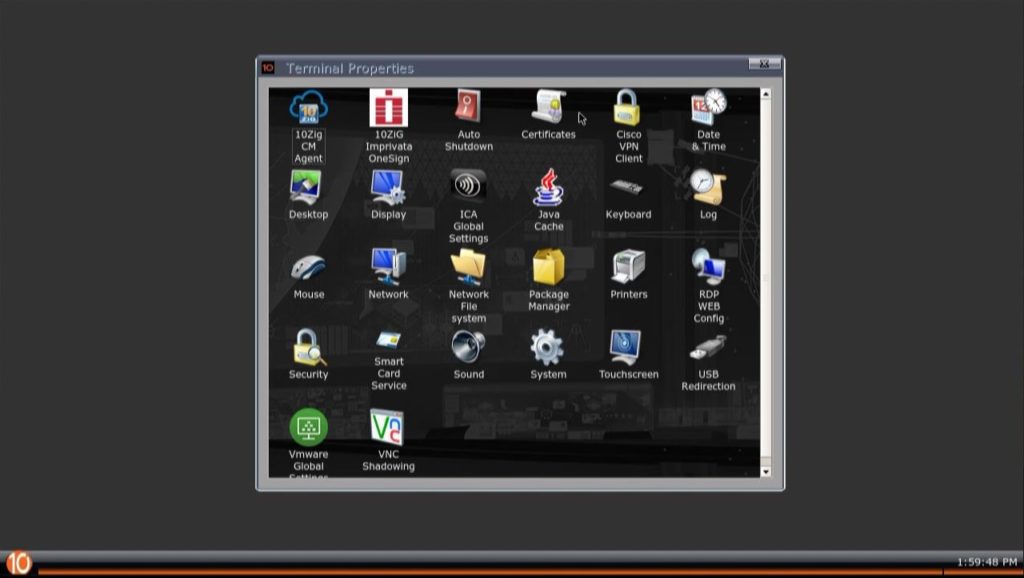
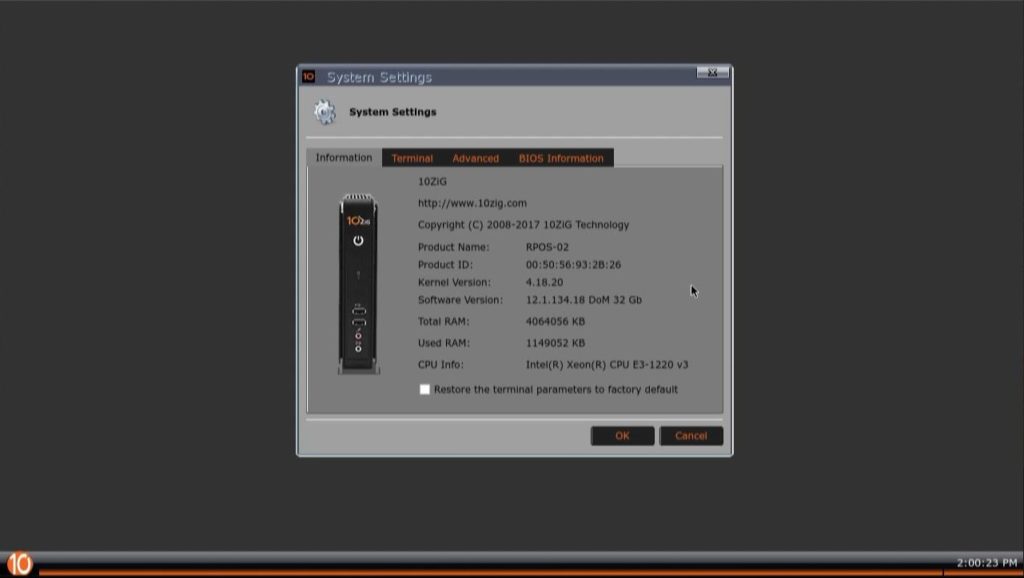
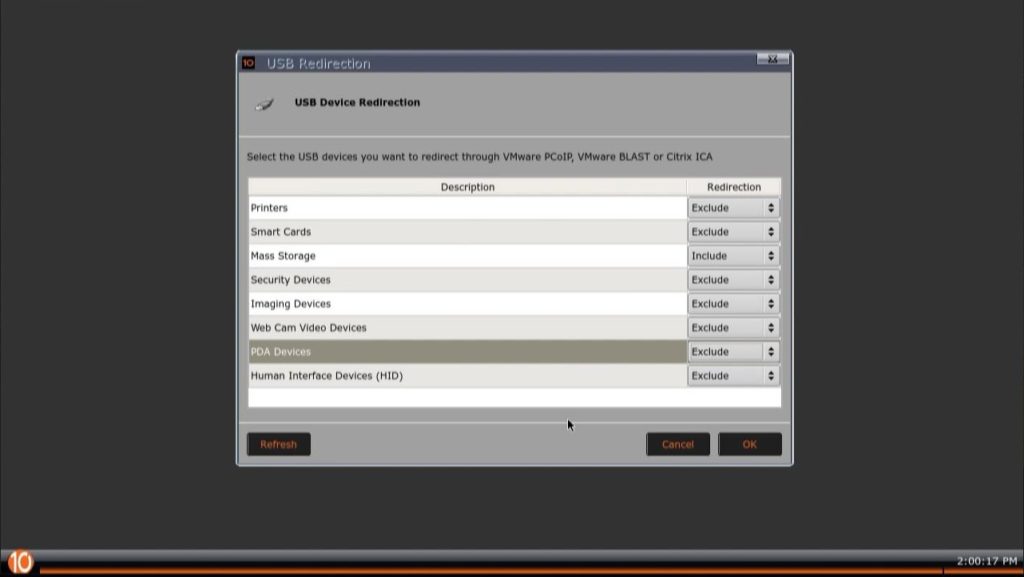
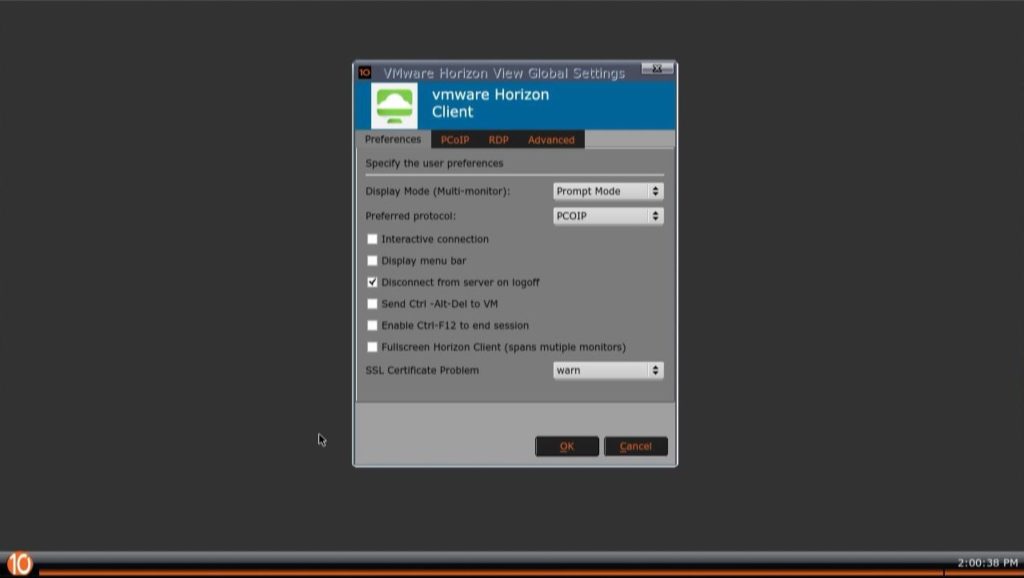
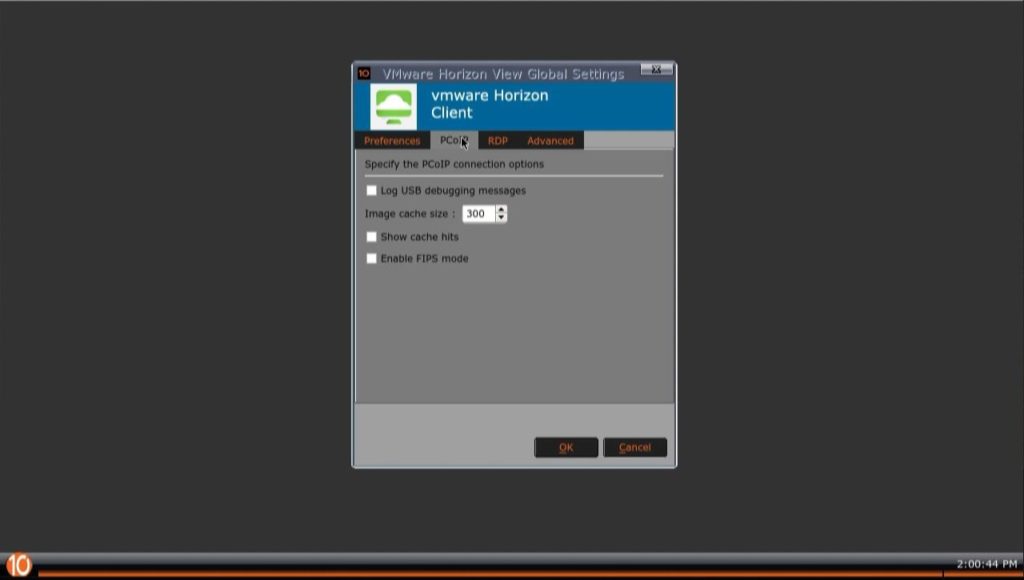
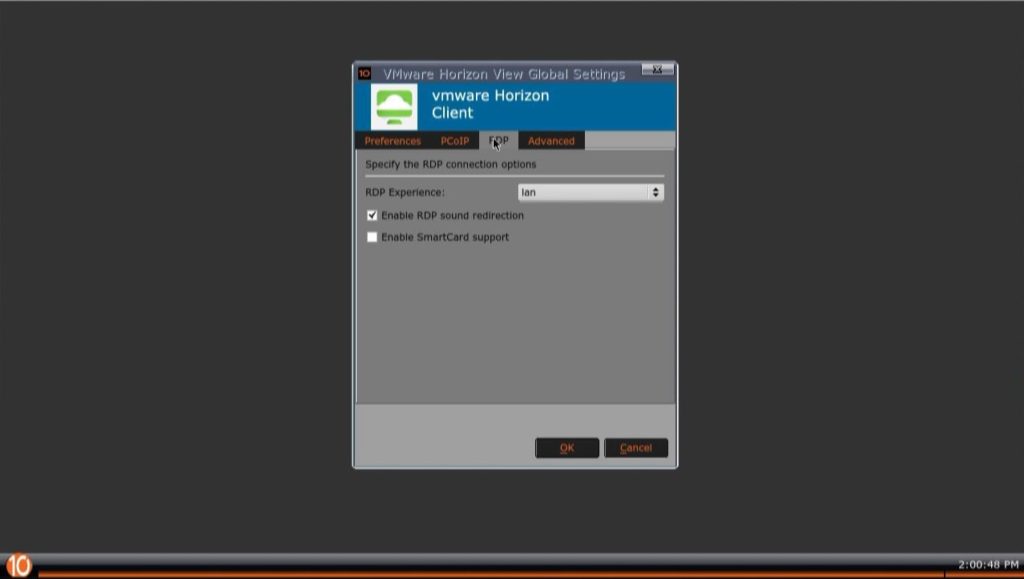
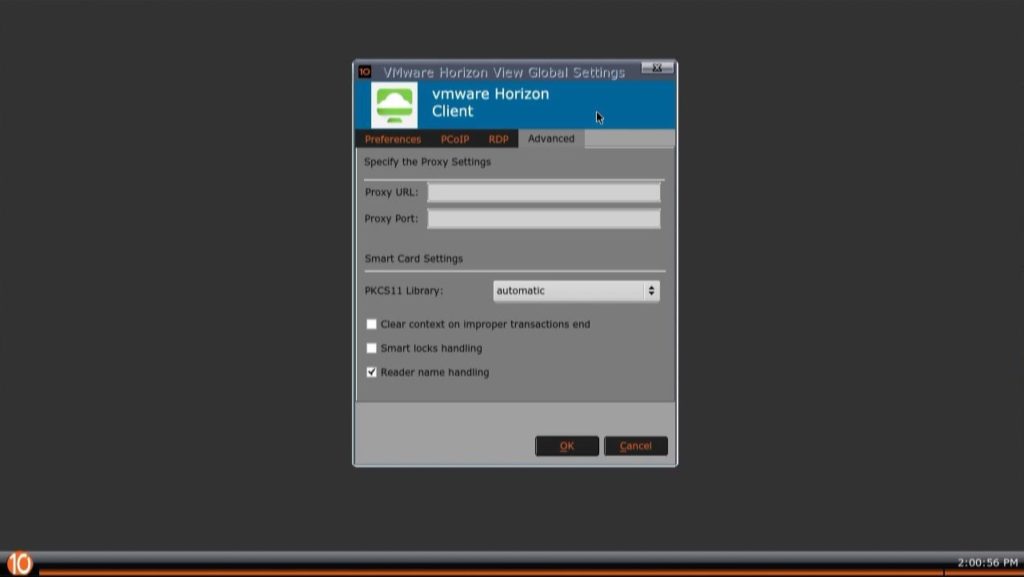
We can also configure the unit itself, along with other things like the VMware Global Settings, USB Redirection, etc…

10ZiG RepurpOS (RPOS) Terminal Properties Window used for configuring settings.
10ZiG RepurpOS (RPOS) Terminal Properties (Unit Settings)
10ZiG RepurpOS (RPOS) System Settings Window
10ZiG RepurpOS (RPOS) System Settings
10ZiG RepurpOS (RPOS) USB Redirection Settings Window
10ZiG RepurpOS (RPOS) USB Redirection Settings

And below we have the VMware Global Settings window.

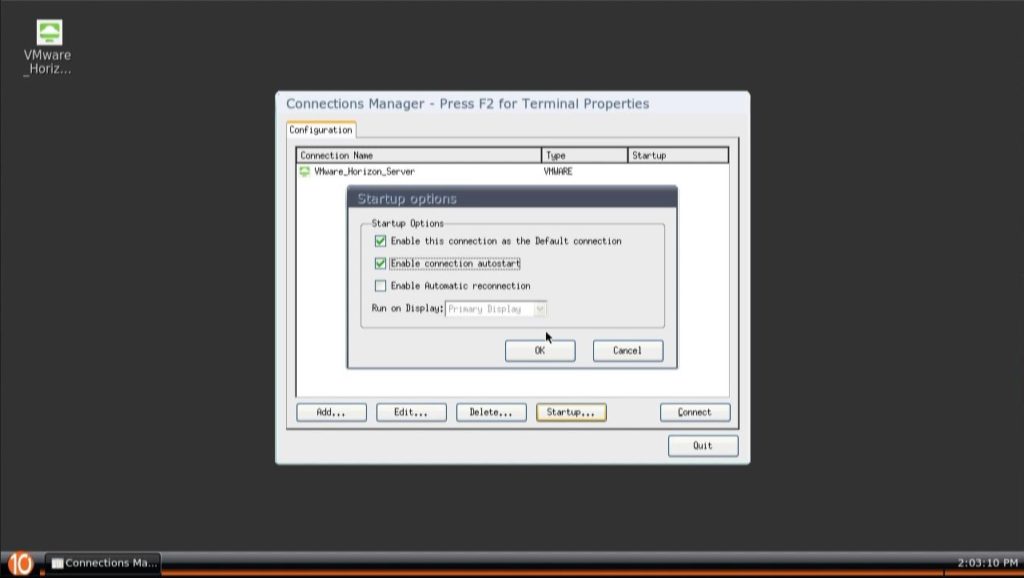
We also have the ability to configure the default connection from the Connection Manager. We can also configure whether we want auto-start a connection and enable automatic reconnection.

10ZiG RepurpOS (RPOS) Connections Manager and Startup options windows.
10ZiG RepurpOS (RPOS) Connections Manager and Startup options

On a final note, you can see there is multi-display support built in. This is more apparent when browsing through other sections of the UI on the 10ZiG RPOS.

VDI Connection Testing

It’s time to test out the main functionality of the 10ZiG RepurpOS (RPOS) software!

I’ve gone ahead and created a connection profile for my company “Digitally Accurate Inc.” to access our VDI environment.

10ZiG RepurpOS (RPOS) desktop with an icon to connect to the Digitally Accurate Inc. connection profile.
10ZiG RepurpOS (RPOS) with Connection Profile to Digitally Accurate Inc.

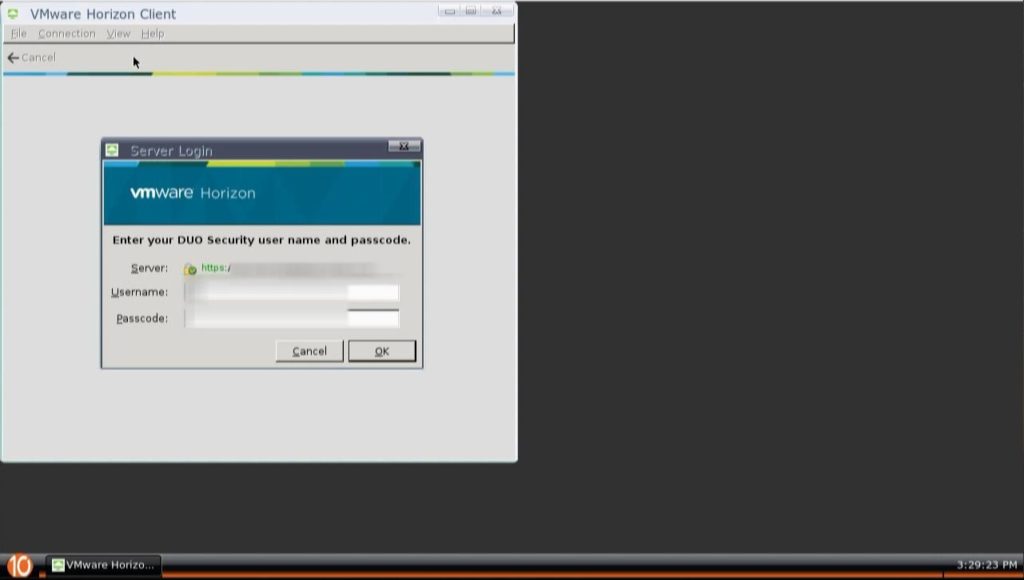
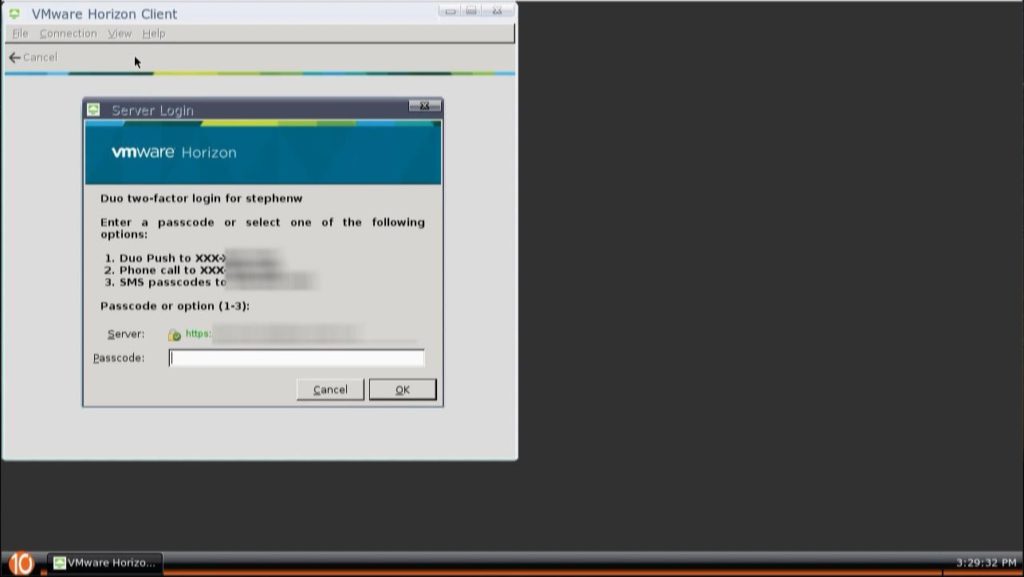
Double clicking that icon, initiates the session. We login with my credentials.

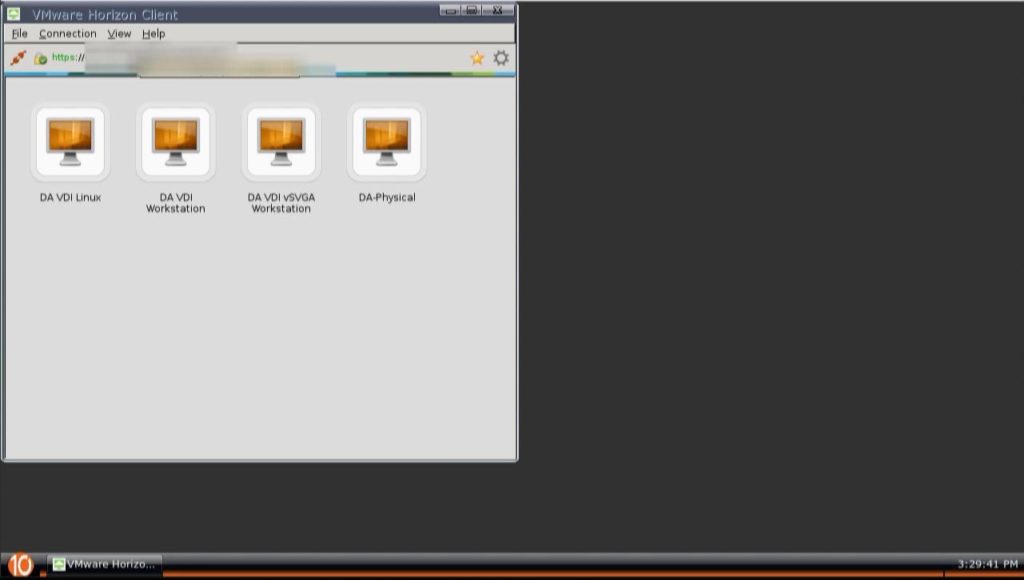
And here we are presented with the available desktop pools. Please note, that you can configure it to automatically connect to a chosen desktop pool, or if only one is available it will automatically connect.

10ZiG RepurpOS (RPOS) VMware Horizon Connection listing available Desktop Pools on Server.
10ZiG RepurpOS (RPOS) VMware Horizon View Desktop Pools

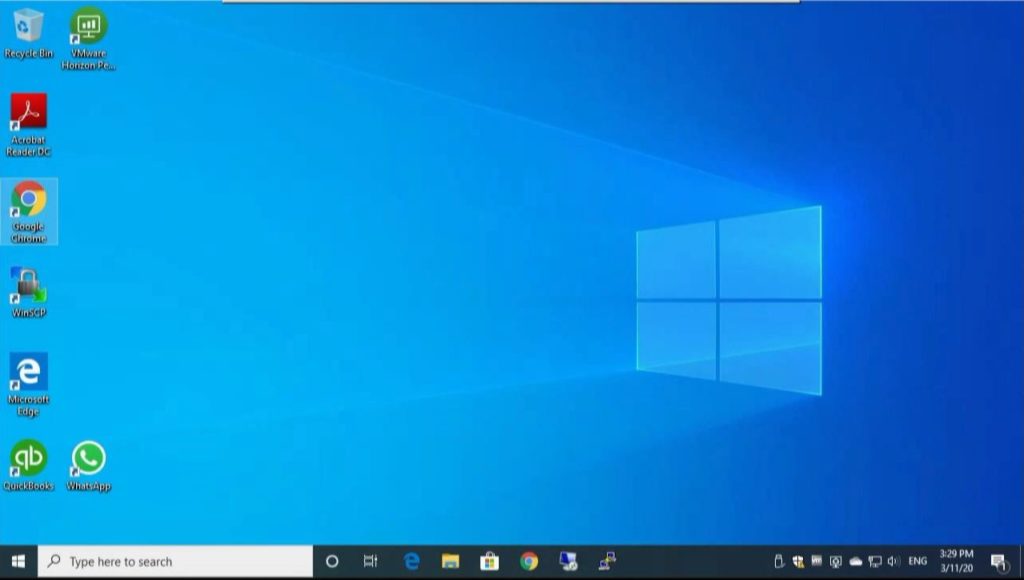
And finally, we have a fully functional connection to our VDI environment on our VMware Horizon View environment using the 10ZiG repurposing software.

10ZiG RepurpOS (RPOS) with an active VDI session to a server running VMware Horizon View.
10ZiG RepurpOS (RPOS) with active VDI session on VMware Horizon View

Again, please note that the screenshots may be a little fuzzy due to the capture from video, the interface in reality is sharp and clear.

Conclusion

In conclusion, the 10ZiG RepurpOS (RPOS) software is a great way to bring life to old or existing hardware, reduce spending during a VDI rollout, and bring value to your investment.

Further backing up that investment, is the ability to use the 10ZiG Manager which is free, and can be used to manage a large number of devices.

I’d highly recommend this software and I look forward to using it more!

Mar 052020
 
Picture of someone video editing on Laptop

Lately, I’ve been playing with video editing and encoding as a new hobby. It requires a powerful system for the production process for both editing, and encoding. While CPU power isn’t necessarily important, the CPU instruction sets and your GPU play a key part with editing and encoding.

For the last few weeks, I’ve been attempting to use my desktop rig with a couple of Nvidia GeForce cards and I’ve been struggling to be able to edit in real time, as well as encode completed video productions in a reasonable amount of time.

Well, there’s a happy ending to this story, my Nvidia Grid K1 and VDI environment saved the day!

Video Editing on VDI Virtual Desktop

My VDI setup

As part of my demo and homelab, I have an HPE ML310e Gen8 v2, with an Nvidia Grid K1 card. This setup is backed with an HPE MSA 2040 SAN for main storage and a Synology DS1813+ for backup and video storage.

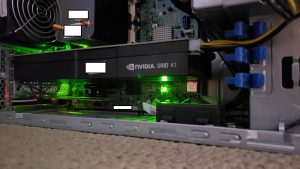
Nvidia GRID K1 in ML310e without air baffle installed
Nvidia GRID K1 in ML310e w/o Air Baffle

On this rig, I’m running VMware Horizon 7.11 and connect to it via a 10ZiG 5948qv Zero Client.

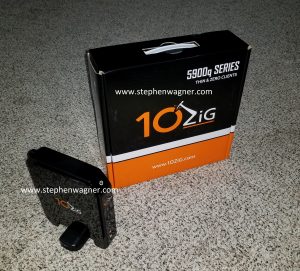
10ZiG 5948q Zero Client

It’s a beautiful desktop replacement as it’s silent, provides a desktop backed with a Intel Xeon Processor, and a high performance GPU.

VDI Video Editing and Encoding

For software, I’ve been using Cyberlink’s PowerDirector software. I’ve used this in the past for screen recording, as well as editing videos I use for demos.

On my physical desktop rig, even with two GPUs it struggles to allow me to preview in realtime the edits I’ve done on a project. The preview window is jolty with loss frames, and it’s hard to know what you’re doing. Also, when producing and encoding a finalized video project, it would take forever to complete even a small 5 minute video at 1080p.

When I first loaded this up on my VDI environment, the software instantly detected the Nvidia GRID card, and asked me if it could use it. From that point on the preview window was fluid, transitions and add-ins were rendered on the fly during previewing, and the final production encoding was literally over 20 times faster using 1080p. Keep in mind this VM only has one Nvidia K180q profile attached to it, so I’m only using less than 25% of the cards full capability.

Other benefits to video editing and encoding on VDI

There’s some other benefits that can be realized when doing video editing and encoding inside of a VDI environment:

  • Ability to connect remotely and work anywhere
  • Ability to work anywhere with a high performance system
  • High speed video storage on demand (since it’s all remote)
  • It can become part of your normal backup solution

This is just another great use case scenario for VDI. Whether it’s for the video professional, or a large organization.

May 062019
 
10ZiG 5948qv Zero Client VMware Horizon View

You have VMware Horizon View deployed along with Duo Multi-Factor Authentication (2FA, MFA), and you’re you having user experience issues with 10ZiG Zero Clients and multiple login dialog boxes and planning on how to deal with the MFA logins.

I spent some time experimenting with numerous different settings trying to find the cleanest workaround that wouldn’t bother the user or mess up the user experience. I’m going to share with you what I came up with below.

If you’re interesting in 10ZiG products and looking to buy, don’t hesitate to reach out to me for information and/or a quote! We can configure and sell 10ZiG Zero Clients (and thin clients), help with solution design and deployment, and provide consulting services! We sell and ship to Canada and the USA!

The Issue

When you have DUO MFA deployed on VMware Horizon, you may experience login issues when using a 10ZiG Zero Client to access the View Connection Server. This is because the authentication string (username, password, and domain) aren’t passed along correctly from the 10ZiG Login Dialog Box to the VMware Horizon View Client application.

Additionally, when DUO is enabled on VMware View (as a RADIUS authentication), there is no domain passed along inside of the DUO login prompt on the view client.

This issue is due to limitations in the VMware Horizon View Linux Client. This issue will and can occur on any system, thin-client, or Zero Client that uses a command string to initialize a VMware View session where DUO is configured on the View Connection Server.

Kevin Greenway, the CTO at 10ZiG, reached out to say that they have previously brought this up with VMware as a feature request (to support the required functionality), and are hopeful it gets committed.

At this point in time, we’d like to recommend everyone to reach out to VMware and ask for this functionality as a feature request. Numerous simultaneous requests will help gain attention and hopefully escalate it on VMware’s priority list.

The Workaround

After troubleshooting this, and realizing that the 10ZiG VMware login details are completely ignored and not passed along to the VMware View client, I started playing with different settings to test the best way to provide the best user experience for logging in.

At first I attempted to use the Kiosk mode, but had issues with some settings not being passed from the 10ZiG Client to the View Client.

Ultimately I found the perfect tweaking of settings that created a seamless login experience for users.

The Settings

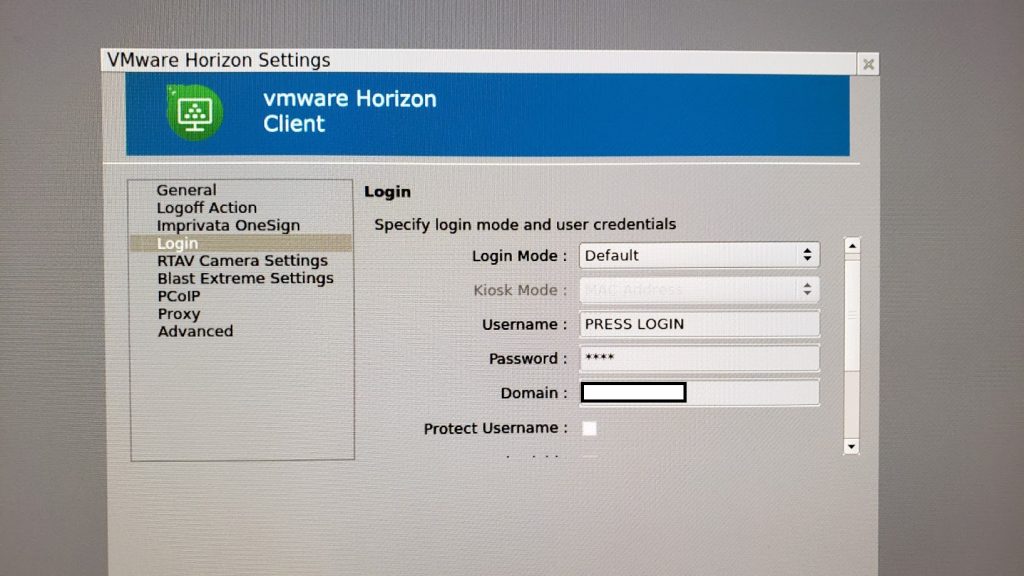
On the 10ZiG Zero Client, we view the “Login” details of the “VMware Horizon Settings” dialog box.

10ZiG Zero Client VMware Horizon Settings Login Settings Dialog Box
10ZiG Zero Client VMware Horizon Settings Login Settings
  • Login Mode: Default
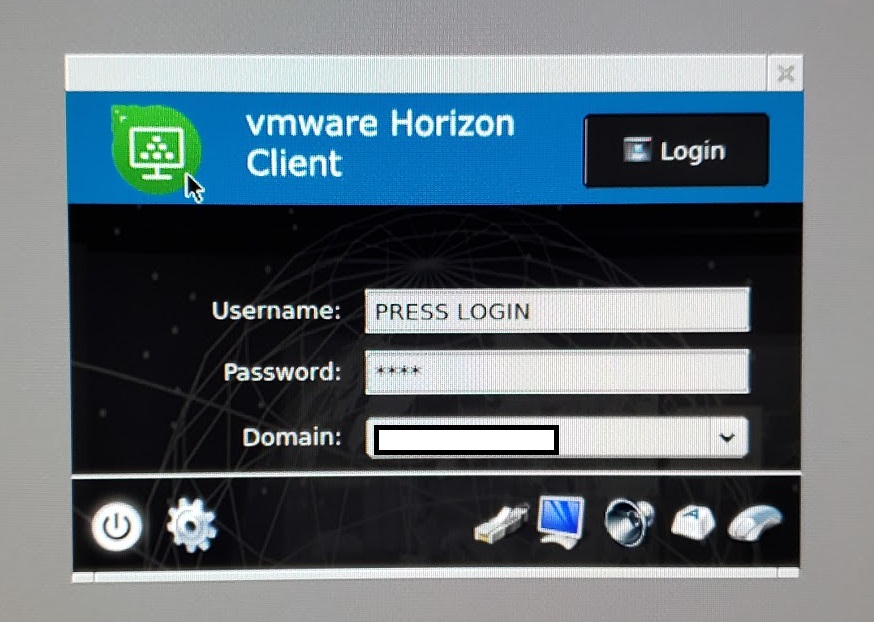
  • Username: PRESS LOGIN
  • Password: 1234
  • Domain: YourDomain

Please Note: In the above, because DUO MFA is enabled, the “Username”, “Password” and “Domain” values aren’t actually passed along to the VMware View application on the Zero Client.

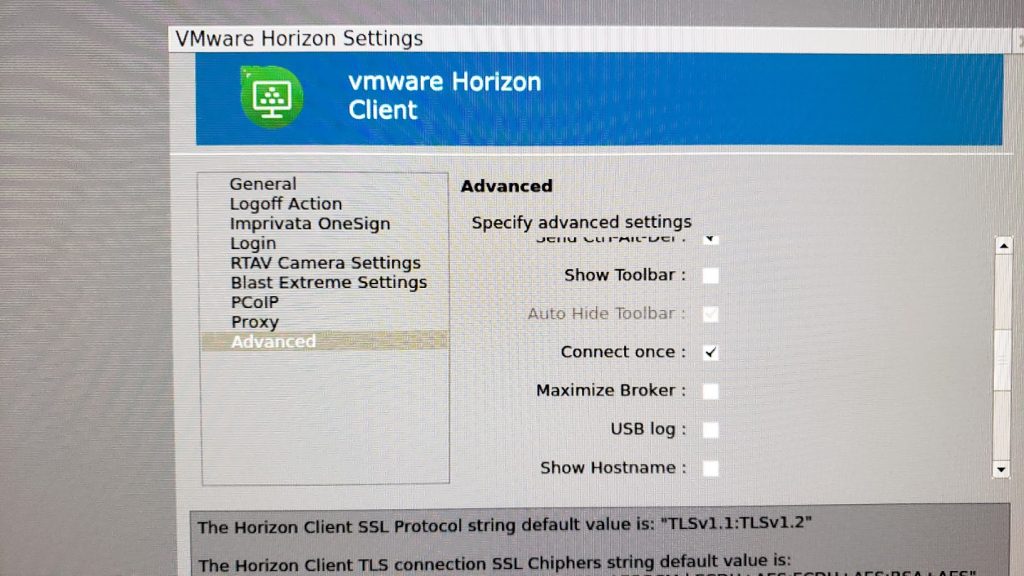
We then navigate to the “Advanced” tab, and enable the “Connect once” option. This will force a server disconnection (and require re-authentication) on a desktop pool logoff or disconnection.

10ZiG Zero Client VMware Horizon Settings Advanced Settings Dialog Window
10ZiG Zero Client VMware Horizon Settings Advanced Settings

Please Note: This option is required so that when a user logs off, disconnects, or get’s cut off by the server, the Zero Client fully disconnects from the View Connection Server which causes re-authentication (a new password prompt) to occur.

The Login User Experience

So now that we’ve made the modifications to the Zero Client, I want to outline what the user experience will look like from Boot, to connection, to disconnection, to re-authentication.

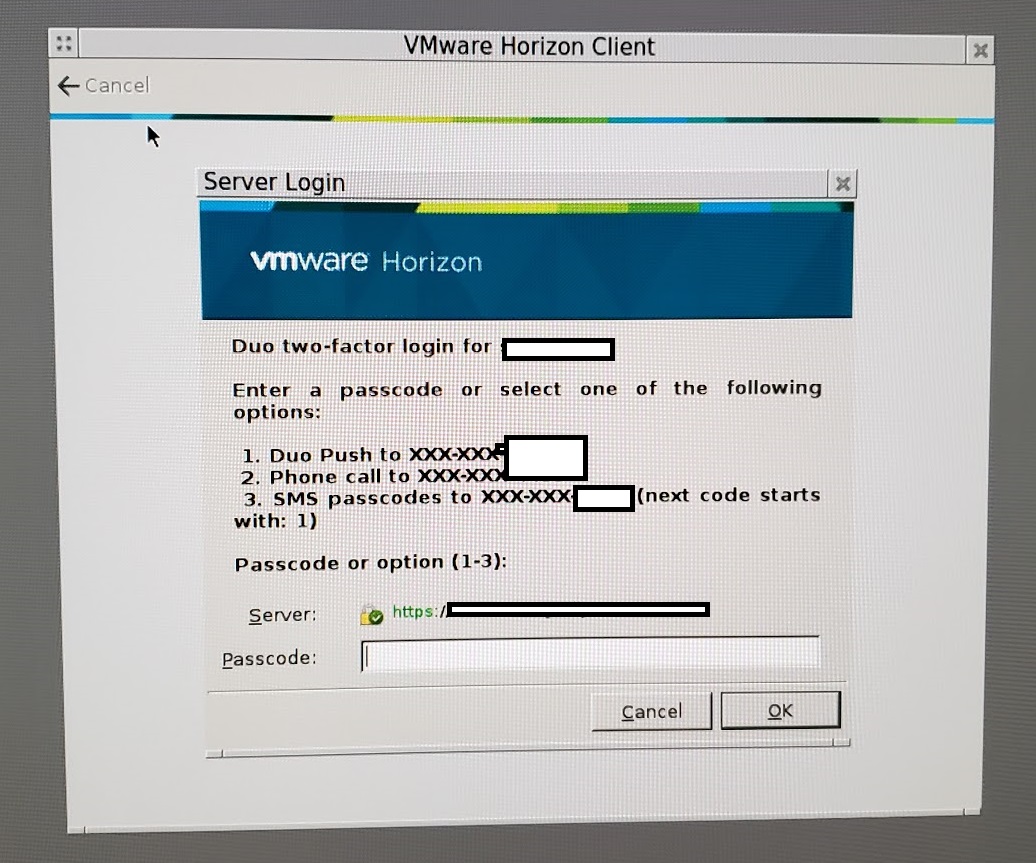
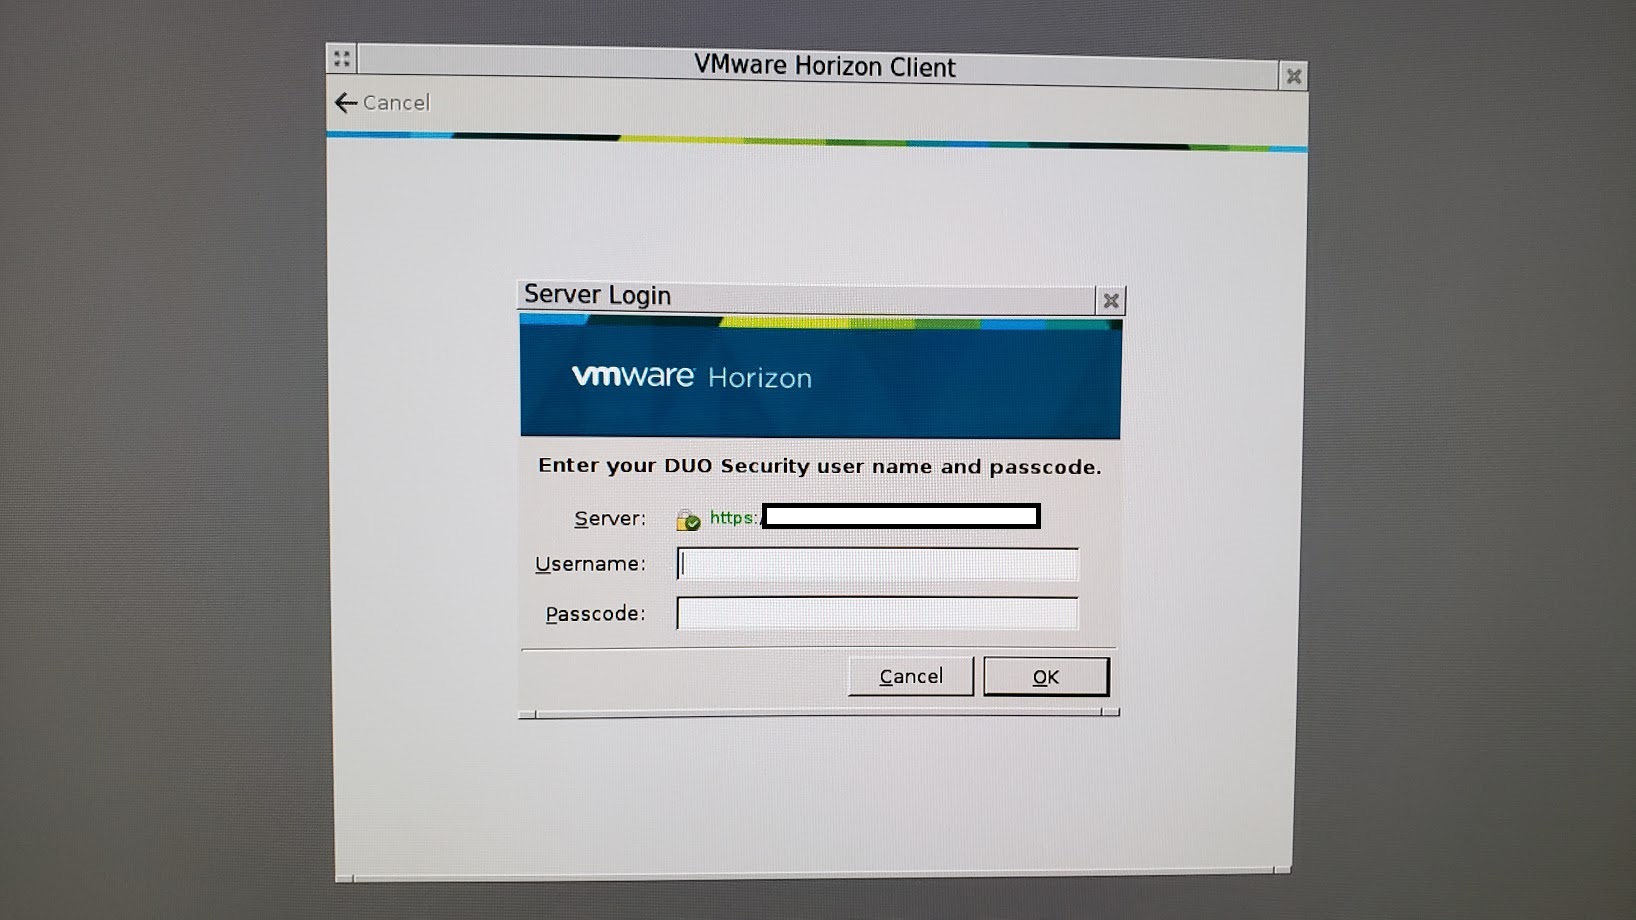
  1. Turning on the 10ZiG Zero Client, you are presented with the DUO Login Prompt on the View Connection Server.
    DUO Security Login VMware View Client Dialog Box
  2. You then must pass 2FA/MFA authentication.
    DUO Security MFA authenticate VMware View Client dialog box
  3. You are then presented with the desktop pools available to the user.
  4. Upon logging off, disconnecting, or getting kicked off the server, the session is closed and you are presented to the 10ZiG VDI Login Window.
    10ZiG Zero Client VMware View Login Dialog Window
  5. To re-establish a connection, click “Login” as instruction by the “Username” field.
  6. You are presented with the DUO Login Window.
    DUO Security Login VMware View Client Dialog Box
  7. And the process repeats.

As you can see it’s a simple loop that requires almost no training on the end user side. You must only inform the users to click “Login” where the prompt advises to do so.

Once you configure this, you can add it to a configuration template (or generate a configuration template), and then deploy it to a large number of 10ZiG Zero Clients using 10ZiG Manager.

Let me know if this helps, and/or if you find a better way to handle the DUO integration!

May 062019
 
10ZiG 5948q Zero Client

You’ve created some 10ZiG Manager configuration templates, modified them to reflect the settings you need, and now you want to deploy the configuration template to your 10ZiG Zero Clients using the 10ZiG Manager.

In this post, we’ll be going over how to deploy an existing configuration template that is stored inside of your 10ZiG Manager management software.

This allows you to push out configs on the fly to either a single device, or 10,000 devices at once. This is a MUST for managing small, medium, and large sized 10ZiG deployments.

If you’re interesting in 10ZiG products and looking to buy, don’t hesitate to reach out to me for information and/or a quote! We can configure and sell 10ZiG Zero Clients (and thin clients), help with solution design and deployment, and provide consulting services! We sell and ship to Canada and the USA!

This post is part three of a three part 10ZiG Manager Tutorial series:

Please Note: we are going to assume you have created a configuration template, have modified it to the settings you required, and have your network properly configured for 10ZiG Manager to function.

Instructions

  1. Open the 10ZiG Manager.
    10ZiG Manager Logged In Main Window
  2. Choose the 10ZiG Zero Client(s) that you’d like to deploy the configuration to. You can “CTRL + Click” or “SHIFT + Click” to select more than one 10ZiG Zero Client.
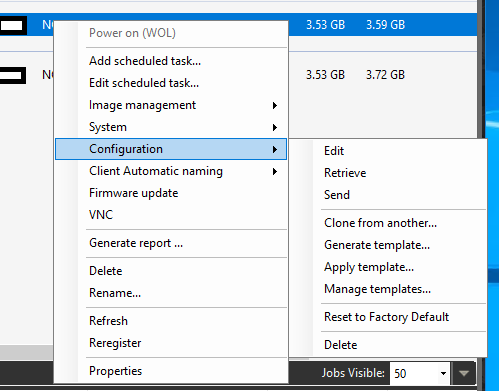
  3. In the menu, expand “Configuration” -> and select “Apply Template”.
    10ZiG Manager Configuration Menu via Right Click
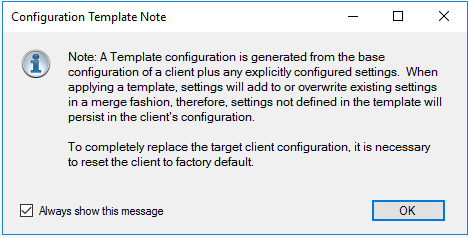
  4. A “Configuration Template Note” is displayed. Please read and understand this, then click “Ok”.
    Configuration Template Note on configuration merge
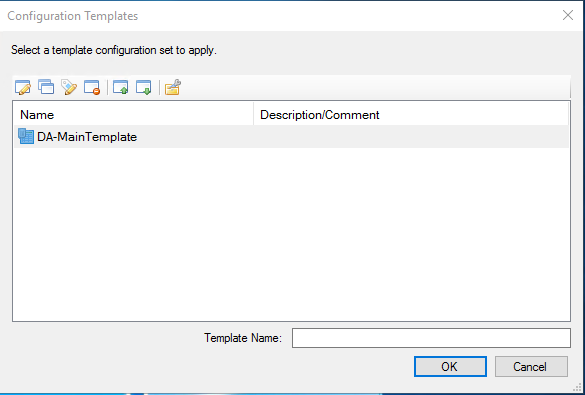
  5. In the “Configuration Templates” window, select and highlight the configuration template you’d like to deploy, and then click “Ok”. In my example, I’m choosing “DA-MainTemplate”.
    10ZiG Apply Template Window Dialog Box
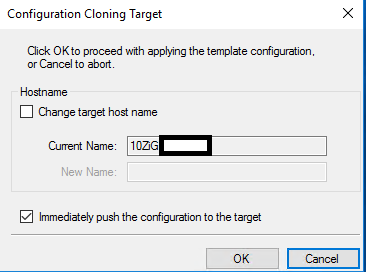
  6. The “Configuration Cloning Target” dialog box is displayed. Here you can change the target hostname, and choose to immediately push the configuration. Select “Ok”.
    Configuration Cloning Target 10ZiG Manager Dialog Box
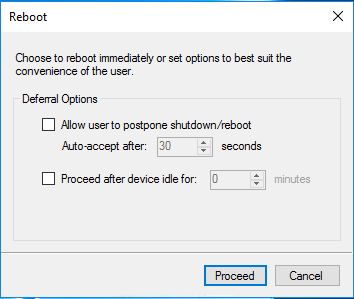
  7. And now the “Reboot” dialog box is displayed. Here you can choose how you’d like the reboot to be handled once the configuration is pushed to the device(s). Select your preference, or leave as default and select “Ok”.
    10ZiG Manager Configuration Template Apply Reboot Options Dialog Box
  8. You’ll be brought back to the 10ZiG Manager interface. Here you’ll see a new task in the tasks list at the bottom of the window.
    10ZiG Manager Apply Configuration Template Status Task Window Pane Completed
  9. Once completed, you have successfully deployed the configuration.

You’re done! You have successfully pushed the configuration template to your 10ZiG Zero Client(s).

You can maintain, edit, and use multiple templates for different users, organizational units, or geographical units.

May 062019
 
10ZiG 5948q Zero Client

Let’s say you manage numerous 10ZiG Zero clients and your users all have similar USB hardware that needs to be redirected to the VDI session. In most cases the hardware will be redirected without any configuration necesary, but what about when that doesn’t happen. You need to push a configuration template with the device information to your 10ZiG Zero Clients.

In my case, I use a YubiKey Security Key. I regularly use this for logins in Chrome and noticed that it wasn’t being directed via USB redirection.

If you’re interesting in 10ZiG products and looking to buy, don’t hesitate to reach out to me for information and/or a quote! We can configure and sell 10ZiG Zero Clients (and thin clients), help with solution design and deployment, and provide consulting services! We sell and ship to Canada and the USA!

This post is part two of a three part 10ZiG Manager Tutorial series:

Now there’s two ways to do this:

  1. On the 10ZiG Zero Client, go to settings, USB redirection, and change the preference from “Default” to “Include”. This must manually be done on every Zero Client inside of your infrastructure (time consuming).
  2. Add the USB hardware ID to your configuration template inside of the 10ZiG Manager and then push this to all your 10ZiG Zero Clients that you manage (super fast, can be deployed to thousands of devices in seconds).

In this post we’re going to cover the later, and show you how to add this to a config template. In my example, we’ll be adding the YubiKey security key with a hardware identifier (USB Product ID/PID) of 1050/0120 (Vendor ID: 1050, Product ID: 0120). We’ll be manually adding the hardware ID/PID to the config template in this tutorial.

Please Note: You can also add the settings on a 10ZiG Zero Client, and generate a template by pulling the config from that client. You can then push this to others as well.

To find out the Hardware ID/PID, you can either use the “Device Manager” on Windows, or plug in the device in to a 10ZiG Zero Client, go to settings, USB Redirection, and you should see the device name, along with the HID/PID info.

Instructions

  1. Open the 10ZiG Manager.
    10ZiG Manager Logged In Main Window
  2. Randomly choose a 10ZiG Zero Client from the list, right-click on it to open the menu. Expand “Configuration” -> Select “Manage templates”.
    10ZiG Manager Configuration Menu via Right Click
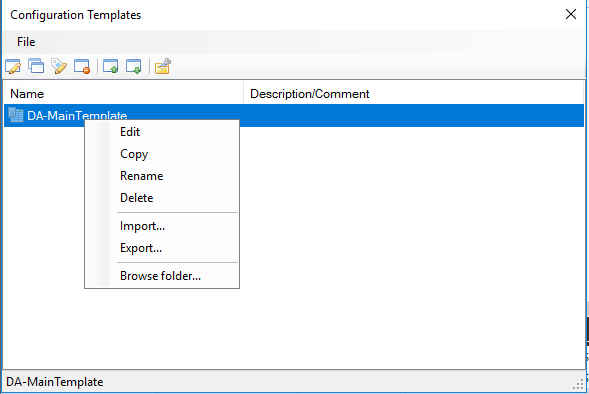
  3. In the “Configuration Templates” window, right-click on your existing template (or create a new one), and select “Edit”.
    10ZiG Manager Configuration Templates Right Click Menu Shown
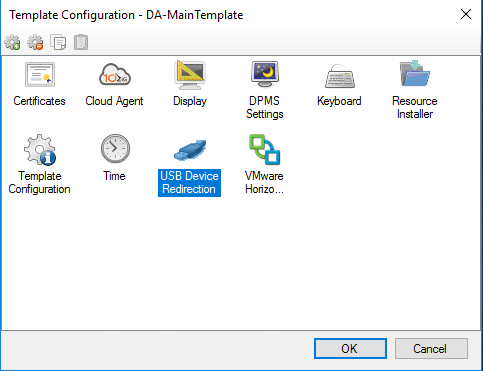
  4. In the “Template Configuration – Template Name” window, double-click on “USB Device Redirection”.
    10ZiG Manager Template Configuration Window Shown
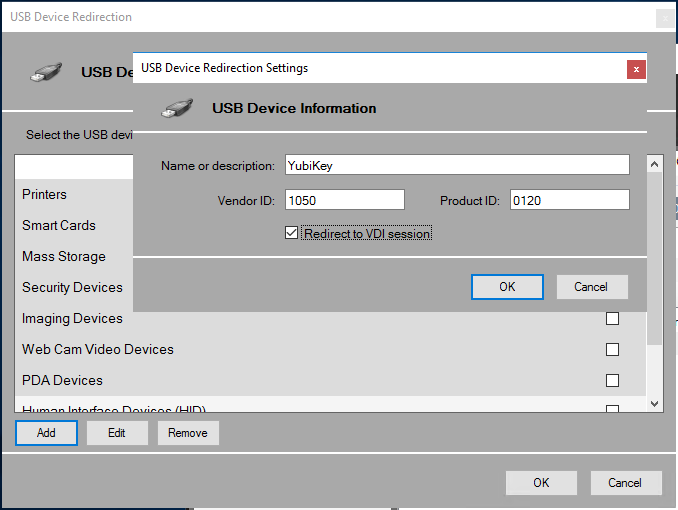
  5. In the “USB Device Redirection” window, click on “Add”.
  6. Enter in a friendly name, and enter your Vendor ID and Product ID in to the fields. For a YubiKey Security key, I did the following.
    10ZiG Manager Configuration USB Redirection Settings Window and Add Window Selected
  7. Click OK on all the fields, save the template. The configuration has been saved to the configuration template.

You’re done! You can now deploy this template to a single 10ZiG Zero Client, or deploy it as a batch to many 10ZiG Zero Clients.

May 062019
 
10ZiG 5948q Zero Client

So you’ve purchase some 10ZiG Zero Clients, configured the 10ZiG Manager, and want to create a configuration template to deploy to all your devices.

In this post, we’ll be going over how to create a configuration template from a manually configured 10ZiG Zero Client, so that you can edit it, and then deploy it to other 10ZiG Zero Clients (whether it’s a single unit, or 10,000).

Once you have a configuration template, you can add certificates, modify the VDI configuration, configure keyboard/mouse input, USB Redirection, and more! Doing all this with a configuration template allows you to manage and maintain a large amount of 10ZiG Zero Clients with ease.

If you’re interesting in 10ZiG products and looking to buy, don’t hesitate to reach out to me for information and/or a quote! We can configure and sell 10ZiG Zero Clients (and thin clients), help with solution design and deployment, and provide consulting services! We sell and ship to Canada and the USA!

This post is part one of a three part 10ZiG Manager Tutorial series:

Please Note: We are going to assume that you have manually configured at least one of your 10ZiG Zero Clients as a base configuration that you want to generate a template from. If not, make sure you do this before generating a template. We are also assuming that you have configured the 10ZiG Management software so that the Zero Clients can connect to it.

Instructions

  1. Open the 10ZiG Manager.
    10ZiG Manager Logged In Main Window
  2. Choose the 10ZiG Zero Client that you have already configured in the list and right-click on the unit.
  3. In the menu, expand “Configuration” -> and Select “Generate Template”.
    10ZiG Manager Configuration Menu via Right Click
  4. A warning explaining how the configuration is merged is presented, please read and understand this.
    Configuration Template Note on configuration merge
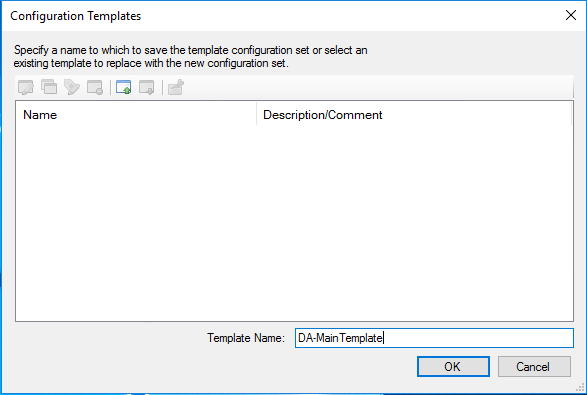
  5. In the “Configuration Templates” window, type in a template name in to the “Template Name” field, and then select “Ok”. I’m calling mine “DA-MainTemplate”.
    Create Configuration Template Name Dialog
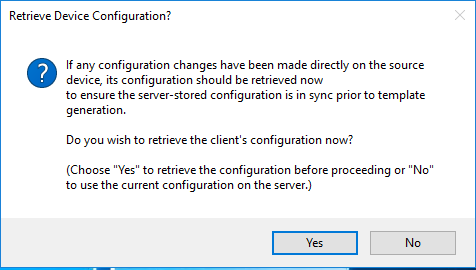
  6. A warning explaining changes is presented, please read and understand this.
    Retrieve Device Configuration Warning Dialog Window
  7. You will be brought back to the 10ZiG Manager, and will see the “Generate configuration template” task in the tasks list at the bottom of the window. It should eventually complete and be marked as successful.
    Generate configuration template task list
  8. The configuration template has been created.

You have now created a configuration template inside of 10ZiG Manager! You can edit this, and eventually deploy it to other 10ZiG Zero Clients on your network.

May 022019
 
Nvidia GRID Logo

I can’t tell you how excited I am that after many years, I’ve finally gotten my hands on and purchased an Nvidia Quadro K1 GPU. This card will be used in my homelab to learn, and demo Nvidia GRID accelerated graphics on VMware Horizon View. In this post I’ll outline the details, installation, configuration, and thoughts. And of course I’ll have plenty of pictures below!

The focus will be to use this card both with vGPU, as well as 3D accelerated vSGA inside in an HPE server running ESXi 6.5 and VMware Horizon View 7.8.

Please Note: As of late (late 2020), hardware h.264 offloading no longer functions with VMware Horizon and VMware BLAST with NVidia Grid K1/K2 cards. More information can be found at https://www.stephenwagner.com/2020/10/10/nvidia-vgpu-grid-k1-k2-no-h264-session-encoding-offload/

Please Note: Some, most, or all of what I’m doing is not officially supported by Nvidia, HPE, and/or VMware. I am simply doing this to learn and demo, and there was a real possibility that it may not have worked since I’m not following the vendor HCL (Hardware Compatibility lists). If you attempt to do this, or something similar, you do so at your own risk.

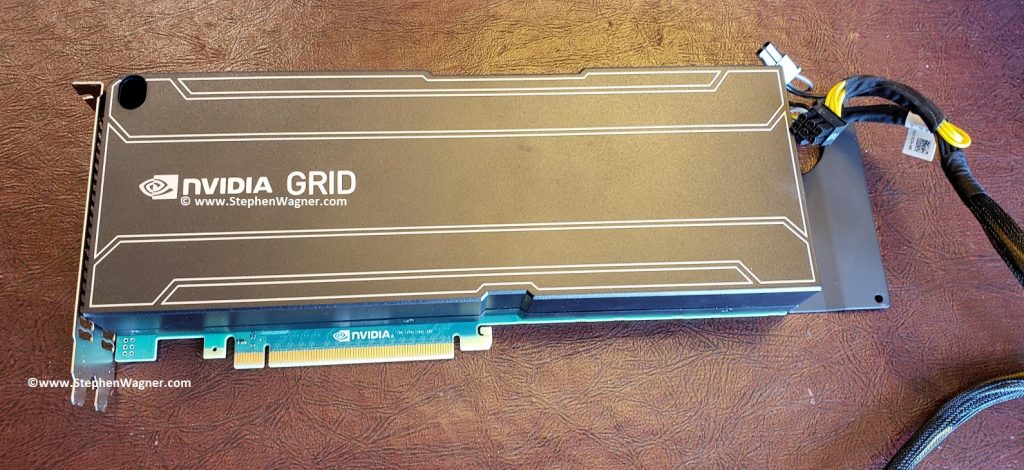
Nvidia GRID K1 Image

For some time I’ve been trying to source either an Nvidia GRID K1/K2 or an AMD FirePro S7150 to get started with a simple homelab/demo environment. One of the reasons for the time it took was I didn’t want to spend too much on it, especially with the chances it may not even work.

Essentially, I have 3 Servers:

  1. HPE DL360p Gen8 (Dual Proc, 128GB RAM)
  2. HPE DL360p Gen8 (Dual Proc, 128GB RAM)
  3. HPE ML310e Gen8 v2 (Single Proc, 32GB RAM)

For the DL360p servers, while the servers are beefy enough, have enough power (dual redundant power supplies), and resources, unfortunately the PCIe slots are half-height. In order for me to use a dual-height card, I’d need to rig something up to have an eGPU (external GPU) outside of the server.

As for the ML310e, it’s an entry level tower server. While it does support dual-height (dual slot) PCIe cards, it only has a single 350W power supply, misses some fancy server technologies (I’ve had issues with VT-d, etc), and only a single processor. I should be able to install the card, however I’m worried about powering it (it has no 6pin PCIe power connector), and having ESXi be able to use it.

Finally, I was worried about cooling. The GRID K1 and GRID K2 are typically passively cooled and meant to be installed in to rack servers with fans running at jet engine speeds. If I used the DL360p with an external setup, this would cause issues. If I used the ML310e internally, I had significant doubts that cooling would be enough. The ML310e did have the plastic air baffles, but only had one fan for the expansion cards area, and of course not all the air would pass through the GRID K1 card.

The Purchase

Because of a limited budget, and the possibility I may not even be able to get it working, I didn’t want to spend too much. I found an eBay user local in my city who had a couple Grid K1 and Grid K2 cards, as well as a bunch of other cool stuff.

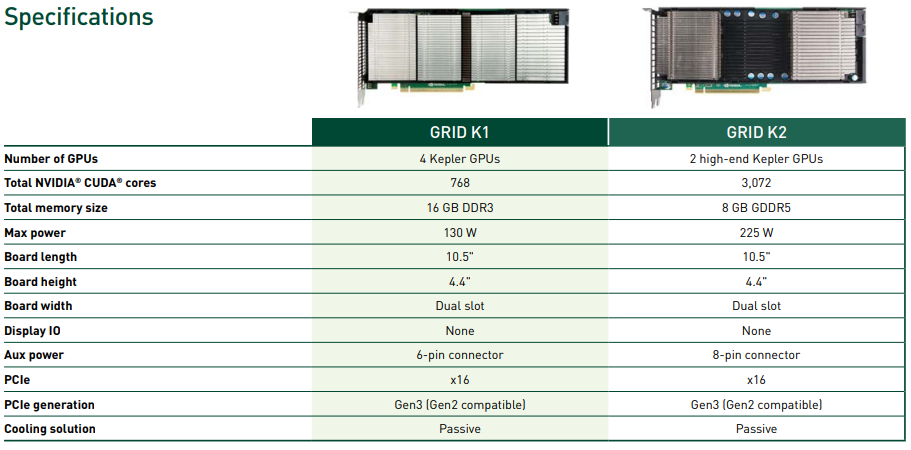
We spoke and he decided to give me a wicked deal on the Grid K1 card. I thought this was a fantastic idea as the power requirements were significantly less (more likely to work on the ML310e) on the K1 card at 130 W max power, versus the K2 card at 225 W max power.

NVIDIA GRID K1 and K2 Specifications
NVIDIA GRID K1 and K2 Specification Table

The above chart is a capture from:
https://www.nvidia.com/content/cloud-computing/pdf/nvidia-grid-datasheet-k1-k2.pdf

We set a time and a place to meet. Preemptively I ran out to a local supply store to purchase an LP4 power adapter splitter, as well as a LP4 to 6pin PCIe power adapter. There were no available power connectors inside of the ML310e server so this was needed. I still thought the chances of this working were slim…

These are the adapters I purchased:

Preparation and Software Installation

I also decided to go ahead and download the Nvidia GRID Software Package. This includes the release notes, user guide, ESXi vib driver (includes vSGA, vGPU), as well as guest drivers for vGPU and pass through. The package also includes the GRID vGPU Manager. The driver I used was from:
https://www.nvidia.com/Download/driverResults.aspx/144909/en-us

To install, I copied over the vib file “NVIDIA-vGPU-kepler-VMware_ESXi_6.5_Host_Driver_367.130-1OEM.650.0.0.4598673.vib” to a datastore, enabled SSH, and then ran the following command to install:

esxcli software vib install -v /path/to/file/NVIDIA-vGPU-kepler-VMware_ESXi_6.5_Host_Driver_367.130-1OEM.650.0.0.4598673.vib

The command completed successfully and I shut down the host. Now I waited to meet.

We finally met and the transaction went smooth in a parking lot (people were staring at us as I handed him cash, and he handed me a big brick of something folded inside of grey static wrap). The card looked like it was in beautiful shape, and we had a good but brief chat. I’ll definitely be purchasing some more hardware from him.

Hardware Installation

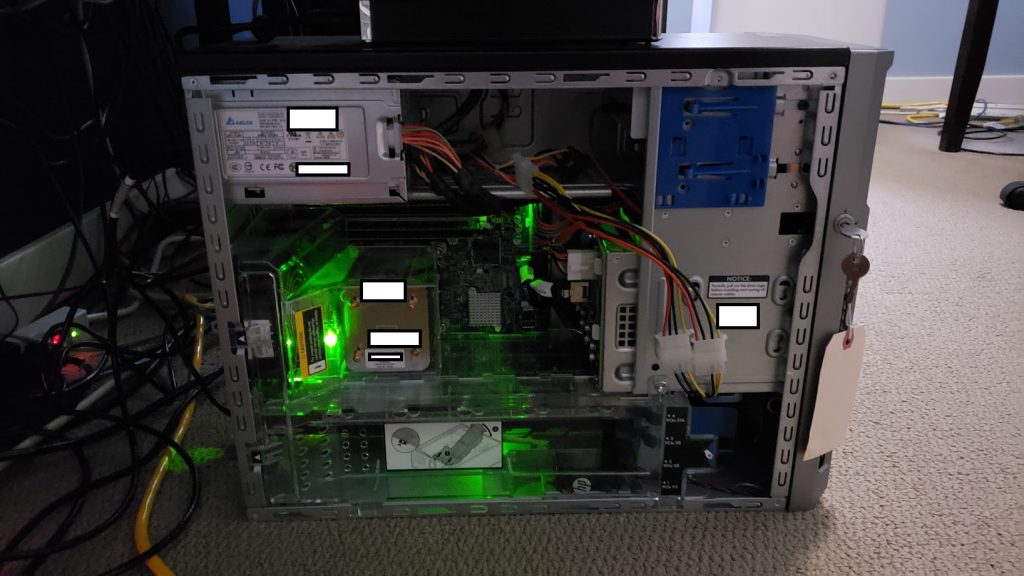
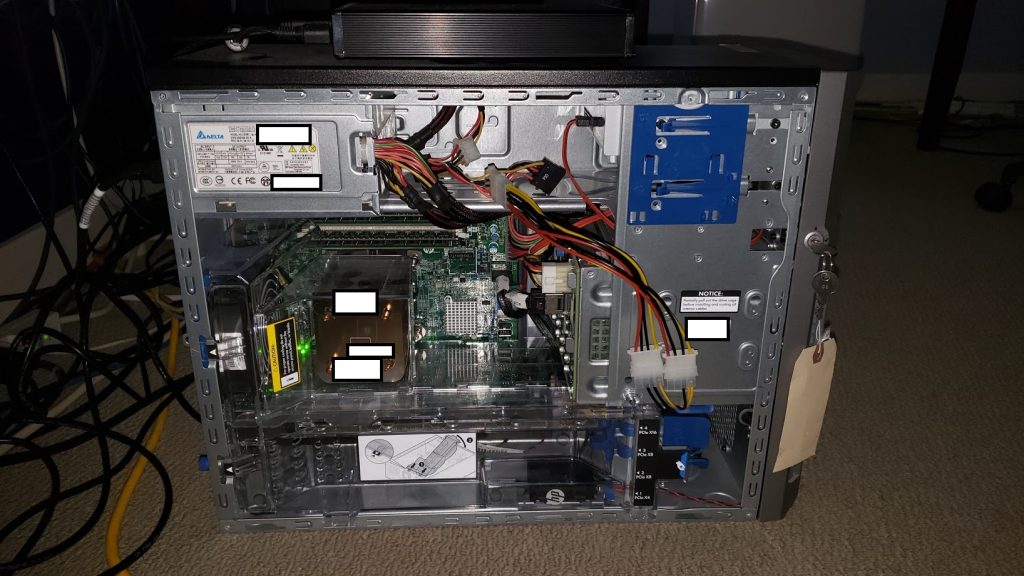
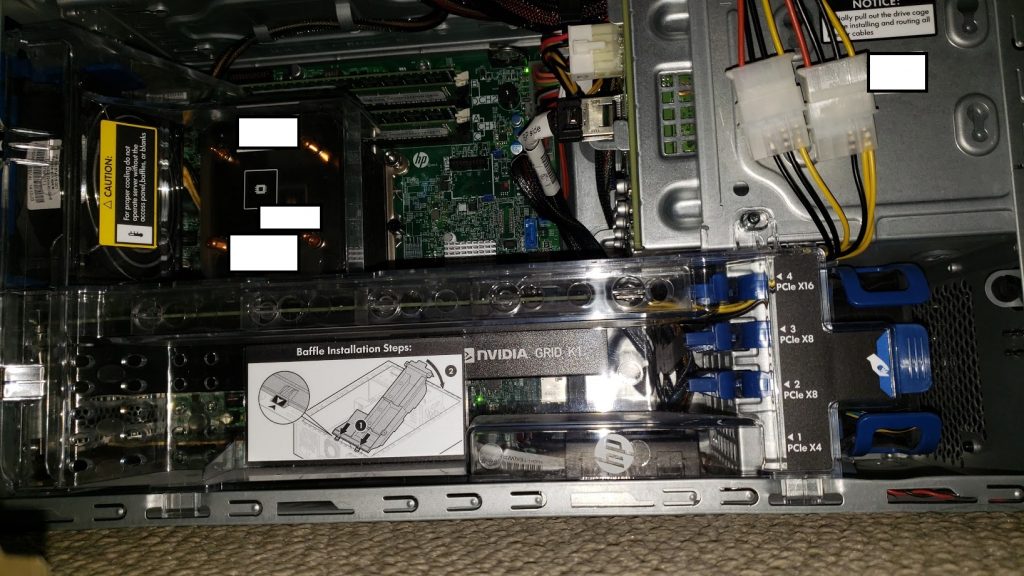
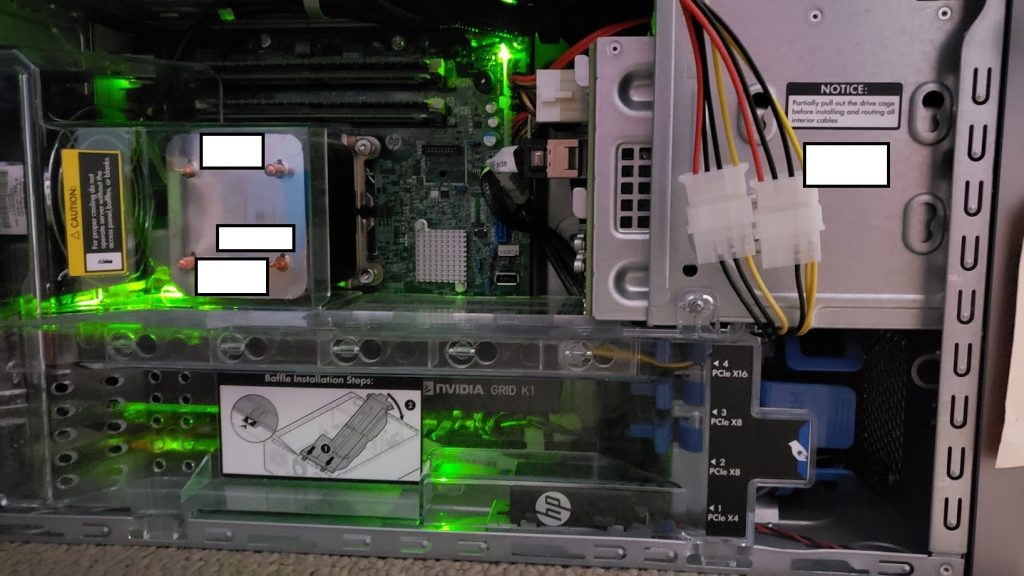
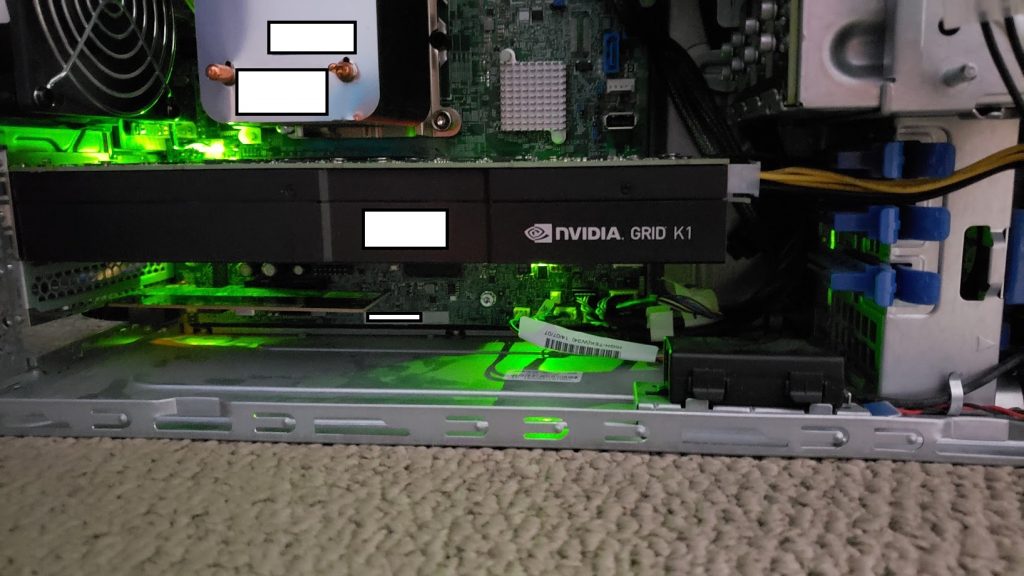
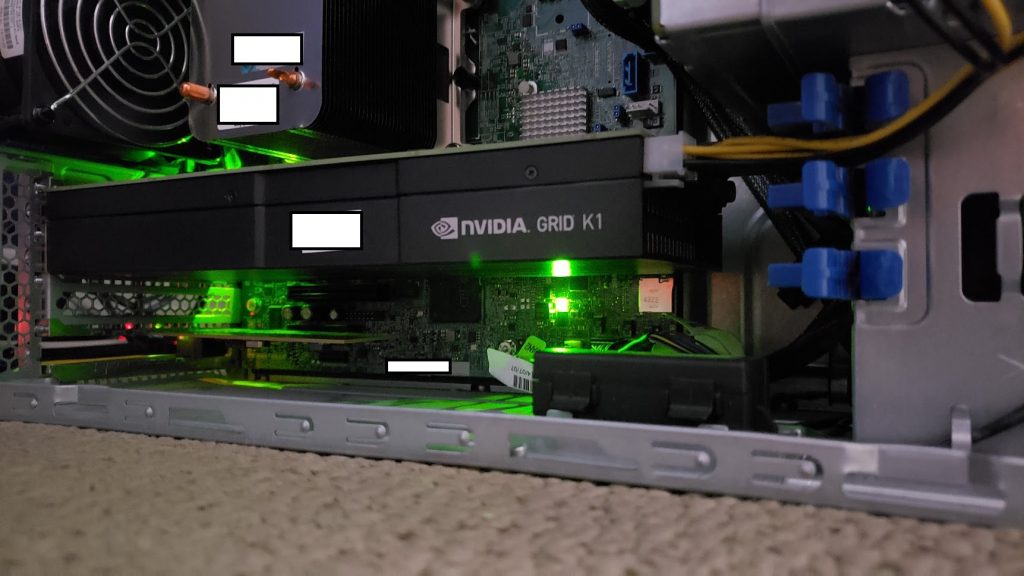
Installing the card in the ML310e was difficult and took some time with care. First I had to remove the plastic air baffle. Then I had issues getting it inside of the case as the back bracket was 1cm too long to be able to put the card in. I had to finesse and slide in on and angle but finally got it installed. The back bracket (front side of case) on the other side slid in to the blue plastic case bracket. This was nice as the ML310e was designed for extremely long PCIe expansion cards and has a bracket on the front side of the case to help support and hold the card up as well.

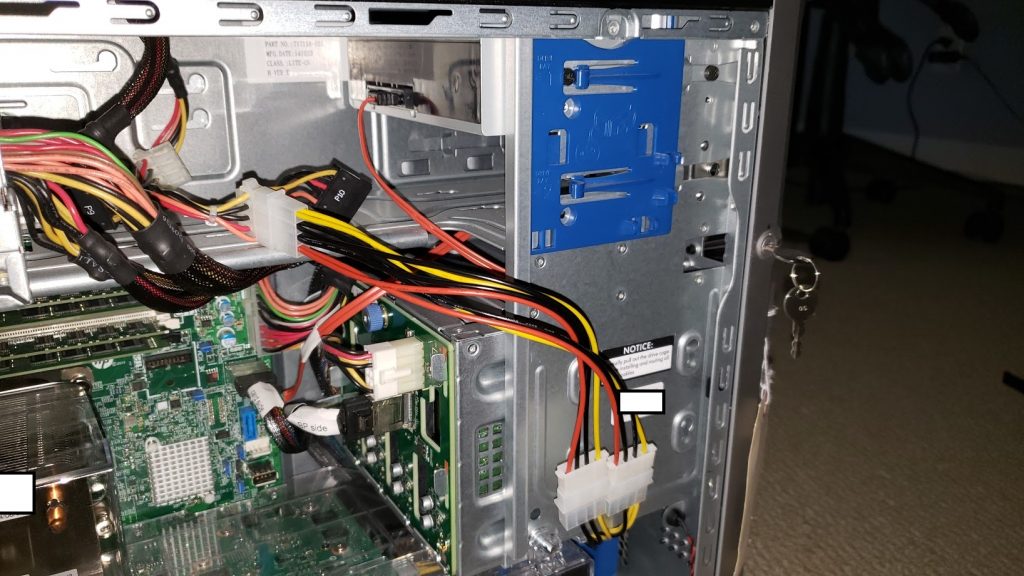
For power I disconnected the DVD-ROM (who uses those anyways, right?), and connected the LP5 splitter and the LP5 to 6pin power adapter. I finally hooked it up to the card.

I laid the cables out nicely and then re-installed the air baffle. Everything was snug and tight.

Please see below for pictures of the Nvidia GRID K1 installed in the ML310e Gen8 V2.

Host Configuration

Powering on the server was a tense moment for me. A few things could have happened:

  1. Server won’t power on
  2. Server would power on but hang & report health alert
  3. Nvidia GRID card could overheat
  4. Nvidia GRID card could overheat and become damaged
  5. Nvidia GRID card could overheat and catch fire
  6. Server would boot but not recognize the card
  7. Server would boot, recognize the card, but not work
  8. Server would boot, recognize the card, and work

With great suspense, the server powered on as per normal. No errors or health alerts were presented.

I logged in to iLo on the server, and watched the server perform a BIOS POST, and start it’s boot to ESXi. Everything was looking well and normal.

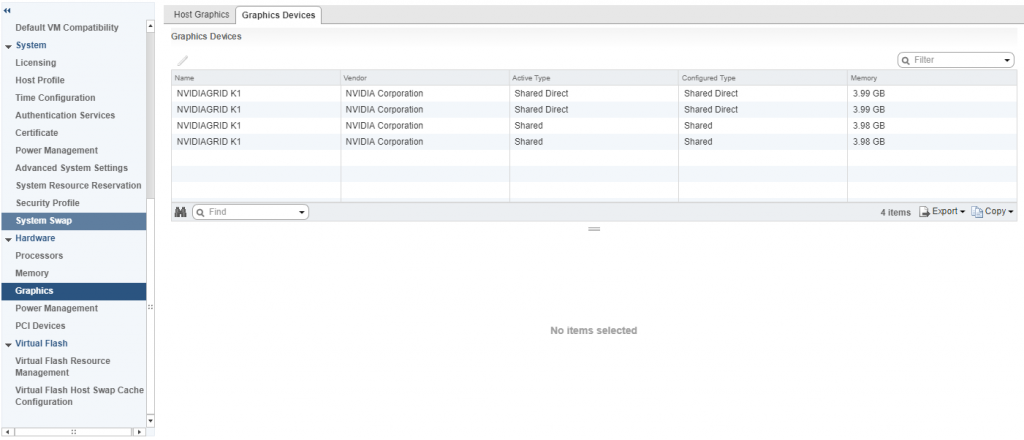
After ESXi booted, and the server came online in vCenter. I went to the server and confirmed the GRID K1 was detected. I went ahead and configured 2 GPUs for vGPU, and 2 GPUs for 3D vSGA.

ESXi Graphics Settings for Host Graphics and Graphics Devices
ESXi Host Graphics Devices Settings

VM Configuration

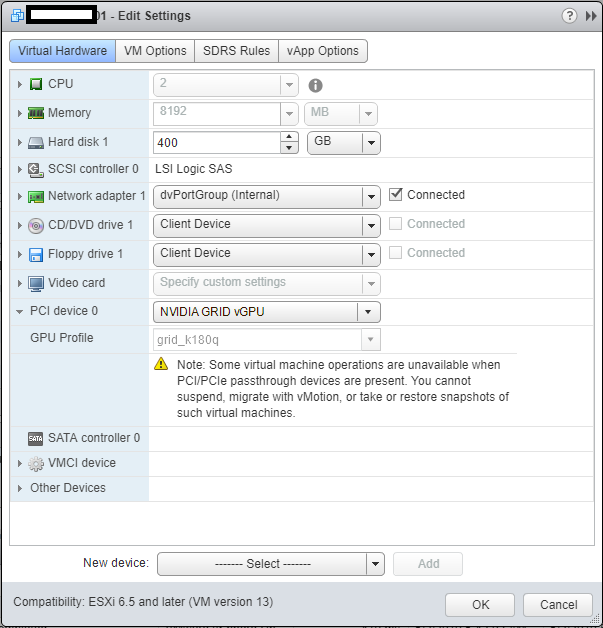
I restarted the X.org service (required when changing the options above), and proceeded to add a vGPU to a virtual machine I already had configured and was using for VDI. You do this by adding a “Shared PCI Device”, selecting “NVIDIA GRID vGPU”, and I chose to use the highest profile available on the K1 card called “grid_k180q”.

Virtual Machine Edit Settings with NVIDIA GRID vGPU and grid_k180q profile selected
VM Settings to add NVIDIA GRID vGPU

After adding and selecting ok, you should see a warning telling you that must allocate and reserve all resources for the virtual machine, click “ok” and continue.

Power On and Testing

I went ahead and powered on the VM. I used the vSphere VM console to install the Nvidia GRID driver package (included in the driver ZIP file downloaded earlier) on the guest. I then restarted the guest.

After restarting, I logged in via Horizon, and could instantly tell it was working. Next step was to disable the VMware vSGA Display Adapter in the “Device Manager” and restart the host again.

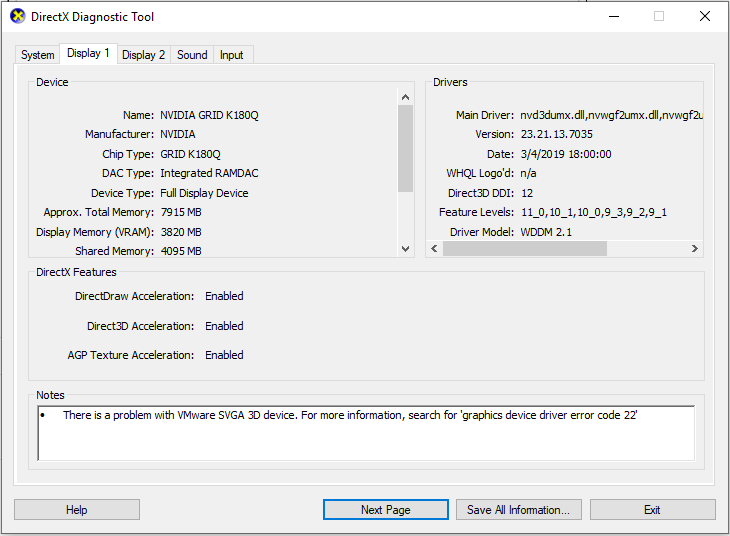
Upon restarting again, to see if I had full 3D acceleration, I opened DirectX diagnostics by clicking on “Start” -> “Run” -> “dxdiag”.

DirectX Diagnostic Tool (dxdiag) showing Nvidia Grid K1 on VMware Horizon using vGPU k180q profile
dxdiag on GRID K1 using k180q profile

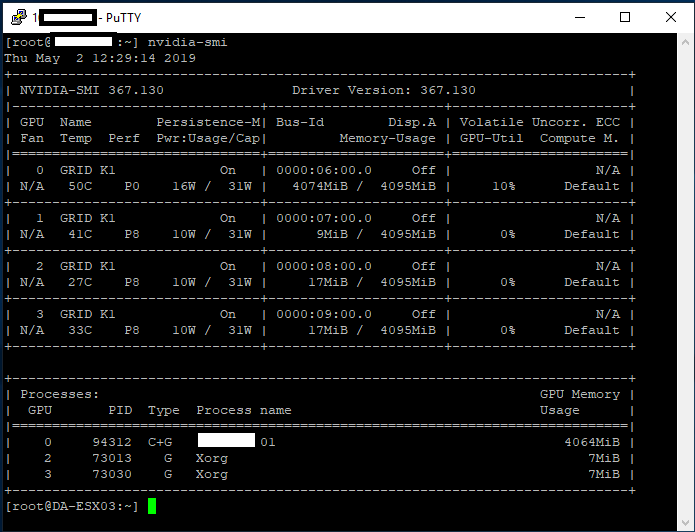
It worked! Now it was time to check the temperature of the card to make sure nothing was overheating. I enabled SSH on the ESXi host, logged in, and ran the “nvidia-smi” command.

nvidia-smi command on ESXi host showing GRID K1 information, vGPU information, temperatures, and power usage
“nvidia-smi” command on ESXi Host

According to this, the different GPUs ranged from 33C to 50C which was PERFECT! Further testing under stress, and I haven’t gotten a core to go above 56. The ML310e still has an option in the BIOS to increase fan speed, which I may test in the future if the temps get higher.

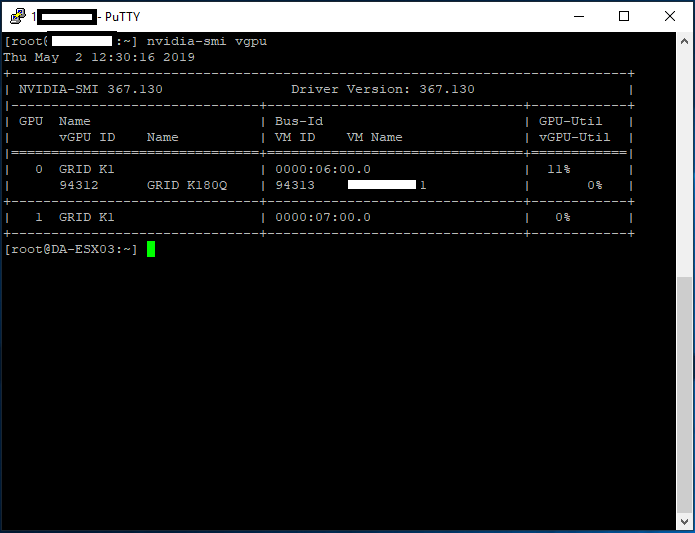
With “nvidia-smi” you can see the 4 GPUs, power usage, temperatures, memory usage, GPU utilization, and processes. This is the main GPU manager for the card. There are some other flags you can use for relevant information.

nvidia-smi with vgpu flag for vgpu information
“nvidia-smi vgpu” for vGPU Information
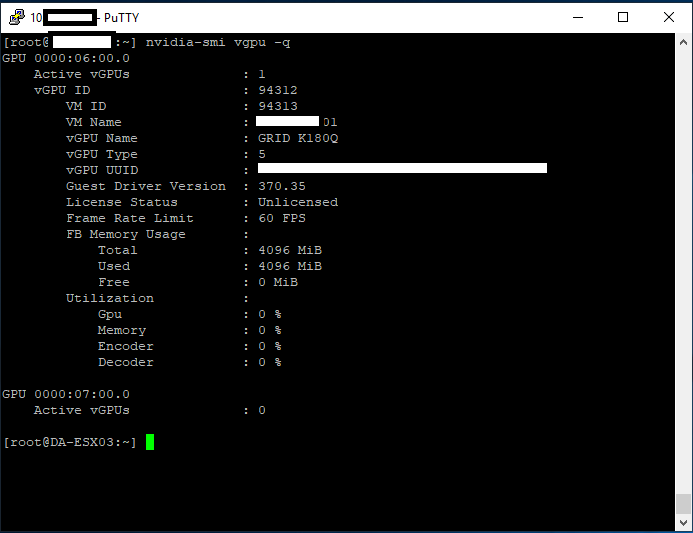
nvidia-smi with vgpu -q flag
“nvidia-smi vgpu -q” to Query more vGPU Information

Final Thoughts

Overall I’m very impressed, and it’s working great. While I haven’t tested any games, it’s working perfect for videos, music, YouTube, and multi-monitor support on my 10ZiG 5948qv. I’m using 2 displays with both running at 1920×1080 for resolution.

I’m looking forward to doing some tests with this VM while continuing to use vGPU. I will also be doing some testing utilizing 3D Accelerated vSGA.

The two coolest parts of this project are:

  • 3D Acceleration and Hardware h.264 Encoding on VMware Horizon
  • Getting a GRID K1 working on an HPE ML310e Gen8 v2

Highly recommend getting a setup like this for your own homelab!

Uses and Projects

Well, I’m writing this “Uses and Projects” section after I wrote the original article (it’s now March 8th, 2020). I have to say I couldn’t be impressed more with this setup, using it as my daily driver.

Since I’ve set this up, I’ve used it remotely while on airplanes, working while travelling, even for video editing.

Some of the projects (and posts) I’ve done, can be found here:

Leave a comment and let me know what you think! Or leave a question!

Jan 262018
 
10ZiG 5948q Zero Client

In an effort to truly showcase the capabilities of VMware Horizon View and the 10ZiG 5948q Zero Client, I wanted to put together a demo showing the ability to run Red Hat Enterprise Linux (RHEL 7.4) in a VDI environment.

First and foremost, this was super easy to setup. It was almost too easy…

Sidenote: Remember, my company Digitally Accurate Inc. is a 10ZiG partner. We can configure and sell 10ZiG Zero Clients (and thin clients), help with solution design and deployment, and provide consulting services! Contact us today for information or a quote! We sell and ship to Canada and the USA!

Please see below for video:

You’ll notice during login that after the credential prompt multiple desktops were available (we chose to log on to the RHEL instance) to choose from. You’ll see further on in the video versioning and specifications as well as video playback. Again, please note that my environment does not have any GPU or 3D rendering.

Please Note: The momentary black border on the bottom right side during login, was due to a resolution change on the VDI session. This was the first time logging in with this client, and the border doesn’t normally occur unless changing resolutions.

Equipment/Software used in this demo:

Please note, my company Digitally Accurate Inc, is a VMware Solution Provider Partner, 10ZiG Partner, and Red Hat Ready Business partner. Please don’t hesitate in reaching out for anything VDI! We design, sell, implement, and support VMware and VDI environments!